I haven’t written any blogs in a while as there hasn’t honestly been anything from Mazda, which has made me stop and go WOW. Most people who have interactions with me would have thought I would be interested in the Mazda 3 TCR. The TCR car looks great, but when I learned Mazda went with the “Spec” engine for the series, it became a “meh” for me. Having an engine that is based on more or less a VW power plant pulling a Mazda around the track made it a lot less interesting. I do know why Mazda chose to go that path, but that is another story.
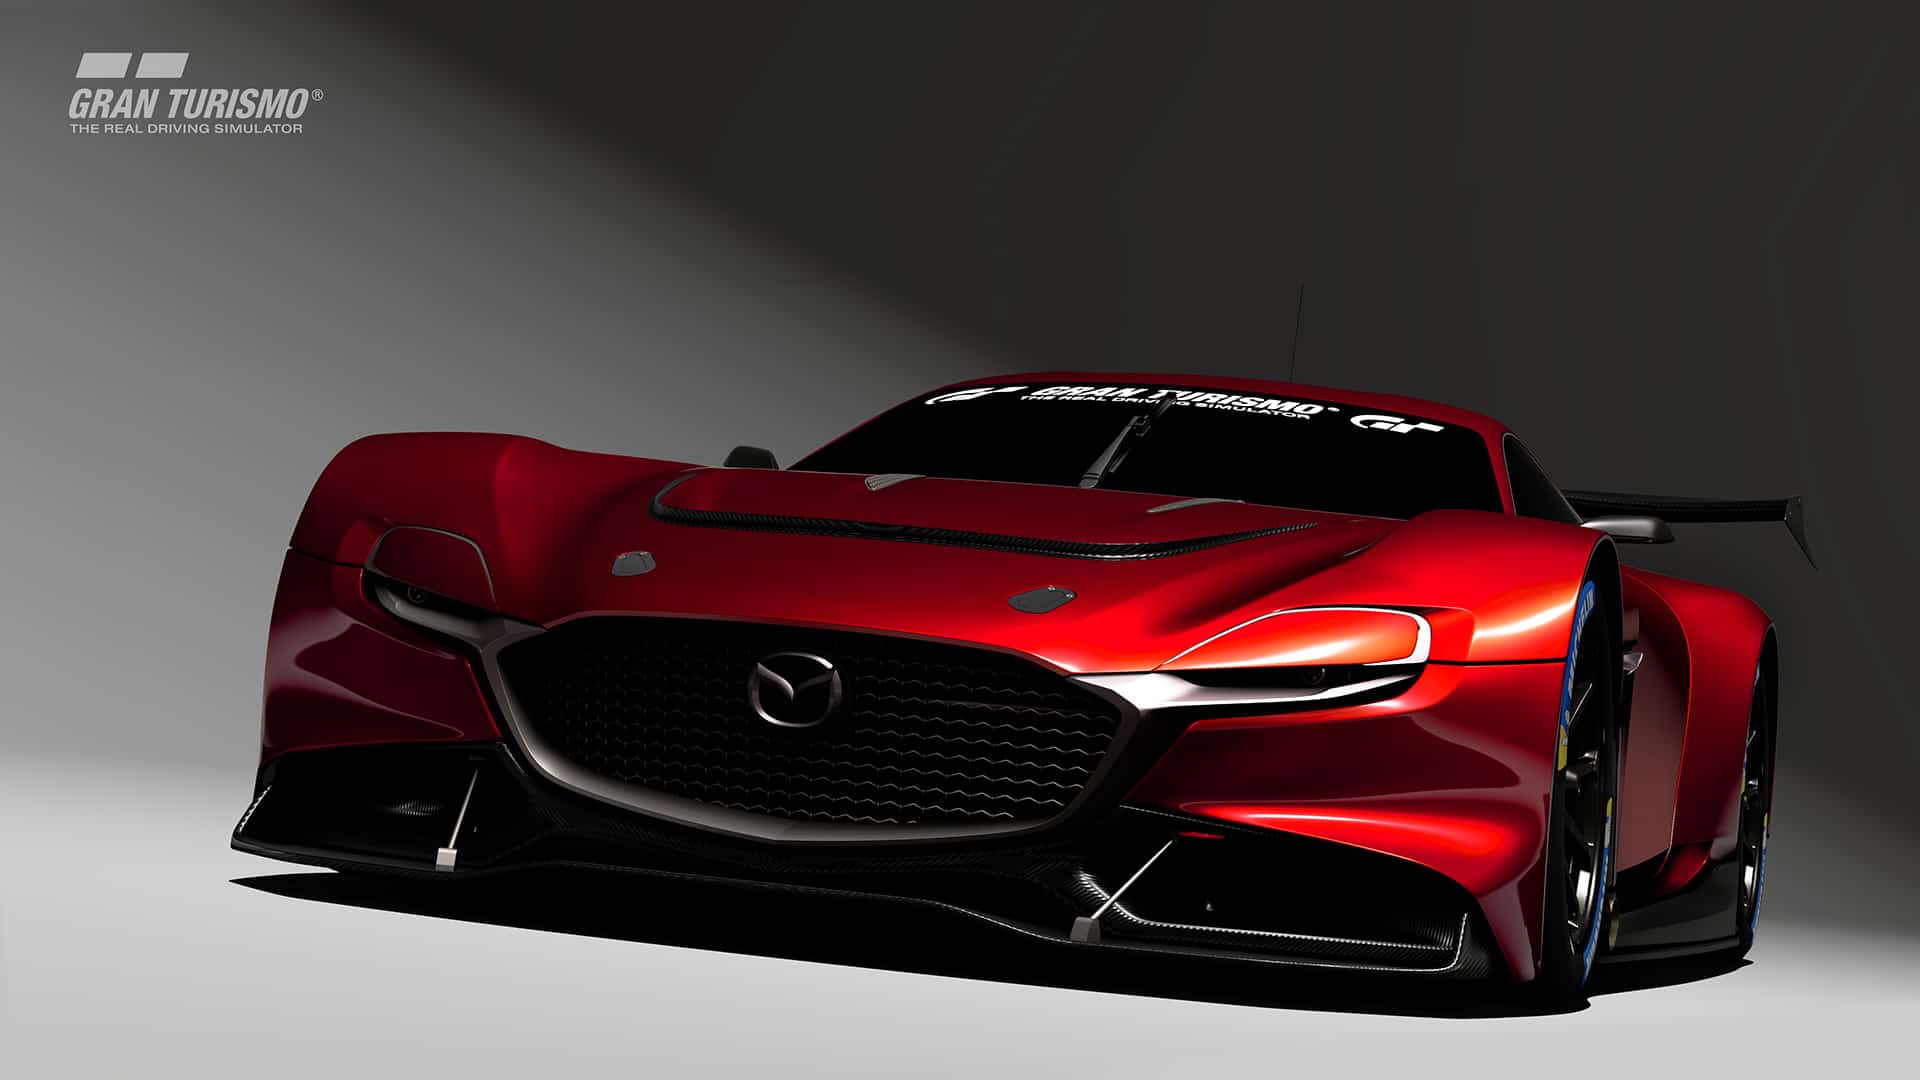
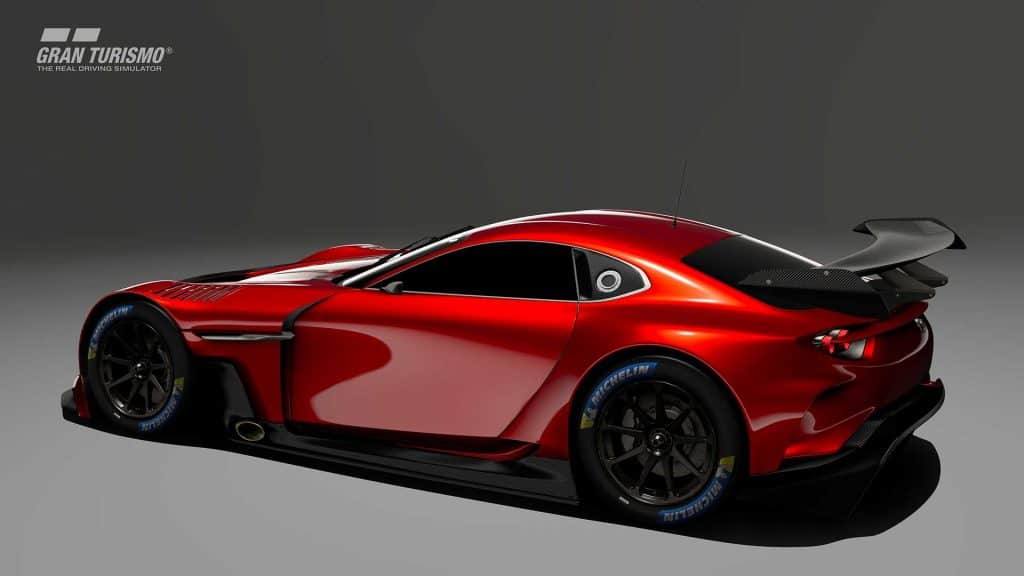
Mazda Rotary GT3 Concept Car
What did make me go WOW recently was at the Grand Turismo Championships when Mazda announced the RX-Vision GT3 concept! Mazda loves a sexy race car, and if you look at the past two, they have both come out of the Mazda North American studios. This concept is no exception as Julien Montousse, the design chief for Mazda North America, was present during the announcement of the car.
This is a big deal in my mind, we have just seen a change at Mazda USA with Nelson Cosgrove now appointed as the new director of Mazda Motorsports. Mazda has done everything except come right out and say we are going to build another rotary, and that message looks to be getting stronger. We have seen more patents popping up, calling out more tech and drawings of rotary goodness, including my favorite the top-mounted turbo rotary engine from years back.
Like anything Mazda teases us with, we will have to wait and see what happens. On a personal level, I hope Mazda gets us a 2020 Mazda 3 AWD turbo MT, but that is another one of those “wait and see” dreams from Mazda.
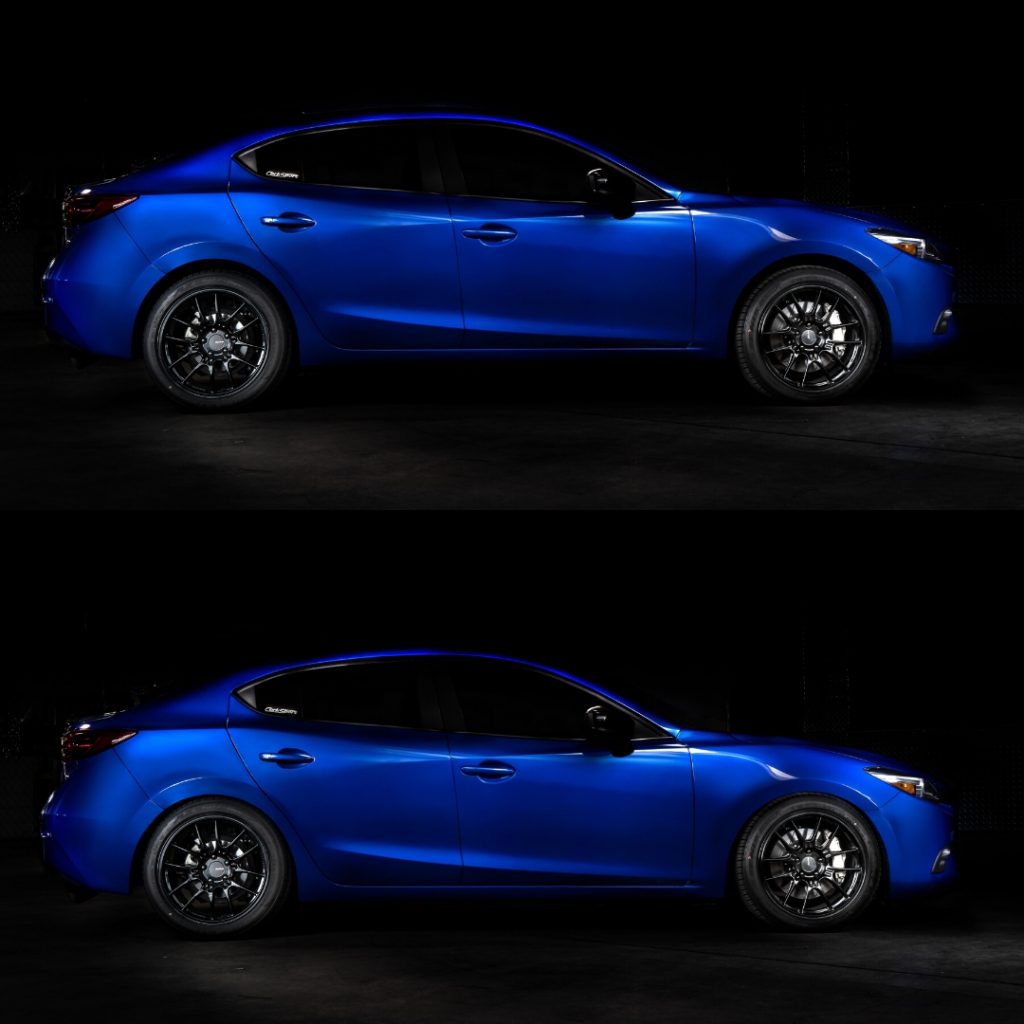
We hit a great balance between a street and track setup so you can have plenty of fun whether your corner of choice is on a backroad or an autocross course and still be comfortable on the daily commute.
Along the same line as our Mazdaspeed 3 kit, we diverged from the normal spring rates chosen for 3rd GEN coilover setups. We really wanted to strike a good middle point between a basic street coilover and a full race setup.
With that in mind, spring rate selection was critical to ensure a stiff enough setup for good track handling but soft enough for regular roads.
Shop All 2014-2018 Mazda 3 Parts
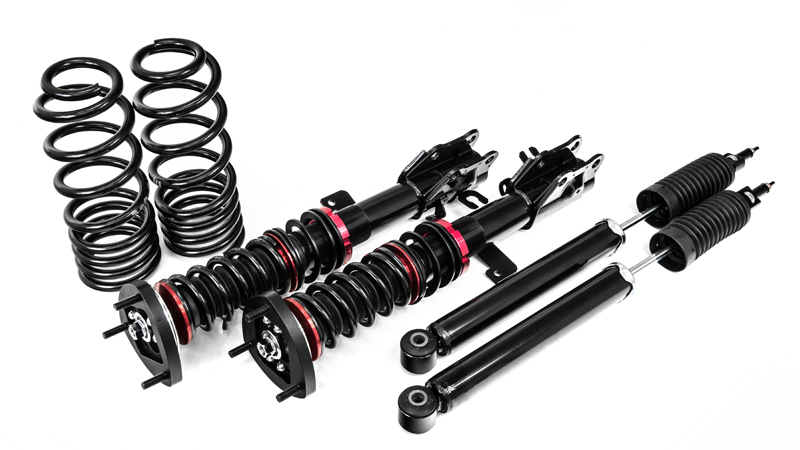
The final rates we ended up at were 7K linear front springs and 8K linear rear springs. We prefer linear springs so that the car will react the same no matter the corner or bumpiness of the road. This provides a ride that is stiffer than stock but is not harsh or uncomfortable. This is coupled with more neutral handling (less understeer) and a suspension natural frequency that is slightly higher in the rear than the front for added driver feedback and comfort.
Racing Inspired
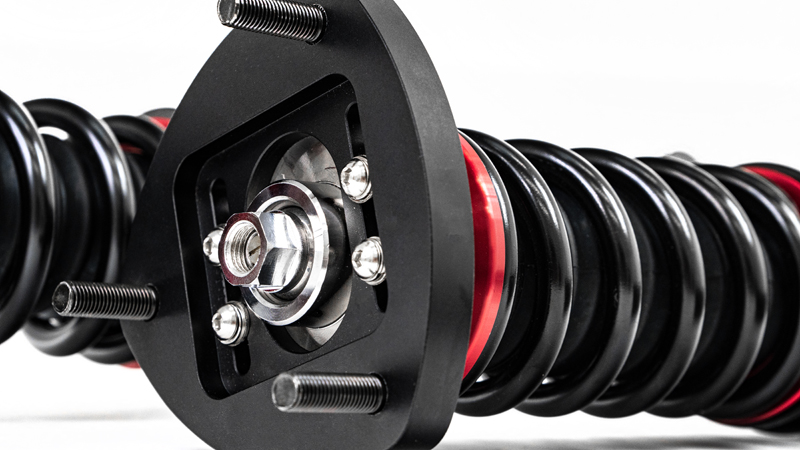
To further add to the handling benefits, the CS coilovers have 15-way adjustable rebound damping in both the front and the rear. This allows you to tune your ride to exactly how you like it, whether you’re going for comfort or handling. It’s even easy to use one set up at the track and then soften things up for the ride home! The front also comes with adjustable camber plates for fine-tuning camber for handling or fitment.
Long Lasting Quality
Obviously, there’s one big component that we haven’t talked about yet: ride height! The CorkSport Coilovers offer approximately 2 inches of ride height adjustment, with the highest option being roughly 0.5” lower than the OEM suspension. This is enough adjustment to go from an “OEM+” setup to a low setup that will turn heads and everything in between. This isn’t just about looks though as a lowered ride height offers a lower center of gravity, reduced body roll, and improved driver confidence.
Optimized Spring Rates
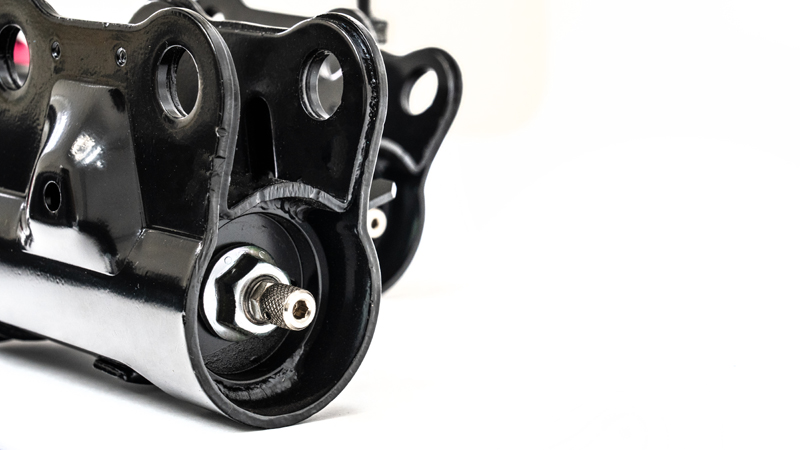
One final unconventional touch is the inverted monotube design of the front coilovers. Instead of a more conventional and cost-effective design, this uses a 180° rotated damper design. This improves the rigidity and reliability of the strut while also removing a little bit of unsprung weight. You get great driver feedback from this style of design, which is why we specifically chose it!
Adjustability for Street and Track
The CorkSport Coilover kit is a great upgrade for whatever corner you want to throw at your GEN3. Be sure to check out the product listing for more details and images.
Shop All 2014-2018 Mazda 3 Parts
Don’t hesitate to call us with any questions you may have as well, we’re happy to help!
Searching for more power for your speeds MZR engine?
Are you building your DISI motor, and trying to figure out your next setup? Say no more…
This next Mazdaspeed-focused blog is going to focus on making some big power numbers, and what it takes to get there. Now is the time to go beyond the scope of the 400-wheel horsepower to look at what it takes for 500 horsepower at the wheels.
In our 400 WHP blog, this is not an all-inclusive guide and the only way to achieve these power levels… However, it’s something that’s been tried and tested for years and proven to be a reliable method of making the power you’re after. We are aiming to educate you in the best way to make the most out of your MZR engine.
Let’s get started
With the MZR engine being out for over 10 years, it’s had a lot of time under the knife. We know how the engine responds to different airflow mods, tuning characteristics, fuel, etc.
We also know that 400 Whp is about the limit of the stock bottom end on the Mazdaspeed 3. If you have a Mazdaspeed 6, then you can assume it’d be a bit less given you have AWD and need to account for further drivetrain loss.
It is beyond this point that the motor is in danger and could potentially let go. Keep in mind that at 400 Whp you are nearly doubling OEM power output, and that’s a lot of strain on those pistons and rods that were never designed to endure that power long term. If you are wanting to go beyond 400 Whp then you should know that you are also looking at the price tag of a Built motor.
CorkSport
Now, if you are relatively new to this, and aren’t very familiar with the basic building blocks of the platform such as the Cobb Accessport, and Upgraded Fuel Pump Internals, then I invite you to read our 400 Whp Blog to build a good foundation. Do you feel you have a good understanding of what it takes to get to 400 Whp? Then you are ready to read on!
When you’re at a point in your build that you are seeking 500 Whp then it’s safe to say that you probably have gotten the more tedious stuff out of the way… You probably have about every bolt-on modification, and you understand what it’s like to work with a professional tuner.
That being said, let’s do a bit of a recap on the 400 Whp mods, so you have a good idea of where we need to go from here.
These are all the recommended/required mods to increase engine airflow and efficiency to make 400 WHP.
– Stock Fueling on Pump Gas usually nets around 330-350 Whp depending on octane and gas quality.
– Stock Fueling on E85 blend fuel usually nets around 370-390 Whp depending on Tune aggression and also Quality of the gas and E85.
– With Aux fueling such as port fuel, or methanol you can easily bump up over the 400 Whp mark and beyond. (I’ll get into the differences more in a bit)
Putting down 500 Whp pretty much requires many of the same mods that 400 Whp does, BUT the primary game changers are the Advanced Bolt On’s and Fuel.
(If you’d like to refresh your memory on the basic bolt-ons and how they affect your Mazda please refer to the 400 Whp blog.)
I’m ready for more POWAHH
In the grand scheme of things, making the 400whp is relatively easy and affordable considering it can be done on the stock block. With bolt on parts, fuel, and a tune you can easily hit that number. But as soon as you want to make more, you’re looking at a built engine, as previously mentioned, And that’s a whole new can of worms.
So, what’s all involved in a built motor? That’s a bit of an open-ended question as there are so many variables to take into consideration. However, “built” engines usually contain forged pistons and rods with upgraded bearings to handle more abuse. From there, the complexity increases as you get into port work, cams, etc. I will touch on that a bit more later.
Fortunately for you, most engine builders have their entry level engine ready to handle 500 wheel horsepower and it’s a pretty basic build that features stronger internals. But, the tedious stuff like port work is usually reserved for the higher tier engines that are usually built for more power.
I won’t get into the engine building side of things, as that could turn into a whole other tangent. But you can assume that a built motor may cost you anywhere from 5k and up dependent on the level of motor you go with. From there we can start piecing together our 500 Whp build.
CorkSport
Let’s Talk TURBO’S (Crowd Cheers)
The turbo is the heart and soul of the Zoom-Zoom, so it seems like a suitable place to start.
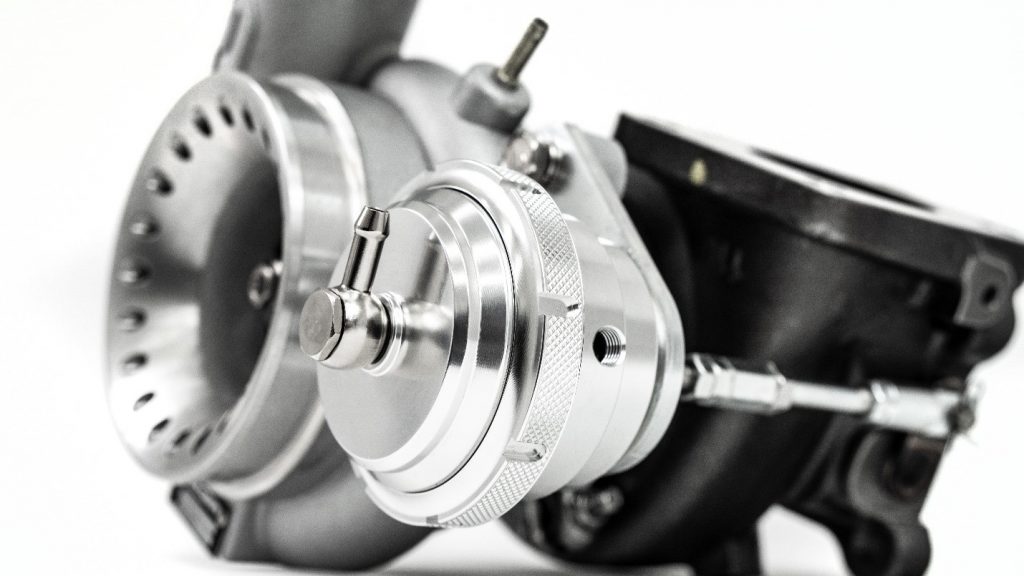
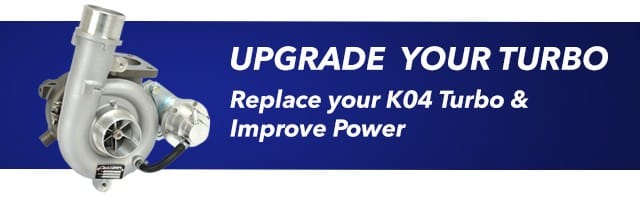
CST5 Turbo Upgrade – 2006-2013 DISI MZR
As we know, the CST4 is happy up to around 400+ Whp. Which is why it was the recommended turbo in the 400whp blog. But now we are ready to take a step up to the CST5 Turbo for the Mazdaspeed which is happy up to… You guessed it! 500+ WHP. With the ability to hit 20 PSI by 3500-3600 RPM and Carry out 30 PSI it really packs a punch for its size. You may be needing to upgrade your intake to pair to the T5, I’d recommend our Power Series 3.5” Intake I mentioned earlier. It will come with the 4” coupler required to mate up to the turbo.
The turbo is available with an internal gate, or an External Gate so you can choose what works best for you. Both options can hit the same power numbers.
Let’s Talk Fuel
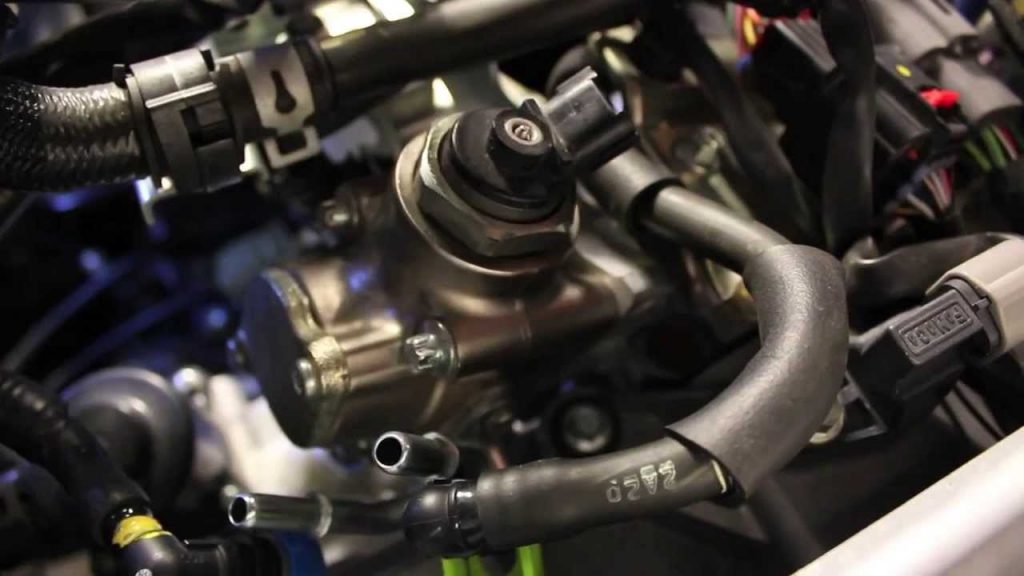
HPFP System
“What options do I have for bigger injectors?”
At CorkSport I get this question rather often. Unfortunately, I must tell them “There aren’t any”
Without going too off topic here I will explain why.
Our cars feature a Direct Injection fuel system or DI… And by today’s standards, it’s a bit primitive. The MZR DISI was one of the first pioneers of modern DI, which is probably why the OEM high-pressure fuel pump can’t even sustain the full potential of the factory injectors. Don’t worry, the CorkSport Fuel Pump internals fixes that problem.
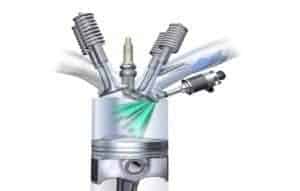
Port Injection is simple and easy to maintain. It works by spraying low pressure fuel into the intake runner where it atomizes in the air stream before entering the combustion chamber. For car guys, it’s fantastic and easy to swap out injectors when you are ready for more fuel.
Direct Injection takes a whole new approach. Instead of the fuel going in through the intake manifold, it goes DIRECTLY into the combustion chamber.
In order to overcome the force of compression, the fuel must be highly pressurized in order to atomize correctly. It also must deliver more volume in a shorter amount of time. This is why your Mazdaspeed has a high-pressure fuel pump.
This causes a whole lot of complications for injector developers because things like fuel pressure also become a huge variable when attempting to create a larger Direct Injector. The bigger the hole on the injector, the more fuel pressure is required to create adequate atomization. Combining that with the rarity, and size of the Mazdaspeed platform, it’s just not worth it for any manufacturer to develop one.
So, what’s the solution to getting more fuel? Well… As previously mentioned, you pretty much have 2 choices Port Injection or Methanol. Since both of these are considered Auxiliary fueling, they are controlled by separate controllers, unless you want to ball out and get a Motec ECU that can control the OEM engine systems, as well as your port fuel.
Choosing which system, you want to go with solely depends on your power goals, and how much money you have to spend. Those 2 factors are pretty much the only question you need to ask yourself.
Leo dropping that cash on a port Injection fuel system
Methanol – Cheap and simple
Port Injection – Expensive and Reliable
You must remember that the OEM fuel system, even with E85 in your tank is only good up to around 370-390 WHP. So, everything beyond that is supported by your AUX fueling. If your extra fuel system stops spraying for any reason, that could lead to catastrophic damage depending on how much you’re relying on it. When you’re just trying to nudge over the 400 whp mark on a CST4 or CST5 then Methanol is usually fine in my opinion. But beyond that, I’d be concerned with the reliability aspect.
When you have a properly set up port fuel kit (Manifold with fuel rail required) it behaves almost as if there is no AUX fueling system. This is especially the case when you have it all integrated into your factory gas tank and don’t need to fill up a separate cell. A quality Port Fuel Kit is pretty full-proof.
You’ll have to make the decision that’s best for you, but I’d recommend a port fuel kit to support 500 Whp, vs a heavy spraying methanol kit.
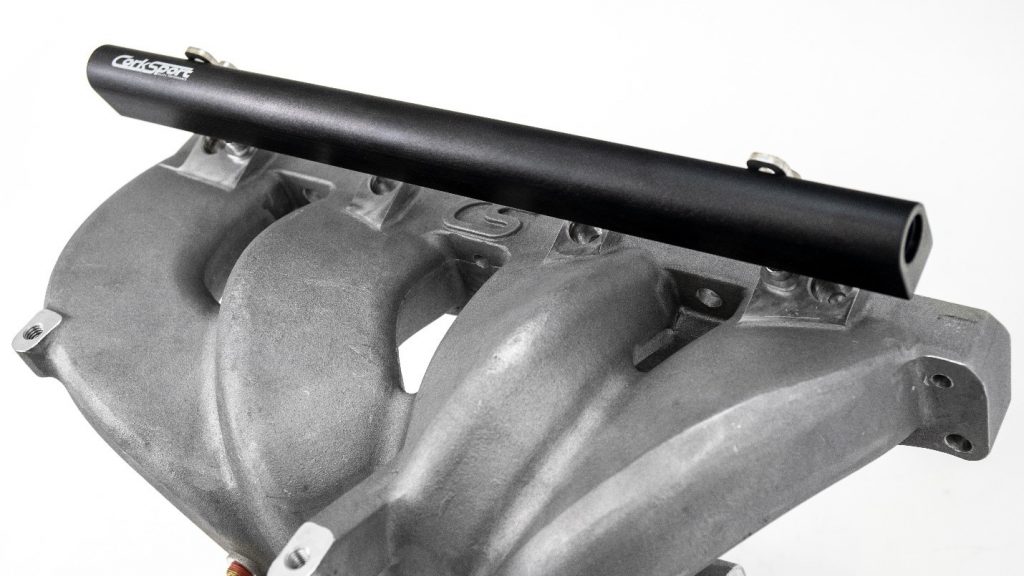
CorkSport Manifold With Fuel Rail For Port Injection
Let’s Talk Manifolds
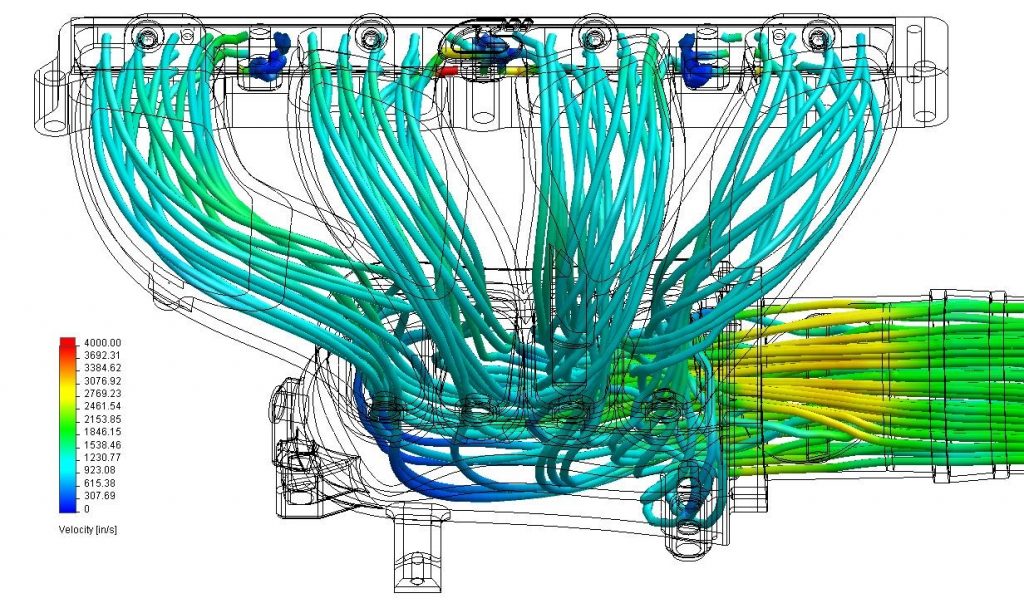
Manifolds are responsible for transferring all the air in and out of the motor from their respective cylinder. This job is an important one as it needs to distribute the gases as evenly as possible. The more even the flow, the better the performance!
On the Mazdaspeed Platform, the OEM intake manifold is known to be the bigger restriction over its exhaust counterpart. With very unequal flow distribution across the 4 runners, it has been proven not only to restrict power but also cause premature wear and tear on cylinder #3; here’s why.
This is caused by “over-feeding” air to #3 in comparison to the other cylinders. Over time this #3 is actively running leaner than its counterparts which is why it’s been deemed the most common cylinder to blow if an engine does give way.
CorkSport Intake Manifold shown to provide example of even Flow
It is because of this, that I always recommend a CorkSport intake manifold for even stock power levels. It may not be required to make 500 Whp, since you can essentially just turn up the boost to counteract the restriction. But in the name of reliability and efficiency, you should always try to help your engine breathe with the most minimal effort while also helping it maintain its health.
CS manifolds, FMIC, and 3.5” intake in picture
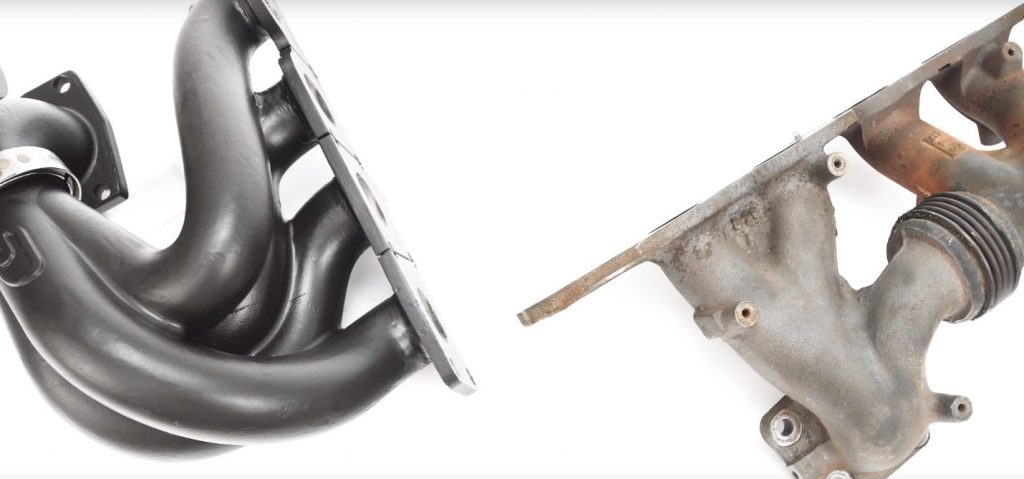
The OEM Exhaust manifold may not be as bad as the intake manifold, but it’s still not ideal, especially at this power level. A performance exhaust manifold needs to be designed with exhaust scavenging in mind.
Exhaust scavenging is a very cool effect. The exhaust gases leaving the combustion chamber travel out the individual runners and enter the collector. It’s at this point that it creates a vacuum-like effect on the runners, assisting the exhaust gases to escape from the other cylinders. This constant scavenging helps improve exhaust flow dramatically, especially when you start making power over 400 Whp.
You can learn more about exhaust Scavenging in our Blog that dives deep into it and shows examples comparing our Exhaust Manifold to OEM!
Stay Up-to-date with CorkSport
CS Exhaust Manifold vs The OEM Manifold
When you replace both the Intake and Exhaust Manifolds with a performance unit you are drastically helping your motor improve its efficiency, which can mean 3 things.
1. Make the same power on less boost. 2. Make more power on the same boost. 3. Make Way more power on way more boost.
When you have to push your car less to make the power you want, reliability improves, and it also needs more room on the table for when you want to make even more power later on. That leads us to our next topic, Efficiency Mods.
The Cherry On Top
With a built motor, full bolt-ons, fuel, and a big enough turbo you can easily hit 500 whp.
However, efficiency mods such as Camshafts or Throttle Body will help you make more power easier, or really push the limits of your turbo by improving its ability to perform.
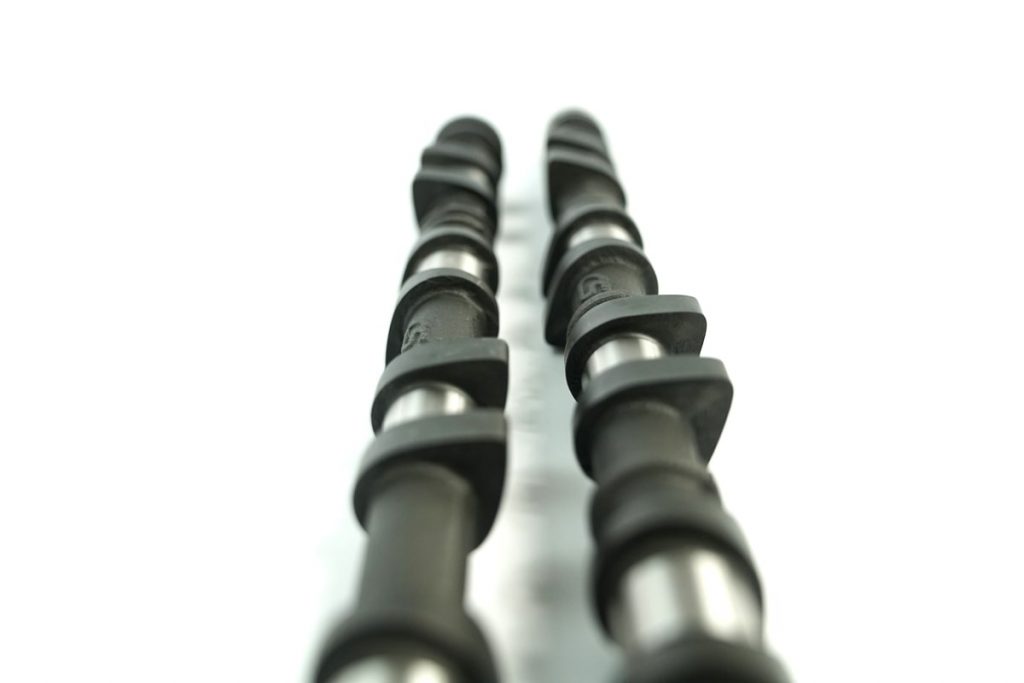
Our CS Camshafts are ideal when you start getting into this power range. It helps with everything from turbo spool, midrange power, and top end. Even on K04 powered speed 3’s / 6’s our cams netted around 20 Whp. You can imagine the kind of exponential improvements it can make as you move up in power.
Mazdaspeed Camshafts for DISI MZR Motor
That being said, if you’re already having a motor built, or you happen to be going inside your motor, its not a bad idea at all to toss these cams in. They will only help you, and if anything, help your car to not need to work so hard when you’re pushing its limits.
Performance Throttle Body for 2006-2013 DISI MZR Mazdaspeed
To top that off something like our CorkSport Throttle Body has been proven to make more horsepower and flow 33% more CFM than the OEM unit. Up until recently, no other throttle body has been a viable option due to drivability issues. But CS now offers a drop in plug and play unit that doesn’t come with the problems and utilizes OEM ECU logic to function. Modifications like the throttle body are the awesome little bonuses you can do to help the car hit that 500 Whp mark even easier.
Let’s Recap
So, to cover everything that we’ve learned: This is what we recommend to achieve 500 WHP
We hope you enjoyed reading this blog, and now have a better understanding of the details that go into making 500 whp. Next, we will be reviewing the in’s and out’s of 600 whp!
My Name is Symon Powlison and this is my journey of how I got my Mazdaspeed3 and the Mazda community that became my family.
Let’s head back in time a bit, I was a broke high school student and I had just bought a 1997 dodge avenger, while my friends had all dabbled with modifying their cars at the time, I had not, but I knew I wanted to. The avenger came with an exhaust that sounded ok and some wheels and that’s about it.
When I showed my new car to my best friend Barett (yes Corksport Barett) and talked about build aspirations that never happened, we decided that we both wanted new stereo and subs, 2007-2008 was the time for loud music and lots of bass lol, “Darude Sandstorm” anyone?
I had a lot of fun with that car but long story short the car was towed away late in the night for having a flat tire in a parking lot. Now with little to no money and my little avenger was never to be seen again. All is not lost though because those early years with that car started me on a slow trek of building my own “Racecar” later in life it was the catalyst that started it all.
Fast forward to the year 2012, I’m a bit more established now and I’m getting ready to deploy at the first of the year for 10 months, when my Co-Worker decides to buy a BMW 335i, I made the brash decision to follow suit and I purchased a 2004 Audi S4, my wife was needing a new car anyway so I gave her the Kia Optima I had purchased a few months back.
Everybody was happy because I got my car and my wife got a brand new Kia! My Audi came with Tien lower springs, a nice fender roll job, and a Magna-flow exhaust. The roar of the V8 through the exhaust was great, it had quick get up and go and it looked amazing in the brilliant red paint. This was my first experience with a “quick” car and I was hooked, but with Audi’s, I had no idea how to even begin to work on it if it had problems, and neither did anybody close to me. This is when I knew this wouldn’t last but I thoroughly enjoyed it when I had it.
Symon Powlison
During deployment, I would leave my Audi in the hands of Barett, and return to resume driving bliss with the car, until I left again except this time it would be for nearly 3 years. My wife and I left for Korea in the middle of 2014. My car was out of my possession longer than in my possession and thus while my time away I grew apart from my Audi and wanted something new, different, I wanted a hatchback.
I always liked the way hatches look, the bodylines, the mildly flared fenders, the base stance of the hatchback drew me in. I spent countless hours looking at every model of hot hatches, tirelessly and sometimes redundantly, maybe I could afford this or maybe I should buy. I decided to call Barett from Korea and told him I was coming home and I wanted to sell the Audi and get something I truly desired.
He mentioned getting a Mazdaspeed3, I had seen some videos about them but I was rather set on an all-wheel-drive hatch to drive in the snow, but that was dumb because I hate driving in the snow lol. I decided to give the Speed a deep dive look and man I was impressed, not to mention I had an endless resource if I needed any help.
I was sold, the price was right, the whole car package was right, it checked all my boxes, I wanted a turbo 4cyl with good base stats, something reliable to a degree, and something that I could learn to modify and have help if anything breaks.
I arrived home in the spring of 2017, and scoured the interwebz and found the speed of my dreams, a velocity red 2013 tech package mazdaspeed3 with 69k on the dash. With what money I had left in savings, a small income, and an Audi for a deposit. I marched down to the dealership and literally, 6 hours later I walked out of there with my dream car.
Shop all 2010-2013 Mazdaspeed3 Parts
Funny side note here, when I took the MS3 for a test drive I was by myself, I never drove a 6-speed manual car before and didn’t know how to put the car in reverse, so here I am sitting in somebody’s driveway (huge facepalm) trying to figure out how to put the car in reverse when the homeowner comes out and asks if I need help. I tell him the story he laughs and gives me a push to send me on my way back to the dealer.
That test drive officially sold me on the car, I can still remember the first time starting that car and the first time I hit 15psi of boost, it was amazing and probably the coolest feeling ever while driving. I couldn’t wait to show my wife, I ripped the speed all the way home, and it was nothing but smiles per gallon. I couldn’t have been happier. I am honored to have such a loving wife who was just as excited for me to have a car I desired so much. This was my very first and only turbo car I’ve ever owned and every time the car plants my back to the seat I can help but grin from ear to ear.
I kept the car stock for a year on the dot before I started modifying it, if you’re keeping track it’s now April 2018. I purchased all the necessary supporting mods to keep it from going ZZB. I bought an Access port, HPFP Internals, intake, and pro tune and man did that little K04 come alive, a few other supporting mods like exhaust and rear sway bar brought the Mazdaspeed to a different level.
Shop all 2010-2013 Mazdaspeed 3 Categories
The Speed had no changes for another year or less (early spring 2019), finally, it was time for power mods, big turbo, big FMIC, lots of little bits like injector seals, short shifter, motor mounts, and getting a tune from Purple Drank. The car became a monster, smiles turned to white knuckles gripping the wheel from torque steer, turbo noises for days, and a singing bypass valve that subtly lets you know it’s there on any occasion.
That kept me satisfied for another year till now, this plan is to do both manifolds, cams, and EWG. *Hurray for race car noises*. The transformation of my Speed over the last 3 years has been a rewarding experience, providing me with knowledge and experience and confidence to be able to tackle any problems or situations previously I would have avoided or paid an overpriced shop to fix.
This is the best part of the community I joined when I bought my speed, all the experiences and knowledge that has been shared with me have been nothing short of amazing and I’m truly grateful for the speed community. My wife and I don’t take a lot of vacations, but the two events that come up in the year that you can’t miss are Mazda events.
Shop Gen 1 and Gen 2 Mazdaspeed 3
I didn’t know that I could miss Idaho as much as I would when I have to leave Papa Keith’s Mazda Takeover event in Boise after a 4-day party. The big bear puts on an amazing event yearly and when it wraps up the withdrawals of it kick in. Those pains are subsided though just two months later when we all get to catch up for CorkSport’s Dyno Day’s! The event that the CorkSport crew puts together is a blast, its high tempo 2-day event that brings our Mazda community together in the Pacific Northwest, I have seen people from British Columbia to Utah come all the way to Vancouver, WA for this event.
These two trips are something that flows into my DNA and I can’t imagine my life without experiencing them or the people I’ve met along the way. My wife and I look forward to these weekends as I’m sure anyone who has gone to them at least once will, we love spending time with our extended Mazda family and I wouldn’t change it for the world.
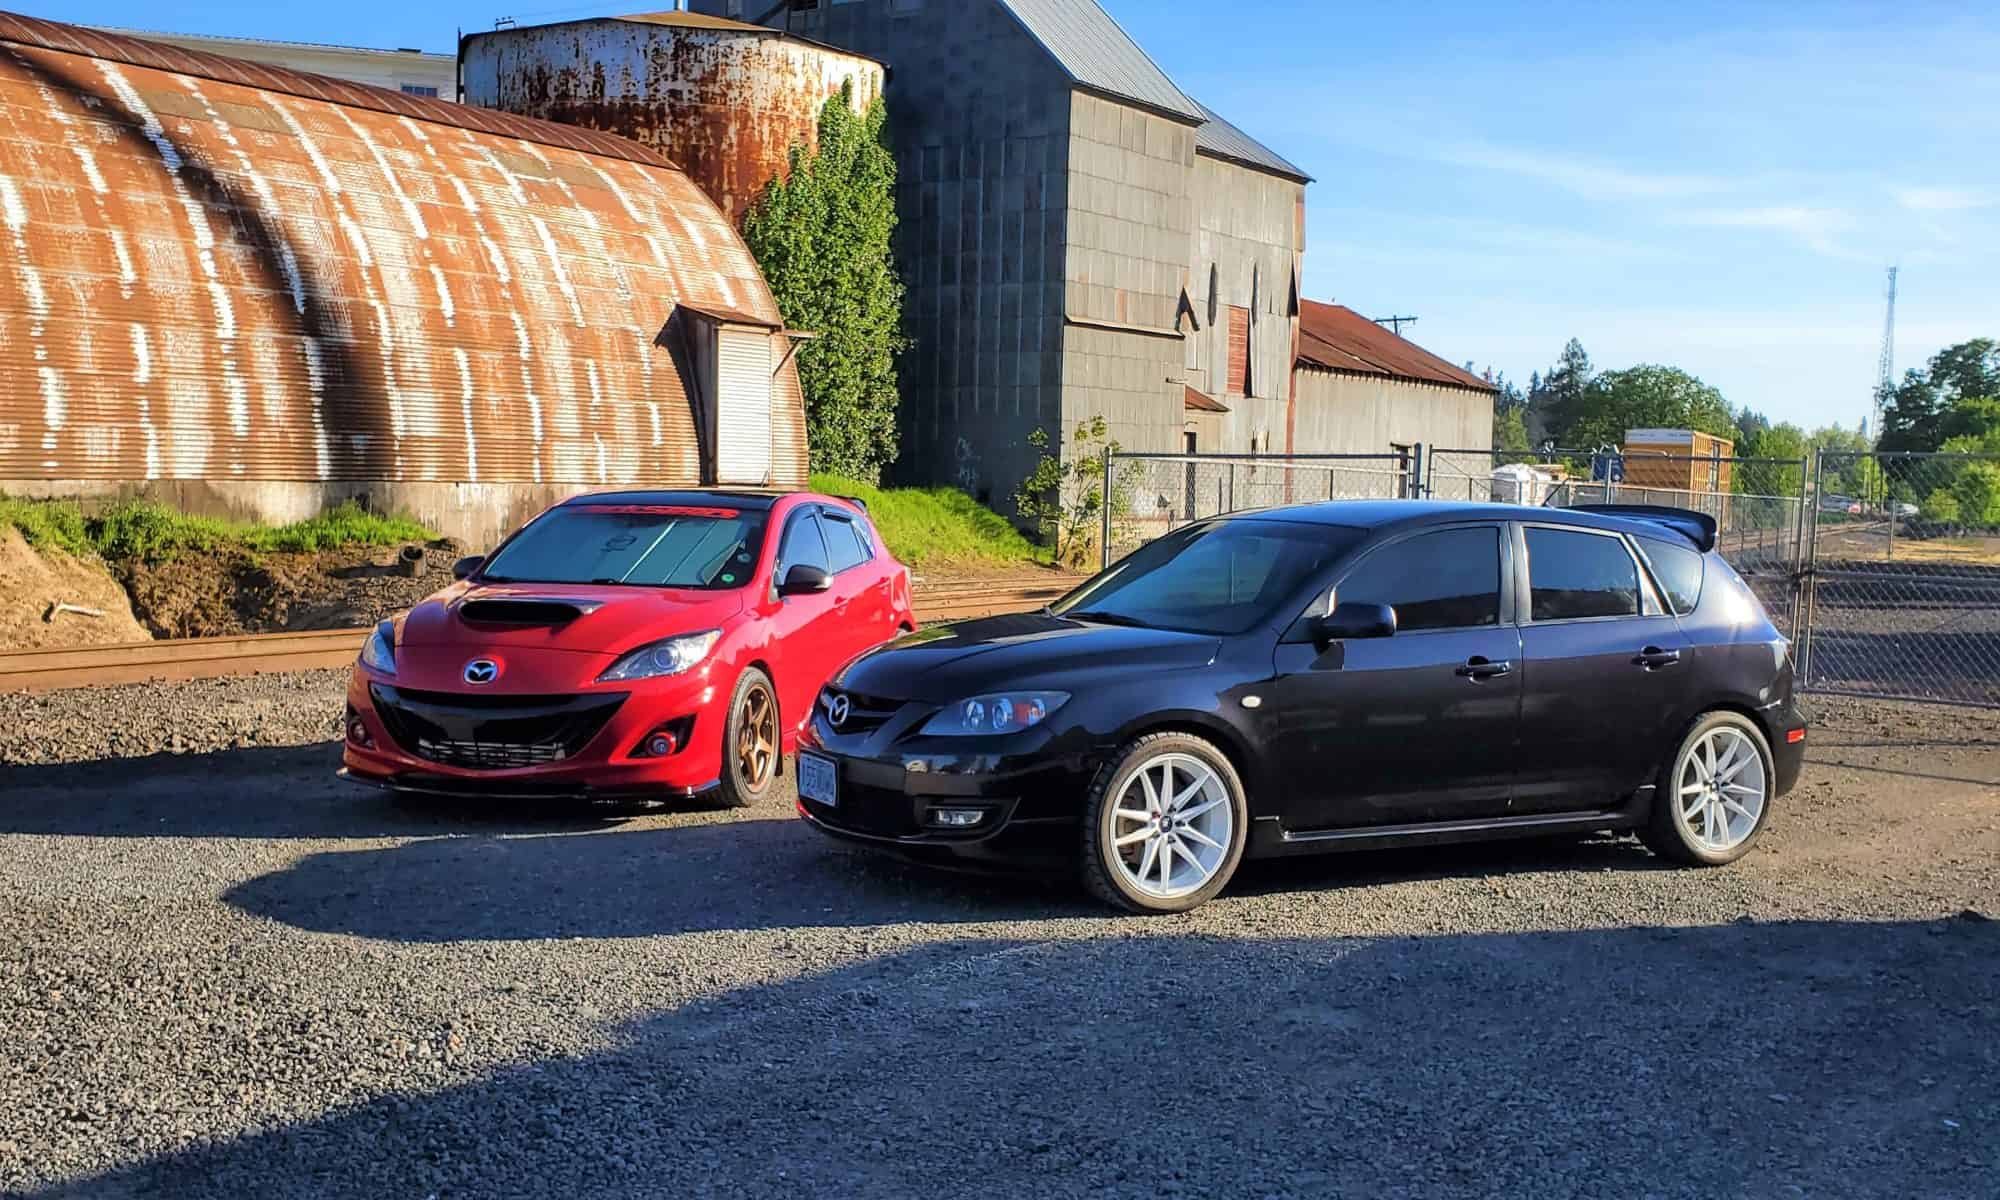
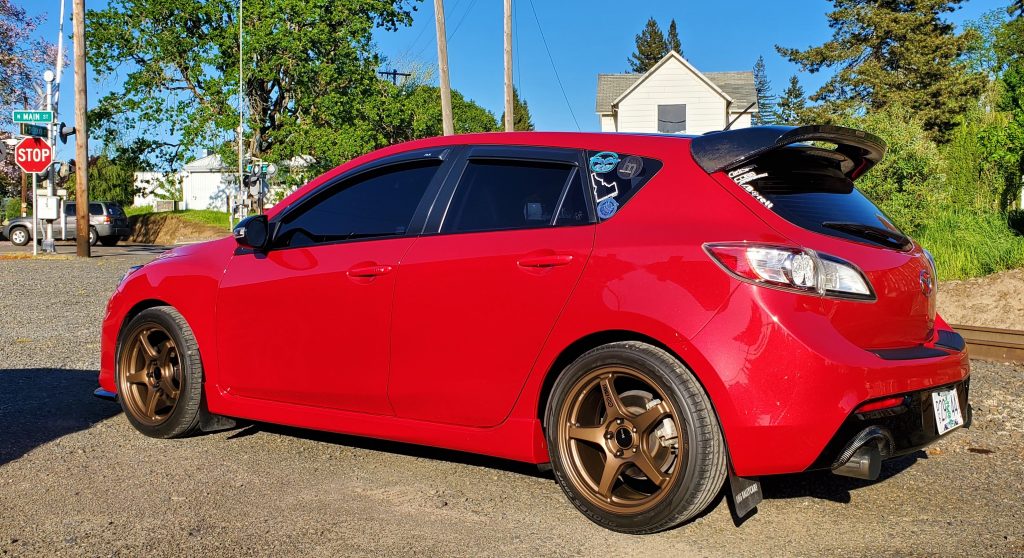
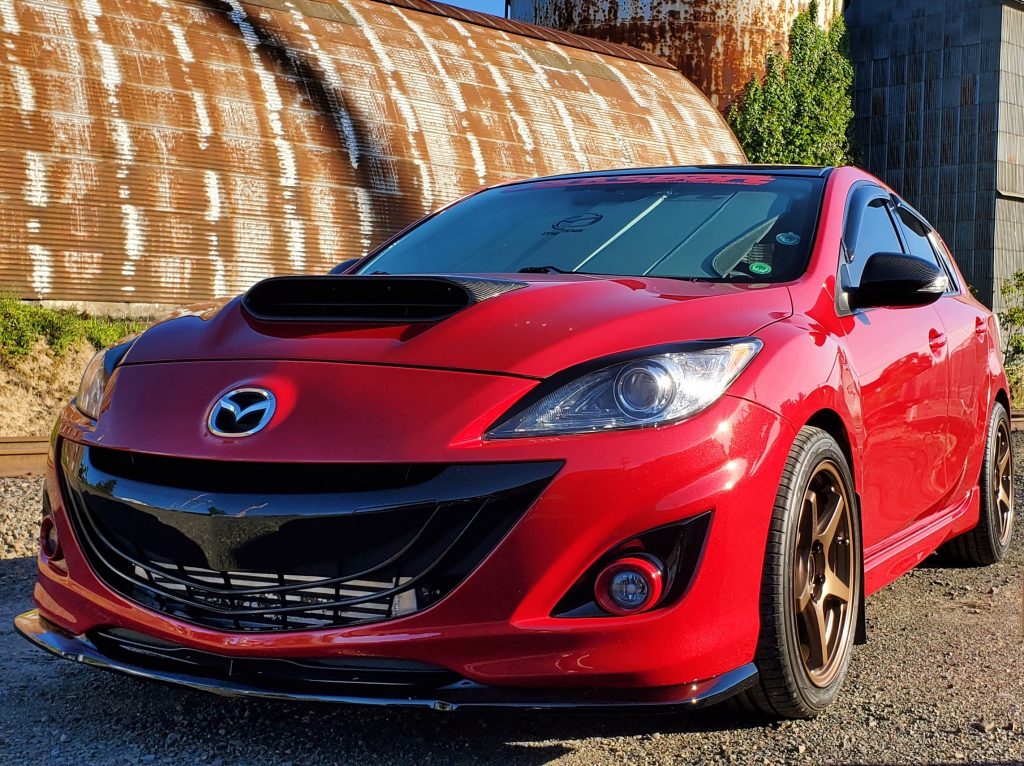
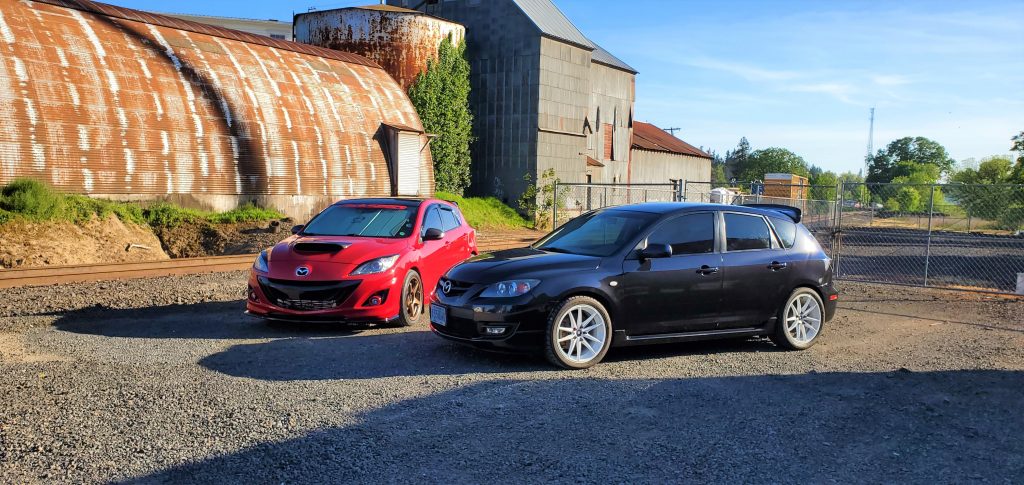
In closing, to say that a car would change my life would be an understatement, but it did and I wouldn’t want it any other way, so if you see the Red Baron Speed of Newberg out and about, come up and say hi and chat for a minute. I hope to see you all at future events, keep hitting that Boost, and stay safe. See you all on the road.
Symon
Red Baron Speed of Newberg December 1st, 2022CorkSport
Let me take you to an extraordinarily dull time in my life, the last time I started my Mazdaspeed when it was still stock.
September 14th, 2018 was a beautiful September day in Washington. I started my car at 6:45 am, just like every other weekday. The Speed3 burbled to life, but it was relatively quiet, flat, and a bit uninteresting. No one knew I was leaving for work – I wasn’t shaking any windows, but that was going to change.
At CorkSport
Once I arrived at work and spread some Friday cheer, I settled in. Almost immediately, I could feel the pile of parts in the corner behind my desk, glaring at the back of my head. I thought to myself, “Don’t turn around – focus damn it!” The day had finally come – install day. Thankfully with our awesome half-day Fridays, I was out of the office and on my way to Brett’s house before 12:30 pm.
After we loaded up Brett’s Rodeo with a load of parts, we set sail to our destination, a place where many tears have been shed, knuckles have been busted, and where dreams have come true; Brett’s garage. Every tool you’ve ever needed and gadgets you didn’t know existed. There were even a few specialty items present, that if he didn’t have quite frankly, this couldn’t have happened.
Shop all Mazdaspeed 3 Parts
We started with thorough degreasing of the engine bay and setting up the essential supplies- because what is an install day without beer and snacks! Once the car has cooled down, I started with taking out the battery box, intake, and intercooler; and then the fun really started. I’ve read the horror stories, I’ve watched the videos, and I thought I spent enough time mentally preparing myself for what was about to come – I was wrong.
The Downpipe
We all know about the Mazdaspeed downpipe on our cars. The devil engineered the placement of this thing, and he had his minions tighten the bolts. There isn’t enough PB blaster in the world to help the corrosion and excessive heat that these bolts withstand. We got the first one out with little to no issue, but it just got progressively harder from there. It was only a matter of time before rounding off the edges of that last bolt. Thankfully Brett has an extractor tool that we hammered on there, and with the small act of god, it was successfully extracted.
My experience with removing the downpipe from the exhaust, as is everyone’s experience, was different. Mine was influenced by the previous owner adding a 2.5″ resonated exhaust on it from the second cat back. The downpipe didn’t want to come out until I wiggled a pry bar in between the flange and put Brett’s Caliper spreader in there (again tools I didn’t even know I needed) and applied sheer grunt force. I got the flange to bend, and after learning a few new choice words, we got it out. By this time, it was 11:30 pm, and we still had a few other things to unbolt before the exhaust came out. Instead of using power tools and waking every neighbor up in a two-block radius, we called it a night.
The Morning After
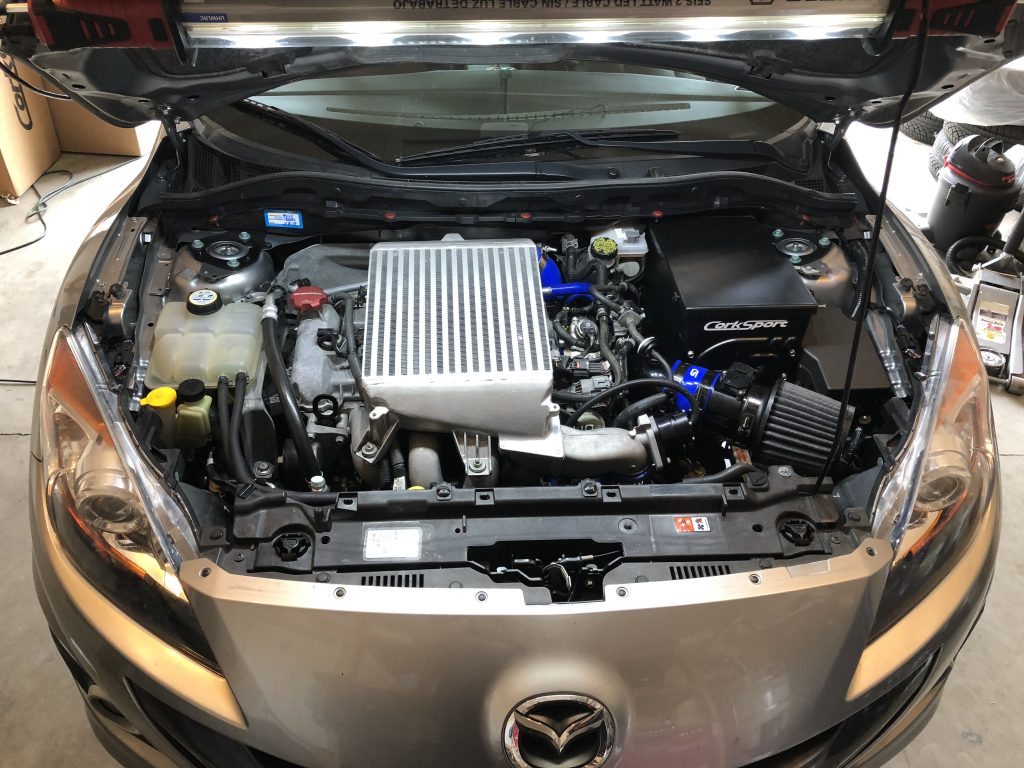
After some much-needed coffee, we made it back from the hardware store (replaced the downpipe nut from hell) it’s time to party. We started with sliding in my new downpipe with the High flow Cat what a breeze compared to taking it out. Next came my intake, I went with the 3.5″ so I don’t have to buy another one when I finally go with our CorkSport CST4 turbo. Still might go with the new CST5. Then I put in my ECU Relocation Box, and I have to say, what a clean looking piece to have in your engine bay!
Mazdaspeed 3 TMIC Top Mount Intercooler
We changed out the OEM spark plugs for some NGK 6510 gapped to .026 and started to put on my new TMIC that is rated up to 450WHP after we got the TMIC it was time to put on my shiny new boost tubes Engine bay= Complete.
Now time to get underneath and put on my highly anticipated Non-Resonated Cat-Back exhaust and my Stage II RMM. Goodbye, torque steer! Once we had the exhaust mostly in place, I realized if I didn’t have the CS exhaust hangers I would have been in trouble. The person before me had his exhaust welded quite poorly in place of the hangers, and I didn’t have an option to use my OEM ones.
Moment of Truth
After everything was double-checked and rechecked, it was time for the moment of truth. I hooked up my battery, I flashed my new tune from Erik Bjork at Drama Tune, and now it was Go Time! I will say hearing my car make those sweet sounds was one of the best moments of my life. I’ve been waiting for this moment since I purchased my car, and it was one of the most surreal experiences I have ever had.
We let the car run for a few minutes and checked to make sure I didn’t have any leaks, and then we headed out for a test drive.
In the immortal words of George Takei “Oh My!”
That was my thought, EVEN on just a base map. My car felt and sounded 1000% different than before. The intake was amplifying fun new mechanical noises – like I was hearing my turbo and BOV dance for the first time. The crackle from the exhaust on a hard 2nd to 3rd upshift was intoxicating, all the while my RMM putting in work to make sure I didn’t torque steer into someone’s front lawn. What an experience! I would even call this life-changing for me. The funny part of the story is that I wasn’t planning on buying all these items at once – true intentions of a foolish car enthusiast. Thankfully for me, I have a fantastic career within CorkSport and have a great friend who helped me make my dreams come true. Who wants a stock car when you work for the number one place in the world for Mazda Performance, not this guy?
Zach from CorkSport
Keep an eye out for my turbo blog, because it’s only a matter of time until the mod bug bites me again.