Whether you want the better handling that comes with the lowered center of gravity, or you want to rid yourself of the wheel gap eyesore. Lowering springs will give you want you’re looking for.
Improved Performance
For running the track, or a spirited drive through the countryside, CorkSport lowering springs are the upgrade you’ve been looking for. By adding lowering springs and lowering the center of gravity of your Mazda allows the car to stay more planted to the road.
One of the biggest things to note on stock suspension is how far upward the suspension travels when hitting a bump. It can make the car feel like it wants to lift off of the road; depending on how fast you’re taking corners. Lowering springs help to correct the car’s suspension travel when you hit a bump in a turn.
Lowering springs also have about 25% increased stiffness. For the Mazdaspeed platform, increased stiffness in the rear is a must. Mazdaspeeds like to squat pretty hard when hitting full boost, so any way you can manage to stiffen up the rear is a great modification for your car.
A Better Look
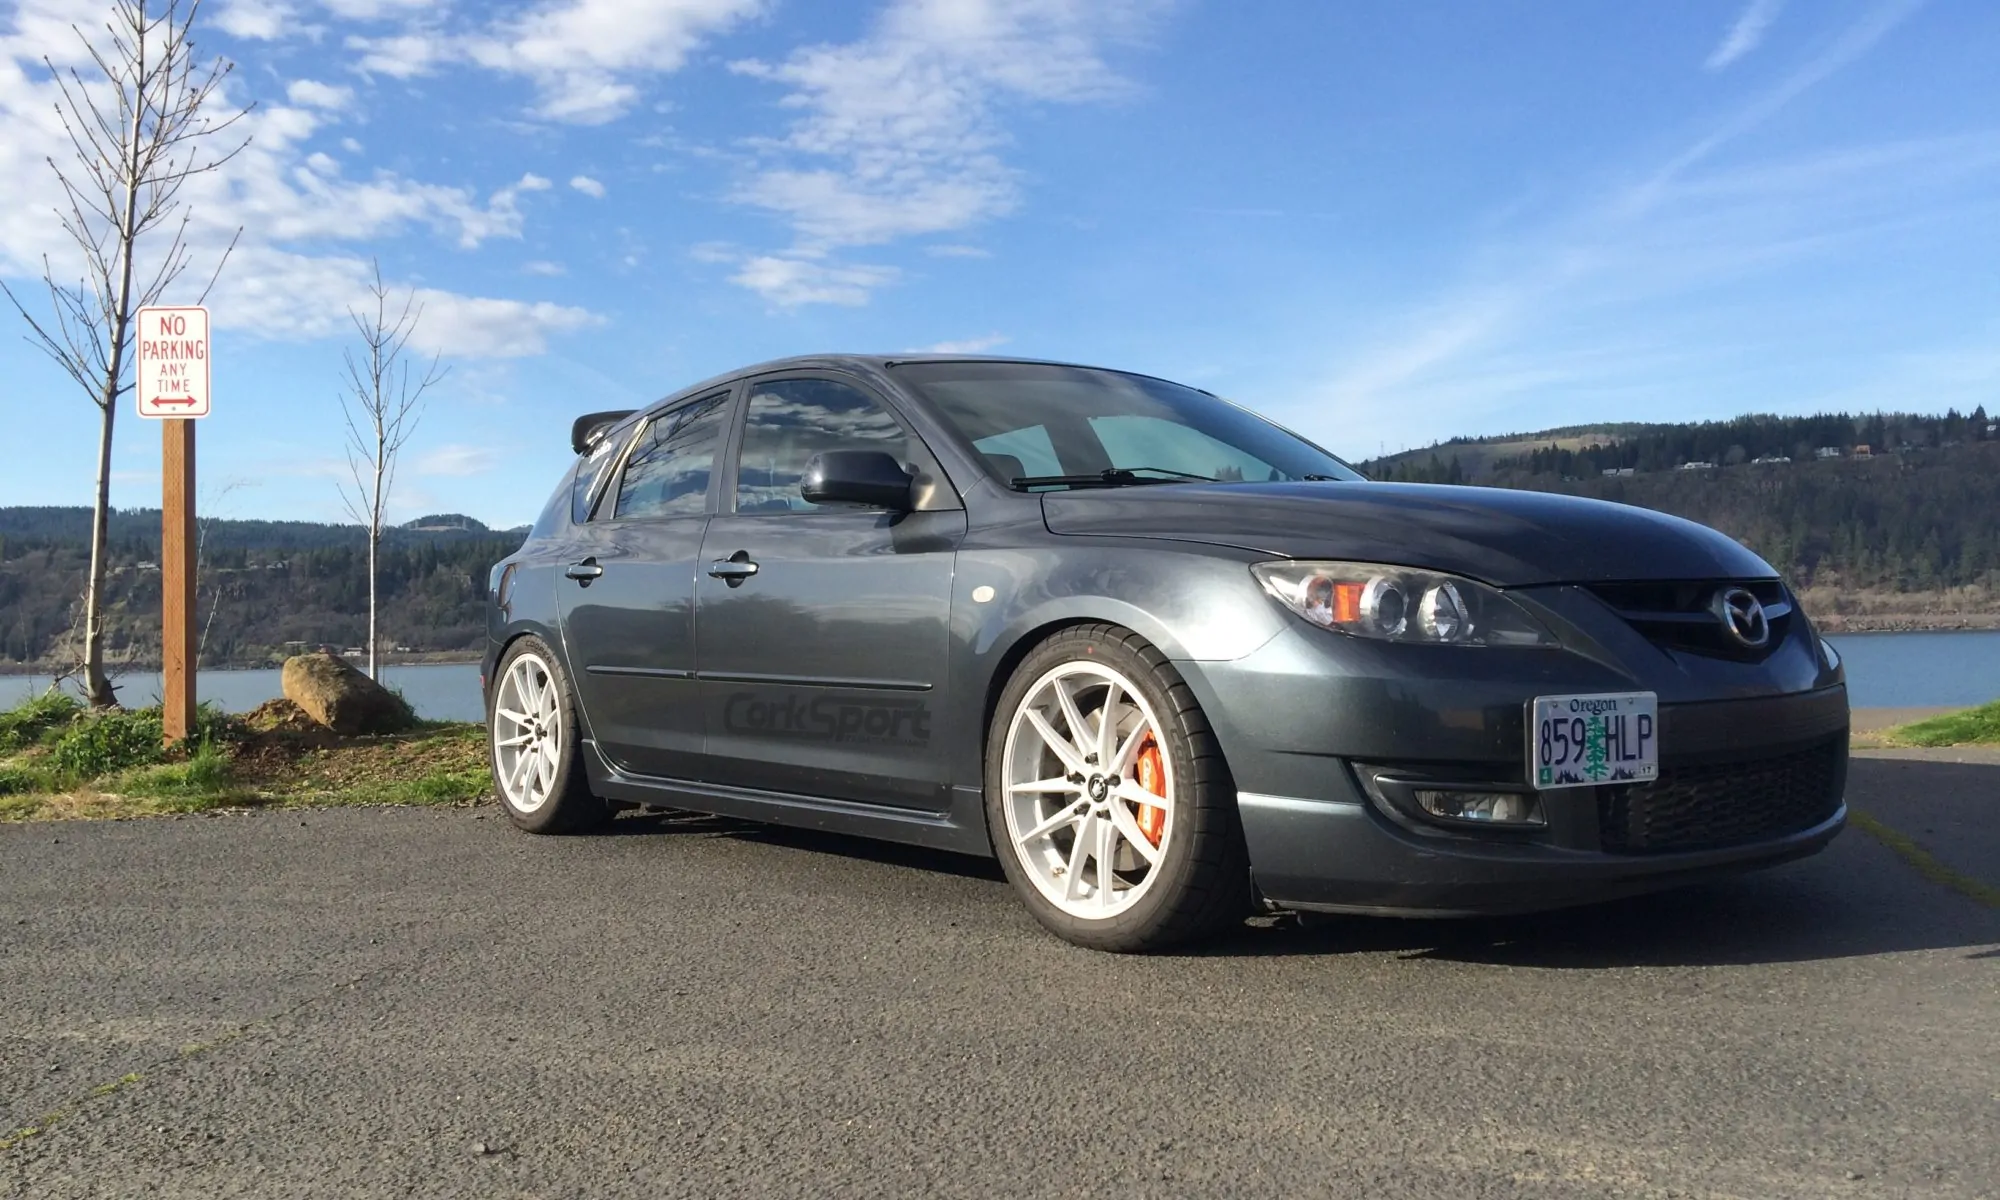
Adding lowering springs also gives your baby amazing eye appeal and a much more aggressive look. Whether you drive a Mazdaspeed3, Mazdaspeed6, Mazda 3, Mazda 6,CX-5, or MX-5, lowering springs will get rid of that ugly wheel well gap. The result is a Mazda that carries a much cleaner and more aggressive look and gives you the ability to take it to the track if you want to.
Some people want to drop their Mazda as much as possible, and some don’t. CorkSport lowering springs don’t deliver a super aggressive drop. If you’re not interested in scraping your front bumper on every road bump, the CorkSport lowering springs have the right drop for you, and provide the increased handling capabilities you’re looking for.
If you’re curious about other suspension pieces for your Mazdaspeed, check out our Struts and Shocks combo kits, that give you just what you need for suspension.
The Mazdaspeed platform is a great place to start if you’re looking for a fun tuner car that offers awesome power to money spent ratio. This holds true until you hit the capacity of the OEM fuel system. If you don’t know it already, the DISI MZR was one of the first gasoline direct injected engines offered in a passenger car. For its time, the Mazdaspeed 3 was a powerful and capable sport hatch right off the showroom floor, however, this type of fuel system quickly reaches it’s limits and is not easily modified for higher power.
In this blog, we are going to take a look at auxiliary fueling with methanol and my personal experience taking this path.
Damn, I’m out of fuel… You got your Speed setup with all the hard parts (aka fully bolted – HPFP,Intake, Exhaust, FMIC, etc.) and finally pulled the trigger on that big turbo. Just a few revisions and your tuner is telling you you’re out of fuel and more or less stuck at around 350-380whp (depending on turbo and octane). It’s time for auxiliary fueling.
Now when considering auxiliary fueling it is critical to consider your goals with the car; the level of complexity and cost are drastically different depending on these goals.
380-440whp Goal:
With this power goal you most likely have a fully bolted Mazdaspeed and an upgraded turbo such as the CorkSport CST4. To achieve this power the auxiliary fuel system can be fairly simple. From my experience, a single nozzle with the appropriate flow rate positioned just before the throttle body can get the job done. This setup is very simple, consisting of a progressive rate controller, fuel cell, some tubing, nozzle and ideally a check valve on the nozzle. This will cost you around ~450 to get started.
I personally started with the AEM Methanol Kit, but there are many other kits available such as Devil’s Own, Auqamist, Snow Performance, and ProMeth. I recommend doing some research to find the best kit for your needs before jumping in.
Once you break past that ~440whp mark you should really start to consider adding nozzles. There’s a couple ways to do this.
First, you could maintain your basic system by adding another nozzle with a splitter and another port in your intercooler piping, just before the throttle body. This can get you close the 500whp mark but is not ideal as you will need to run two very large nozzles. With nozzles, this large the fuel has difficulty atomizing and instead can condense into relatively larger droplets. This is not ideal; however is only the added cost of a splitter and nozzle.
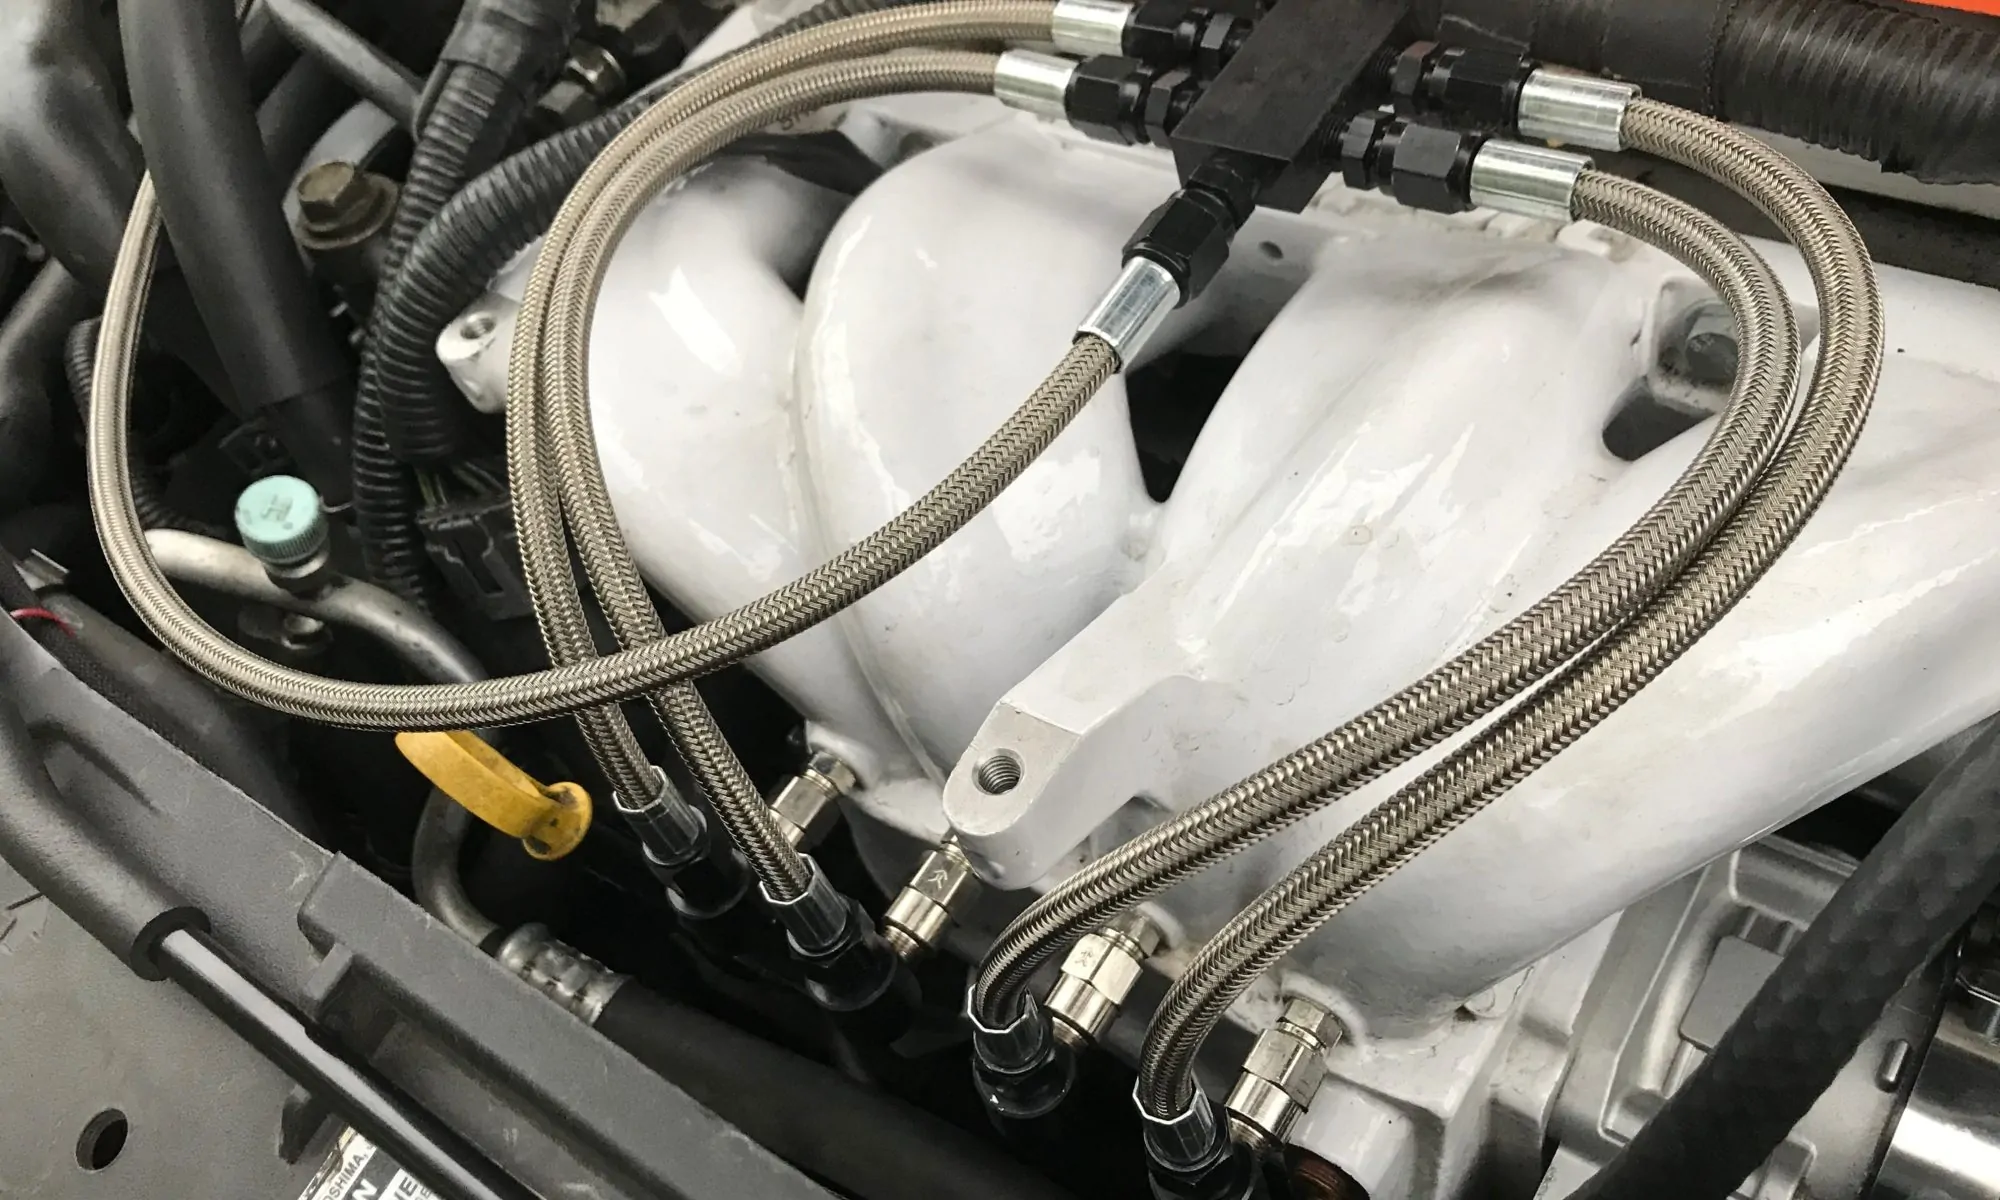
The other option is running a single nozzle on each intake manifold runner. Check it out below.
By doing this, you can now run a smaller nozzle that will atomize much better, but since you have four nozzles you can still flow the appropriate volume for your power goal. However, with this nozzle location, we have made a drastic design change to the system. In a pre-throttle body set up the nozzle never see vacuum, however once located in the intake manifold they will see vacuum which requires additional components to operate correctly.
To avoid the risk of hydro-locking your engine and awful driving characteristics, we must add a check valve to each nozzle and a solenoid-controlled valve to the hose that feeds the nozzles. Check valves (which you see a close up of in just a bit) allow fuel to flow in only one direction. Along with that, a properly design check valve will have a crack pressure (minimum pressure to allow flow) that is slightly greater than the vacuum force in the intake manifold. A solenoid is a valve that opens and closes and is controlled by the controller. This allows fuel to flow only when commanded by the controller.
Let’s take a closer look at the nozzles and distribution block necessary for a per-runner nozzle setup. Looking at the nozzles you’ll see silver cylinder between the nozzle and the black fitting that connects to the hose. This is the check valve. A simple, but critical part of the system for proper function. Up towards the top of the image, you see a single hose entering a black block along with four separate hoses leaving the block to each nozzle. This is the distribution block; this can be configured in many ways, but more or less it allows you to direct fuel to each nozzle from a single hose.
So, as you can see moving to a per-runner setup includes a lot more complexity and cost. This added cost is ~300 on top of the methanol kit you already purchased and not including an intake manifold that is already set up for nozzles. You could cut a little cost by using nylon tubing versus stainless braided hose, but not much.
It’s also worth noting that the pump that comes standard with most kits will not flow enough fuel to support just under 500whp, so depending on your goal you may need an upgraded pump as well. If this is the case I would recommend the pump from ProMeth only because it’s the only pump I’ve found that truly flows more.
500+whp Goal:
At this point, I would simply recommend moving to a true port-injection system. Like the per-runner nozzle setup, a true port injection setup sprays fuel in each runner, but the systems, in general, are very different. Since port injection alone could be a couple blogs on its own I will give the quick and dirty here. A true port injection setup uses conventional style gasoline injectors that control flow amount directly in the injector itself. This allows much more precise control and reduces a lot of risks. However, the cost is much higher starting around ~1500-2000.
Lastly, I wanted to mention some things I love about using methanol for auxiliary fueling. Methanol is expensive, about ~ 8-12 per gallon which is a real bummer, but it does not get used for all driving situations. You don’t use the methanol unless you are pushing your car to the point that the extra fuel is needed.
The methanol is contained in a separate fuel cell like the image above verses in the OE fuel tank. Therefore it’s only used when you want to use it. Unlike E85 blends or other exotic fuel that must be mixed and/or used through the standard OE injectors and therefore used for all your commuting.
The GEN2 Mazdaspeed 3 has a lot in common with the Mazdaspeed 6 and the GEN1 Mazdaspeed 3 when referencing the engine and transmission. However, there were a few things that Mazda did change and improve when they gave the Mazdaspeed 3 a facelift in 2010.
Some of these changes include the valve cover, the gear ratios in the transmission, the power steering system, and the oil filter assembly. This last one is the one I want to talk about today.
Perhaps you just ran across this blog while googling how to change the oil in your Mazdaspeed for the first time or maybe you’ve already done a handful of oil changes. Either way, you can benefit from this info, unless you already have a 2010-2013 Mazdaspeed 3 you lucky bas****. All you Mazdaspeed6 and GEN1 Mazdaspeed3 owners listen up.
This is what you’ll find on your pre-2010 Mazdaspeed 3 and all Mazdaspeed 6; it sucks. This design uses an internal filter element only which is fine, but the OE housing cap is a real PITA to remove from the car which makes a simple oil change a much more frustrating process than it should be.
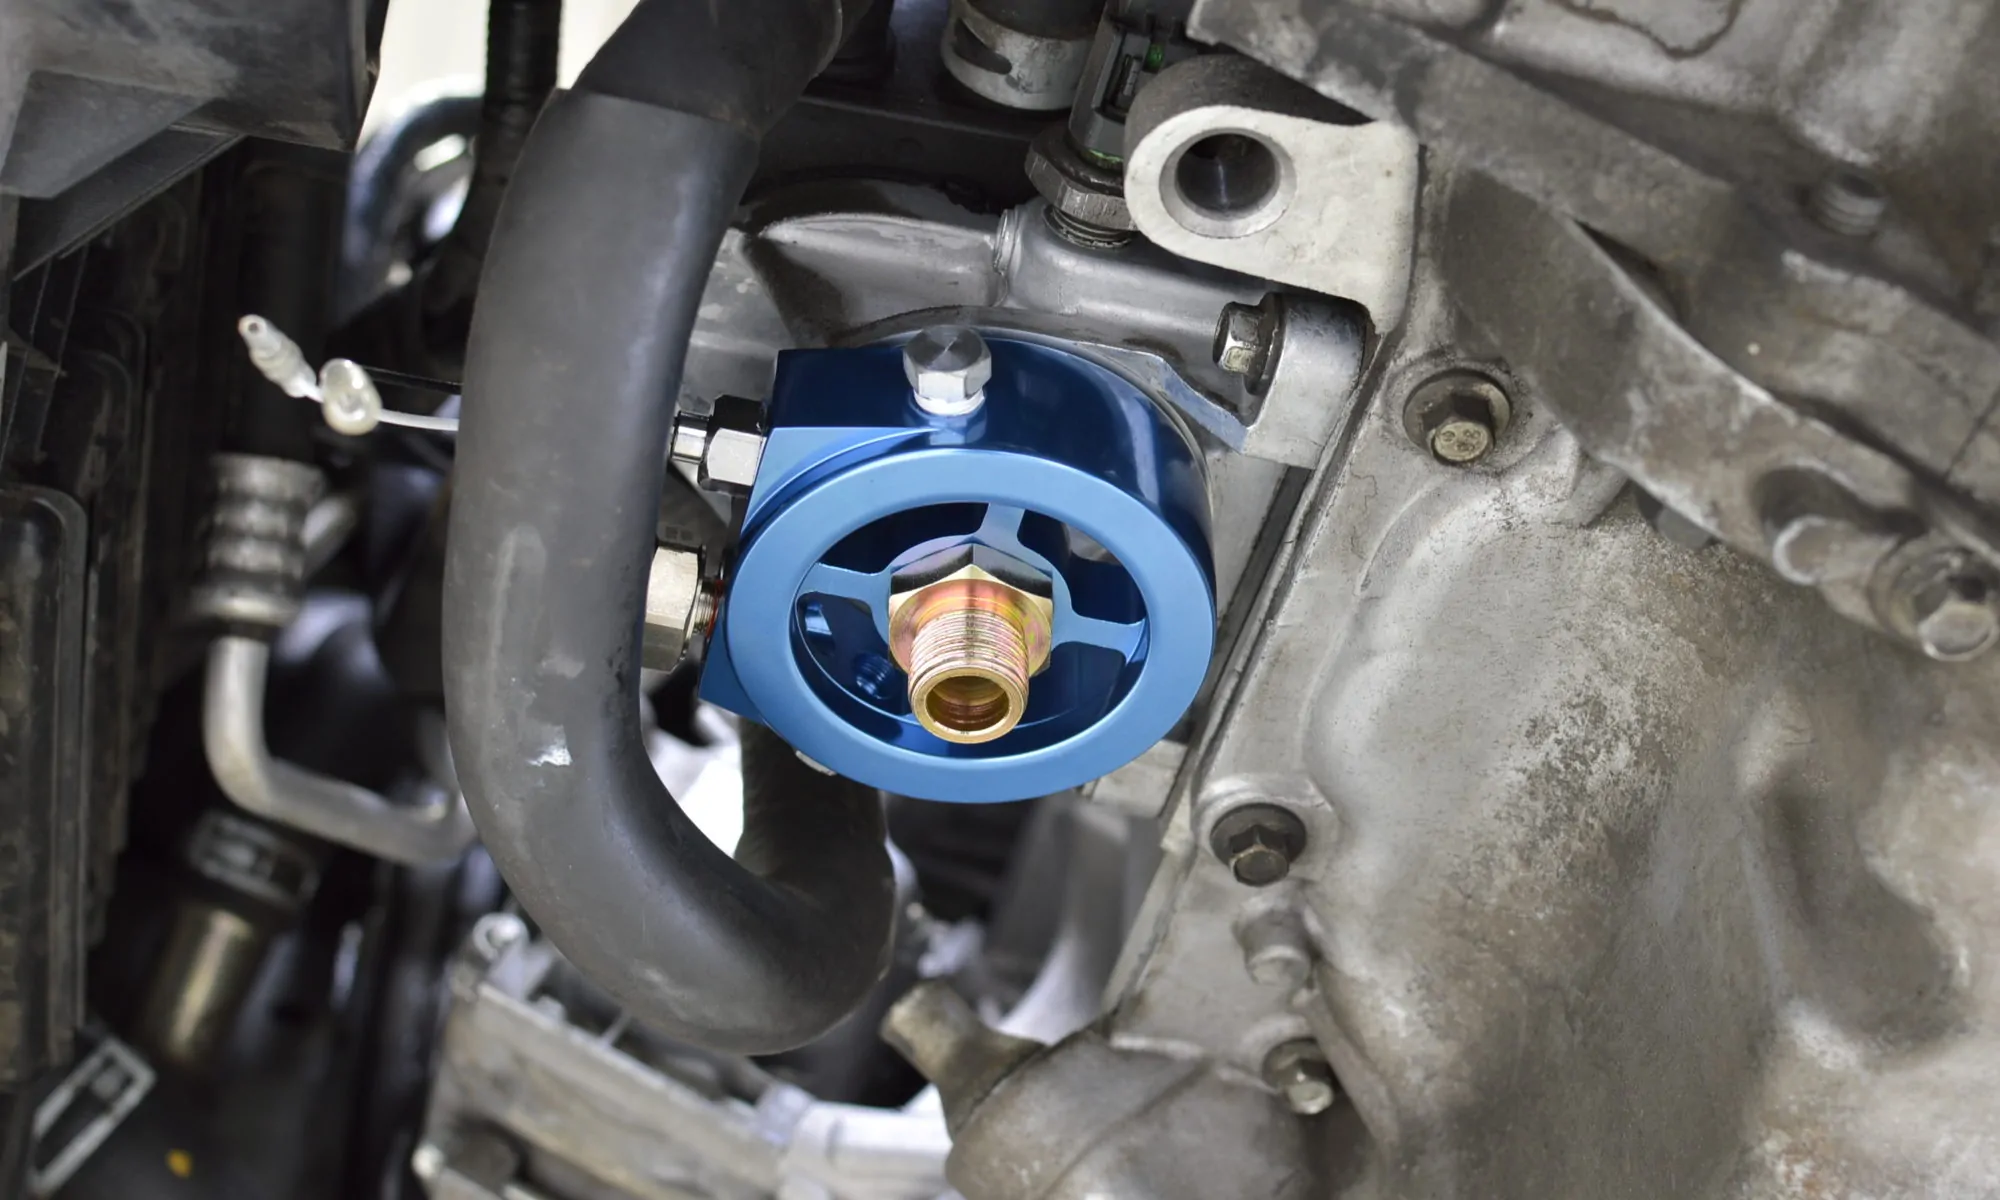
Along with the difficult disassembly, there is a limited number of filter options compared to the modern canister design. Luckily, the oil filter housing found on the 2010-2013 Mazdaspeed 3 utilizes a modern canister oil filter and is a simple bolt-on affair.
Mazda part # L311-14-311A is the part you’re looking for and can be found online or at your local Mazda dealership. It’s also wise to get a new gasket for the installation; nobody wants to do a job twice. This is Mazda part # LF02-14-342.
Once you get your parts and all your oil and a new modern oil filter, you’re ready for the big install. It’s actually really simple, only adding about 30 minutes to your oil filter change. Remove the fluid-to-fluid heat exchanger (the black thing on top with the coolant ports), then pull the housing off the engine and swap over the sensor. Back on the car with the new gasket and you’re good to go.
Another great benefit of the modern oil filter canister is the ability to use an oil filter plate to provide sensor ports for gauges such as oil pressure and oil temperature.
This sums up the oil filter housing swap; it’s really just that simple. So if you have an oil change coming up and aren’t one of the lucky ones with the GEN2 Mazdaspeed 3, then consider this before you get started. I promise you won’t regret it.
-Barett @ CorkSport
Oil Filter Changes Made easy for your 2007-2009 Mazdaspeed 3 and 2006-2007 Mazdaspeed 6 August 3rd, 2023Derrick Ambrose
If the title doesn’t tell the story then you must still be at the top of the hill; good luck with that as it won’t last long. Now let me tell you my story.
Even before I got my Mazdaspeed3 I was a tinkerer; I wouldn’t call it modding because there were no off-the-shelf parts for my vehicle at the time. I was 16 years old with my first truck; I quickly made it loud and obnoxious among many other things.
Flash forward to my later years, and you’ll find that I haven’t changed; things have just gotten more expensive… ya, you know what I’m talking about. We don’t grow up; our toys just get more expensive.
So I got my 2009 Mazdaspeed 3 in 2014 with a fresh Mazda Motorsports short block, a CorkSport SRI, and Race Pipe. Oh, don’t let me forget the CS Fuel Pump Internals and Cobb AP… I don’t want to get roasted on my blog. Anyway, that setup was short lived.
Within two weeks’ time, just long enough to break-in the engine, there was a prototype CorkSport Mazdaspeed turbo on my car along with an assortment of other goodies such as a Downpipe, Cat-Back Exhaust, and a few suspension goodies. Two weeks! That’s all it took!
Over the next year, the car had new parts on it every month…perks of the job you could say. I tried the Mazdaspeed3 TMIC setup, and then like everyone else moved to an FMIC setup, new CS Struts and Springs got set up, went to a 3.5” intake, got the engine all mounted up and then various other engine power products like the CorkSport Intake Manifold and Camshafts. Oh! I almost forgot the MS3 Big Brake Kit up front! Damn I have to say going fast is fun, but “throwing out the parachute” as you dive into a corner is just as exhilarating.
Like any seasoned Mazdaspeed owner knows, the OE short block was not long for the world. 18K miles later the infamous friction washers got me with a silent death. All… yes, I mean ALL…of the valves were bent, and the head was looking a bit rough, but luckily I didn’t vent the block.
At that point, my beloved Mazdaspeed and I were not seeing eye-to-eye (I think we have all had this feeling with our project cars right? You debate pushing it off a cliff?) so she sat for a good nine months before I decided I was ready to build the engine.
Wait. What? Remember that slippery slope I told you about? Well, when you are already this deep into the car the slope is covered in gear oil and damn near vertical…so I went deeper into the darkness known as project cars.
A month later I had a built engine (and significantly less money) that was ready to take on 600+ HP and more than eager to continue eating away at my bank account. A built engine wasn’t enough though. I cut up the front of the car for the custom CS Crashbar with/Big Core Intercooler so I could support my new power goal of 500WHP. I have the engine, so I might as well use it, right? (Note: This is the kind of logic that continues to cost you lots of money) To do this, I go the car setup with a larger turbocharger and an AEM Methanol Injection System.
The single 16 GPH nozzle was quickly at its power capacity so without even considering the cost I moved to a port meth injection system that is getting set up as I write this.
Anyways…why does my story matter to you? Well because it’s not just my story, it’s the story of damn near every guy and gal that gets into modding their Mazda. Maybe power isn’t your goal like mine is, but if you’re a motoring enthusiast, then it doesn’t matter. There are so many awesome ways to slide down the proverbial hill.
For all of you at the top still… this is your warning. Enjoy the ride with its bumps and bruises, but most importantly appreciate the experiences and friends you gain along the way.
Let’s pick up where we left off with part 1! The year 2015, I made my way back to the Golden State from Arizona. At this point in time, I was content with the power, but my Mazdaspeed 3 looked otherwise stock on the outside, so that was my next plan of attack.
After a couple of months of settling in, I hashed out my plan. My buddy back in Arizona, Travis was selling his Evo 10 wheels. They were freshly powder coated, and he had the ability to ship them from his work. He was nice enough to make that happen for me. Since I was getting new wheels on the way, I knew it was time to drop it, so I purchased lowering springs. Since my Mazdaspeed 3 only had 15k on it at the time, I opted to keep the OEM shocks and struts, knowing Coil-overs were down the road. But, it is advised to use the upgraded shocks and struts with lowering springs, especially on older suspension.
After it was all said and done, I was happy with this look. It stayed like this for a few months until I got bored again. The mod bug started to itch, so, I decided it was time to upgrade to a 3.5” intake and get a port and polished manifold to see what this KO4 could do. With the 3.5” intake it also needed a battery relocation kit.
Knowing that the Mazdaspeed Big Turbo was down the road, I thought about the future and where I could save potential dollars. We got it up to about 325-330 WHP on the K04 Turbo with some e85. For California’s terrible 91 Octane fuel, I was satisfied. I also threw on boost and oil pressure gauges to monitor more in the Mazdaspeed. Oil pressure was the key!
Mazdaspeed Boost and Oil Gauges
I got more acquainted with the local Mazda community in Nor Cal and ended up meeting one of the largest influencers for my build this way. Brian of BMSPEC. During this time, BMSPEC was just a side project for him as we worked full time as an Engineer in the corporate world. He ended up taking me under his wing (No pun intended) and taught me a thing or two. In return, I helped him out after work to make Aero Parts like wing extensions and splitters. I assisted where I could with the dirty work, and my car was one of the beta testers. So, for those of you that wonder where my extension and splitter came from, there is your answer!
Brian guided me on the right path to take for setting up my coil-overs and getting my Mazdaspeed 3 to not only handle as well as possible but also look good while doing it. It was awesome for me to be able to represent his parts and start to make my car stand out. I am very fortunate to have had that opportunity and be able to call him my friend.
In early 2016, I was driving behind a semi-truck on the freeway which resulted in pretty a chipped-up bumper. Working closely with my body shop, we got my Mazdaspeed 3 fully repainted (Minus the hatch.) I requested that the mirrors be painted black, Roof black, fog bezels black, and the rear valence black. It took several months for them to finish, as I gave them permission to take their time. But they did an incredible job, and the paint has held up phenomenally.
Mazdaspeed 3 and Mazda 3 at Golden Gate Bridge
A few months before my move to Washington, I finally hopped on a big turbo upgrade. Paired with this was an upgraded EBCS, and MAP sensor. The Mazda Intercooler was also upgraded from a TMIC to an FMIC. She was starting to turn into the car I had aspired to build. But, as all us car guys know, this just means the bar gets raised higher and our aspirations grow further! An upgraded intake manifold was also added to even out air flow between runners even more.
The time is now late 2016. I got offered a job with CorkSport right after Thanksgiving. So I packed up, said goodbye to all my close friends to set out on a venture in the PNW. Things were beginning to get more interesting, and the journey for my Mazdaspeed3 would continue. Stay tuned for part 3!