
The Mazdaspeed platform is a great place to start if you’re looking for a fun tuner car that offers awesome power to money spent ratio. This holds true until you hit the capacity of the OEM fuel system. If you don’t know it already, the DISI MZR was one of the first gasoline direct injected engines offered in a passenger car. For its time, the Mazdaspeed 3 was a powerful and capable sport hatch right off the showroom floor, however, this type of fuel system quickly reaches it’s limits and is not easily modified for higher power.
In this blog, we are going to take a look at auxiliary fueling with methanol and my personal experience taking this path.
Damn, I’m out of fuel… You got your Speed setup with all the hard parts (aka fully bolted – HPFP, Intake, Exhaust, FMIC, etc.) and finally pulled the trigger on that big turbo. Just a few revisions and your tuner is telling you you’re out of fuel and more or less stuck at around 350-380whp (depending on turbo and octane). It’s time for auxiliary fueling.
Now when considering auxiliary fueling it is critical to consider your goals with the car; the level of complexity and cost are drastically different depending on these goals.
380-440whp Goal:
With this power goal you most likely have a fully bolted Mazdaspeed and an upgraded turbo such as the CorkSport CST4. To achieve this power the auxiliary fuel system can be fairly simple. From my experience, a single nozzle with the appropriate flow rate positioned just before the throttle body can get the job done. This setup is very simple, consisting of a progressive rate controller, fuel cell, some tubing, nozzle and ideally a check valve on the nozzle. This will cost you around ~450 to get started.

I personally started with the AEM Methanol Kit, but there are many other kits available such as Devil’s Own, Auqamist, Snow Performance, and ProMeth. I recommend doing some research to find the best kit for your needs before jumping in.
Note: Since the writing of this post we have since produced an Auxiliary Methanol Tank for the Mazdaspeed 3.
Stay Up-to-date with CorkSport
Read the Blog on post How To Achieve 400 WHP In Your Mazdaspeed
440-500whp Goal:
Once you break past that ~440whp mark you should really start to consider adding nozzles. There’s a couple ways to do this.
First, you could maintain your basic system by adding another nozzle with a splitter and another port in your intercooler piping, just before the throttle body. This can get you close the 500whp mark but is not ideal as you will need to run two very large nozzles. With nozzles, this large the fuel has difficulty atomizing and instead can condense into relatively larger droplets. This is not ideal; however is only the added cost of a splitter and nozzle.
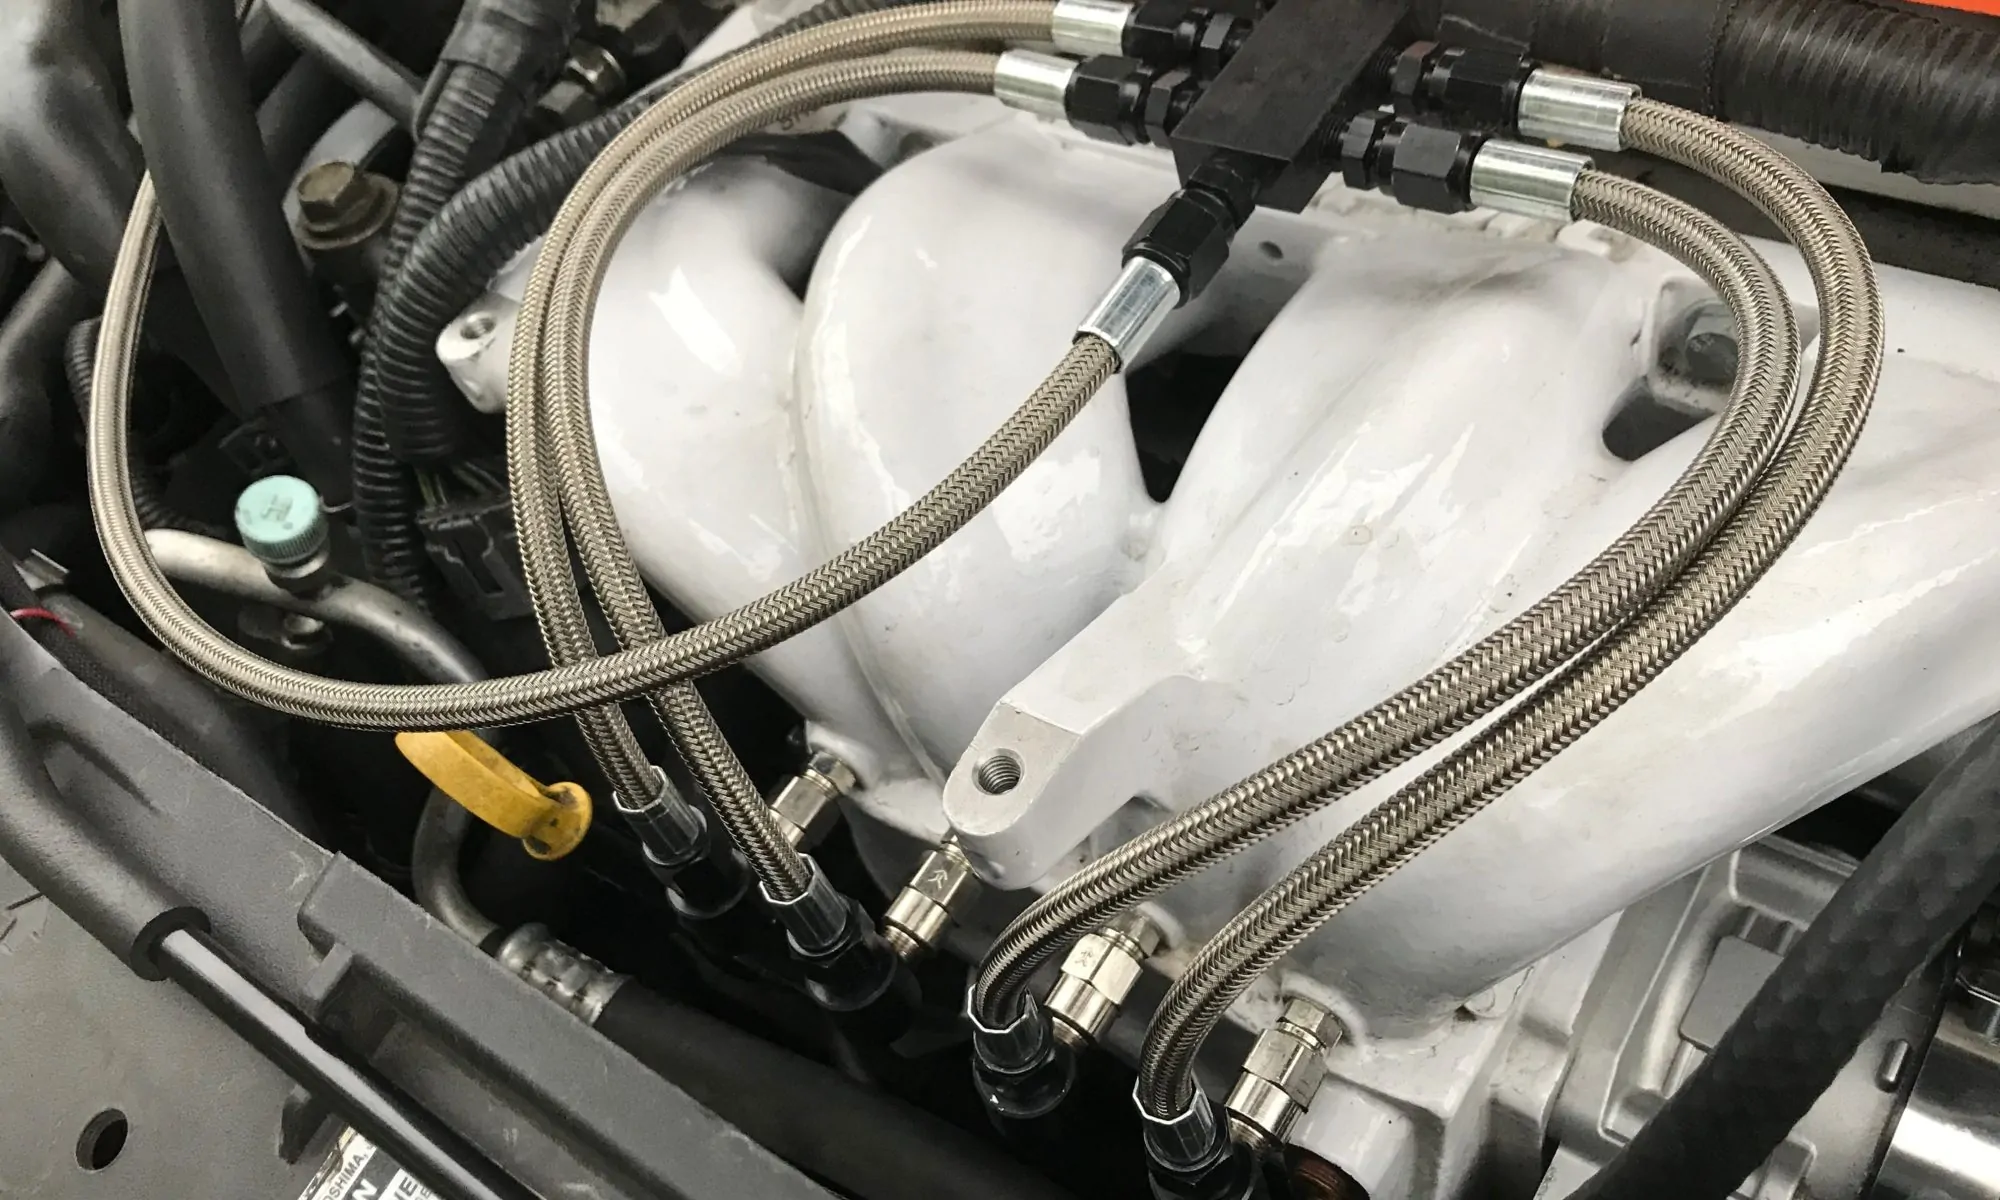
The other option is running a single nozzle on each intake manifold runner. Check it out below.

By doing this, you can now run a smaller nozzle that will atomize much better, but since you have four nozzles you can still flow the appropriate volume for your power goal. However, with this nozzle location, we have made a drastic design change to the system. In a pre-throttle body set up the nozzle never see vacuum, however once located in the intake manifold they will see vacuum which requires additional components to operate correctly.
To avoid the risk of hydro-locking your engine and awful driving characteristics, we must add a check valve to each nozzle and a solenoid-controlled valve to the hose that feeds the nozzles. Check valves (which you see a close up of in just a bit) allow fuel to flow in only one direction. Along with that, a properly design check valve will have a crack pressure (minimum pressure to allow flow) that is slightly greater than the vacuum force in the intake manifold. A solenoid is a valve that opens and closes and is controlled by the controller. This allows fuel to flow only when commanded by the controller.

Let’s take a closer look at the nozzles and distribution block necessary for a per-runner nozzle setup. Looking at the nozzles you’ll see silver cylinder between the nozzle and the black fitting that connects to the hose. This is the check valve. A simple, but critical part of the system for proper function. Up towards the top of the image, you see a single hose entering a black block along with four separate hoses leaving the block to each nozzle. This is the distribution block; this can be configured in many ways, but more or less it allows you to direct fuel to each nozzle from a single hose.
So, as you can see moving to a per-runner setup includes a lot more complexity and cost. This added cost is ~300 on top of the methanol kit you already purchased and not including an intake manifold that is already set up for nozzles. You could cut a little cost by using nylon tubing versus stainless braided hose, but not much.
It’s also worth noting that the pump that comes standard with most kits will not flow enough fuel to support just under 500whp, so depending on your goal you may need an upgraded pump as well. If this is the case I would recommend the pump from ProMeth only because it’s the only pump I’ve found that truly flows more.
500+whp Goal:
At this point, I would simply recommend moving to a true port-injection system. Like the per-runner nozzle setup, a true port injection setup sprays fuel in each runner, but the systems, in general, are very different. Since port injection alone could be a couple blogs on its own I will give the quick and dirty here. A true port injection setup uses conventional style gasoline injectors that control flow amount directly in the injector itself. This allows much more precise control and reduces a lot of risks. However, the cost is much higher starting around ~1500-2000.
Lastly, I wanted to mention some things I love about using methanol for auxiliary fueling. Methanol is expensive, about ~ 8-12 per gallon which is a real bummer, but it does not get used for all driving situations. You don’t use the methanol unless you are pushing your car to the point that the extra fuel is needed.

The methanol is contained in a separate fuel cell like the image above verses in the OE fuel tank. Therefore it’s only used when you want to use it. Unlike E85 blends or other exotic fuel that must be mixed and/or used through the standard OE injectors and therefore used for all your commuting.
Read the blog post on Recipe to Make a 500 HP Mazdaspeed 3
I hope my lessons learned were useful for you and your exploration into methanol auxiliary fueling. With that, I sign off.
*All pricing based off of price at the time of the blog writing.
Don’t forget that an additional benefit of methanol is the lower inlet air temperatures. Even if you don’t inject enough methanol to be a significant addition of fuel, you can realize benefits from lower intake temps. There is a slight change to AFRs in this tuning, but that’s pretty easy to accommodate.
I am very late to comment.
But i need to mention how helpful this is to me.
How you broke out the levels of performance available vs cost was great !
I loathe heat and watch temps constantly.
Ambient <intake< Boosted air.
Meth is in my future as planned all along. Having four bungs at the ready.
But now i might build this progressively, starting with TB squirting just for the cooling down feature under load.
But if want a system that will grow with my build/rebuilds i see the pump is a key. Thanks for that point !
am surprised you folks have not designed a manifold block with proper check valve to use with a four nozzle setups ?
Thanks kindly : ) for the excellent write up !
i am looking forward to maximizing my CS 18g soon.
I like to use the 4 nozzle like the 1 you show were I can buy this system to run a nozzle in each runner