Everything You Need to Know About Camber Plates 101 – What are Camber Plates & Why do I Need Them

When lowering your car with coilovers or lowering springs, you will need an alignment to reset the suspension geometry for optimal performance and tire wear.  One of the key aspects of this alignment is the camber. 

The suspension alignment of your Mazda can completely change the way the car handles, brakes, and accelerates.  Camber is one of the critical variables in an alignment that needs to be set up for your Mazda and for your driving needs.  Let’s talk about camber and why you might need camber plates.

2020 Mazda 3 stanced

Camber (aka camber angle) is the measured angle of the wheel/tire centerline vs true vertical.  Any measurement in angles is typically expressed in degrees in the automotive world and can be stated as negative, neutral/zero or positive degrees of camber. 

In the image below we have a diagram showing a mock setup with a MacPherson strut suspension style. MacPherson struts setups are common in passenger cars and are used in the Mazda 3, Mazda 6, CX5, CX9, & CX50

Camber Diagram Breakdown:

  • The thin red arching part represents the chassis and fender of the vehicle.
  • The grey color components represent the lower control arm and the strut assembly (MacPherson Strut).
  • The black thing that looks like a tire…is the tire and wheel.
  • The green line represents “True Vertical” so we can see the camber .
  • The blue line represents the “Wheel/Tire Centerline” and will change angles depending on camber.
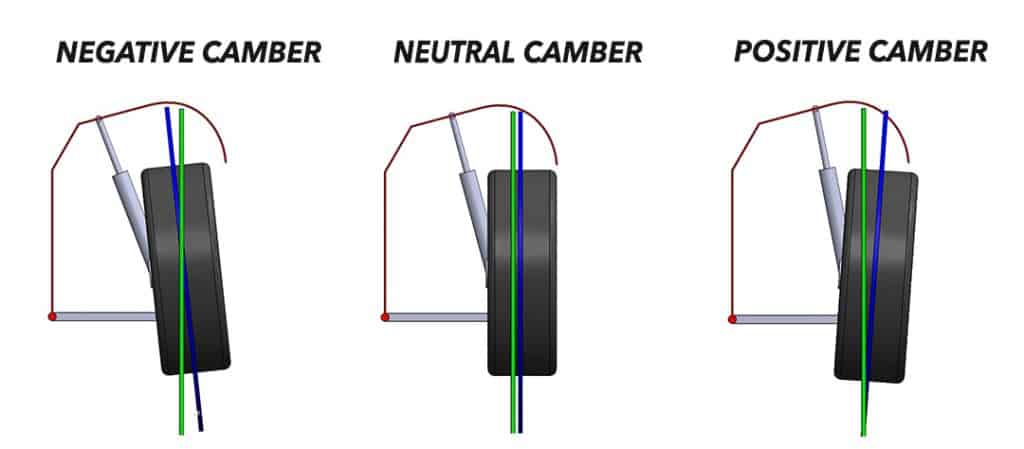
Let’s assume the vehicle is sitting on the ground and we are facing the front of the vehicle driver’s side.  When the vehicle is sitting on the tires this is considered our “static ride height”.  This is important to note because this is how the vehicle’s static alignment is measured.  Let’s break down the adjustments of camber.

Negative Camber:

Negative camber is when the top of the tire leans inward towards the center of the vehicle. A typical amount of negative camber for a street-use vehicle is negative 0.5 – 1.0 degrees in the front and slightly more negative 0.8 – 1.5 degrees in the rear.  This provides a good balance of performance cornering grip, braking, accelerating and tire wear.  The slightly more negative rear camber aids making the car more oversteer prone which is safer for the average driver. 

The Pros of Negative Camber:

Negative camber is critical to the suspension alignment as it directly affects the total mechanical grip of the tire.  Negative camber helps keep the tire contact patch in full contact with the road surface during corning.  When the vehicle is sitting or driving straight the tire is leaned inwards slightly with negative camber.  When you turn the vehicle typically leans outward slightly (body roll) and thus affects the tire contact patch.  The static negative camber counteracts that body roll, keeping the tire contact patch flat to the ground when you have a body roll from turning. 

The Cons of Negative Camber:

Negative camber reduces the overall tire contact patch size in straight-line driving.  This affects braking and acceleration due to the reduced contact patch size.  Too much negative camber, typically more than negative 3 degrees, will drastically affect this to the point that it may make the vehicle unsafe to drive on public roads.  So, negative camber is a balancing act of too little vs too much and should be professionally adjusted to benefit the overall suspension setup and use of the vehicle. 

Positive Camber:

Positive camber is not typically used on a street and/or road course racing car.  With positive camber, you would have the cons of camber in straight line performance braking and acceleration and even worse performance in turn as the positive camber would exaggerate the body lean.  If you have positive camber, it is highly recommended to inspect your suspension for issues and/or get the vehicle aligned and adjusted. 

However, there are exceptions to this.  In very specific racing environments such as oval circuit races.  Negative camber on the outside tires and positive camber on the inside tires can be beneficial because the vehicle is only ever turning in one direction.  Therefore all four tires (not just the outside tires) are counteracting the body lean of the vehicle while turning.

Static vs Dynamic Camber:

Camber can be defined in two forms; static and dynamic. 

  • Static Camber is when the vehicle is sitting on the tires (aka at rest).  This is how alignment shops measure the vehicle’s alignment including camber.  
  • Dynamic Camber is the resulting camber as the wheel/tire moves up and down in the suspension travel.  

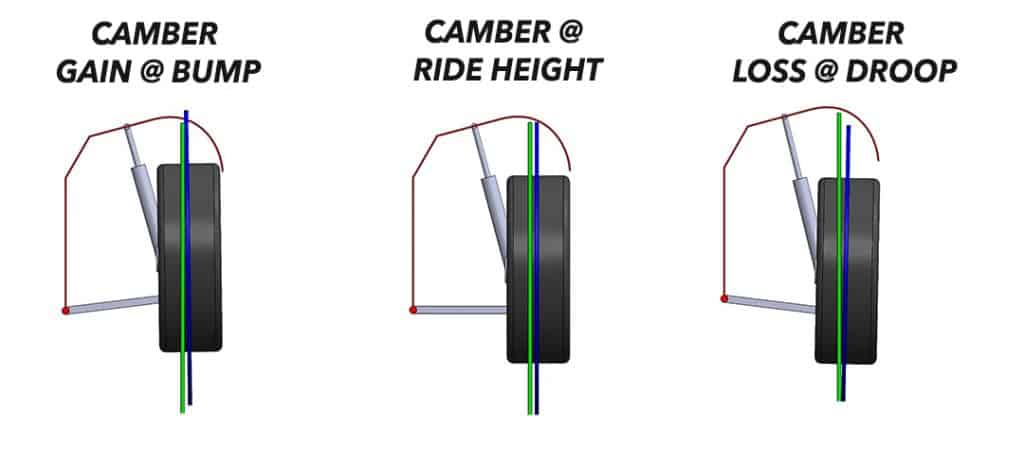
When an individual speaks to their camber setup, they are most likely talking about their static camber.  Dynamic camber is not easy to measure without knowing the geometry of the suspension itself.  Dynamic camber changes as the suspension travels up and down.  Typically as the wheel/tire travels up from ride height (aka bump travel), there is more negative camber called camber gain.  The opposite follows when the wheel/tires travel down from ride height (aka droop travel), there is less negative camber called camber loss, and can even become positive camber with some suspension styles. 

Camber Gain in Bump, Static Ride height, & Droop
 Mazda 3 performance parts camber diagram 2

In a MacPherson Strut-style front suspension (Mazda’s go-to setup), the camber gain is fairly minimal at typically less than 1 degree of negative camber gained in the first bit of suspension travel.  As the suspension excessively compresses in bump, the camber gain is typically reduced or lost.  This is called the camber gain curve and is described as a curve because it is dynamically changing as the suspension travels up and down. 

Reviewing the above diagram there are three images showing the change in camber due to camber gain/loss.  Watching the relation of the blue and green lines, you can see the chamber change depending on wheel/tire travel. 

  • Middle Image: Shows static ride height at neutral/zero camber.  This can be seen with the blue and green lines, they are parallel.  
  • Left Image: Shows bump travel camber gain.  The blue and green lines are intersecting at the top and have a larger gap at the bottom. 
  • Right Image: Shows droop travel camber loss.  The blue and green lines have a gap at the top and are intersecting at the bottom. 

As you can see, camber is a very dynamic aspect of the suspension geometry that affects many aspects of the vehicle.  Cornering, braking and accelerating are all directly affected by dynamic camber, but this all start with your static camber setup. 

Let’s be real, static camber is how you fit those new wheels and tires you are so excited about; so let’s talk more about camber and its effect on fitting those wheels and tires.  Static camber, as discussed above, sets your baseline camber for the dynamic camber to “build off of” through suspension travel. 

Static Camber + Camber Gain = Wheel/Tire Clearance to Fender

Here you can see a diagram of wheel/tire clearance to the front fender when the suspension is in bump travel.
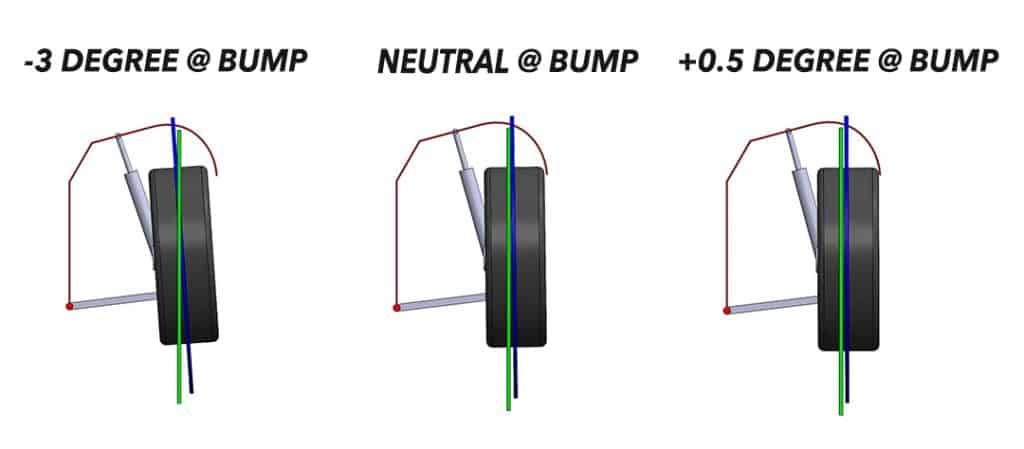
The more negative the static camber is, the more fender-to-tire clearance you have in bump travel. 

Your chosen wheel and tire setup will also have an effect on this clearance due to the many different widths and offsets you can choose. Generally, the smaller the offset, the more the wheel will “poke” outward from the side of the vehicle.  Wheel width and offset are the key aspects to fitting a wheel on a given setup.  Typically your Mazda 3 is going to need a fairly conservative wheel and tire setup to fit without excessive negative camber. 

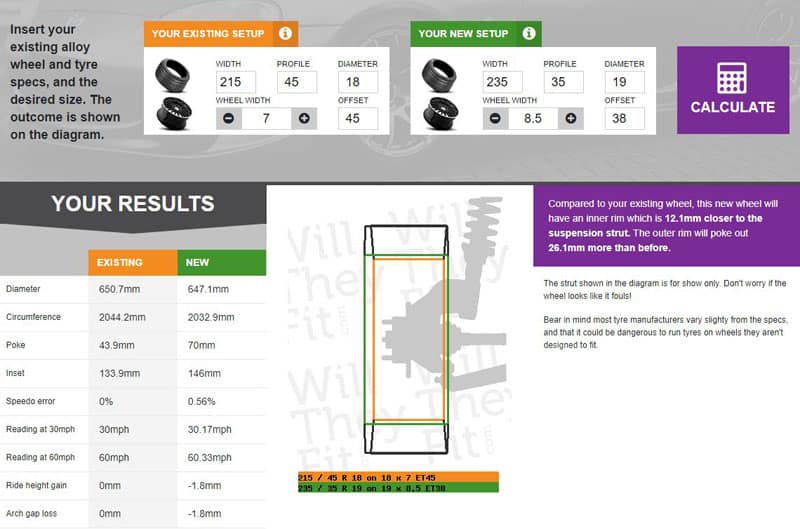
Instead of trying to explain all the details about wheel and tire fitment setup, I’ll point you to a fantastic website that allows you to input your existing wheel and tire setup and compare to your new setup.  The website outputs a great visual diagram of the current and new setup with measurements you can reference. See: www.willtheyfit.com

Here is an example of our wheel and tire setup vs the OEM wheel and tire setup.  This is currently on our 2021 Mazda 3 Turbo Hatch.  It looks fantastic and performs great with our Turbo Lowering Springs and our Coilovers.
Mazda 3 performance parts wheel fitment guide

Lastly, camber is not the only suspension setting affected by lowering your car on springs or coilovers.  Toe is the next critical suspension setting that needs to be corrected after camber is set in place.  Toe also drastically affects how the vehicle drives and will quickly destroy tires if not setup correctly for the intended driving.
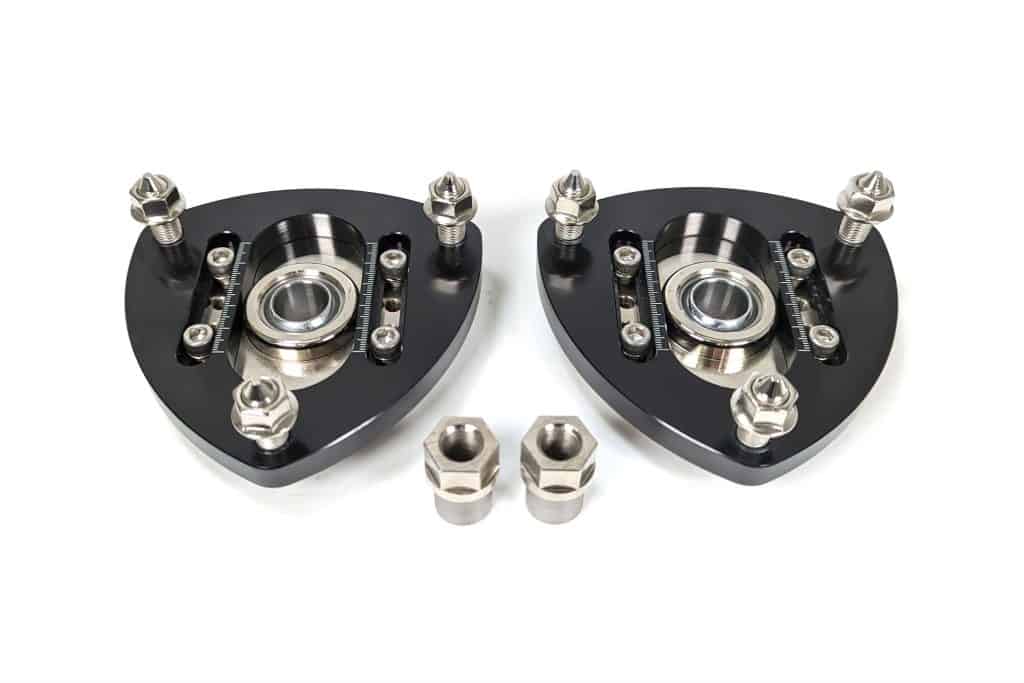
2021 Mazda Turbo Camber Adjustment

Read about The Best Camber Plates for the Mazda 3 & CX-30

How Do You Adjust Camber?

Most MacPherson struts do not have any camber adjustability from the OEM, so what do you do? Depending on the amount of drop from your lowering springs and your driving needs, you may need to purchase aftermarket camber plates to get your suspension dialed in or to prevent your meaty wheel and tire setup from rubbing!

So, the moral of the story. When lowering your car, make sure to get a proper alignment for the betterment of your vehicle’s performance and the longevity of your tires!  Don’t go too crazy with camber; remember it’s a balancing of performance, durability, and fitment. 

2020 Mazda 3 stanced CorkSport

Thanks for tuning in, we hope this was a helpful blog about camber setup for your Mazda!

Barett @ CS

Stay up-to-date on the latest news and product updates from CorkSport.

* indicates required

Cold Air Intake Systems Explained for your Naturally Aspirated & Turbo Mazda

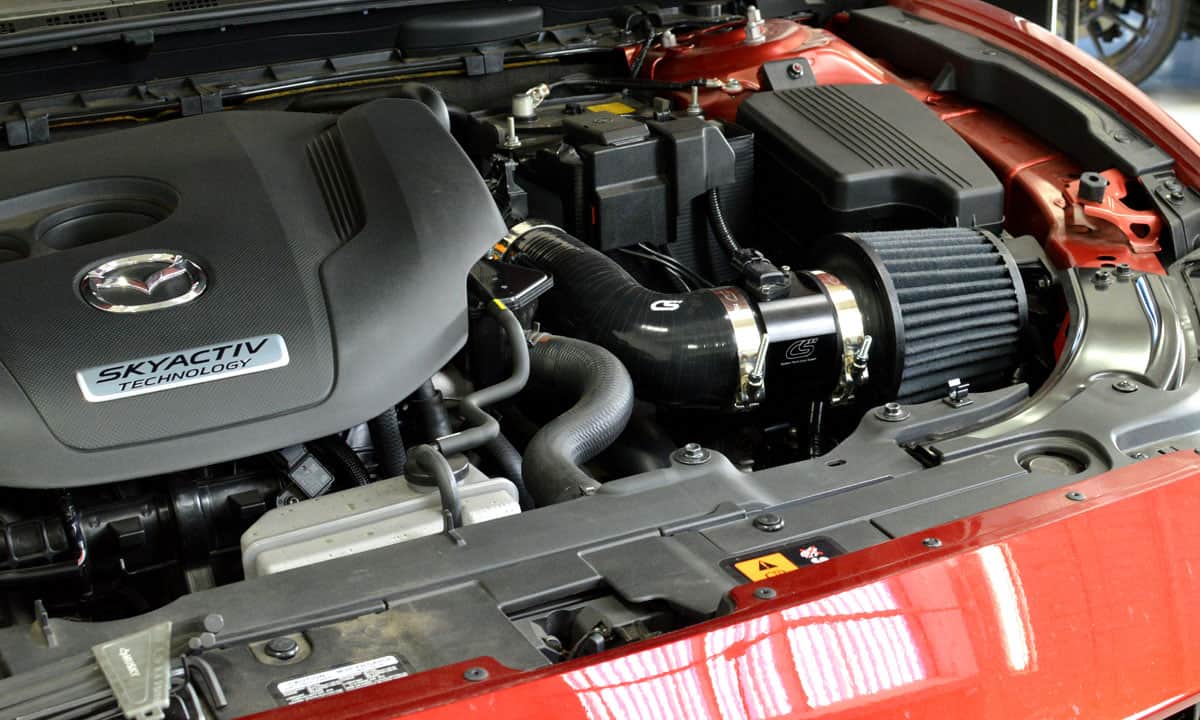
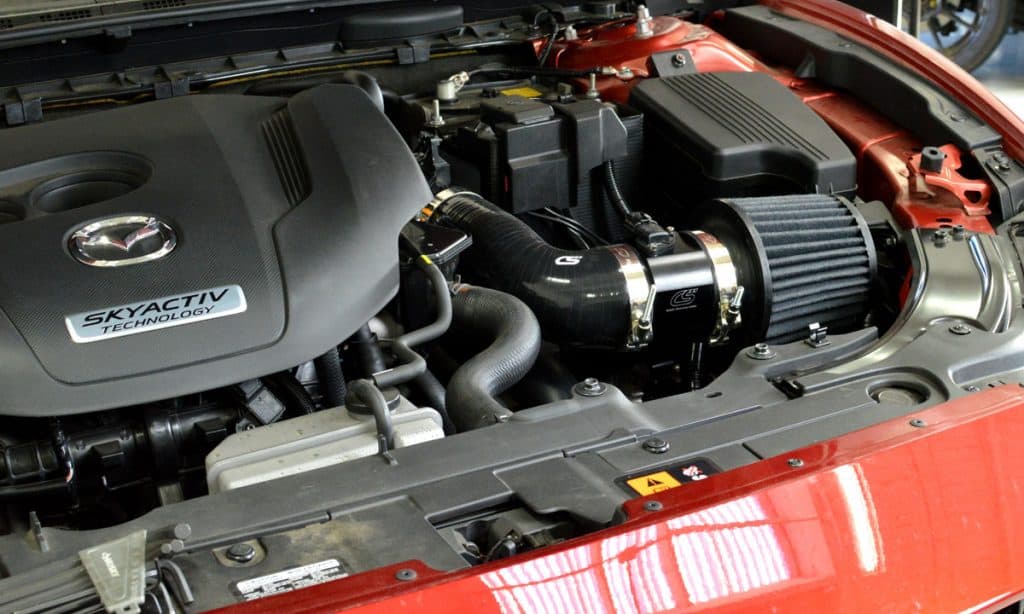
Mazda 6 Turbo Performance Intake

Cold air intake systems, are they necessary? Are they worth the extra cost? Does it matter if the engine is turbocharged or not? Will the engine or its performance be hurt without one? We have repeatedly seen these questions on forums and social media groups regarding Mazda’s 3rd and 4th Generation Mazda 3 & 6. To help the Mazda community grow and learn about their cars and what to do with them, we have written a blog that we hope will help shed some light on these questions and others. 

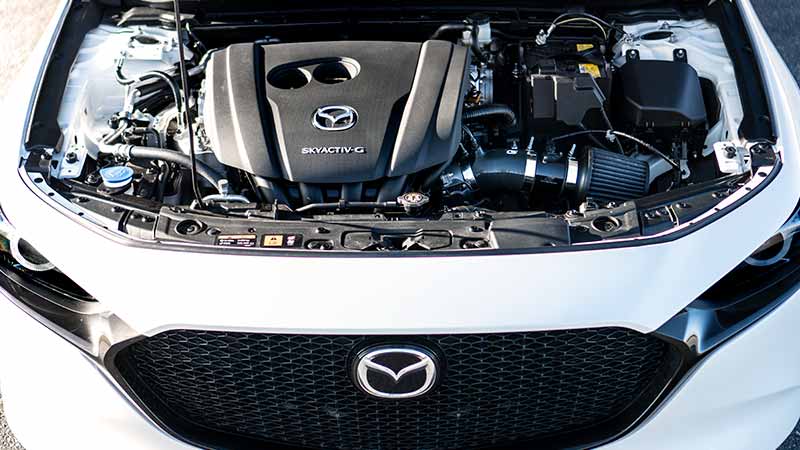
Mazda 3 Turbo Short Ram Intake

Most importantly, you will NOT hurt your engine if you use an SRI only on Turbo or Non-Turbo applications.  

What are the typical intake systems available for your Mazda? At CorkSport, we have two primary intake system setups: Short Ram Intake (SRI) System and Cold Air Intake (CAI) System. It is essential to distinguish between the two because you (the Mazda enthusiasts) will ultimately decide which system to use. 

Short Ram Intake (SRI) System

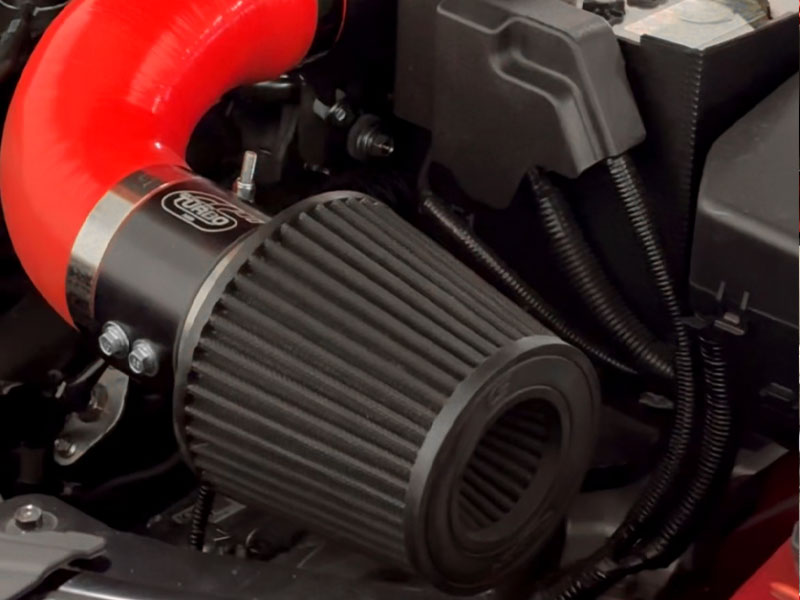
This CorkSport system consists of a filter, billet MAF housing, silicone coupler, a few clamps, and may or may not have a mounting bracket (depending on the application). This system is efficient and straightforward (an unrestricted airflow path increases power). This system removes the factory airbox and snorkel. The cost is very effective for the results and provides excellent induction sounds. 

Mazda 6 Turbo Performance Intake

Cold Air Intake (CAI) System

Mazda 3 Cold Air Box for a complete cold air intake system

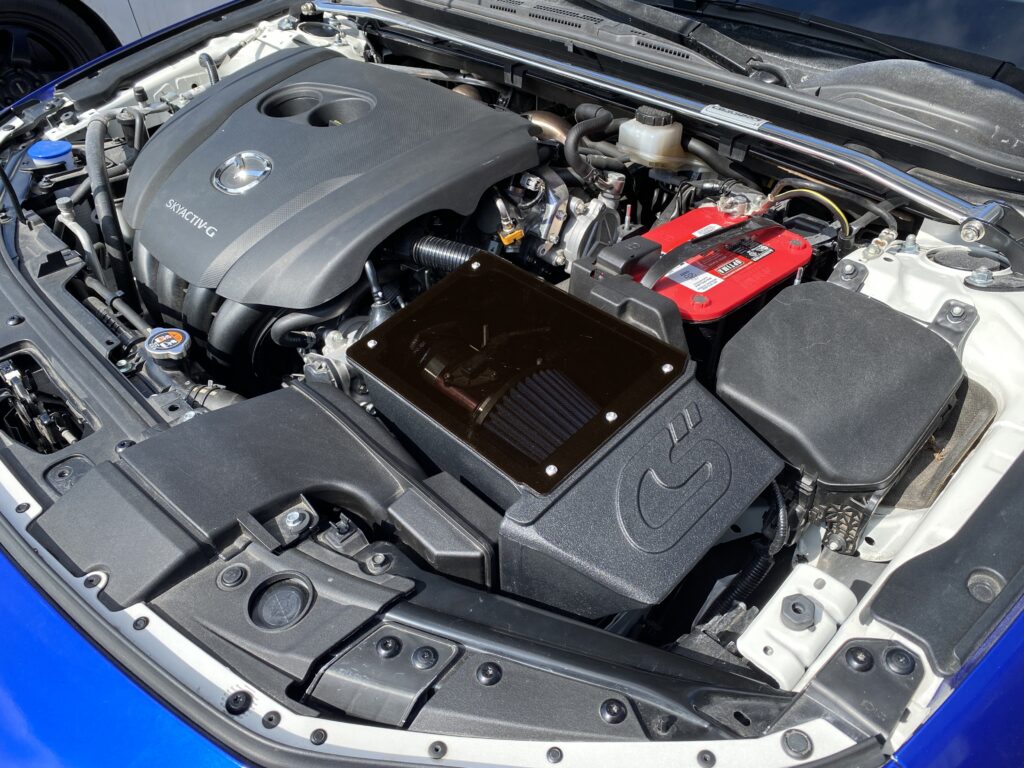
CorkSport’s system consists of the SRI (as mentioned above) plus a heat shield or airbox designed to keep the engine bay heat away from the intake system’s inlet and help direct cold air induction. This system removes the factory airbox and may or may not reuse the factory snorkel. The cost will be higher than a short ram intake due to the additional components involved and may muffle some of the induction noises but provide better heat control.

Mazda performance air intake heat shield

OK, is a Cold Air Intake System worth the extra cost and complexity? Does it do anything? Well, in our opinion, yes and no. We have tested this, and we have proven that a heatshield does improve (read reduce) “heat soak” of the intake system, BUT not in the ways most people expect. Below is some data from our 2018 Mazda 6 Turbo SRI and then also with our SRI + Heat Shield:

Mazda SRI Dyno without a heat shield

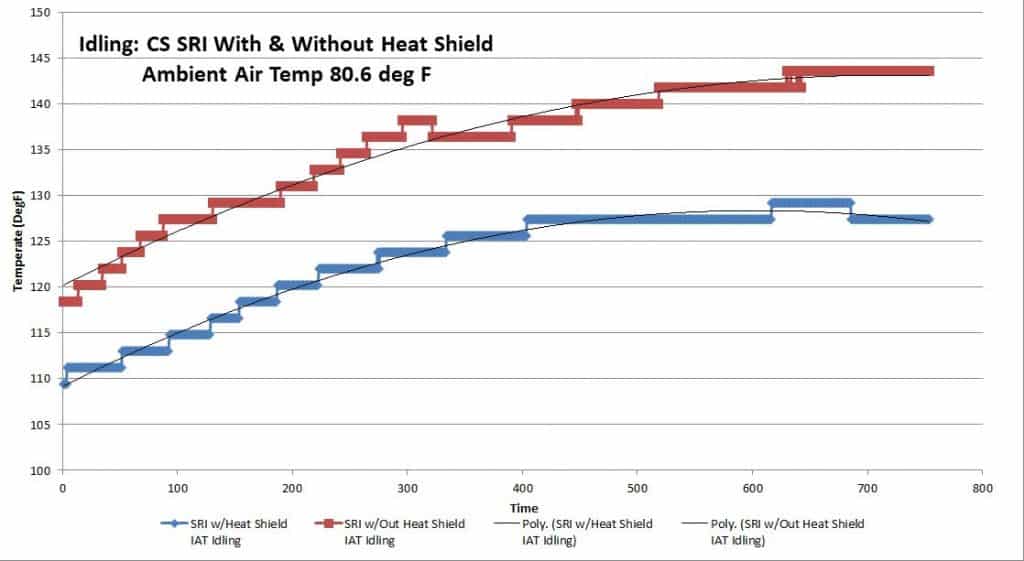
This first graph shows the vehicle idling for a period of time, much like sitting at a stoplight or in traffic. The red graph shows the short ram intake only, and the blue chart shows the SRI+Heat Shield. It’s pretty apparent the heat shield is helping reduce the amount of engine bay heat being ingested by the intake while the vehicle is sitting. The maximum temperature delta is approximately 15-20deg F. That’s a respectable improvement, and this lower amount of heat soak should, in theory, improve the vehicle’s acceleration from a complete stop. Now let’s look at a graph that combines idling and acceleration up to 50mph

Mazda Dyno with Short Ram Intake

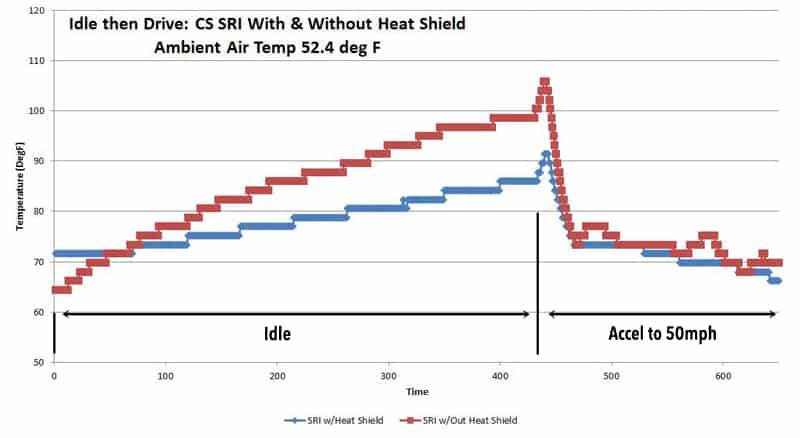
The second graph indicates similar data for the stationary idling period, but more importantly, is what the data tells us once the vehicle starts moving. You see a small spike for both systems (this is due to the engine suddenly ingesting more air), then you see the air temp drop rapidly as the vehicle increases in speed. The vehicle’s forward motion/speed is important because that is how fresh cool ambient air enters the engine bay.

You’ll notice that both the red and blue graphs meet at the same point after the rapid cooling then have a small amount of fluctuation. In a nutshell, both the SRI and SRI+Heat Shield perform about the same once the vehicle is moving. Again, they perform almost identically once the car is rolling.

Mazda Short Ram Intake with Heat Shield Installed

Next question, does it matter if the vehicle is turbocharged or not? Before we answer that, let’s go over the differences between turbocharged and non-turbocharged systems. 

Turbocharged

The engine is equipped with a turbocharger and an intercooler system to cool the boosted air temperatures before entering the engine. The intercooler system is required to negate the by-product of turbocharging an engine (and thus boost), which is heat. The airflow path is intake -> turbo -> intercooler -> engine.

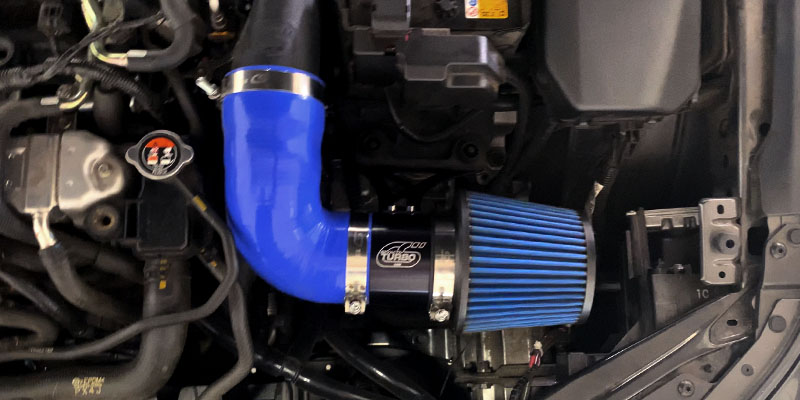
Short ram itnake system with turbo inlet pipe in blue on Mazda

In a turbocharged engine, the need for and use of a Cold Air Intake System is typically not deemed necessary or very useful. The turbocharger superheats the cooler air it receives from the intake before passing it to the intercooler. The boosted air exiting the turbo is substantially hotter than the ambient air temperatures in your engine bay before it enters the intake – especially true while the vehicle is moving.    

More focus is placed on performance improvements of the intercooler system because that is the primary method to cool the incoming boosted (read “hot”) airflow before it enters the engine. The use of a cold air intake system has little effect on the resulting boost air temps, so the cost-effectiveness is not great. This is precisely why the Mazdaspeed platform focuses on increasing the intake size (ingesting more air = more power), adding a larger turbo (more boost), and increasing the size of the intercooler (additional surface area for cooling) coupled with a professional tune to maximize power.

Non-Turbocharged

The engine is not equipped with a turbocharger and, therefore, does not require an intercooler system. The airflow path is more direct and does not have a cooling system built-in; intake -> engine.  

Have a Non-Turbo with our SRI – Check out our new 2019+ Mazda 3 Cold Air Box to keep temps cool!

Since there is no intercooler to cool the incoming air (it’s not needed), the best way to improve air density and performance is with cooler air entering the engine directly. So, a cold air intake on a non-turbo engine can be helpful – especially in warmer climates. 

2019 Mazda 3 short ram air intake

Let’s Recap: 

In either turbo or non-turbo applications, a heat shield or CAI system will provide varying degrees of benefit in some driving situations. For a turbo application specifically, the usefulness of the CAI system is marginal due to the turbo heating the air it receives from the intake. Instead, investing in a short ram intake and performance intercooler system is a much better plan.   

For the non-turbo applications, a cold air intake system is a worthwhile investment because the airflow path is so much more direct, and it’s the only way to help reduce intake air temps and thus increase air density which equals power.  

We hope this has been a helpful and educational blog and lends support as you decide the right path for you and your Mazda! Thanks for tuning in!

-Barett @ CS

Connect with us

You may also Like

Stay up-to-date on the latest news and product updates from CorkSport.

* indicates required

Mazdaspeed 3 Port Injection Fuel Kit

Its 2021, you survived 2020 and finally got those last goodies installed on your Mazdaspeed 3…you’re finally fully bolted.  It’s been about 6 months and now you want more, but your Tuner keeps telling you you are out of fuel. What the Hell does that mean!?

Let me tell what that means and let me show you the solution via the BEST Port Injection Fuel Kit for your Mazdaspeed 3 or MPS 3.  If you know this is the kit for you don’t wait any longer (Link to ALL THE FUEL), but I do invite you to check out the great information below. 

Mazdaspeed 3 8th Port Auxiliary Fuel Kit

Say no to “out of fuel” and say yes to enough fuel to support 750+WHP!  But first let’s take a step back to understand the basics. 

Why is your Mazdaspeed 3 “out of fuel”?

The Mazdaspeed 3 and 6 use early technology for direct injection injectors which sadly do not have an aftermarket replacement and reach their flow capacity limit quickly.  This basically puts a limit on the OEM fuel systems horsepower capacity.  From what we have seen firsthand and in the community; the limit is around 360-390whp depending on the performance parts on the engine and the fuel used.  The only current solution is to add a port injection system with either 2 extra or 4 extra injectors.  We’ll talk more about that. 

Mazdaspeed 3 8th Port Auxiliary Fuel Kit

What is an auxiliary port injection fuel system? – This is a kit that adds (does not replace) port style fuel injectors to the intake manifold so that you can increase the total fueling capacity of your Mazdaspeed or MPS.  There are a few ways this can be done and all have been done in the Mazdaspeed Community. 

Stay Up-to-date with CorkSport   


2 extra or 4 extra injectors (aka 6th Port or 8th Port Injection)

While the CorkSport Port Injection Fuel Kit is designed for 4 extra injectors (8th Port Kit); there are options in the community that only use 2 extra injectors (6th Port Kit).   CorkSport believes the 8th Port Injection kit is the superior setup because it has higher capacity, is more reliable and safer for the engine.

With an 8th Port Kit there is an extra injector on each runner of the intake manifold spraying directly into that one and only runner.  With a 6th Port Kit there are two extra injectors spraying directly ahead of the throttle body and then depending on the flow distribution of the intake manifold to disperse the fuel to each runner and thus cylinder.

Return vs Returnless Setups

This is another option for Port Injection Fuel Kits in the community.  While both have their place, the CorkSport 8th Port Fuel Kit uses a “return” style setup because again it has higher capacity, is more reliable and safer for the engine because it is easier to tune for.

In a “return” style setup the fuel pressure for the extra injectors increase as boost pressure increases keeping a consistent fuel flow rate per injector duty cycle which provides the higher capacity and much more consistent tuning.  While the “returnless” style setup just plumbs the extra injectors into the OEM fuel feed to the HPFP.  The fuel pressure does not increase with boost pressure and therefore the capacity is lower, around 500-550WHP.

Integrated vs Standalone Fuel System

Lastly is the consideration of how the Port Injection Injectors are fueled.  This can come from the OEM fuel tank or from a completely separate fuel tank in the vehicle.  Unlike the bullets points above, this is not really a “one is better than the other”, but more of “what suits the needs of your vehicle and uses”. 

Integrated Setup

As the name implies this means the Port Injection Fuel Kit sources its fuel from the OEM tank and in-tank pump.  This can actually be done a couple ways 1) via the “returnless” setup as mentioned above but that has its issues or 2) via a surge tank that is mounted in the engine bay or cabin…which has some concerns.

The surge tank setup is a very common “racecar” setup and for good reason.  It handles high G load corning, acceleration, and braking great and also fuels the entire car, not just the port injection system.  However the cost is usually much higher and requires relocation of other engine bay components so you can mount the surge tank. Along with that you can only use one fuel for the entire system so if your car needs a special high octane fuel then you have to use it at all times during operation, whether cruising or full power.

Standalone Setup

In contrary this is a completely separate fuel source via a separate tank.  This can be a really great option for the enthusiast that does some spirited driving, maybe some events here and there, but also daily drives their Mazdaspeed 3.  How is this the case?

With a completely separate fuel cell for the port injection system you can run the exotic race gas/ethanol in the port injection tank and run normal cheap pump gas in the OEM tank.  When you daily drive/cruise you only use the pump gas in the OEM tank and when you want power the port injection kicks in with the high octane fuel.  It’s a win/win, especially if you do not have ethanol close by and have to special order the exotic fuel like we do here in the PNW.  However this does mean you need a 2nd fuel tank for the port injection which can be a pain, BUT CorkSport has that covered in this complete kit

Mazdaspeed 3 8th Port Auxiliary Fuel Kit

Ok let’s recap on where the CorkSport Port Injection Kit for Mazdaspeed 3 fits in:

  • 4 Extra Injectors aka 8th Port Fuel Injection Kit – one injector per runner for more precise fueling
  • Return Style Setup – Fuel pressure rising with boost pressure for more capacity and precision
  • Standalone Tank – Cheap pump gas for daily driving and high octane fuel for port injection power in the secondary fuel cell

I don’t know about you, but this sounds like you can have your cake and eat it to!

CORKSPORT MAZDA PERFORMANCE BLOG

Image Credit: Shift Sector Coalinga 2020

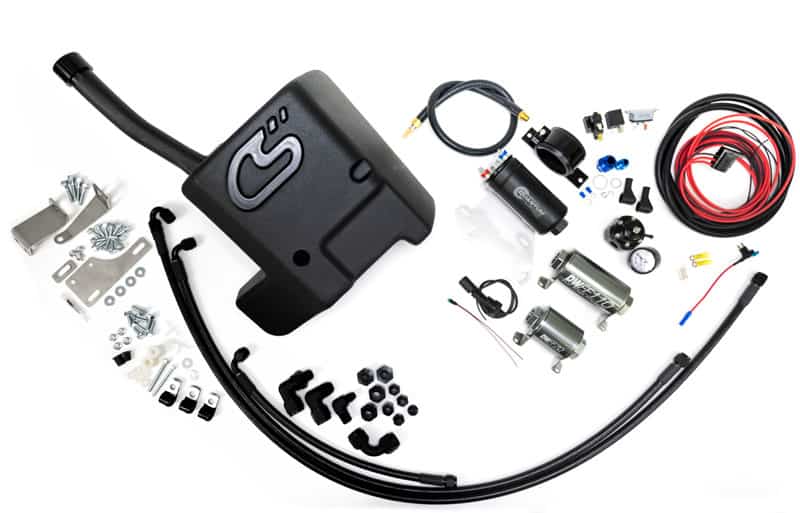
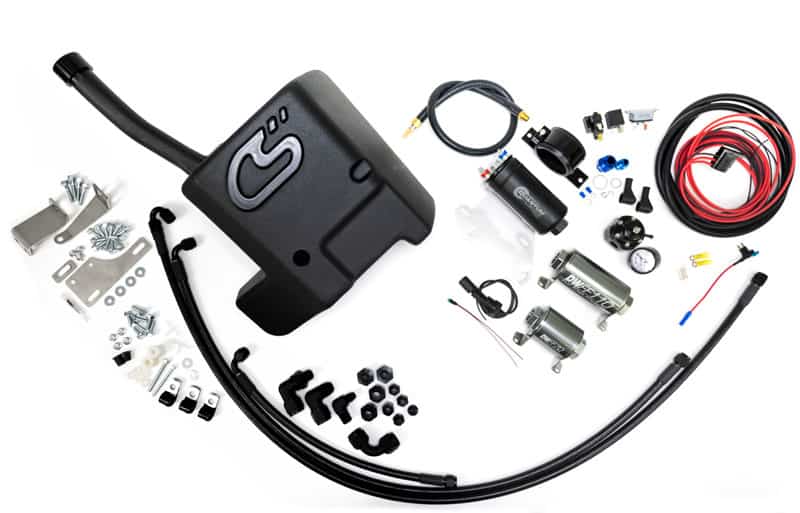
Let’s look at the components that make up the CorkSport Port Injection Fuel Kit.  What’s in the Box:

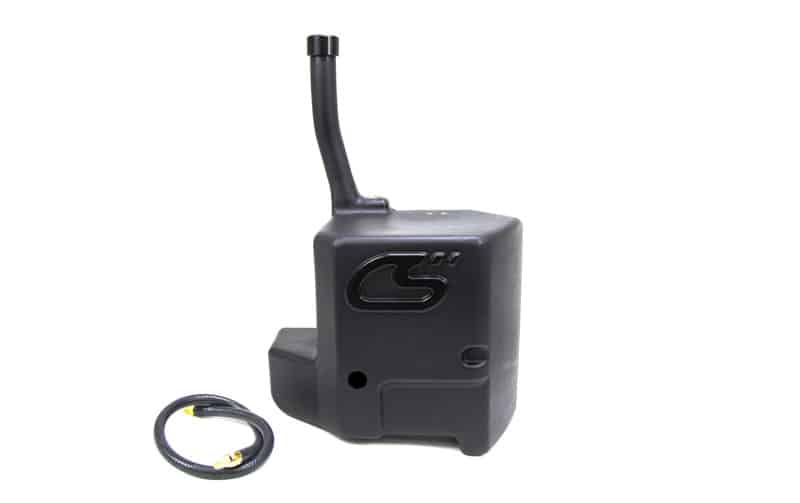
CorkSport Fender Mounted Fuel Cell

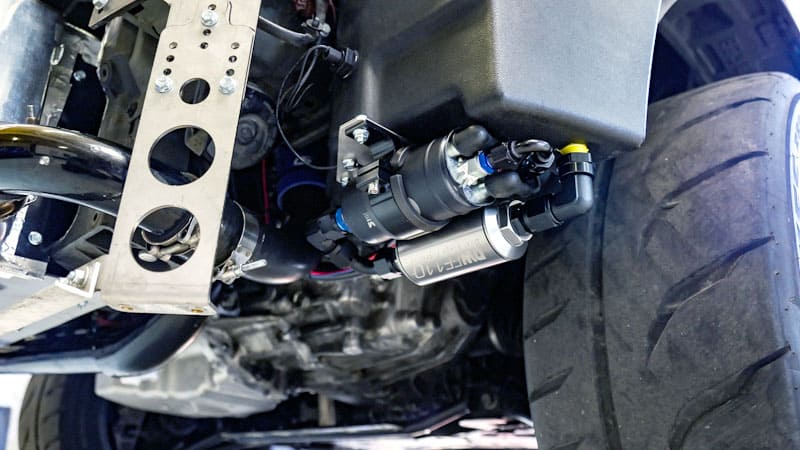
This is a huge element of what makes the CorkSport Port Injection Fuel Kit great.  This fuel cell is custom CAD designed specifically for your GEN1 and GEN2 Mazdaspeed 3 to fit hidden under the headlight behind the bumper cover.  At 2.6 gallons capacity you don’t need to refill the fuel cell often and there is an integrated level sensor to remind you when you are at 0.8 gallons.  No in-cab tanks and smells. 

Mazdaspeed 3 Fender Mounted Auxiliary Fuel Cell

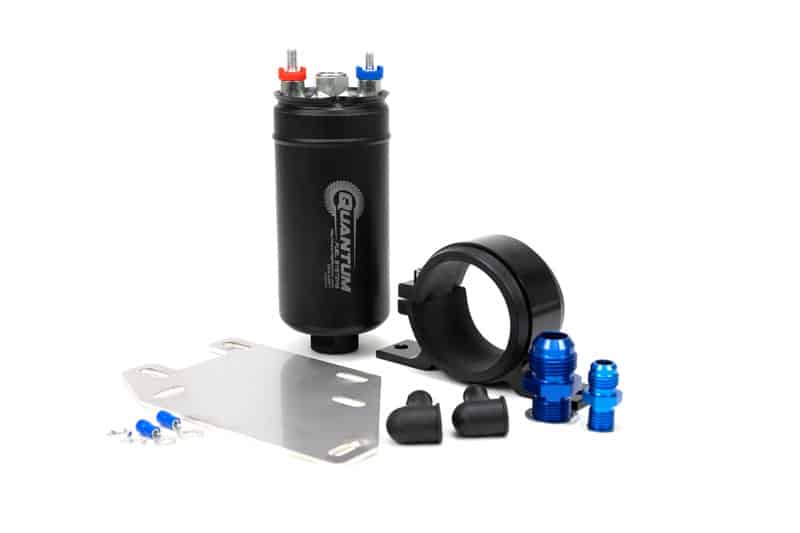
Quantum Fuel Pump

  • A 380LPH inline fuel pump is used.  This is a Bosch 044 style pump that has the flow capacity needed and is e85 safe.
Mazdaspeed 3 8th Port Auxiliary Fuel Kit

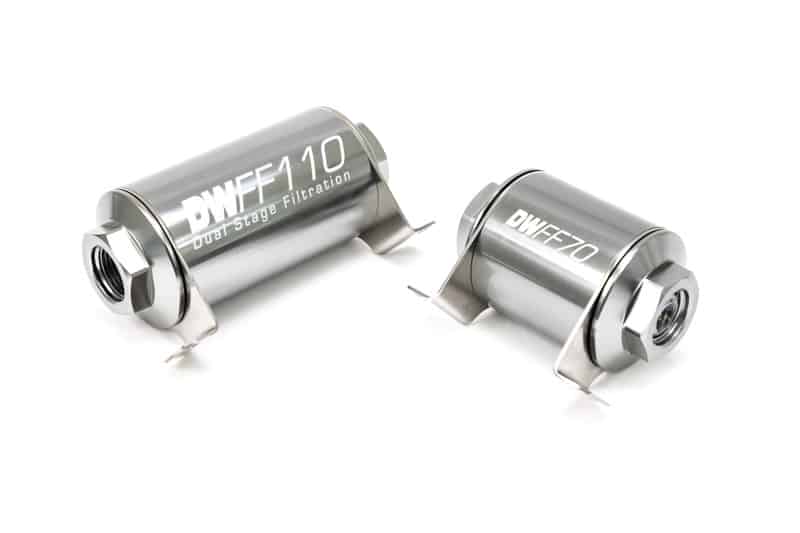
DeatschWerks Fuel Filters

  • Two fuel filters are used in the system for complete filtration.  A pre-pump 100 micron filter filters the fuel flowing from the tank to the pump, therefore protection the pump from debris.  A post-pump 10 micron filter filters the fuel even more before entering the fuel injectors, therefore protecting the fuel injectors from very small particulates.  Both filters use a dual stage filtration design that incorporates a magnet and a stainless steel mesh media.
Mazdaspeed 3 8th Port Auxiliary Fuel Kit

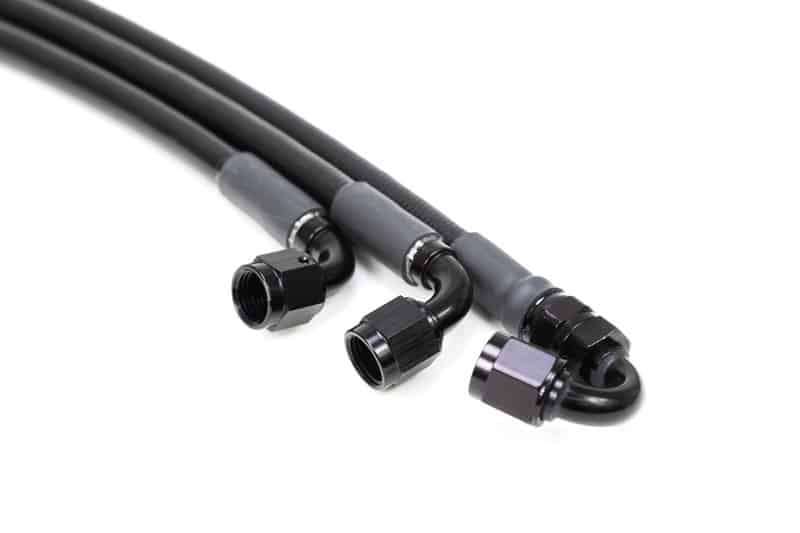
Spec’d Length 6AN Fuel Lines

  • No headaches and ready to go! Like our Mazdaspeed high pressure fuel line, the included fuel lines are the CorkSport Fuel Lines are spec’d to length and fully assembled ready to use.  The lines are PTFE lined with stainless steel braiding and a hytrel coating for a sleek finish and protection against abrasion.  All fittings minus on 150deg fitting are permanently crimped and sealed.
Mazdaspeed 3 8th Port Auxiliary Fuel Kit

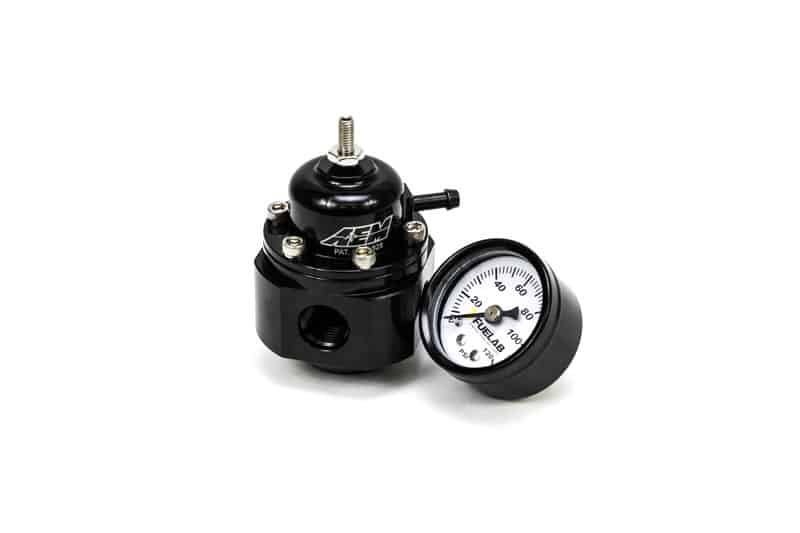
Fuel Pressure Regulator

  • An AEM fuel pressure regulator is used for this return style setup.  This provides easy adjustment and setup of the fuel rail pressure with the included Fuel Lab Analog Pressure Gauge
Mazdaspeed 3 8th Port Auxiliary Fuel Kit

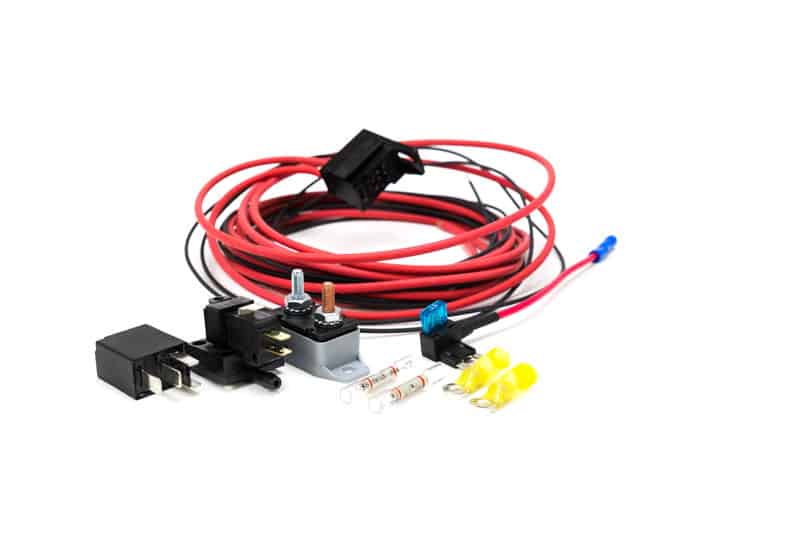
Electronics

  • Too further simplify, a 30amp relay kit is provided.  Relays are a critical component in setting up a port injection fuel system.  This allows you to safely and reliably provide power and control to the fuel pump. With that a Hobbs Switch is also provided, this acts as a trigger for the relay to apply power to the fuel pump when a set boost pressure is met.  Example: when you reach 4psi the Hobbs Switch will signal the relay to apply power to the fuel pump.  This is a great setup for daily driven cars because you only turn on the pump when needed vs running at all times.  It greatly helps the life of your pump.
Mazdaspeed 3 8th Port Auxiliary Fuel Kit

Misc Hardware

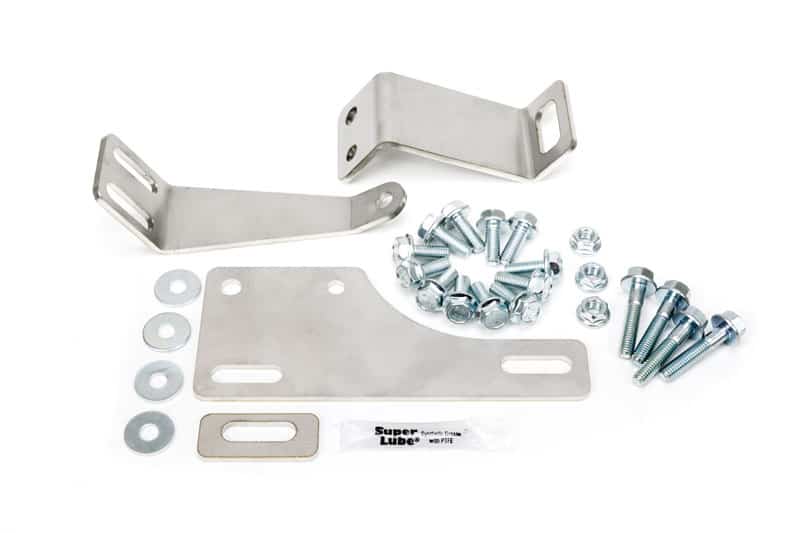
  • Lastly is all the misc hardware and brackets to get this into your speed.  We’ve got this handled and clearly show the install process with the online color step-by-step instructions.
Mazdaspeed 3 8th Port Auxiliary Fuel Kit

Alright that’s what’s in the box for the CorkSport Port Injection Kit; now let’s talk about the other required items.  There are 2-3 critical items needed to get your port injection kit up and running.  

Port Injection Controller

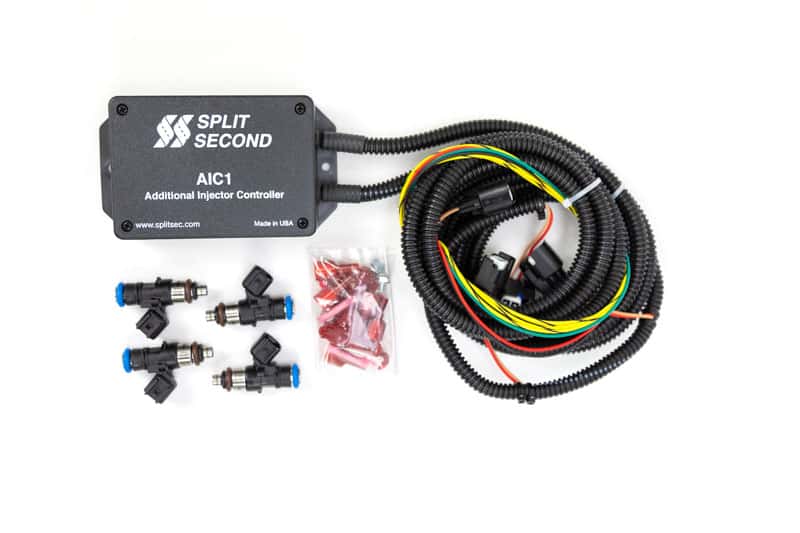
  • The OEM ECU and Cobb/Versatuner tuning options cannot control the extra 4x injectors in the kit so you will need a separate controller and software for this.  There is a simple and proven option with the Split Second Additional Injector Controller AIC1.  It comes with a ready to run harness for EV6 injectors and the harness integration for power, signal and control are very simple.  Check it out here and add it to your CorkSport Port Injection Kit for a one stop shop.
Split Second Injector Controller AIC1-V4H EV6 for Auxiliary Fuel System

Injectors

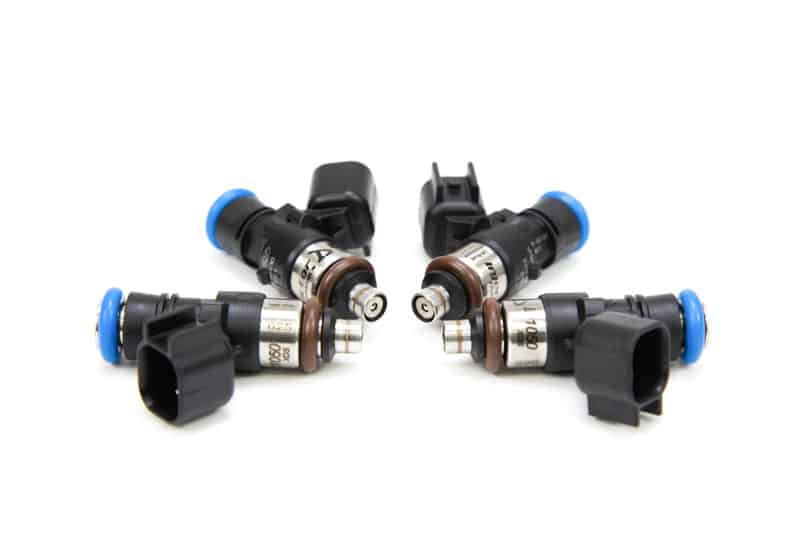
  • You will need 4x injectors for the CorkSport 8th Port Fuel Kit.  The injectors need to have 14mm o-rings top and bottom and the length of 34mm or 48mm (if using the CorkSport intake manifold).  To use with the Split Second Additional Injector Controller AIC1; you will want the EV6 connection style. For capacity we recommend at least 1000cc/mm.  To cover all these requirements just use the Injector Dynamics ID1050x.  They are proven and reliable, you can grab a set right here with the CorkSport Port Injection Kit.
Injector Dynamics 1050x Port Injectors for Auxiliary Fuel System

Bonus!

  • While this is not required for operation, it is highly recommended.  The N2MB Racing WOT Box allows you to change the type of Redline and Launch Control cut to a safer method.  OEM will deactivate the injectors for this vs the WOT Box deactivates the spark plugs.  This is much safer for your engine, especially with running a port injection fuel kit.  With this you can also Flat Foot Shift which is faster and way too much fun. (Insert Fireball Emoji Here)

Why doesn’t the CorkSport Port Injection Fuel Kit include these items? 

That’s a good question and we have a good reason.  Originally the kit was going to, but we asked the community how they would want the kit and the answers surprised us.  A lot of people wanted the kit minus the Controller and the Injectors because they already had those items.  So we pulled those out of the kit as solo items you can choose to add if needed.   

Installing this kit into your Mazdaspeed 3 is a day project with some buddies.  Bank on 6+ hours due to the wiring (its always tedious, but important to do right). Read the installation instructions before starting the install so you are ready with all the needed tools and supplies for wiring. 

Mazdaspeed 3 8th Port Auxiliary Fuel Kit

I do want to note that like any project that involves wiring, there will be some wiring required for the install and the extra wiring and connection you decide you need are not included in the CorkSport kit.  Every car is different and how each person wants to get things wired up is different.  There is also some very minimal drilling required to install the tank mounting brackets. 

CORKSPORT MAZDA PERFORMANCE BLOG

I hope you found this blog helpful and informative not just to learn about the CorkSport Port Injection Fuel Kit, but to also learn about the other setups and options you can choose from.  I hope this helps you decide what is best for your car and goals.  Give us a call if you have any questions, we’d be happy to help. 

Barett @ CS
Stay up-to-date on the latest news and product updates from CorkSport.

* indicates required

Recipe to Make a 500 HP Mazdaspeed 3

400 Whp not enough for you and your Mazdaspeed3? 

Searching for more power for your speeds MZR engine? 

Are you building your DISI motor, and trying to figure out your next setup? Say no more… 

This next Mazdaspeed-focused blog is going to focus on making some big power numbers, and what it takes to get there. Now is the time to go beyond the scope of the 400-wheel horsepower to look at what it takes for 500 horsepower at the wheels. 

In our 400 WHP blog, this is not an all-inclusive guide and the only way to achieve these power levels… However, it’s something that’s been tried and tested for years and proven to be a reliable method of making the power you’re after. We are aiming to educate you in the best way to make the most out of your MZR engine.

Let’s get started 

With the MZR engine being out for over 10 years, it’s had a lot of time under the knife. We know how the engine responds to different airflow mods, tuning characteristics, fuel, etc.

We also know that 400 Whp is about the limit of the stock bottom end on the Mazdaspeed 3. If you have a Mazdaspeed 6, then you can assume it’d be a bit less given you have AWD and need to account for further drivetrain loss.

It is beyond this point that the motor is in danger and could potentially let go. Keep in mind that at 400 Whp you are nearly doubling OEM power output, and that’s a lot of strain on those pistons and rods that were never designed to endure that power long term.  If you are wanting to go beyond 400 Whp then you should know that you are also looking at the price tag of a Built motor.

What it takes to Make 500 Whp In Your Mazdaspeed
CorkSport

Now, if you are relatively new to this, and aren’t very familiar with the basic building blocks of the platform such as the Cobb Accessport, and Upgraded Fuel Pump Internals, then I invite you to read our 400 Whp Blog to build a good foundation. Do you feel you have a good understanding of what it takes to get to 400 Whp? Then you are ready to read on!

When you’re at a point in your build that you are seeking 500 Whp then it’s safe to say that you probably have gotten the more tedious stuff out of the way… You probably have about every bolt-on modification, and you understand what it’s like to work with a professional tuner.

That being said, let’s do a bit of a recap on the 400 Whp mods, so you have a good idea of where we need to go from here.

These are all the recommended/required mods to increase engine airflow and efficiency to make 400 WHP.

Basic Bolt Ons: (Less Expensive / easily removable parts )
Fuel Pump Internals
3.5” Intake (Requires ECU relocation or battery box)
Upgraded EBCS
Upgraded Map Sensor
Upgraded Downpipe
Upgraded Intercooler
Upgraded Catback Exhaust
Oil Catch Can

Advanced Bolt Ons: ( More expensive / more difficult to remove )
Upgraded Turbocharger
Upgraded Intake Manifold (Optional but Recommended)
Upgraded Exhaust Manifold (Optional but Recommended)

Fuel:

Stock Fueling on Pump Gas usually nets around 330-350 Whp depending on octane and gas quality.

Stock Fueling on E85 blend fuel usually nets around 370-390 Whp depending on Tune aggression and also Quality of the gas and E85.

With Aux fueling such as port fuel, or methanol you can easily bump up over the 400 Whp mark and beyond. (I’ll get into the differences more in a bit)

Putting down 500 Whp pretty much requires many of the same mods that 400 Whp does, BUT the primary game changers are the Advanced Bolt On’s and Fuel.

(If you’d like to refresh your memory on the basic bolt-ons and how they affect your Mazda please refer to the 400 Whp blog.)

I’m ready for more POWAHH

In the grand scheme of things, making the 400whp is relatively easy and affordable considering it can be done on the stock block. With bolt on parts, fuel, and a tune you can easily hit that number. But as soon as you want to make more, you’re looking at a built engine, as previously mentioned, And that’s a whole new can of worms.

So, what’s all involved in a built motor? That’s a bit of an open-ended question as there are so many variables to take into consideration. However, “built” engines usually contain forged pistons and rods with upgraded bearings to handle more abuse. From there, the complexity increases as you get into port work, cams, etc. I will touch on that a bit more later. 

Fortunately for you, most engine builders have their entry level engine ready to handle 500 wheel horsepower and it’s a pretty basic build that features stronger internals. But, the tedious stuff like port work is usually reserved for the higher tier engines that are usually built for more power.

I won’t get into the engine building side of things, as that could turn into a whole other tangent. But you can assume that a built motor may cost you anywhere from 5k and up dependent on the level of motor you go with. From there we can start piecing together our 500 Whp build.

What it takes to Make 500 Whp In Your Mazdaspeed
CorkSport

Let’s Talk TURBO’S (Crowd Cheers) 

The turbo is the heart and soul of the Zoom-Zoom, so it seems like a suitable place to start.

What it takes to Make 500 Whp In Your Mazdaspeed with the CSt5 Mazdaspeed Turbo
CST5 Turbo Upgrade – 2006-2013 DISI MZR

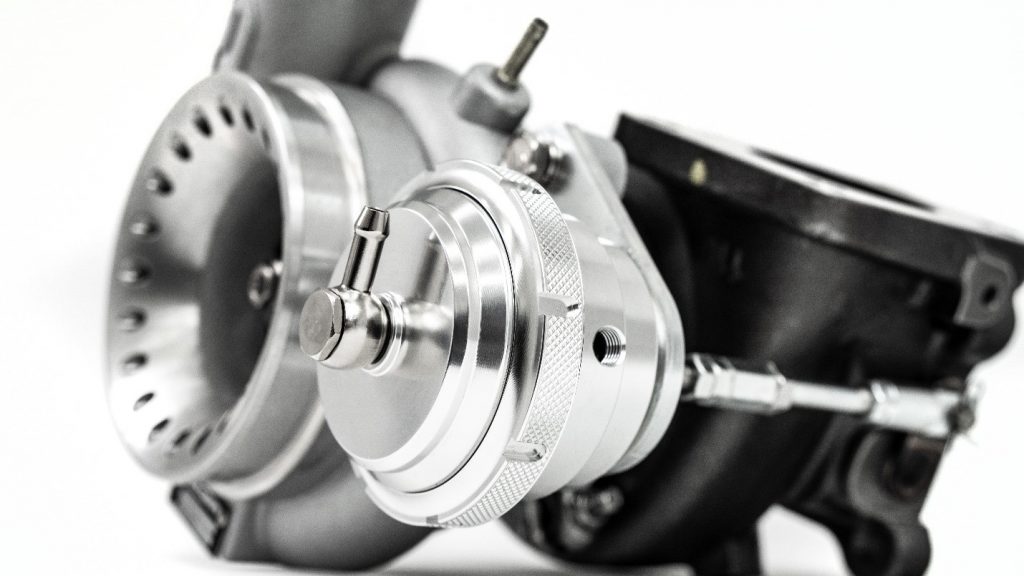
As we know, the CST4 is happy up to around 400+ Whp. Which is why it was the recommended turbo in the 400whp blog. But now we are ready to take a step up to the CST5 Turbo for the Mazdaspeed which is happy up to… You guessed it! 500+ WHP. With the ability to hit 20 PSI by 3500-3600 RPM and Carry out 30 PSI it really packs a punch for its size. You may be needing to upgrade your intake to pair to the T5, I’d recommend our Power Series 3.5” Intake I mentioned earlier. It will come with the 4” coupler required to mate up to the turbo.

The turbo is available with an internal gate, or an External Gate so you can choose what works best for you. Both options can hit the same power numbers.

Upgrade Your Turbo with the CST4

Let’s Talk Fuel

What it takes to Make 500 Whp In Your Mazdaspeed
HPFP System

“What options do I have for bigger injectors?”

At CorkSport I get this question rather often. Unfortunately, I must tell them “There aren’t any”

Without going too off topic here I will explain why.

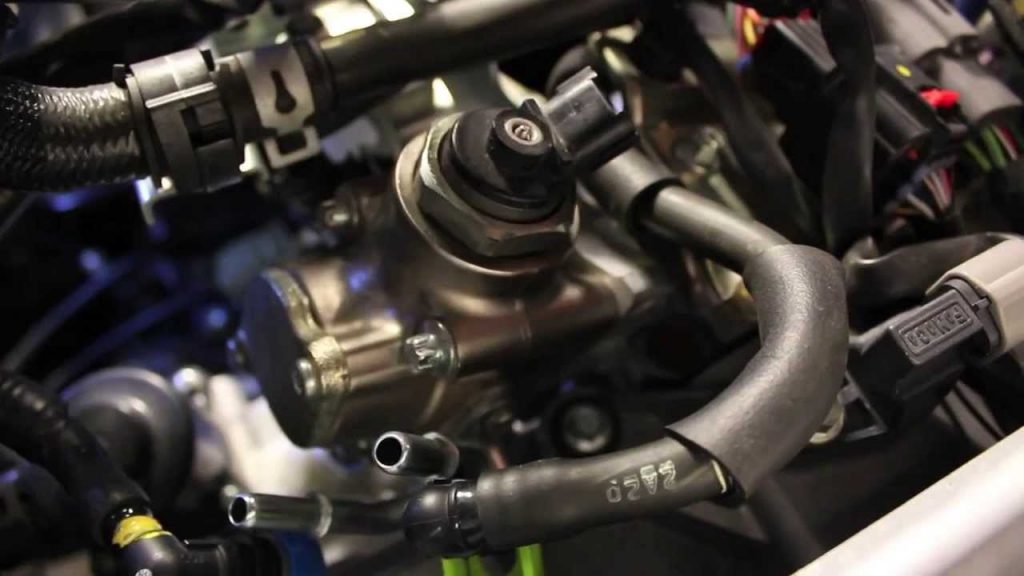
Our cars feature a Direct Injection fuel system or DI… And by today’s standards, it’s a bit primitive. The MZR DISI was one of the first pioneers of modern DI, which is probably why the OEM high-pressure fuel pump can’t even sustain the full potential of the factory injectors. Don’t worry, the CorkSport Fuel Pump internals fixes that problem.

Port Injection is simple and easy to maintain. It works by spraying low pressure fuel into the intake runner where it atomizes in the air stream before entering the combustion chamber.  For car guys, it’s fantastic and easy to swap out injectors when you are ready for more fuel.

Direct Injection takes a whole new approach. Instead of the fuel going in through the intake manifold, it goes DIRECTLY into the combustion chamber.

In order to overcome the force of compression, the fuel must be highly pressurized in order to atomize correctly. It also must deliver more volume in a shorter amount of time. This is why your Mazdaspeed has a high-pressure fuel pump. 

This causes a whole lot of complications for injector developers because things like fuel pressure also become a huge variable when attempting to create a larger Direct Injector. The bigger the hole on the injector, the more fuel pressure is required to create adequate atomization. Combining that with the rarity, and size of the Mazdaspeed platform, it’s just not worth it for any manufacturer to develop one.

So, what’s the solution to getting more fuel? Well… As previously mentioned, you pretty much have 2 choices Port Injection or Methanol. Since both of these are considered Auxiliary fueling, they are controlled by separate controllers, unless you want to ball out and get a Motec ECU that can control the OEM engine systems, as well as your port fuel.

Choosing which system, you want to go with solely depends on your power goals, and how much money you have to spend. Those 2 factors are pretty much the only question you need to ask yourself.

What it takes to Make 500 Whp In Your Mazdaspeed
Leo dropping that cash on a port Injection fuel system

Methanol – Cheap and simple 

Port Injection – Expensive and Reliable 

You must remember that the OEM fuel system, even with E85 in your tank is only good up to around 370-390 WHP. So, everything beyond that is supported by your AUX fueling. If your extra fuel system stops spraying for any reason, that could lead to catastrophic damage depending on how much you’re relying on it. When you’re just trying to nudge over the 400 whp mark on a CST4 or CST5 then Methanol is usually fine in my opinion. But beyond that, I’d be concerned with the reliability aspect.

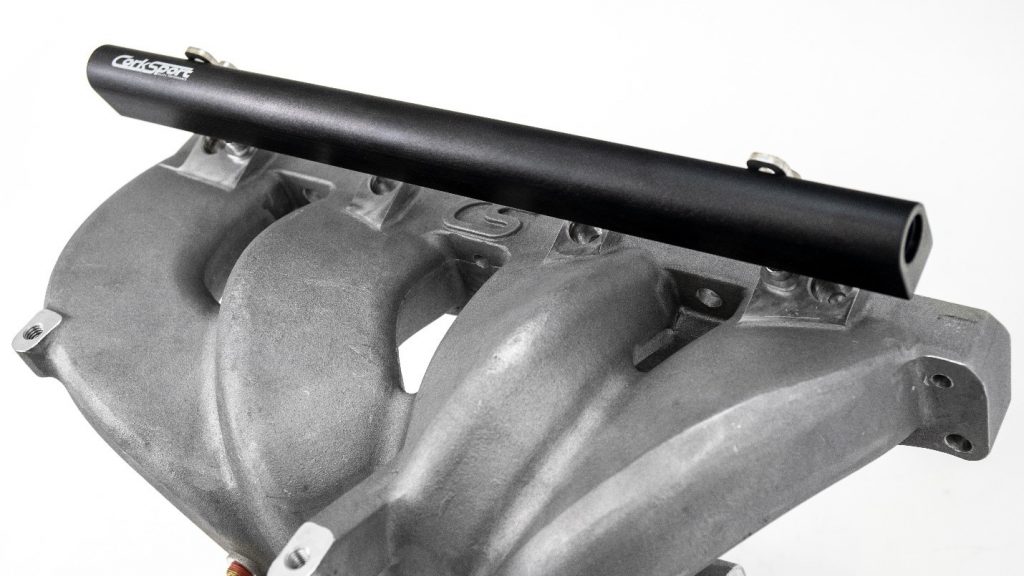
When you have a properly set up port fuel kit (Manifold with fuel rail required) it behaves almost as if there is no AUX fueling system. This is especially the case when you have it all integrated into your factory gas tank and don’t need to fill up a separate cell. A quality Port Fuel Kit is pretty full-proof.

You’ll have to make the decision that’s best for you, but I’d recommend a port fuel kit to support 500 Whp, vs a heavy spraying methanol kit.

Mazdaspeed Intake Manifold with CorkSport fuel rail
CorkSport Manifold With Fuel Rail For Port Injection

Let’s Talk Manifolds 

Manifolds are responsible for transferring all the air in and out of the motor from their respective cylinder. This job is an important one as it needs to distribute the gases as evenly as possible. The more even the flow, the better the performance!

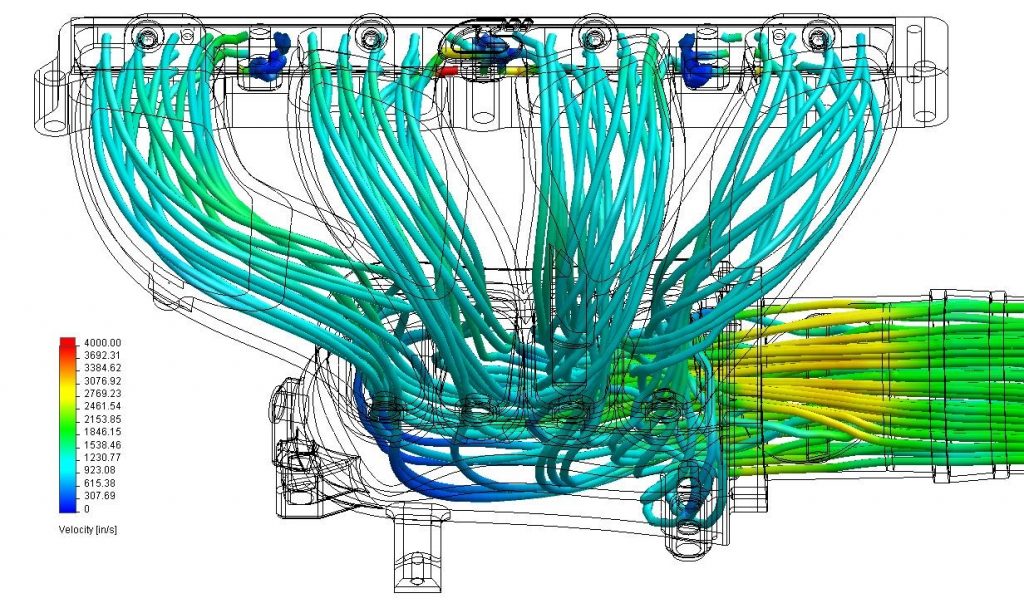
On the Mazdaspeed Platform, the OEM intake manifold is known to be the bigger restriction over its exhaust counterpart. With very unequal flow distribution across the 4 runners, it has been proven not only to restrict power but also cause premature wear and tear on cylinder #3; here’s why.

This is caused by “over-feeding” air to #3 in comparison to the other cylinders. Over time this #3 is actively running leaner than its counterparts which is why it’s been deemed the most common cylinder to blow if an engine does give way.

CorkSport Intake Manifold for Mazdaspeed shown to provide example of even Flow
CorkSport Intake Manifold shown to provide example of even Flow

It is because of this, that I always recommend a CorkSport intake manifold for even stock power levels. It may not be required to make 500 Whp, since you can essentially just turn up the boost to counteract the restriction. But in the name of reliability and efficiency, you should always try to help your engine breathe with the most minimal effort while also helping it maintain its health. 

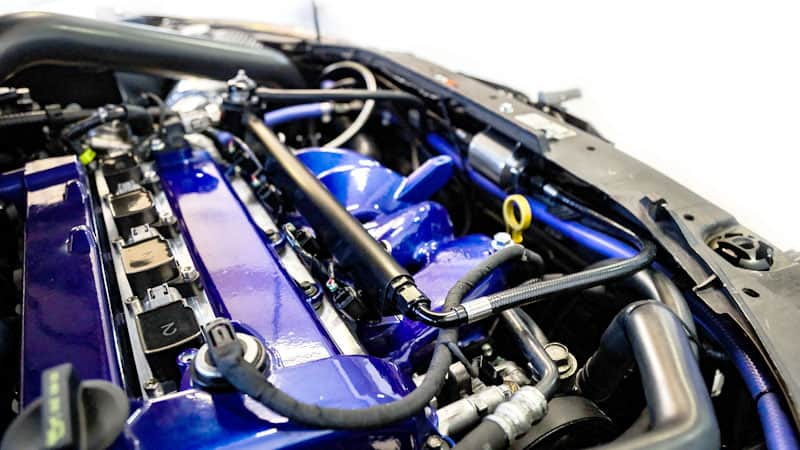
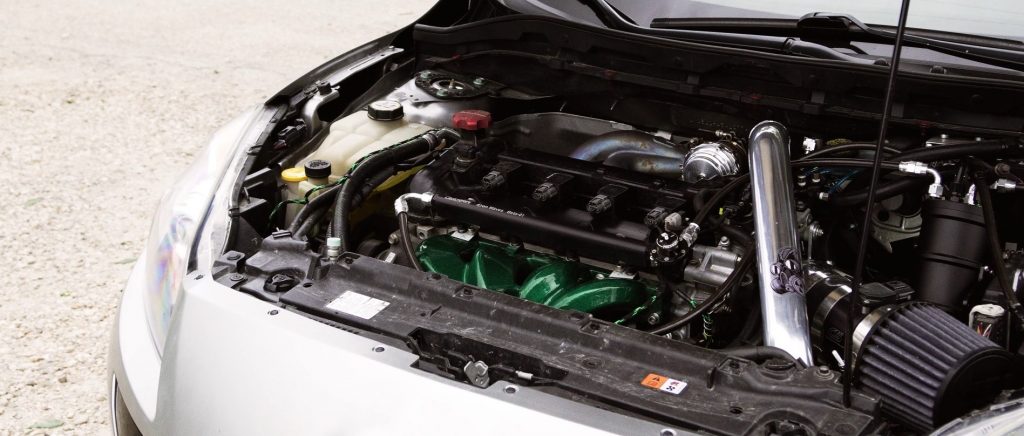
Mazdaspeed engine making 500 WHP
CS manifolds, FMIC, and 3.5” intake in picture

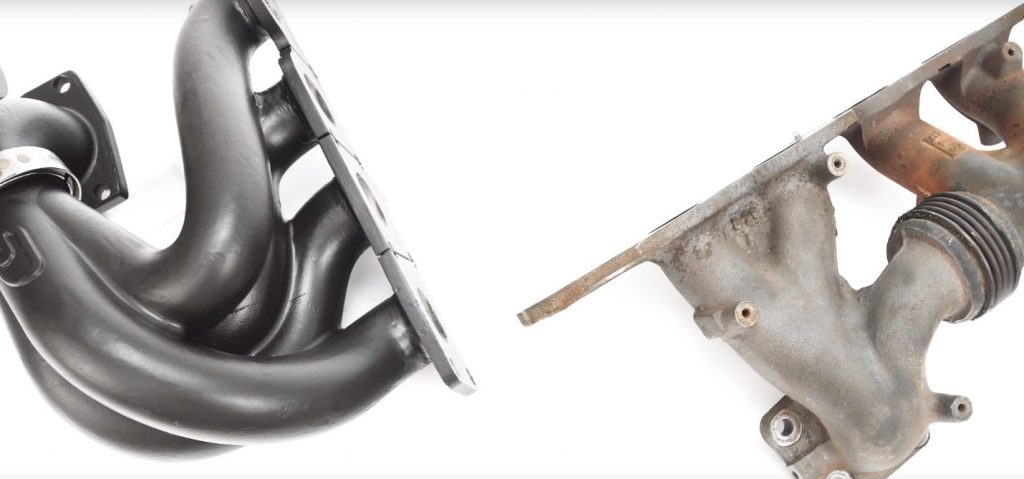
The OEM Exhaust manifold may not be as bad as the intake manifold, but it’s still not ideal, especially at this power level. A performance exhaust manifold needs to be designed with exhaust scavenging in mind. 

Exhaust scavenging is a very cool effect. The exhaust gases leaving the combustion chamber travel out the individual runners and enter the collector. It’s at this point that it creates a vacuum-like effect on the runners, assisting the exhaust gases to escape from the other cylinders. This constant scavenging helps improve exhaust flow dramatically, especially when you start making power over 400 Whp.

You can learn more about exhaust Scavenging in our Blog that dives deep into it and shows examples comparing our Exhaust Manifold to OEM!

Stay Up-to-date with CorkSport   


What it takes to Make 500 Whp In Your Mazdaspeed
CS Exhaust Manifold vs The OEM Manifold
When you replace both the Intake and Exhaust Manifolds with a performance unit you are drastically helping your motor improve its efficiency, which can mean 3 things.

1. Make the same power on less boost.
2. Make more power on the same boost.
3. Make Way more power on way more boost. 

When you have to push your car less to make the power you want, reliability improves, and it also needs more room on the table for when you want to make even more power later on.  That leads us to our next topic, Efficiency Mods.

The Cherry On Top 

With a built motor, full bolt-ons, fuel, and a big enough turbo you can easily hit 500 whp.

However, efficiency mods such as Camshafts or Throttle Body will help you make more power easier, or really push the limits of your turbo by improving its ability to perform.

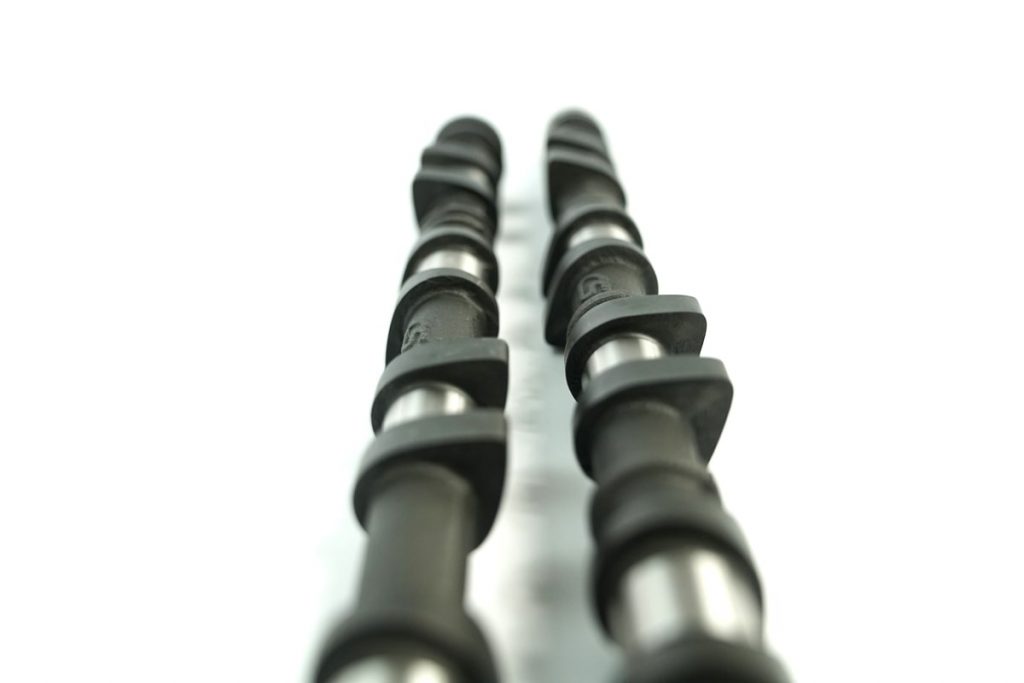
Our CS Camshafts are ideal when you start getting into this power range. It helps with everything from turbo spool, midrange power, and top end. Even on K04 powered speed 3’s / 6’s our cams netted around 20 Whp. You can imagine the kind of exponential improvements it can make as you move up in power.
Camshafts for Mazaspeed
Mazdaspeed Camshafts for DISI MZR Motor

That being said, if you’re already having a motor built, or you happen to be going inside your motor, its not a bad idea at all to toss these cams in. They will only help you, and if anything, help your car to not need to work so hard when you’re pushing its limits.

Performance throttle body for Mazdaspeed
Performance Throttle Body for 2006-2013 DISI MZR Mazdaspeed

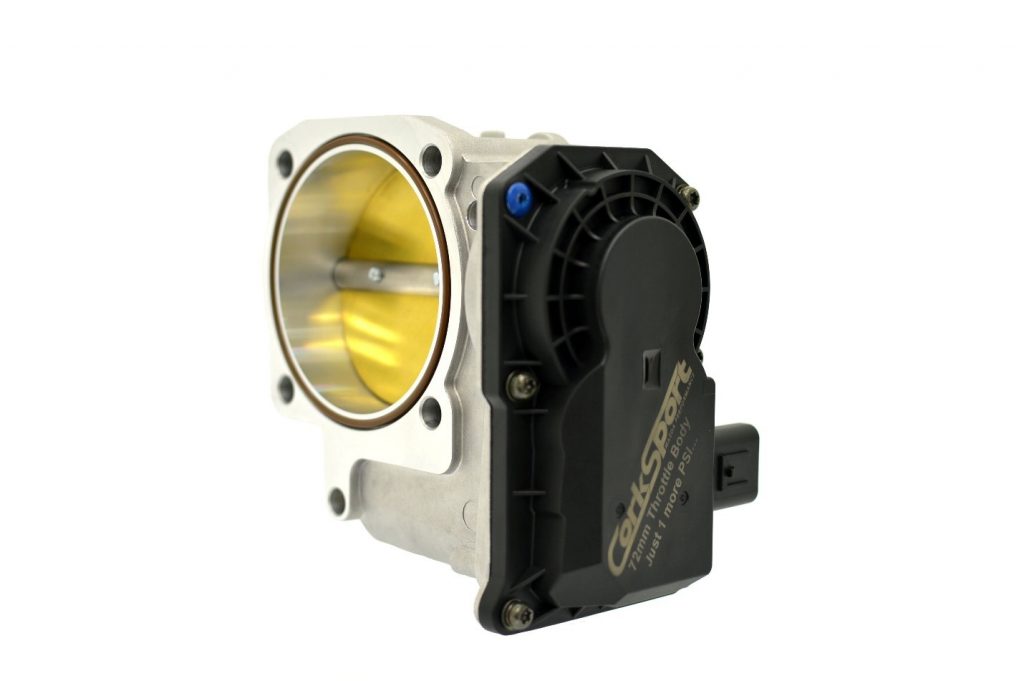
To top that off something like our CorkSport Throttle Body has been proven to make more horsepower and flow 33% more CFM than the OEM unit. Up until recently, no other throttle body has been a viable option due to drivability issues. But CS now offers a drop in plug and play unit that doesn’t come with the problems and utilizes OEM ECU logic to function. Modifications like the throttle body are the awesome little bonuses you can do to help the car hit that 500 Whp mark even easier.

Let’s Recap

So, to cover everything that we’ve learned:
This is what we recommend to achieve 500 WHP

1. Built Motor with upgraded Cam Shafts
2. Auxiliary Fueling
3. Full Bolt-Ons, CS Throttle Body recommended.
4. CST5 Turbocharger
5. Manifolds

We hope you enjoyed reading this blog, and now have a better understanding of the details that go into making 500 whp. Next, we will be reviewing the in’s and out’s of 600 whp!

Stay up-to-date on the latest news and product updates from CorkSport.

* indicates required

Skyactiv 2.5T Intake Heat Shield

OEM Look and solid performance power gains for the Mazda 6 Turbo

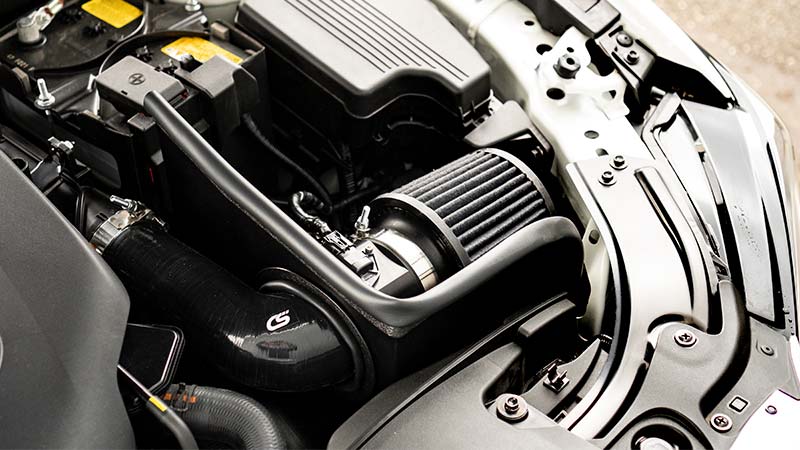
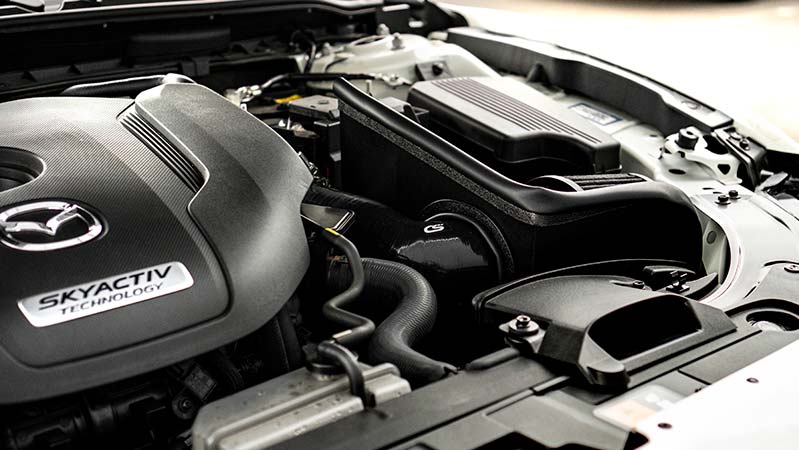
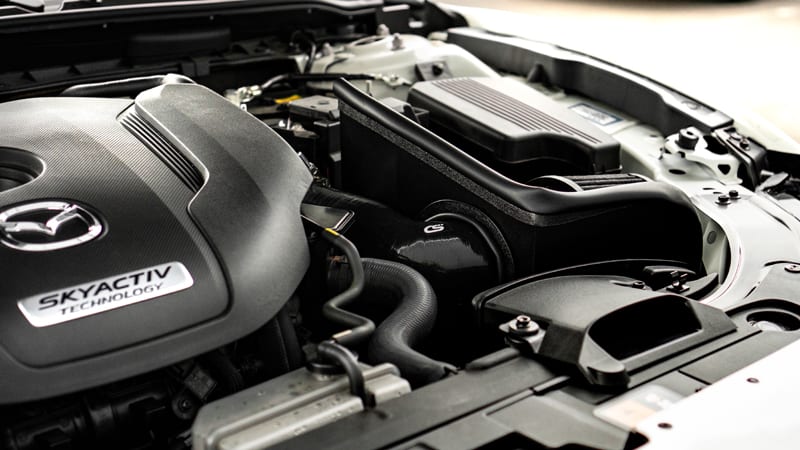
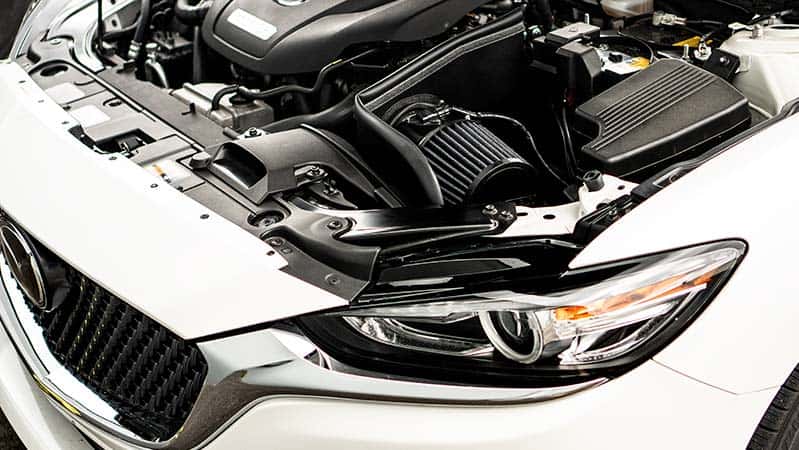
We’re back with another product for SkyActiv 2.5T owners that a lot of you have requested after getting your CorkSport SRI. Introducing the CorkSport Heat Shield for 2018+ Mazda 6 Turbo, 2019+ Mazda CX-5 Turbo, and 2016+ Mazda CX-9! Cool down your intake air temps in two ways: by blocking heat from the engine bay and by using the OEM ducting to draw in fresh air. This allows your turbo system to breathe just a bit easier, especially during hot days or if you’re stuck sitting in traffic. Plus, it makes the CS SRI look like a factory option performance part!

Read on for full details and be sure to give us a call if you have any questions!

Isolates heat from the Mazda 6 turbo SRI

Stay Up-to-date with CorkSport   


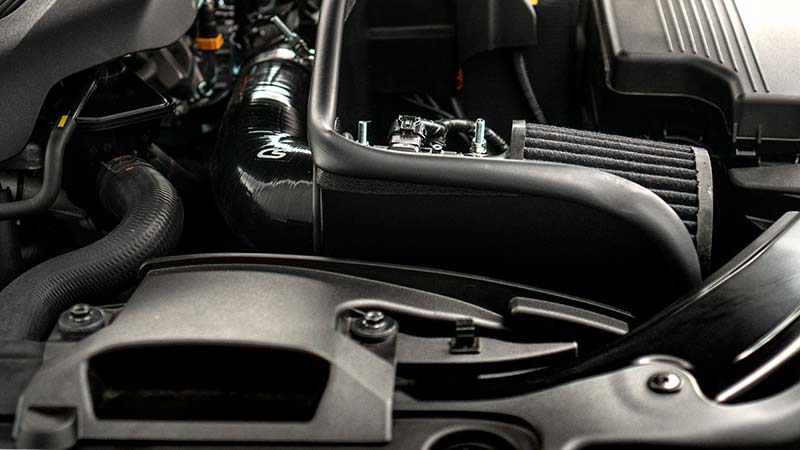
We really focused on keeping cool air around the filter with the CorkSport SkyActiv 2.5T heat shield. The shield was carefully designed to seal the intake off from as much engine bay heat as possible. This meant a complicated 2 piece design that is riveted together. We also designed the shield to work with the OEM air ducting. This directs cool outside air to the filter, further reducing intake air temps. The shield is also left open to the area in front of the tire, underneath the headlight. We found that this area gets some fresh air during driving as well, further keeping air temps down.

Cx9 Turbo cold air intake heat shield
CorkSport Heatshield

Now what benefits does cooler air offer? The basic generalization is that since cooler air is denser than warmer air, your engine can ingest more air per cycle, and make more power. When a car is turbocharged though, this gets a little more complicated as you have a turbo that compresses and heats up your intake air and then an intercooler that cools down the boosted air before even getting to the engine. What that means is that the “colder air will make more power” generalization may not hold true, especially with how advanced modern turbocharged vehicles have become. What colder intake air does offer you is a less stress on your turbo system. Colder air means your turbo does not have to work as hard to flow the same amount of air at the same boost pressure. In addition, colder intake air can translate to slightly cooler air exiting your turbo and heading to your intercooler, taking some stress off the intercooler as well.

Cx5 Skyactiv 2.5T Performance airbox
See the video

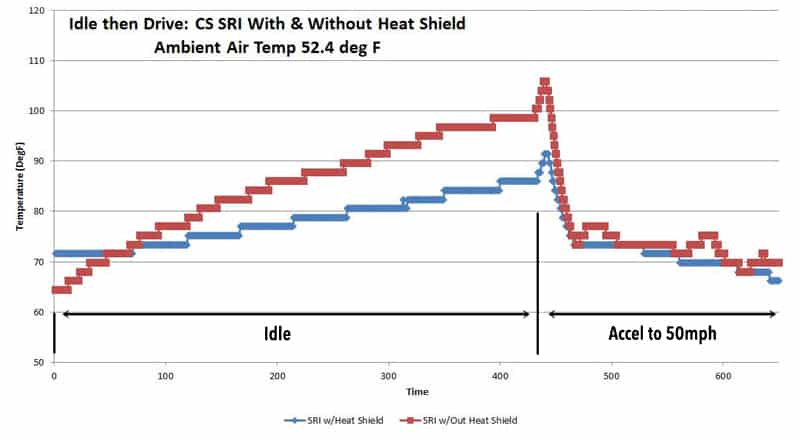
Enough theory, let’s talk results! In both daily driving testing and in torture testing on the dyno, we found decreased intake air temps with the CorkSport Heat Shield installed. When cruising or when it’s cold outside, we were actually surprised at the low intake temps of the CS SRI alone—there’s actually a surprising amount of fresh air that gets into the engine bay. Where the heat shield really comes into its own is when sitting stationary or driving on a very hot day. That’s when we saw our biggest improvements in intake air temp.

While we did not see any notable changes to horsepower, our torture testing on the dyno really shows what a worst case scenario would look like for intake temps. Check out the graph below that compares the CS SRI alone vs. the CS SRI and heat shield combo. This is a little exaggerated due to decreased airflow on the dyno but is similar to what your engine could see when sitting in traffic on a hot day, then accelerating back up to speed.

Performance Skyactiv 2.5T air temp data
CorkSport

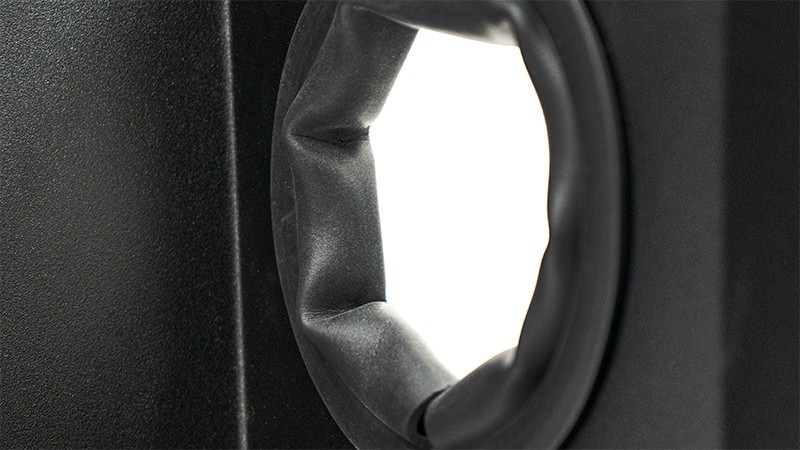
The CorkSport Heat Shield is made from laser cut and precision formed carbon steel. We chose carbon steel for great strength and lower heat transfer than aluminum. For corrosion resistance, the heat shield is finished off with wrinkle black powdercoating. This coating also gives the heatshield a great look that helps it blend in with the rest of the engine bay and make the intake system look like a factory performance part! The two sections of the shield are attached together using stainless steel rivets for a great look and long lasting strength. Lastly we include rubber edge seal to keep as much heat out as possible, and to prevent any vibration or unwanted noise.

Mazda Cx5 Turbo Short Ram Intake OEM Look
CS Heatshield

If you’re looking for the next mod your Sky 2.5T or have been holding off on the CS SRI until there was some heat protection, check out the new CorkSport Heat Shield. We are even offering a package deal! If you purchase the heatshield and SRI together you will save $20.

For early adopters of the CS SRI, we have not forgotten about you! We are also offering the same $20 discount on the heatshield for a short time. When placing your order, enter coupon code heatshield20, and in the customer notes, enter your original SRI order number. BAM – $20 Savings!

Finally, we’ve got some new silicone colors coming for the CS SRI! They aren’t quite here yet but if you’re looking to add a splash of color in your engine bay, wait just a bit longer! That’s all for now, be sure to check out the product listing for more images of the heat shield and give us a call if you have questions!


Connect with us

Stay up-to-date on the latest news and product updates from CorkSport.

* indicates required