Mazdaspeed 3 X-Clutch First Review

Many community members are asking, “What clutch should I buy for my Speed3/Speed6?” or “What’s the best clutch for Mazdaspeed 3/6?” and there isn’t a perfect answer because the right answer depends on your goals with your car. 

While I can’t say what the best clutch is, I can share my experience to date with my Twin Ceramic Rigid Disc X-Clutch in my Mazdaspeed 3.  
Mazdaspeed X-Clutch review

First Impressions

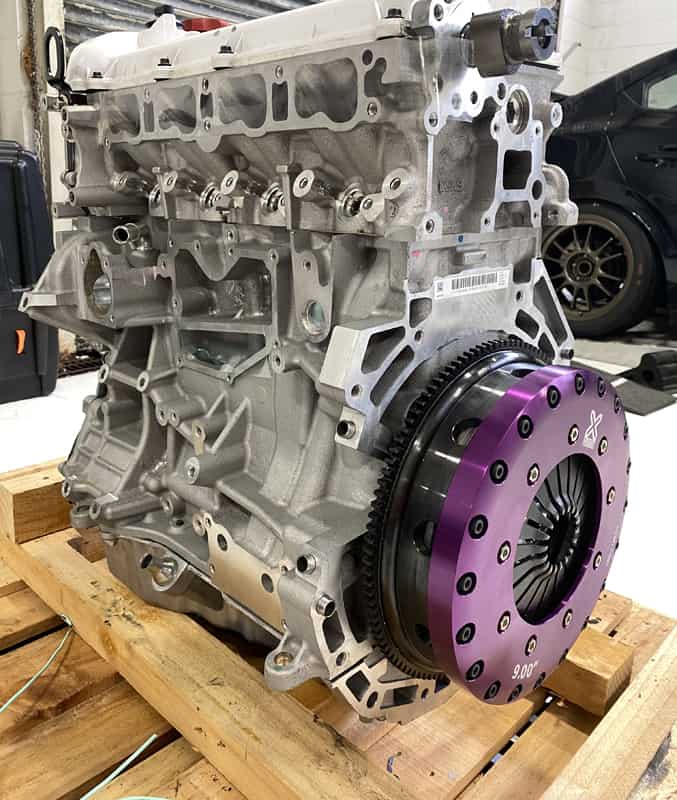
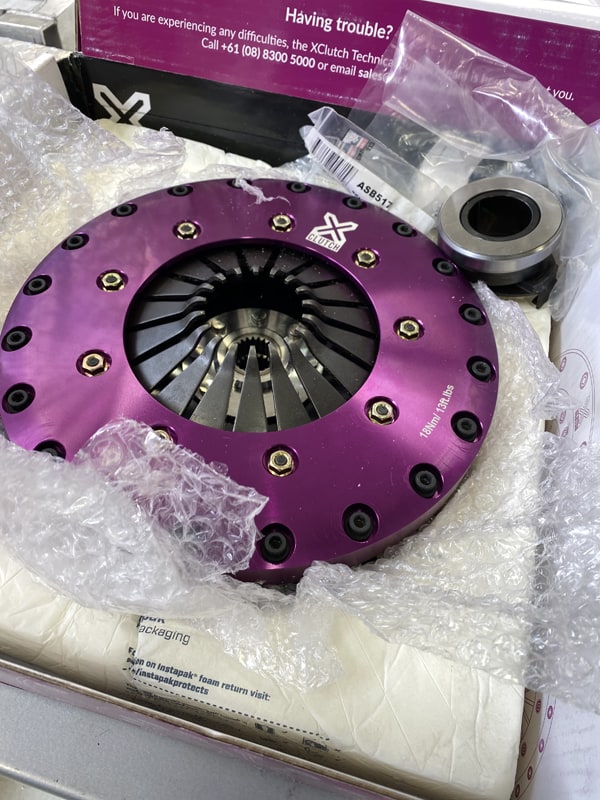
Opening the box I found a very well-packaged assembled clutch kit.  This included the assembled pressure plate, discs, and flywheel along with a new throw-out bearing, flywheel to crank bolts, and a nice alignment tool. XClutch also included some generic instructions – They certainly don’t rival CorkSport instructions, but are better than most clutch instructions I have used.  
Mazdaspeed X-Clutch review

Getting into it

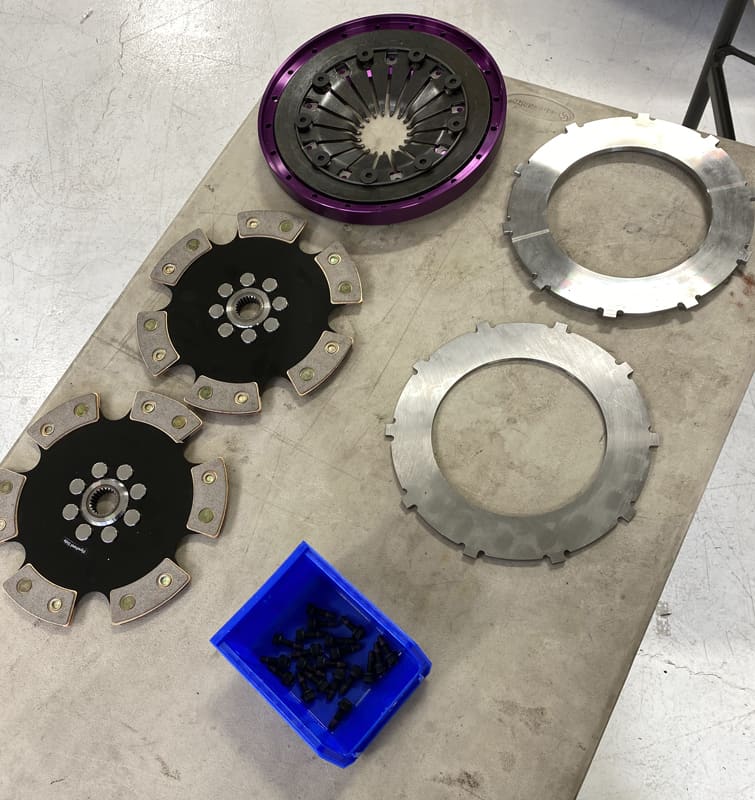
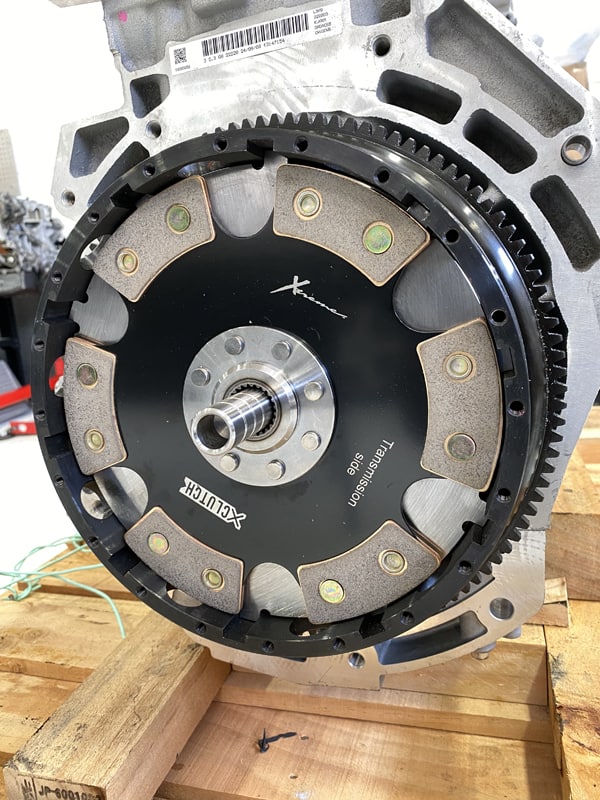
Disassembling the clutch assembly I found some nicely constructed components.  The material fit and finish was great along with the identification of transmission vs engine side of the discus laser engraved was a nice touch. 

Something worth noting: Some clutch kits come to you in separate pieces. This makes you 100% dependent on their instructions for the assembly process (and a lot of times those instructions are lacking), but with the XClutch the whole thing came assembled.  I like this because it gave me the chance to see how it was assembled and therefore made me more confident I would assemble it correctly on the engine.  
Mazdaspeed X-Clutch review

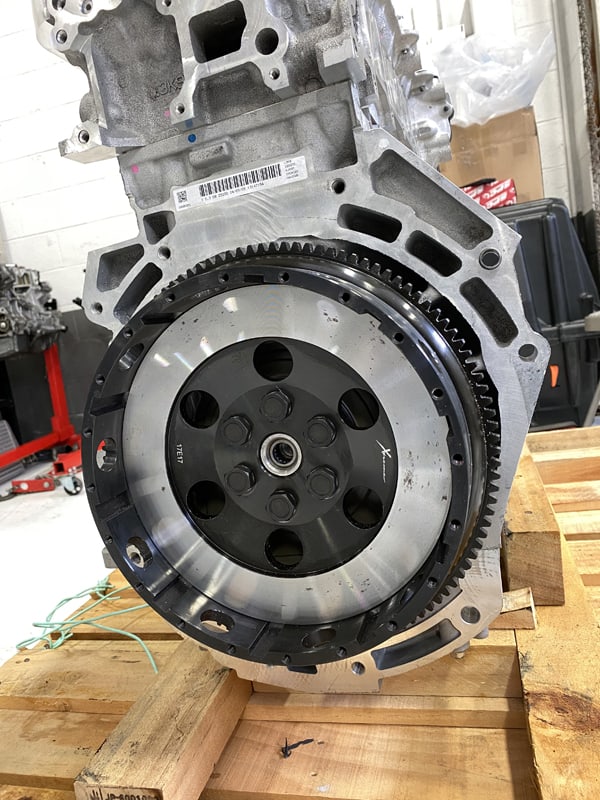
Now let’s get the clutch on the engine. After disassembling the clutch kit, the first part to go on the engine is the flywheel after a quick cleaning of the machine parts and surfaces.  Using the provided hardware and some lock-tight the flywheel gets torqued down.  The flywheel was a perfect fit on the snout of the crank…a little persuasion was needed which tells me the flywheel will be perfectly centered.  
Mazdaspeed X-Clutch review

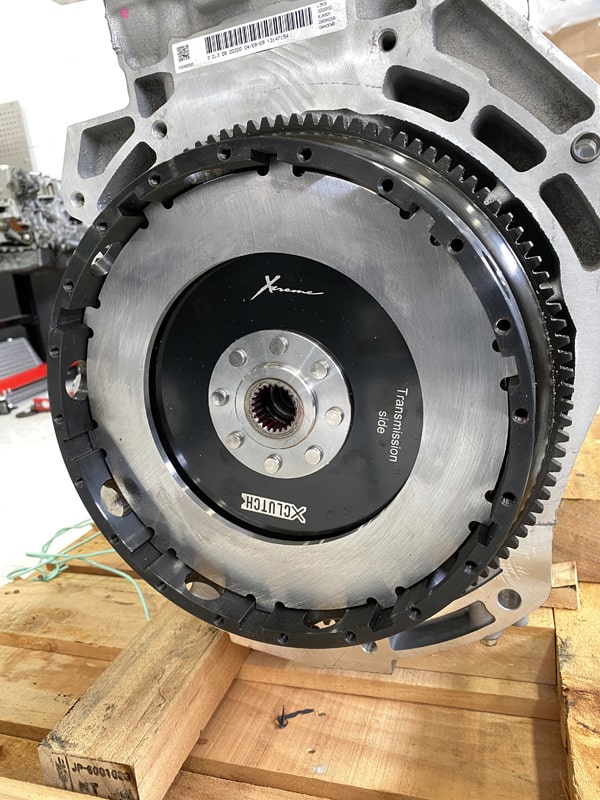
Next is the first clutch disc (make sure you can read “transmission side”) then the middle floater plate.  Following that is the next clutch disc (and again make sure you can read “transmission side”) along with the provided alignment tool. 
Mazdaspeed X-Clutch review

The Tool

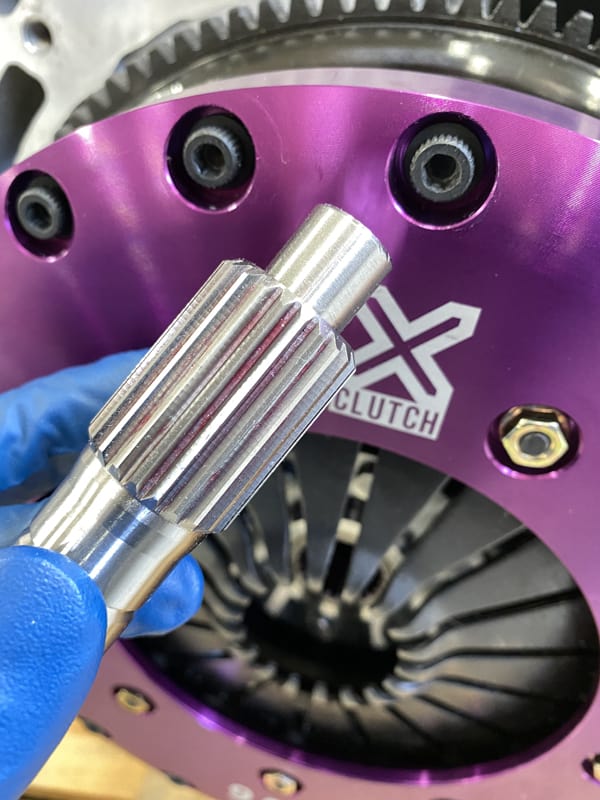
So I want to take a minute to talk about the alignment tool.  I’ve installed many clutches in many vehicles throughout my life ranging from an OE replacement in my 92’ Mazda b2600i, Mazdaspeed3, and a twin-disc in a Dodge.  Every single kit came with the generic plastic alignment tool that doesn’t fit great and flexes.  

But not X-Clutch, their kit included a very nice billet steel alignment tool that fit snugs and did not sag or move when installed.  This seemingly simple tool made a huge difference in the whole installation process.  
Mazdaspeed X-Clutch review

Back to the install steps; next up is the pressure plate floater plate.  Typically this is part of the pressure plate assembly, but with the Xclutch design, this is separate.  
Mazdaspeed X-Clutch review

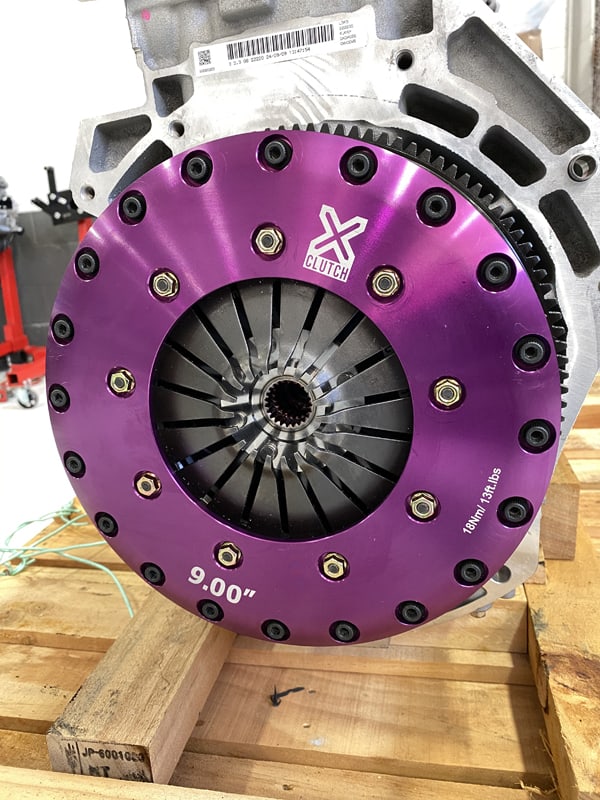
Last is the pressure plate itself which is what applies the force to the clutch discs.  The installation of this is slow and tedious, but important to follow.  The hardware must be installed and torqued down evenly around the perimeter, much like torquing a wheel but with a lot more lug nuts.  

X-Clutch has clear instructions on this so don’t worry.  
Mazdaspeed X-Clutch review

Bringing it back together

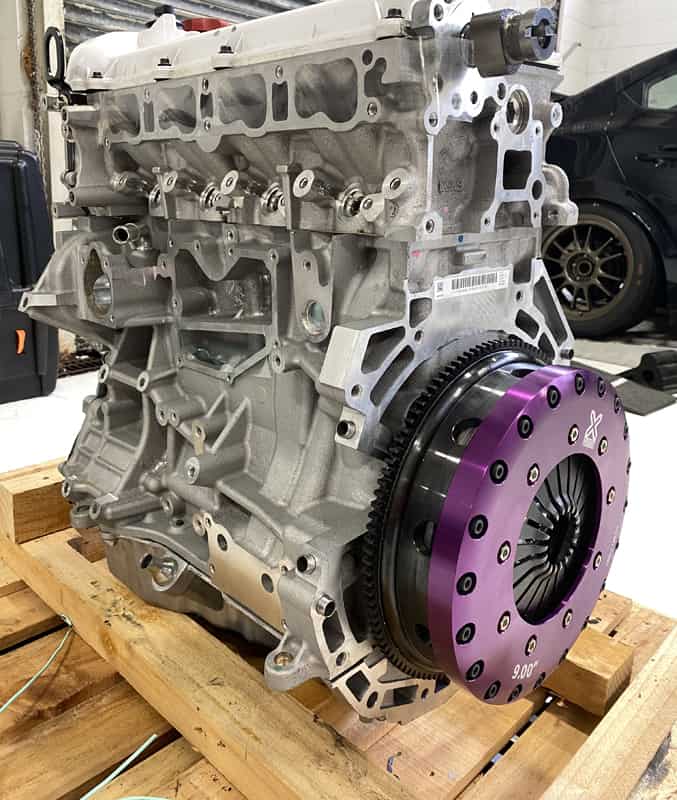
So your clutch is all buttoned up and now it’s time to attach the transmission to the engine.  I’ll admit this was a task I was dreading…many times I’ve fought this process because the damn input shaft in the transmission just would not line up with the clutch disc and crank, but I was pleasantly surprised.  

I don’t know if it was luck or if the alignment toll was really that perfect, but in one try the transmission slid right onto the clutch and aligned perfectly.  It was honestly shocking.   I can only hope your installation goes as smoothly.  
Now the review you have been wanting…

First impressions are great.  The peddle pressure is very similar to OEM, maybe just a hair stiffer, but is nearly identical so if you’re worried about a stiff pedal DON’T, it’s cake.  The engagement point is around the middle right now, but I expect it to move up in the pedal stroke slightly as it breaks in further.  I like this, but this is a preference thing. 

Engagement control is interesting.  Going from an ACT 6-puck ceramic to this is very similar in the “grabbiness” of the clutch since they are both ceramic puck discs, but the X-Clutch I would say is a bit more aggressive.  This makes sense with the rigid disc design and the very high torque capacity…1,350 ft/lbs!

So here’s my suggestion and you can check them out here. Learn More!

Conclusion

If you want a OE replacement with a bit more headroom for power then the Street single disc organic is going to be your closest bet.  If you want good street manners but have more power to hold then the Street Plus twin disc organic is going to be your best balance.  Lastly, if you are pursuing motorsports and high heat capacity then the Race twin disc ceramic will be your go-to clutch kit.  

-CS

Connect with us

Connect with us

Stay up-to-date on the latest news and product updates from CorkSport.

* indicates required

The Rear End Drivetrain – Mazdaspeed 3 AWD Swap ( Part 5)

Welcome to part 5 of the Mazdaspeed3 AWD Swap (sorry for the delay; things got really busy for a bit)! This blog covers the rear-end drivetrain and the huge modification that makes it all work.  

There are a lot of images and explanations of those images so you can see and understand the differences between the Mazdaspeed 6 and CX7 rear drivetrain.    

What is the Rear Differential

Jumping right into it, let’s identify what the rear differential is. The rear differential transfers power from the transfer case via a PTO/driveshaft, through the ring and pinion, out to the axles, and then to the wheels and tires.

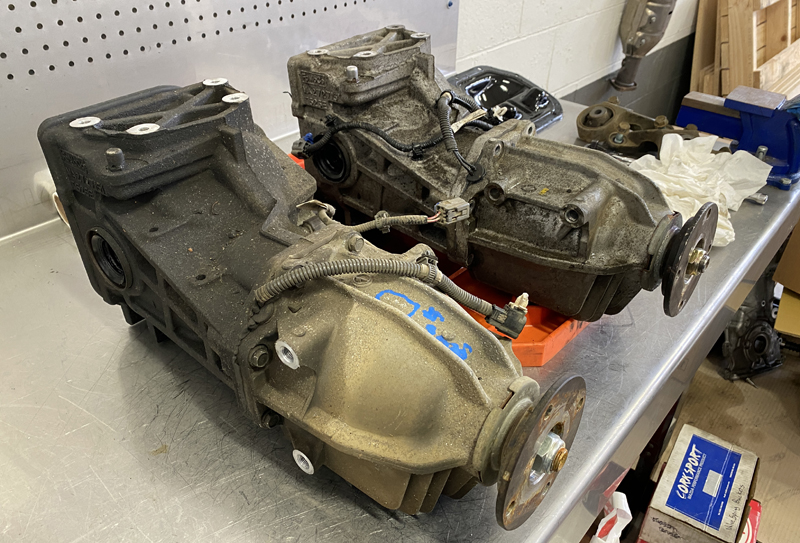
Mazdaspeed 3 AWD Rear Differential Swap Comparison Mazdaspeed vs CX7
CX-7 vs Mazdaspeed Differential Comparison

However, as with many modern AWD systems in compact cars, there is a clutch mechanism between the PTO/driveshaft and the differential. This clutch mechanism controls the percentage of engine torque transferred to the rear tires.

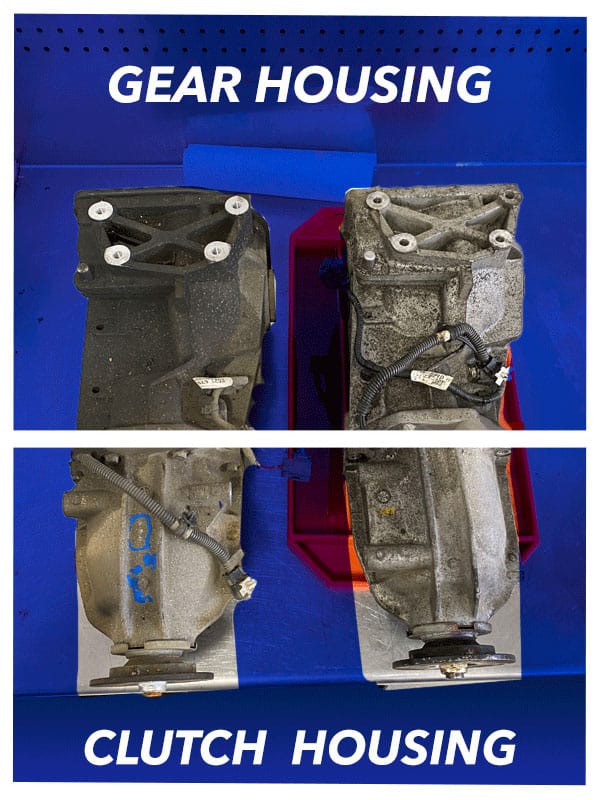
In the diagram below, we’ve identified the two major sections of the differential assembly. The line demonstrates the connection point between the two sections. The rear section is the gear housing, and the front is the clutch housing.

Differential Gear Housing and clutch housing diagram

Now that you understand the differential assembly. Let’s identify the difference between Mazdaspeed 6 and CX7. There are two major differences.

Differences In Differential

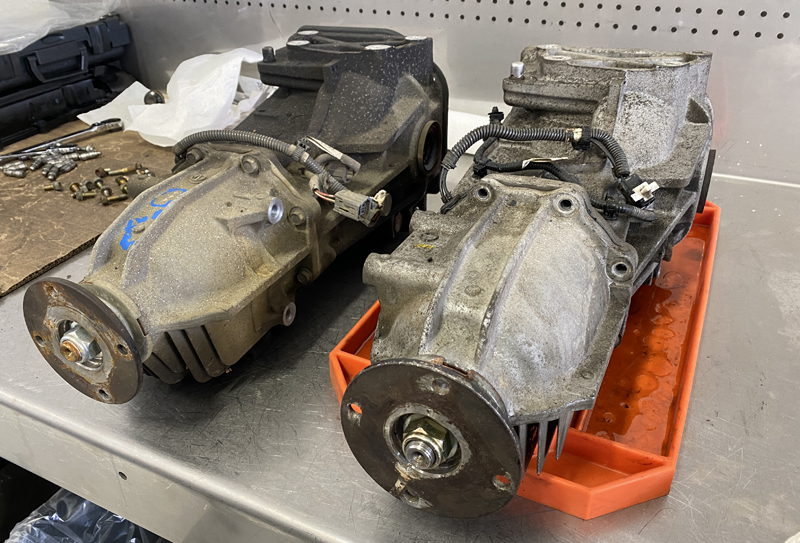
The first difference is the clutch housing mounting points for the front subframe mounting brackets. In the image below, you will see two mounting points with threaded holes on the right side of the differential, while the other differential does not have those mounting points.

The CX7 differential is on the left, and the Speed 6 is on the right. The CX7 on the left)has TWO front mounting points whereas, the Speed 6 only has a ONE mount. While this may not be a big deal for a daily driver with modest power levels, it’s a huge advantage for a racecar with nearly 900whp.  

Comparison of CX7 and Mazdaspeed 6 differential side by side
Left to Right: CX-7 and Mazdaspeed Differential

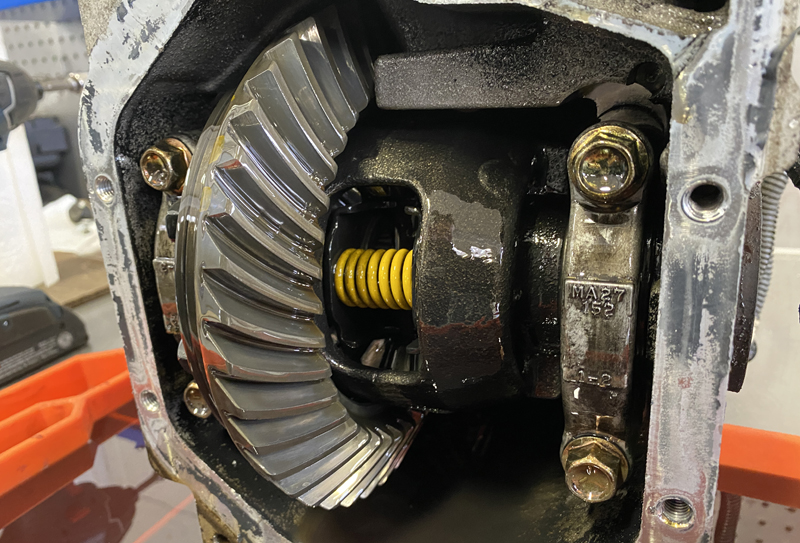
Moving to the inside of the gear housings, the CX7 uses an open differential setup, vs the Mazdaspeed 6, uses a Mazda proprietary LSD (limited slip differential). The LSD is more desirable because it will provide better power distribution to both rear tires vs the open differential.

Fun Fact: the Mazda-developed LSD uses “friction cone washers” sandwiched between the spider gears and differential carrier housing to create the limited slip effect. As load is applied through the spider gears, the increased load presses the spider gears against the friction washer, which makes this a very street-friendly and progressive type of LSD. Check it out below. 

Mazdaspeed limited slip differential

So here we are at a point where we need to use the CX7 differential because it has the ideal two-mounting front section, and we have a CX7 subframe, so…duh, but we want the rear LSD for better power distribution.

Time to split these differentials in half and see if we can swap things around. 

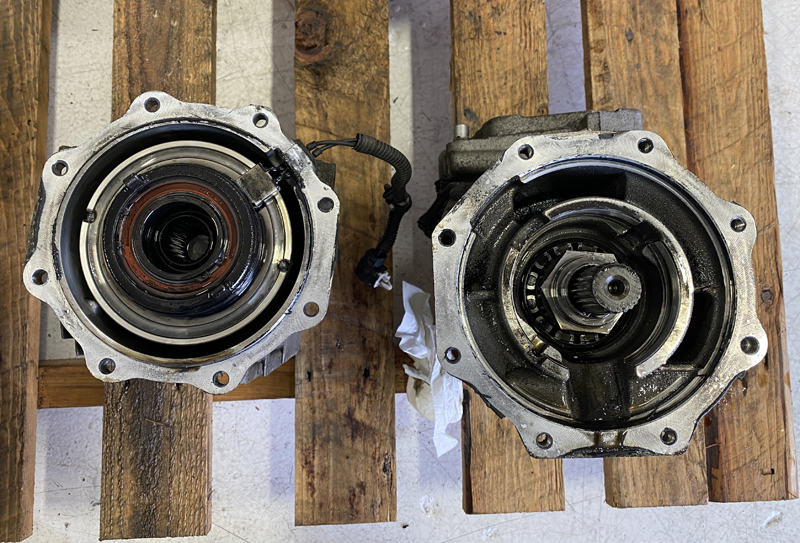
Mazdaspeed 3 AWD Differential Swap separated
Rear Differential Separated

Splitting them in half to separate the clutch housing and gear housing, we can see a splined connection that interlocks the two halves.

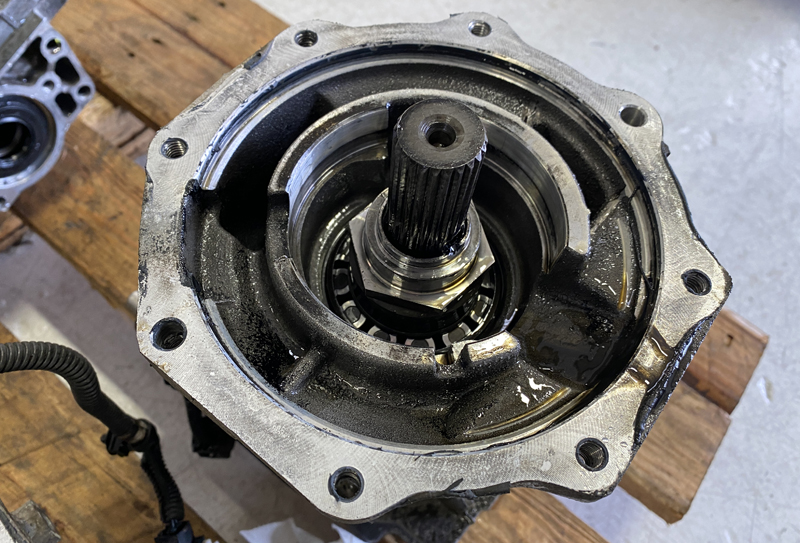
Mazdaspeed 6 Rear Differential Gear Housing

On the gear housing side, the pinion gears are retained by an internal nut, which is good because splitting the assemblies did not affect the pre-load on the bearings.

Mazdaspeed 6 Rear Differential Clutch Housing

Let’s look at the clutch housing side. The clutch pack is retained by the external nut on the driveshaft flange; again, splitting the assemblies did not affect any bearing pre-load.

Things are looking great!  And with that, we assembled the CX7 clutch housings with the Speed6 gear housings without issues!  

Now to review: if you are doing this swap, you will NEED a CX7 rear differential assembly, but you DO NOT NEED a speed6 rear differential assembly. We only did that to learn and to get the LSD. You can use the CX7 as is because the gear ratio is the same, and the LSD is not required. 

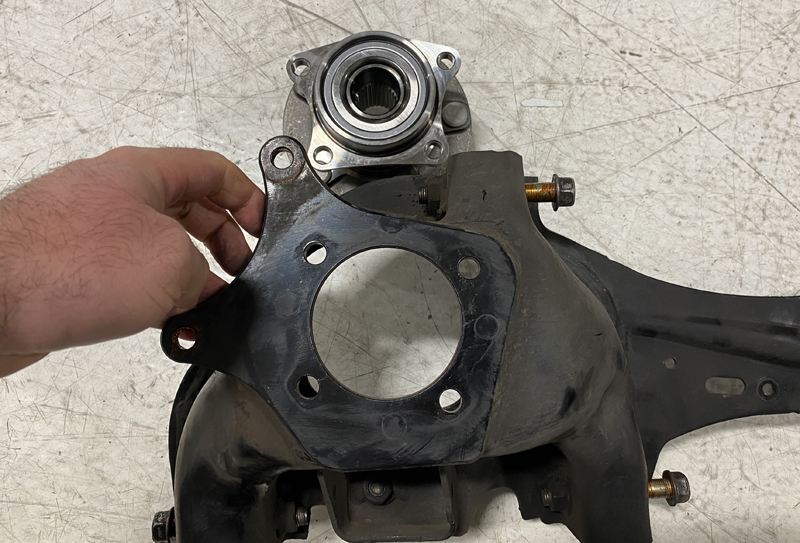
Next up are the suspension trailing arms; when using the OEM Speed3 suspension, the trailing arms need to be modified to use the OEM CX7 wheel bearings.

Modifying the Trail Arms of the Mazdaspeed

Mazdaspeed 3 trailing arm plate
Mazdaspeed 3 Trailing Arm Plate

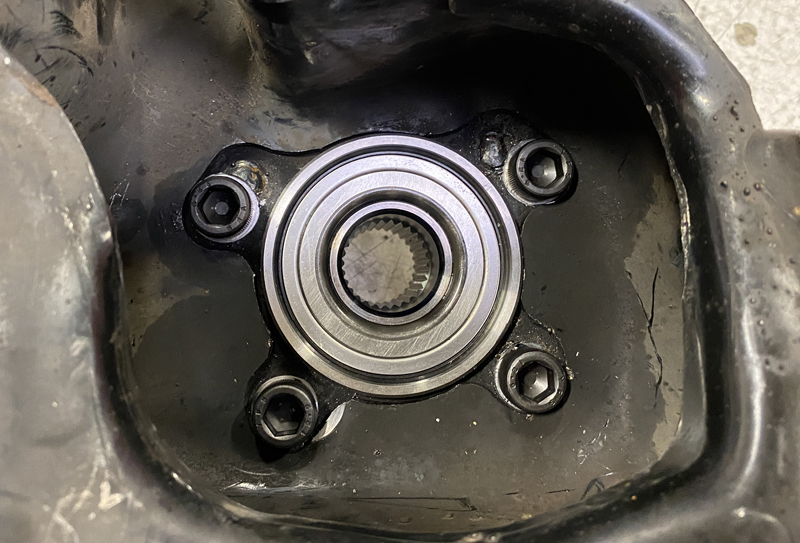
The OEM trailing arm has a beefy steel plate welded to the stamped steel structure. While the bolt and center holes look correct, they are slightly different in bore and location.

Mazdaspeed 3 trailing arm showing fitment
Mazdaspeed Trailing Arm

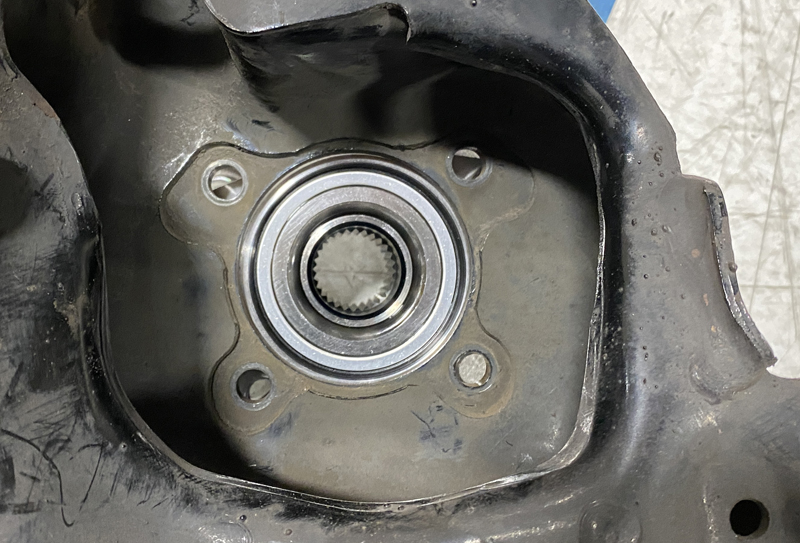
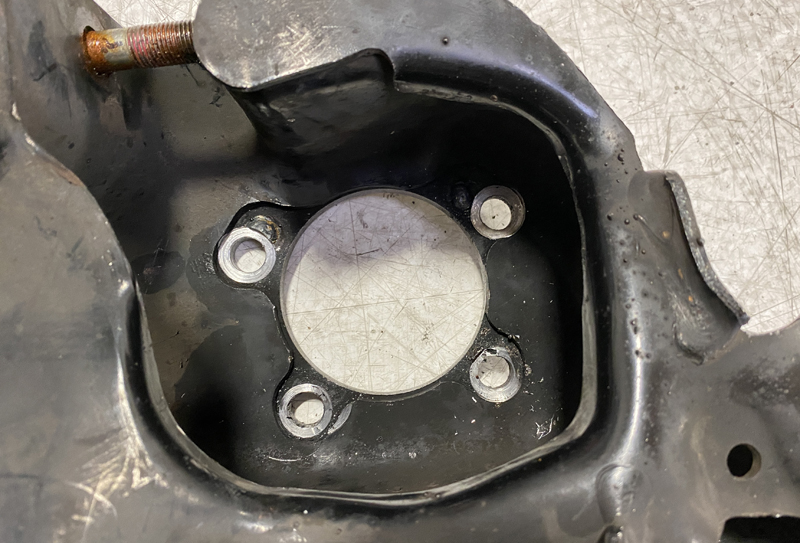
To make the Mazdaspeed 3 trailing arm work, modification was needed via welding the original bolt holes shut and then redrilling the holes in the correct bolt pattern for the CX7 wheel bearing.  Along with that, the center bore diameter had to be increased slightly as well.  

New Welded Holes for the Mazdaspeed 
 fitting cx7 bearings
New Welded Holes for the Mazdaspeed
Fitment of the Rear Trailing Arms & CX7 Wheel Bearing

Modifying the rear trailing arms is only 1 of 3 major fabrication projects needed for the AWD swap.  The others are building a Rear Motor Mount (which I designed a badass billet one for) and the center driveshaft mounting plate which I also designed.  

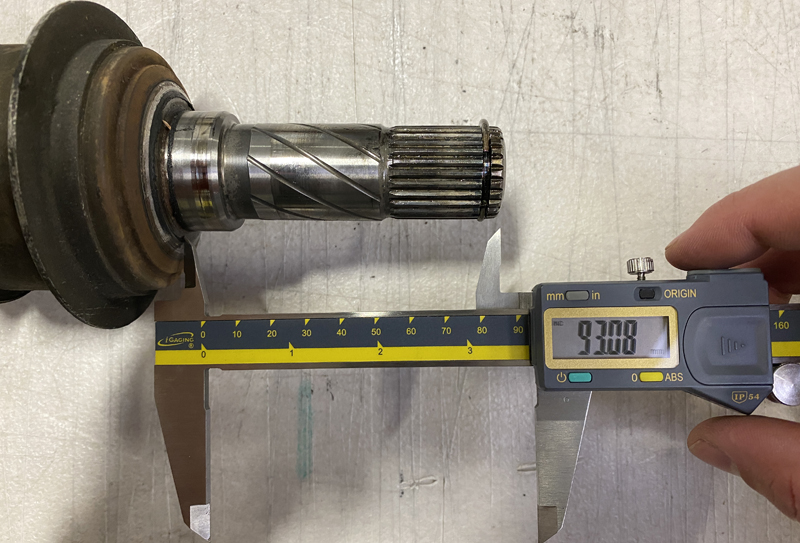
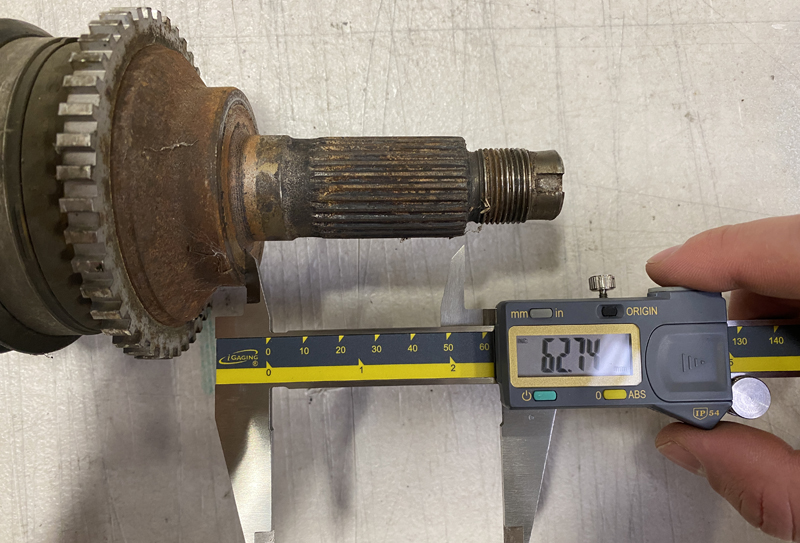
Now, with the trailing arms and wheel bearings in place, we can finally figure out the rear axle lengths. Checking both the Speed 6 and CX7 rear OEM axles, I found they use the same wheel bearing and differential inputs, which is great. However, The lengths are not the same.

Mazdaspeed 6 Differential Spline Length
Mazda CX-7 Differential Spline Length

Unfortunately, in test fitting the Speed 6 and CX7, we found that both needed to be shorter for the Speed 3 application. With that fact, the cost is a lot more expensive for anyone swapping because of the needed custom rear axles.

I was personally going to get custom rear axles either way due to the power levels and use of the Halfmilespeed3, but it’s not a requirement. 

Rear Custom Axles for the Mazdaspeed 3
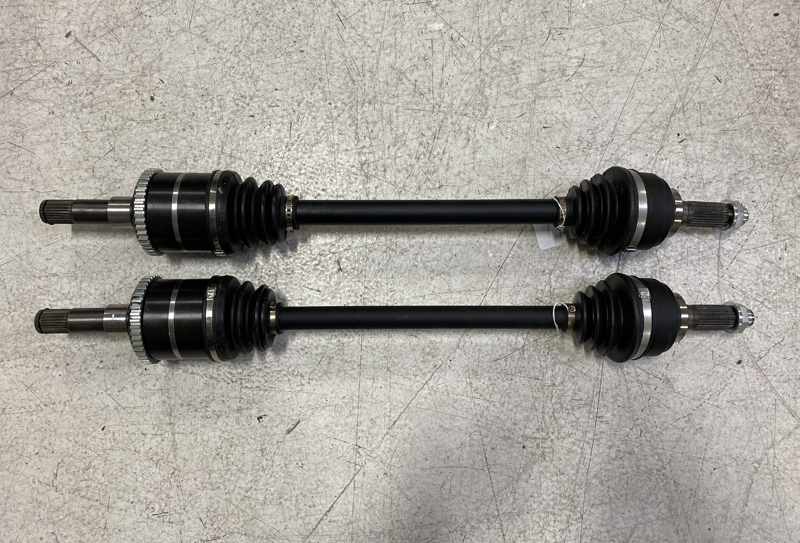
700WHP Rated Custom Rear Axles

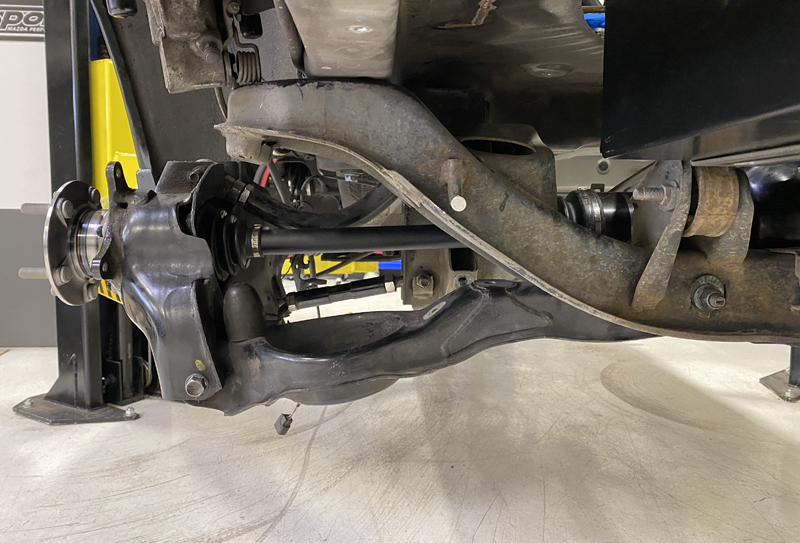
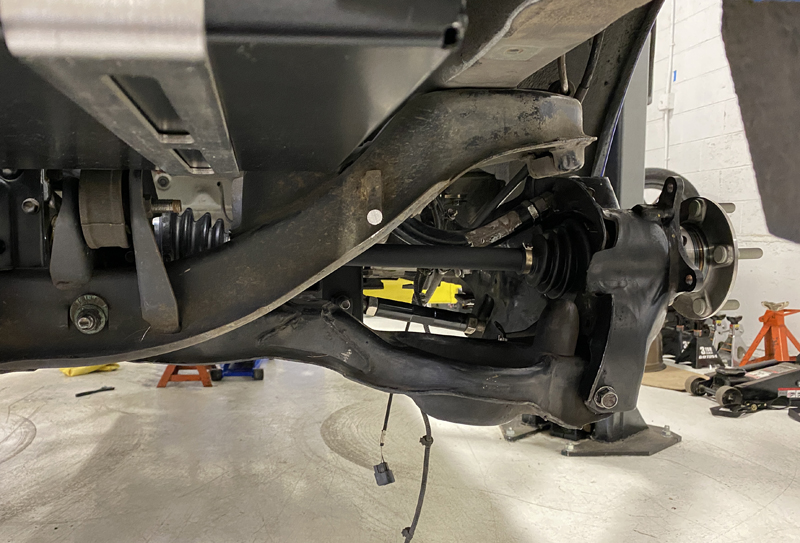
Fast forward many weeks, and we have a set of custom-length 700WHP-rated rear axles to compliment the front DSS 5.9 axles.

Rear Custom Axles installed on the 2007-2009 Mazdaspeed 3
Mazdaspeed 3 Rear Axles installed

All bolted in and looking great!  While doing this I learned a few things and realized that one of my assumptions was wrong. 

  1. The front axles work and don’t work from the MS3.  The driver front MS3 axles will interface perfectly with the Mazdaspeed6 transmission.  However, the inboard CV housing/spline section for the passenger side front will need to be replaced/modified to work with the speed6 intermediate shaft.  
  2. The rear ABS sensor for the Mazdaspeed3 will not work with a Speed6-style ABS trigger wheel. They use a much different and more modern magnetic trigger wheel incorporated in the rear ABS sensor for the Mazdaspeed3 will not work with a Speed6-style ABS trigger wheel. They use a much different and more modern magnetic trigger wheel incorporated inside the wheel bearings…which we don’t have when using the CX7 wheel bearings. This has led me to develop custom ABS trigger wheels to work with the OEM Mazdaspeed 3 sensor. More on that later.

Alright, that wraps up the rear drivetrain setup.  There are plenty more huge milestones to overcome, which are coming up in this multi-part blog series! 

I hope you are enjoying this series about the Mazdaspeed 3 AWD Swap. Stay tuned for more blogs to come!

You can also find updates on my IG @halfmilespeed3, the CorkSport 7th Gear Membership, and on mazdaspeeds.org.

Thanks for tuning in!

-Barett @ CS

Connect with us

You may also like

Stay up-to-date on the latest news and product updates from CorkSport.

* indicates required

2010 MS3 – Best Way to Get 40+ HP

Your Mazda breathes just like you do. Maximizing the intake of air for your Mazdaspeed and freeing up the expulsion of used gasses (exhaust) will help your vehicle breath better, and go faster.

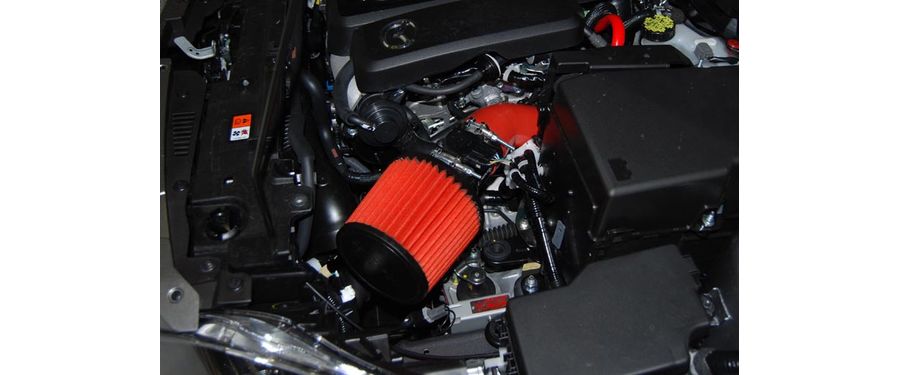
On the intake side of things, you can set yourself up with a Stage II Power Series Short Ram Intake which includes our mandrel bent turbo inlet pipe, custom designed MAF housing, and silicone coupler. This will free-up flow into the stock turbo and allow your Mazdaspeed to breath deeper. The average gains seen here are 10-15 hp.

For exhaling, you want your Mazdaspeed3 to expel all those used gasses as quick as possible. With the CorkSport turbo-back exhaust, you are reducing the back-pressure and allowing your Mazdaspeed to utilize the potential of its turbo. The kit comes with CorkSport’s full 80mm catback dual exhaust, racepipe, and downpipe. This setup will give the average MS3 owner 28-31 hp at the wheels.

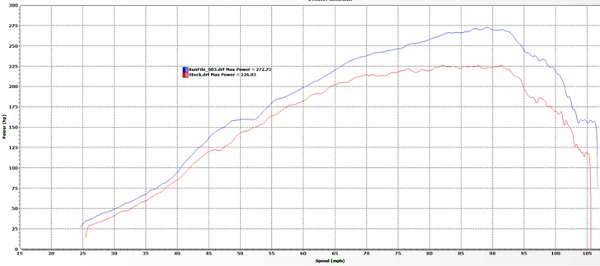
Shown below is our 2010 Mazdaspeed 3 with the CorkSport Short Ram Intake & Turbo-back exhaust and stock turbo, compared to the same Mazdaspeed3 completely stock. The before number is 226 hp and came out to 272 with the SRI and Turbo-back exhaust. That is a 46 hp increase to the wheels with two products.


For those of you on more of a budget, may I suggest just the Short Ram Intake and racepipe? For this smaller investment, you can get an increase of wheel hp in upper 20’s to lower 30’s.

Safely Upgrade Your Mazdaspeed Turbo

It doesn’t take long for those building power to use up the stock Mazdaspeed K04 turbo. They are prone to fail, especially when you start shoving that extra air through it. A common question is, “My Mazdaspeed is smoking, is my turbo bad?”

First things first. There is a BIG difference between replacing a bad turbo and upgrading Mazdaspeed K04 to a more efficient one for more power. If you want to replace it, go with OEM and just plug and play, you’re good to go, wash your hands, and get on with your life. This will have your car up and running pretty quickly. However, your maximum power output will be limited and you will eventually have the same problem – the Mazdaspeed KO4 turbo will fail.

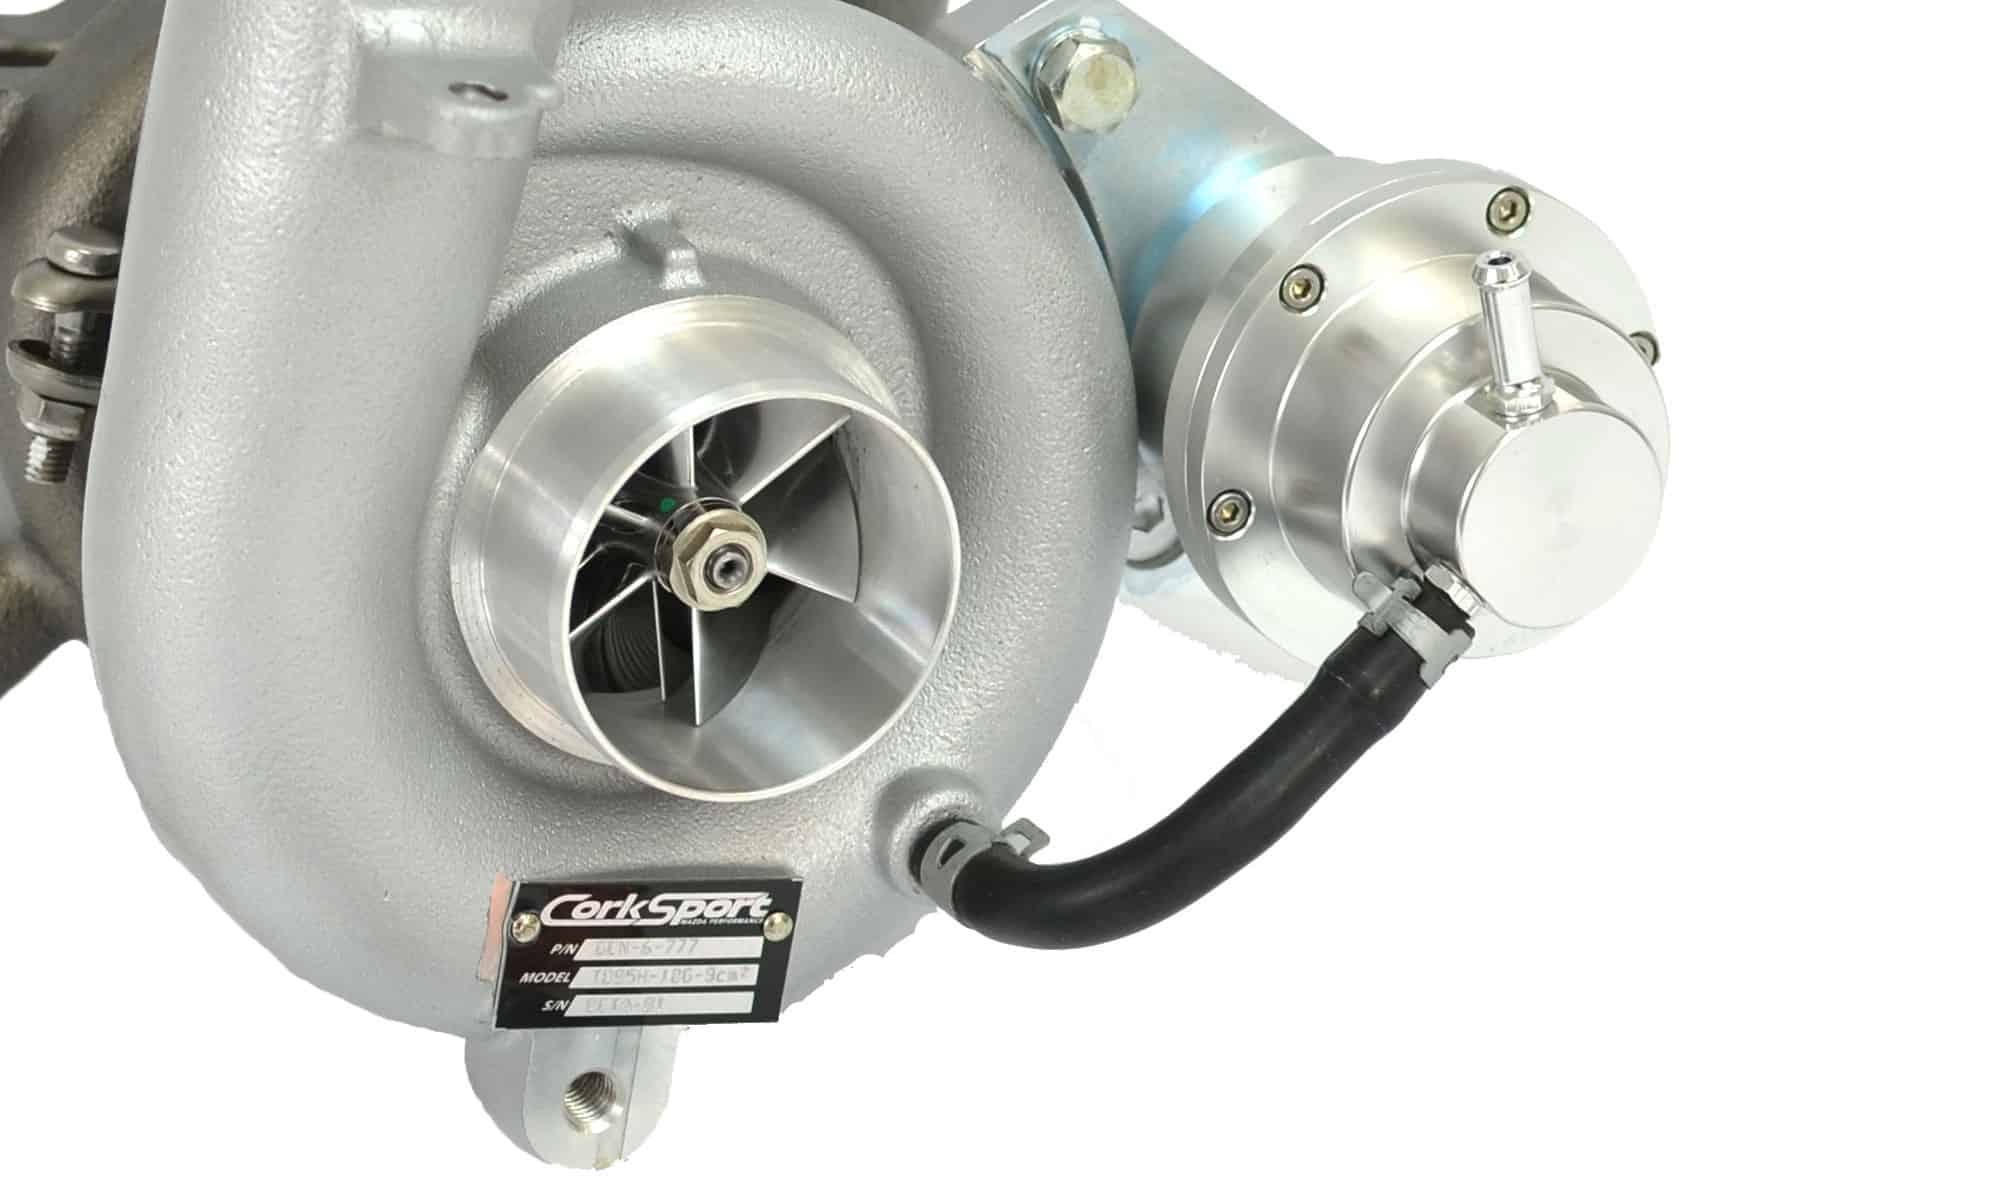
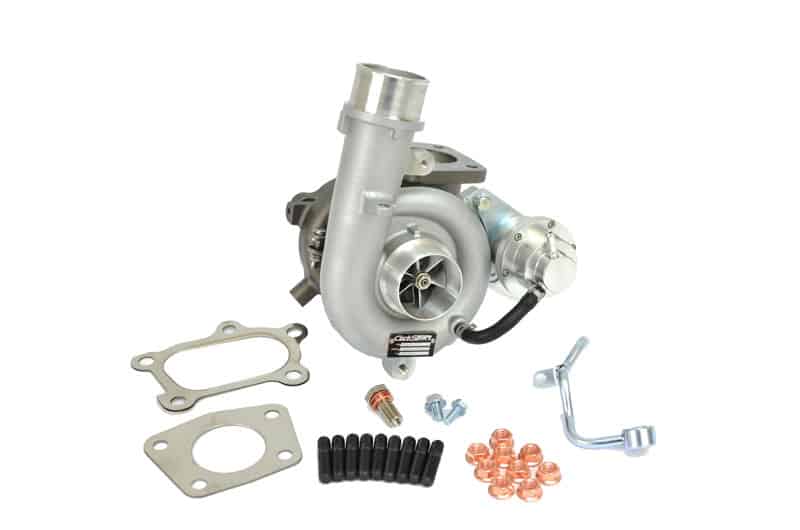
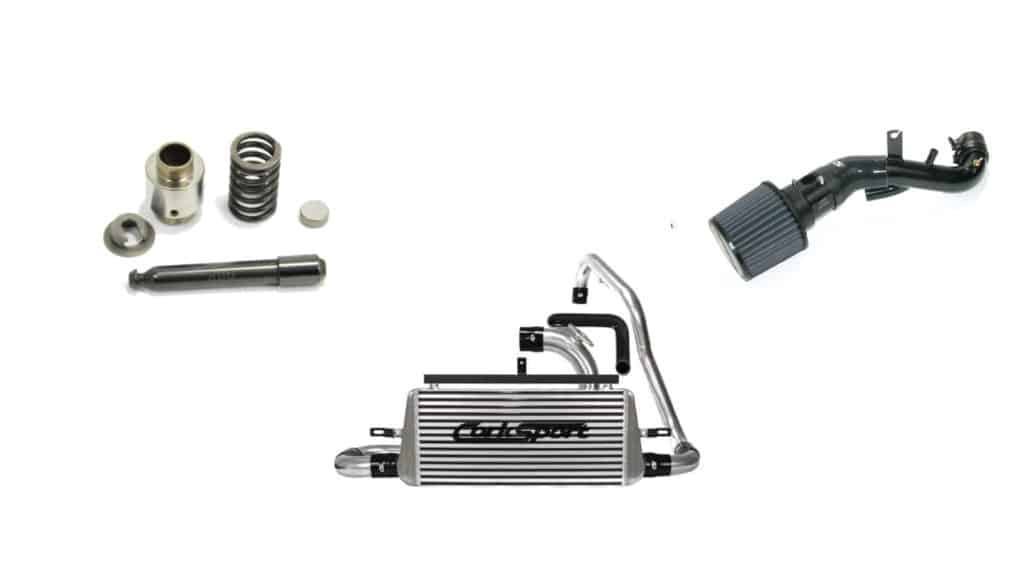
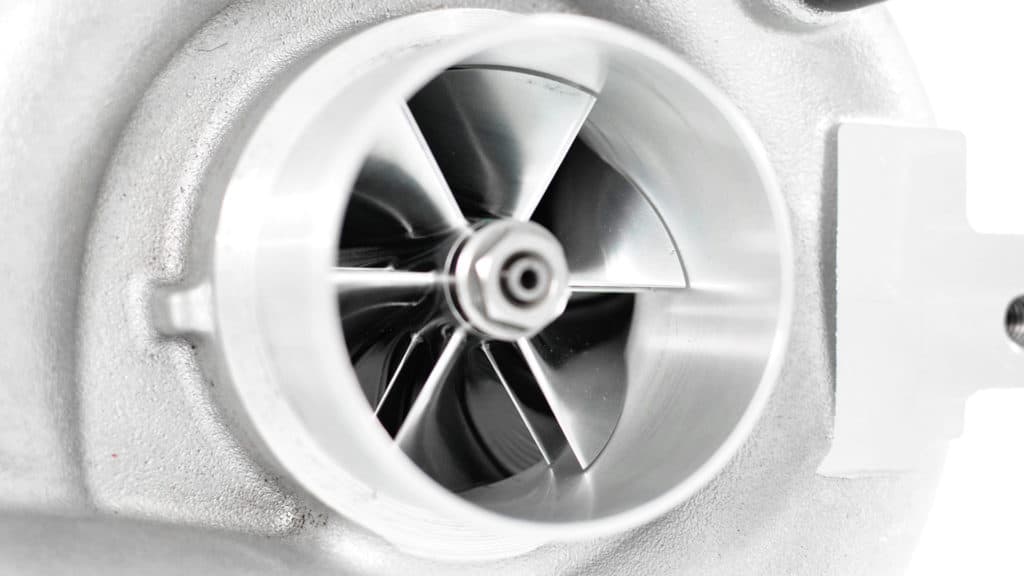
If you are saying to yourself, “It’s time to upgrade the K04 Turbo…I NEED more power in my life!” Then this blog is for you. Below, we lay out the basics needed to successfully install a CorkSport Mazdaspeed Turbo, highlighting the required supporting modifications to keep your Mazdaspeed safe. As a bonus, we keep our installation instructions on each of our product pages, so you can preview how easy the installation will be for your experience level.

Mazdaspeed Turbo Upgrade for the K04 BNR

Here it is, the list is comprised of the BARE essentials to run the 18G CorkSport turbo.

HPFP INTERNALS

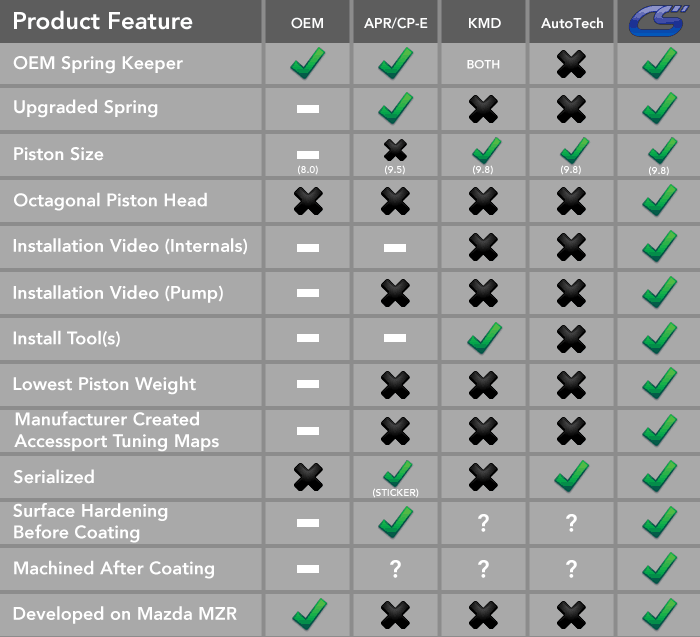
Giving you 50% more efficiency with your fueling system, as well as, a strong base to build power for your Mazdaspeed. The CorkSport Max Flow Fuel Pump Internals are built to directly replace your stock fuel pump internals and perform with immediate improvements.

CorkSport fuel pump vs. competitors

ACCESSPORT (or VERSATUNE if you have a CX-7)

The Cobb Accessport will give you the basis for tuning, and since this is required with the CorkSport turbo – you’ll want to make sure you have this in hand and ready for when you install your turbo.

These are the basic foundations of our Mazdaspeeds, without these two items you cannot operate your Mazda after installing an upgraded turbo.  You will need your Mazdaspeed tuned, and your tuner is going to say the same thing.

That’s it, that’s all you need to run the CorkSport Mazdaspeed turbo safely. With this proper foundation, you can put yourself in a position for efficiency, or more power.

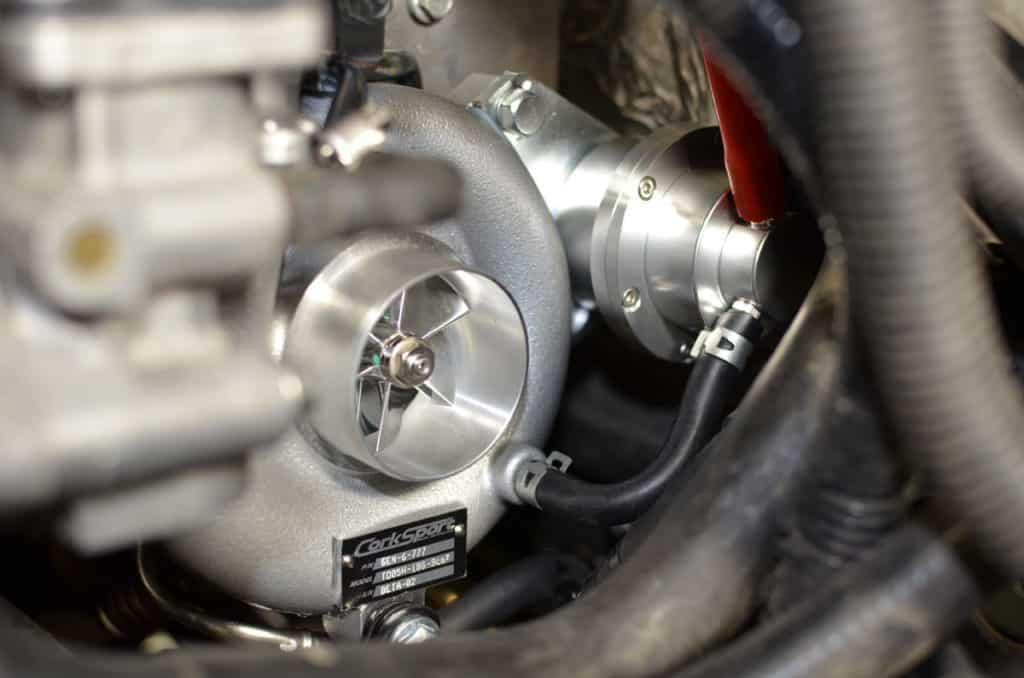
Mazdaspeed turbo upgarde and installed on a Mazdaspeed 3

Now the question is do you want to make it go fast and harness the power that this turbo is built for? Keep reading and we’ll provide some other awesome upgrades that are the next step once you have your turbo installed and running.  Oh, and if you are looking for a proven path to make 400WHP, check out our Chasing 400 WHP Blog here!

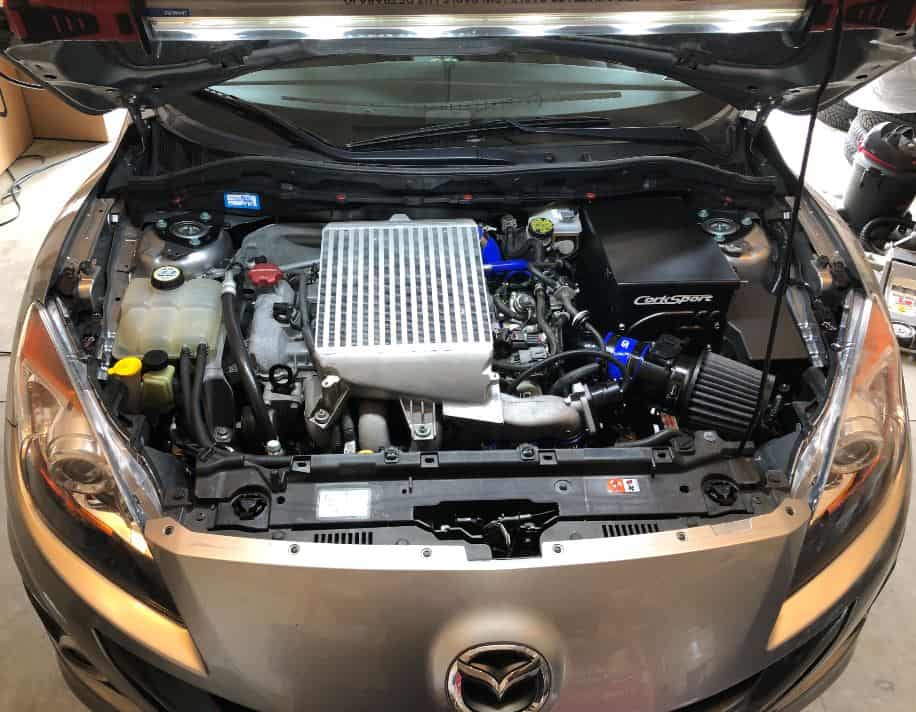
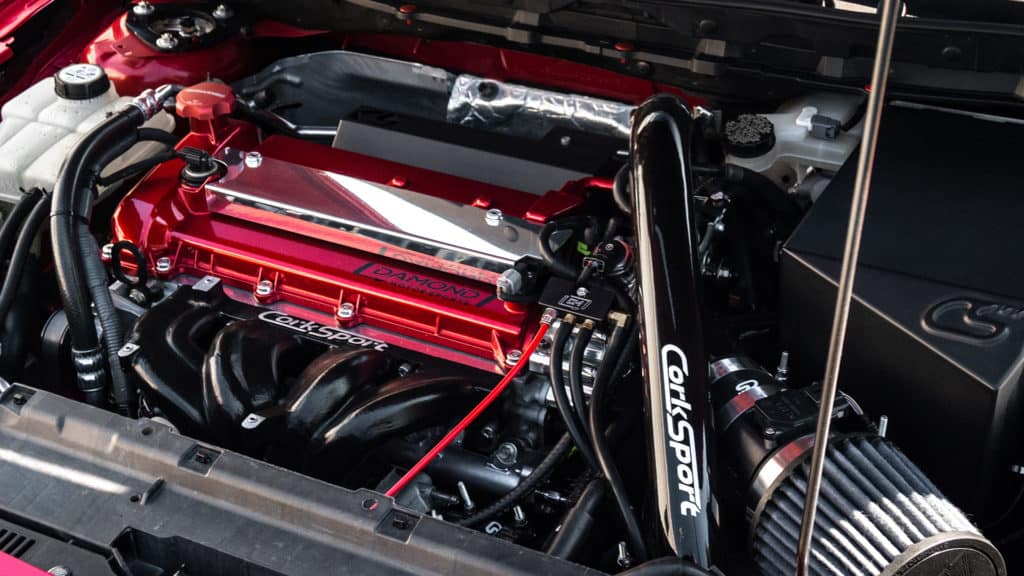
2013 Mazdaspeed 3 Engine bay with TMIC, SRI and Turbo inlet pipe, CST4

CorkSport Upgraded 3.5” Intake

The CorkSport turbo is rated for up to 450WHP with the right set up. Unless you are going for the MOON and shooting for over 700WHP a 3.5” intake will be more than sufficient for this turbo. Giving you some extra airflow to increase your power range, and harness what your Mazdaspeed3 is capable of. Note: Will require additional tuning!

Mazdaspeed 3 Turbo Back Exhaust

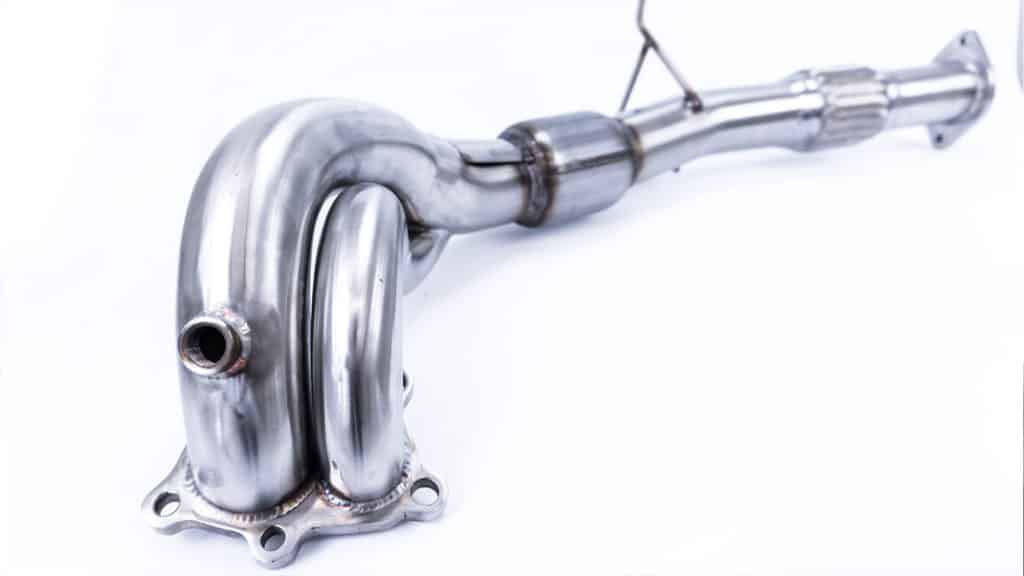
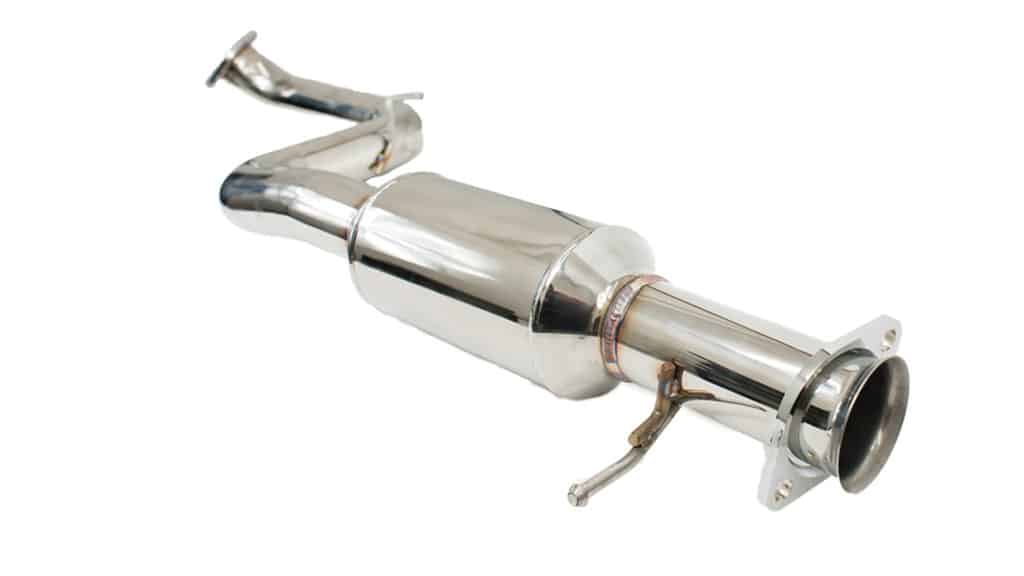
CorkSport Mazdaspeed Downpipe

Doesn’t matter if you go with a high-flow catalyst or opt-in for one without, the choice is yours. However, if you want to utilize its flow you are going to have to upgrade to a bigger diameter. Our 80mm one does really well, plus it sounds GREAT.  Note: Will require additional tuning!

The CorkSport Cat Back Exhaust System gives your new 2016 Miata the power it needs without the annoying drone.

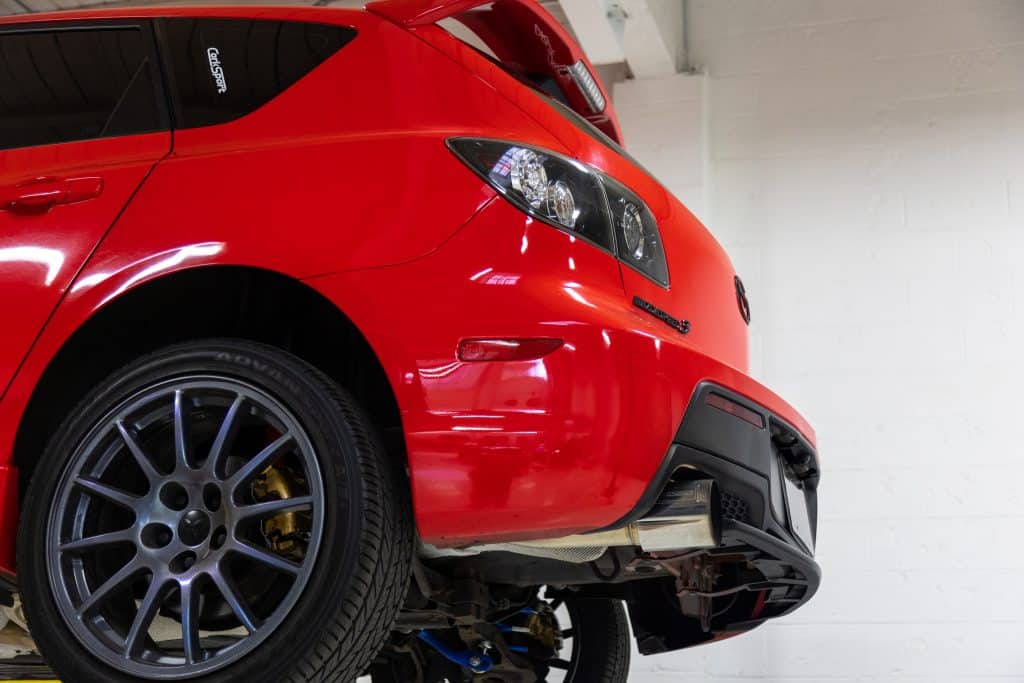
CorkSport Cat-Back Exhaust

It’s no secret that car engines are just big air pumps, the faster you can shove air into the engine and how fast you can expel it efficiently is what it takes to make more power. No need to run the stock 63.5mm exhaust when you can run our 80mm (like to wake up the neighbors every morning, go with our non-resonated, you can’t beat the cold start)

Top Mount intercooler or the Mazdaspeed

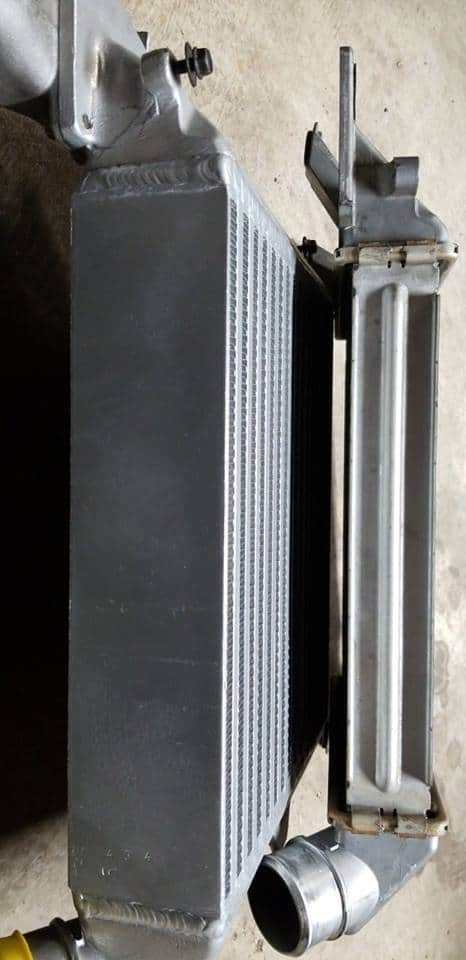
CorkSport Top Mount Intercooler

If your power goal is 450whp or less you can get away with just upgrading your TMIC and be on your way and they look great in your engine bay.  Note: Will require additional tuning!

If you have the 2nd gen you can really utilize that hood scoop from the factory.  Not only that but you can even see a noticeable performance gain with our larger hood scoop and a TMIC set up.

When it comes to your Mazdaspeed we know you want to create safe power and harness the true potential of your ride. Be sure to build upon the proper foundation and head in the right direction for your build. Our techs are available for any questions you have and are ready to assist with planning your Mazdaspeed build path! Any questions – give us a call directly – (360)260-2675, email to sales@corksport.com or leave a comment and we’ll get back to you!

Connect with us

You may also like

Stay up-to-date on the latest news and product updates from CorkSport.

* indicates required

Tuning – What Are Your Options

Pretty much since I joined this platform, I’ve noticed a pattern of people asking the same questions about tuning their Mazdaspeed. There is a lot of information out there, but it’s not always consolidated or easy to find. So, in an effort to assist newcomers, this will be a write up explaining the ins and outs of tuning; when you need it, OTS vs. Pro Tunes, and how you can proceed.

*There are other options for tuning the vehicle besides the Cobb
Accessport, such as Versa Tuner. But, for the ease of explanation throughout this blog, I will be referencing the AP*

What Is Tuning & Why Do You Need It?

Mazdaspeed 3 Engine with Front intake, SRI, batter box, heat shield

Without getting too elaborate for this specific blog, “Tuning” is just the remapping of the tables in the ECU from OE specs to something different. It is a key aspect of your car’s engine health and the easiest way to make more HP. You can even tune a bone stock car and will typically see gains, especially when they are boosted from the factory. Bolt-on parts free up even more headroom in airflow, and when tuned accordingly you make even more power. The relationship between bolt-on parts and a tune is a beautiful thing, and hopefully, by the end of this blog, you will understand how they work together.

“So when should I get a tune?”

I’m so very glad you asked that! Well, let’s look at it like this… Mazda spent a long time getting their factory tune for the Speed 3 as good as possible. But they dialed it in around one set up, and one set up ONLY. That’s 100% OEM parts. In this form, the ECU knows what to expect, how everything should respond, and most importantly when something is wrong. It doesn’t have a mind of its own though, it only knows what it’s been told. So, if other parts in the system are replaced, and the ECU isn’t told how to react to that, things start to get a little weird.

CorkSport High Pressure fuel pump internals, short ram intake with turbo inlet pipe, and front mount intercooler

The ECU has an ability to adjust itself within reason for variations in fuel, oxygen content, etc. But in a perfect world, it shouldn’t have to adjust itself at all. Tuning for the mods you do will not only let you have more fun, but it will get it as close to this perfect world as possible.

Minor things like an intake upgrade (Retaining stock MAF) BPV, or Catback usually won’t throw off the ECU enough to cause problems or CEL’s but it’s obviously not ideal. That being said, its best to get an Acessport or another means of tuning your Mazdaspeed prior to putting on bolt-on parts.

Mazdaspeed Exhaust system

So here is a basic FAQ

“I want to add a turbo back exhaust, but I don’t want to get an AP and tune the car. Can I do that?”
– No, you are not able to do this for two reasons.

  • Deleting the factory cats opens a huge restriction. Without a tune, the car will risk overboosting.
  • Without high-pressure fuel pump internals you also risk running lean and blowing the engine. Even if you have the internals with no tune, the drivability of the car can suffer because of how it affects the turbo.

“Can I get an intake with no tune?”

If its factory size, then you can usually get away with it. The turbo isn’t trying to make more boost, and the MAF housing should be accurate to the OE. If it’s a larger one like our 3” or 3.5” then no, you cannot.

However, I always recommend tuning the car.

“Can I get a catback with no tune?”

Yes, you will be OK, the catback is not monitored by any sensors, and you’re not deleting any cats.

“Can I change my intercooler without a tune or fuel pump internals

You should not. Just like the cats on the downpipe, the factory intercooler is a restriction. The ECU currently is tuned to fight this restriction to make a specific boost level at a specific RPM. If you remove this restriction, and you don’t tell the ECU, you risk over boosting. Over boosting mixed with no fuel pump internals can be a risky combo for running lean as well.  

“Can I upgrade my turbo without tuning the car?”

  • Definitely not, any turbo that moves more air than the factory one automatically needs a tune. The ECU is tuned to coincide with the factory compressor map. If you don’t want to tune for a turbo, make sure you get a factory replacement. These are just some of the common questions we get, but if you have more specific scenarios you can always email or call us! On to the next section.

OTS maps vs a Pro-Tune

I remember when I first got my hands on an Accessport. Trying to make sure I selected the right map and learning how to read all the parameters. I know a lot of newbies that are just getting an AP probably are asking themselves which OTS tune is the right one to use, and when should they get a Pro-Tune and how.

It’s no news to anyone that’s been in the community for a minute that the Cobb OTS maps are not the best Long-Term Solution. The reason for this is because they are:

(A) Very conservative, and not letting you get the full potential you can.
(B) Meant for a large population of cars, and aren’t really dialed in. Essentially, they are just rough around the edges.

However, OTS maps do serve a purpose. For someone who is planning on doing their basic bolt-ons in stages over the course of a few months then it works out well. These maps can be viewed as basic stepping stones “Stage 1, Stage 1+, Stage 2, Stage 3, Etc” that allow you to put on your first bolt-ons and flash the corresponding tune. So, as you are putting on your fuel pump internals, intake, downpipe, Intercooler, you can flash those readily available maps.


In a nutshell, the OTS Maps work great during the transitional phase of your modding Journey. But, once you know you are done with your bolt-ons for a bit, that’s when you want a map that is 100% dialed in, and specific for YOUR car. The difference between a custom tune and the Cobb OTS maps are truly astonishing, and you’ll see once you’re there.

Something to also note….

If your K04 ‘Sploded and you are looking at a larger turbo, an OTS is no longer an option, it’s off the table. Cobb made those OTS maps solely for a factory turbo’d Mazdaspeed. If you buy a bigger turbo like ours, a Pro-Tune is needed (along with fuel pump internals)

“Don’t I have to get the car on a dyno in order to get a Pro-Tune? There’s no Mazdaspeed tuners in my city!!!!”

If you’re not one of the lucky ones that live by a Mazdaspeed tuner, then fear not. The days of having to get it on the dyno to get a tune or over. With the Accessport, Maps are sent/downloaded over email.

To Start the process, you need to:

  1. Buy the tune
  2. Give them your full engine Mod List
  3. The tuner will instruct you on taking your Data Logs
  4. Over the course of a few weeks, you will go back and forth with new tune revisions and the car usually gets smoother and faster with each revision.

By the end of this process, you will have a dialed-in tune and a smooth-running car. But, please note that if you add another part to the car or change parts. You may need to get a revision tune done to account for the new mod. Talk to your tuner about this and get their thoughts.

Mazdaspeed K04 Turbo Upgrade

Recap

I hope that this helped some of you to better understand the processes you should take, and to wrap it up we will hit some of my main points.

  1. The first mods you should get for your Mazdaspeed if you plan to mod it is the upgraded fuel pump internals and an Accessport
  2. If you just want to run an SRI and a catback, you can get away with it, but a tune is Recommended.
  3. You should NOT run a downpipe without HPFPs or a tune.
  4. OTS maps are great during a transitional time with your car while bolting on parts. After this, you should get a Pro-Tune
  5. You shouldn’t run a larger turbo on the stock map or on an OTS map. Communicate with a tuner before the installation and have a new base map ready. We have both a 3.5 Bar MAP Sensor and 4.5 Map Sensor.
  6. Pro-tuners can tune you, even when they aren’t local.

To conclude this blog, it’s important to know how critical the proper tune on the car can be. It can make or break the engine, literally.

If any of you still have questions, you can always give us a call, and remember to have fun as you begin your journey down the path to making power, and giving WRX’s the L.


Happy Boosting,
Brett@CS

Connect with us