After spending some time with a number of Motorsports Marketing minds at the SEMA show last month, we have been contemplating starting a CorkSport Contingency Program to help sponsor successful enthusiasts who are out there campaigning their cars in activities such as AutoCross, Drag Racing, Rally Cross, etc. The program would work similar to other contingency programs with decal placement requirements, sign up in advance and a schedule for contingency awards based on being enrolled in the program and achieving a specified goal.
With this in mind, we’re looking for your input. If you’re a racer and would like to see your sport be the initial run for our CorkSport Contingency Program, drop us a line and let us know.
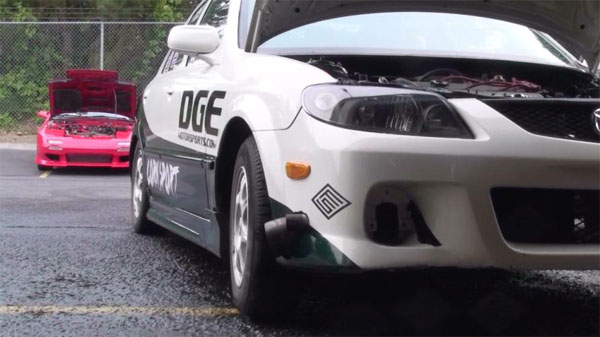
I frequently get calls asking “What should I do with my car?!” and asking what engines a customer can swap in. Engine swaps are a good thing to think about, but there are a wide range of items to consider before you decide on doing a swap. Doing an engine swap can be a simple bolt in to the factory mounts or as sophisticated as having to notch the frame rails, fabricate all of your own mounts, custom axles, and major wiring. There are several things to consider. Will the new engine get you the power you want? Will the engine fit? Will it work with the transmission in your car? Will the swap require different wiring? Has anyone done the swap before? Do you need to pass emissions, and if so will your swap pass emissions?
The first thing to take a look at is whether or not someone has done this swap before. This can help you get the job done quicker and help you avoid hidden problems that someone else has already encountered. The internet makes checking to see if someone has done the job before much easier than in the past. Forums are also another big help, and a great place to look. Not everyone publishes an engine swap but if you can find someone on a forum who has done the job they might indulge you and offer up a few pointers. Let’s look at the big picture: If the engine you are installing requires everything to change, like the engine, transmission, wiring, axle, shifter, etc. there is probably going to be a lot of time and money involved with the swap.
Engine fitment is what you should look at next. If the engine you’re planning to swap won’t work with your transmission, make sure you get the all dimensions of the engine and transmission together. One dimension to remember is the height which often gets overlooked. The engine will move in the engine bay and the last thing you want to do is get the engine installed and then discover your engine hits the hood under acceleration.
If the engine you are mounting is not a bolt in make sure you take a look at how the new engine mounts. Find engine bay pictures online or a car to look at with the engine factory installed. Most manufacturers like Mazda keep similar mounting points. There are exceptions to engine mounting so you need to make sure you address this. If you are installing a different transmission with your engine, look at the mounting for it as well.
Transmission mounting is critical. You need to have the transmission located perfectly to get the axles to line up. Check and see how the new transmission is shifted. Does it use a cable shifter or a rod shifter mechanism? How does the clutch operate if it is a manual transmission, hydraulic or cable type? Are the axles larger in diameter and do they have a different spline count? You might have to consider getting custom axles done if you are not able to find a bolt in part.
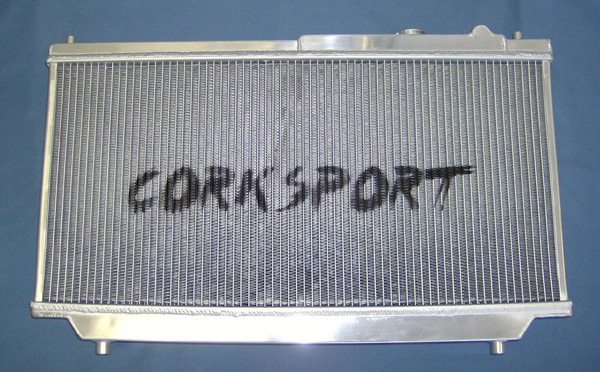
Cooling is also an important item when considering a swap. Do the radiator hoses come close to lining up with your radiator? Does the radiator you have carry enough capacity to cool the new engine? Forced induction engines will generally require larger radiators. If the new engine is turbocharged, make sure you remember that you will need an intercooler and a place to run piping for it.
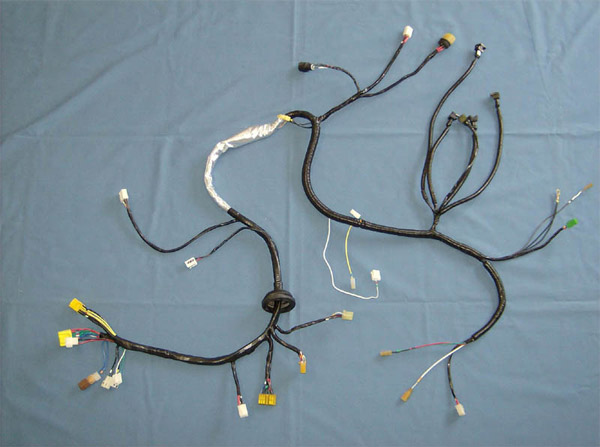
Wiring is the part that scares most people out of doing an engine swap. Most swaps are using engines from newer cars and thus include some extra systems that your car may not have in it. Make sure you have the wiring books for both the cars you are swapping the engine from and to. Engine wiring normally is the most difficult. If you can get the engine wiring that belong to the new engine it will make the job easier. Sensor changes, plug differences, and wiring routing all are important items to look at. A nice side advantage to keeping the newer wire systems is emissions. This can also be a drawback with OBDII systems and the level of complication they can present. Most states will allow you to swap to a newer engine if you keep the emissions controls intact. Make sure you check with your local EPA for emissions info before you do the swap.
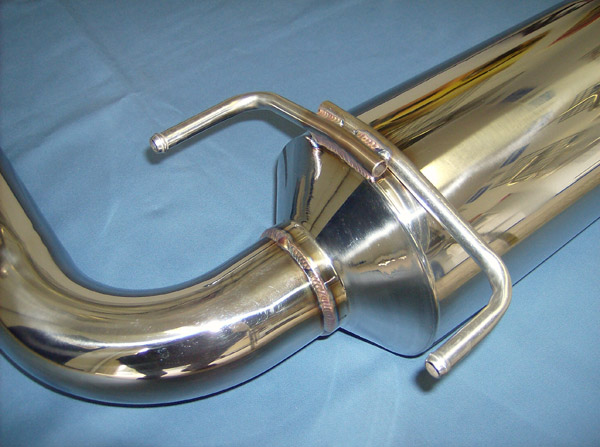
Exhaust is the last thing I will cover. It is normally straight forward to get the exhaust connected up to the existing system on your car, if it is adequate for the new motor. If it is not, look at building or getting a new one built. Make sure to add a catalyst if you are going to be driving your car on the street and required to pass emissions.
To review the swap check list:
Engine fitment
Transmission fitment
Cooling
Wiring
Exhaust
So have I scared you off? The items I have brought up above are all things I have learned from experience doing engine swaps. My goal is to make sure you have everything covered before you start a swap. I have had quite a few calls of people wanting to swap a DISI MZR engine into Proteges, MX-6s, and other cars. I think this will be the next big swap we see once someone takes on the challenge.
We have received a lot of questions regarding the dyno numbers for our products for the 2010 Speed3. So far we’ve only released a Stock vs. (Intake+RacePipe) dyno sheet, and I figured it was time to add some clarity to the questions and comments in a centralized location instead of replying on specific forums and leaving other people in the dark. In the end, our Intake + Racepipe + Downpipe give customers the ability to crank out 51 more horsepower for $687. The key to getting the most out of your car isn’t just to make ample power increases, but to have money left in your wallet to add more options sooner. CorkSport has you covered at a cost of $13.74/hp with a peak gain of 51 Wheel Horsepower and 47 Ft Lb of Torque.
The 2010 Speed3 has a lot of power left on the table, and our product development has really brought that to light. Unfortunately, we stage build everything -starting with an Intake, adding a RacePipe, then the DownPipe…and Dyno and labor hours add cost to parts, so we try our best to get the data we need to validate our products without adding a lot of cost to the parts based on a variety of test iterations and combinations. This blog post details the results of the staged build on our 2010 Speed3. In addition, it makes some details clear about comparing our systems to other options on the market -what’s included in intake and downpipe packages to provide detail to costs vs. gains.
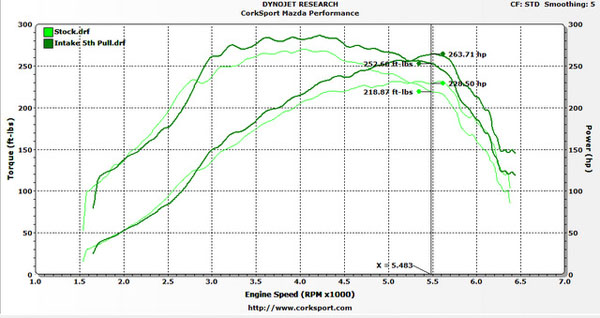
Stock vs. Power Series Intake System
Our $239 intake system includes our aluminum turbo inlet pipe, billet MAF housing and CorkSport Dry Flow Air Filter. Again, this package includes the turbo inlet pipe -it is the only system on the market that is packaged including the inlet pipe -all others are marketed separately. The torque gains were nearly 20ft lbs increase on average. We also saw large sections of torque gain that were up to 33ft lbs of torque. The horsepower gains were equally impressive with the largest differential being a 36whp gain over the stock numbers. Our system works great, we have put a lot of time into the design and validation testing of it and it generates some serious power…at $6.63 per horse at the wheels.
Racepipes and Downpipes…*
The CorkSport TurboBack Exhaust packages are broken into three components: The Downpipe which evacuates exhaust gasses from the turbocharger into the main exhaust system; The Racepipe (available with or without high flow catalytic converter) which replaces the factory secondary restrictive catalytic converter; The CatBack Exhaust System which is comprised of the primary 80mm (3.15″) exhaust pipe and resonators and the dual 80mm tailpipe section. The main component to discuss is the comparison of the CorkSport Downpipe and Racepipe to other Downpipes on the market. A few other Downpipes cost substantially more -due partially to the fact that they include what we sell as a Racepipe. Despite our separate packaging, our pricing is still competitive at $448 for the combined package, and allow our customers to swap in the wide open 80mm Racepipe on track days and retain their factory catalytic converters or choose the Racepipe which features a high flow spun metallic catalytic converter (an additional $200). Whether you choose the Downpipe/Racepipe combination with or without a high flow catalyst, you’ll find our prices aggressively competitive.
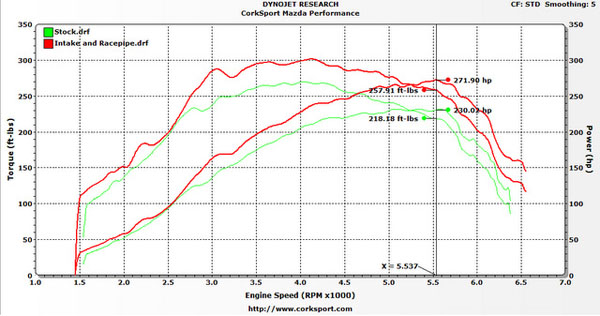
Stock vs. Power Series Intake System + Power Series Stock Fitment Racepipe
This stage adds the Power Series RacePipe to the 2010 Speed3 w/ CorkSport Short Ram Intake & Turbo Inlet Pipe. Power goes up nicely to a combined gain of 41whp and 33ft lb of torque at peak and a blistering 50ft lb of torque at 3000rpm. Where the intake alone dropped low end (1600-2900RPM) torque by a few pound feet relative to stock, the addition of the racepipe puts the entire torque curve higher than that of the stock setup. If you’re running a rally car or just want blistering torque -this is your prime combination.
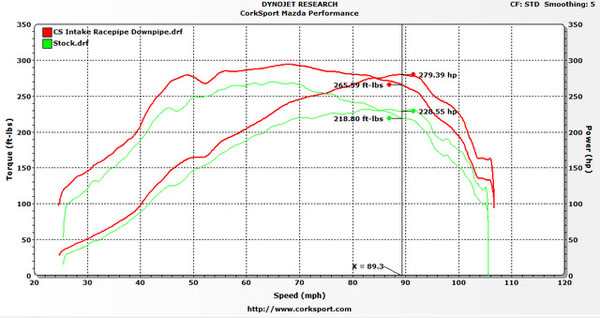
Stock vs. CorkSport Intake + Racepipe + Downpipe
This stage adds the Power Series Downpipe from CorkSport to the 2010 Speed3 w/ Short Ram Intake & Turbo Inlet Pipe. The CorkSport downpipe features a divorced wastegate dump design -providing a separate outlet for wastegate gasses and avoiding disruption of the primary exhaust pathway when the wastegate cracks open to bypass excess exhaust pressure past the turbine wheel. Adding the downpipe to the previously detailed combination of intake and racepipe, power jumps another 10 horse at the cost of a little bit of peak torque, but the low end of the torque curve increases nicely. As a combined package, the CorkSport Intake, Racepipe and Downpipe put down 51 horsepower and 47 pound feet of torque at the wheels. Watch for the release of our downpipe for the 2010 Speed3 in the coming weeks.
* Consult with your local governing body regarding the legality of removal of a factory catalytic converter, whether it is for track or for street use and whether you are using the full race open pipe or a high flow catalyst. High Flow Performance Catalystsare ILLEGAL in the State of California, and will NOT be sold into California.
Staged Dyno Results for 2010 MazdaSpeed3 February 21st, 2018Derrick Ambrose
One common question I hear from customers is, “What should I do with my car?” My reply is normally, “What are you going to do with your car? What are your plans, and what do you want it to do?” Having some idea of the end plan for your car can really help you out when deciding what to purchase. Let’s take a look at the suspension first.
Lowering Springs & Coilovers
Suspension is something that has a wide range of options available for most Mazdas. One of the questions I ask customers “Are you just going to drive this on the street, or will you also take it to the track?” This really gives me a good idea of what to suggest for modifications. The difference between the street and track suspension normally comes down to how stiff the suspension is. Most track suspensions do not work very well on the street because the bumps in the road cause the car to ride really rough because of the higher spring and dampening rates of the shocks and springs. A good street suspension will have a stiffer ride compared to stock but still be reasonably comfortable when driving on public roads.
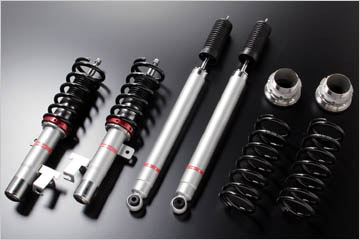
A good track/race suspension will set you back $1500+ depending the on the shocks/springs or coilover options. A good street suspension will run about $1000 or less for springs and shocks. The advantage of coilover suspension is the ability to change ride height, shock dampening, and spring rates. The ride height adjustment is good for lowering the center of gravity on your car. Being able to change the shock dampening allows you to fine-tune the ride of your car. The ability to change the spring rate allows you to make larger changes to how the car performs under cornering. Street strut and spring suspensions are comprised of a lowering spring that matches the original dimensions of the stock spring but with a different compression rate. Most lowering springs sold lower Mazdas from 1-1.5 inches. Upgraded struts also fit the original dimensions but have different valving to change the rebound and compression. This makes the strut either move slower or faster than stock, depending on the application. There are street coilover suspensions available as well from some manufactures like AutoExe.
AutoExe 2010+ Mazda 3 Street Coilovers shown above.
Bushings
Upgraded suspension arm bushings can give you better feedback with less deflection or give, but the trade-off is more vibration into your Mazda due to the increased stiffness. A commonly upgraded bushing is the front control arms. The advantage of the front control arm bushings is less deflection in the bushings making the steering response faster since the bushings have less give. The upgraded bushings also help in launching the car from a standstill by decreasing or eliminating wheel hop. I recommend looking at our tech article on urethane bushings to get more information.
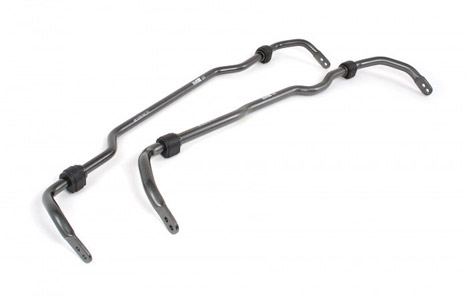
Sway Bars
Sway bars are another option to upgrade in your suspension. The sway bar keeps your car body flatter under cornering but it can also affect the balance of the car. Installation of a larger rear sway bar can create oversteer, which, to simplify things, make the back of the car slide first under hard cornering. This is great for autocross and rally cross where you need very tight rotation of your vehicle to get around cones. On a street car this can be handy but it can also catch you out if you are not experienced enough to know how to counter the change in surprise situations. The last thing you want to do is call a tow truck to pull you out of a ditch when the back end of your car becomes the front end when it slides out.
H&R Swaybars above
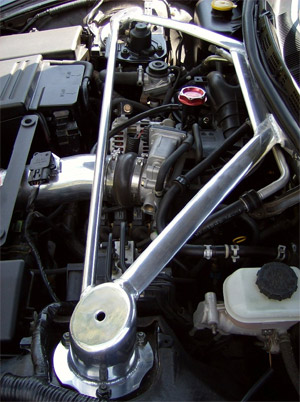
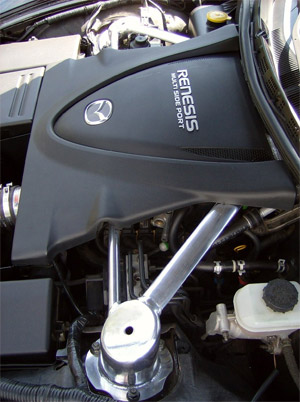
Braces
The last item to bring up is suspension bracing. What the braces do is supplement the vehicle chassis to make it stiffer. You really start to notice the improvements for braces on uneven surface roads or under hard cornering. In open top cars like the Miata/Mx-5 and open trunk hatchbacks like the Protege 5/Mazda 3 the addition of the braces can be noticed in day to day driving due to the additional stiffness in the chassis Check out our tech article on strut tower braces for more specific details
For most street driven cars I recommend a good set of lowering springs and upgraded shocks/struts and move forward from there with braces and swaybars. If you have any questions on suspension feel free to email me at De*****@*******rt.com or give me a call and I can give you specific information for your model of Mazda.
I will cover engine modifications and brake upgrades in future blog posts.
My history as a wrench wielding mechanic in a goon suit is almost exclusively as an enthusiast, and over the years I have spent a lot of time making mistakes using the wrong tool for the job, as well as sourcing reliable tools at the best prices so that I could make otherwise difficult jobs substantially easier.
Because of this, I most certainly do not own a $10,000 6′ tall rollaway SnapOn toolbox. Most of my tools are Craftsman, and a handful of my tools came from the dreaded Harbor Fright. Typo intentional. I figured this week I would take some of what I have learned and pass it on, as well as recommend a few tools that I have found indispensable.
Feel free to discount anything I say or condemn me for being a cheap bastard, but I have managed to get by with a lot of cheap tools and a number of really high end ones where they were necessary.
Where to Buy?
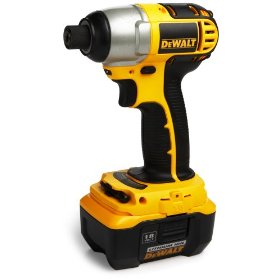
A few things to think about when it comes to purchasing your tools are the level of customer service you can expect when the quality of the tool fails to exceed it’s mission in life; the amount you’re spending for that extra assurance and the risks associated with using a tool for the application in question that is substandard. These questions make my buying decisions simple. If I use a Harbor Freight air saw on a piece of plastic radiator core support and it fails, I do a local warranty return or throw it away, no harm no foul. But if I have to choose a torque wrench or a hand tool that I’m going to be using regularly , I’d be better off going high end based on the job I’m going to expect it to do and the frequency I use it. In the case of the DeWalt pictured below, I know all of the replacement parts are reasonably priced and available online. And, I can talk directly to a DeWalt wholesaler locally to remedy Warranty claims, so Overstock.com might be a perfectly fine place to source that item to save an extra $20-60.
Battery Powered 1/4 or 3/8 Drive Impact Wrench
There are two options here for a small versatile impact system: the 1/4 Hex Drive (like an Allen Wrench but has square drive bits) and the 3/8″ Square Drive (Like a Ratchet). The Square Drive is going to deliver more torque and generally runs off an 18v or higher battery, where as the 1/4″ Hex variety runs 18v maximum for the most part. The benefit of the hex drive is that it runs screwdriver bits and some hex drive drill bits and is a little more versatile…but you pay for that in lack of torque. The Rigid hex drive we use around here will break loose most chassis brace bolts and almost everything in the engine compartment aside from head bolts, turbo bolts, etc. It won’t always break loose exhaust nuts/bolts, so it requires breaking those loose by hand. But that DeWalt pictured above, it cracks out 110ft lb of torque with a Max RPM of 2700. It’s not cheap by any means, kitted up at a retail (read: you can get it cheaper) of ~$350, it’s a big pill to swallow, but when it cuts your time drastically on projects and replaces half of the tools in your box before you even buy them, that’s a heck of a deal.
Either way, these are cordless, airless, versatile, have the potential (depending on brand, drive style, and voltage) for being extremely high torque (some even available in 1/2″ Drive with 36v A123 Li-Po Batteries that punch over 300ft lb of torque).
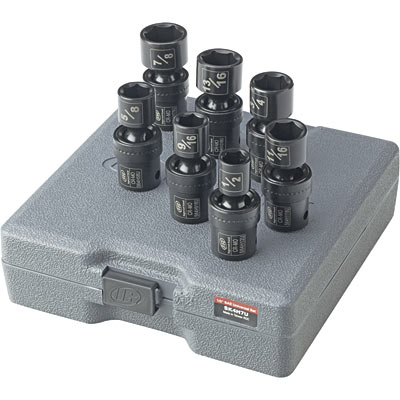
Universal Impact Sockets
These are awesome and get into some harder to reach spots, even if you use them on the end of a ratchet/extension combo or with a breaker bar. Generally, they have a less aggressive universal joint so they work well at getting into a tight space, but don’t promote rounding off of the heads of nuts and bolts due to that aggressive angle. Don’t have a wobbly socket and want your standard universal to stay put better? Use some electrical tape and wrap the universal section to keep it from turning 90 degrees away from the work while you’re lining things up. On these sockets, I almost always go Harbor Freight Pittsburgh Brand or some other Taiwanese Made manufacturer. Why? Because I’ve never had an overseas impact break or round off a nut/bolt. Perhaps I’m just lucky so far, but I’m not spending more than I need to on a tool like this.
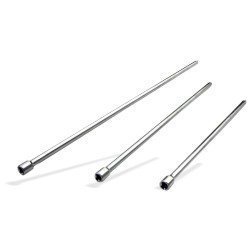
Long Extensions.
I don’t know why I never owned a two foot long 3/8″ Drive Extension until recently, it is by far one of the handiest tools in the box – allowing me to get into places I couldn’t in the past. This combined with a universal or a wobbly impact socket gets my hands out of the engine compartment where I’m guaranteed to bloody my knuckles, and into a place where I can add lots of torque with a breaker bar or a larger ratchet to get the fasteners loose.
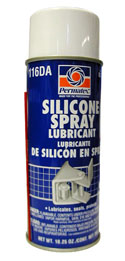
Silicone Spray & Pentrant Spray
(Both of these are always in close reach when I’m working on cars)
The silicone spray is excellent to help lubricate tight parts like exhaust hanger bushings, polyurethane suspension bushings and silicone hoses. Also works well on rubber parts that have become brittle. Keep it OFF of your paint, it has a tendency to soak in and prevent adhesion of future paint jobs. If you must use it to clean black rubber/plastic trim on your vehicle, don’t spray it on, spray it on a cloth and wipe it on. WD-40 is often used in place of silicone spray, but true silicone spray is substantially different than WD-40….which is a bit of a cross between penetrant and silicone spray. If you’re bored – check out 2000+ uses for WD-40.
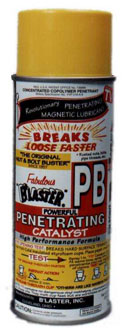
The penetrant spray is a must-have on the workbench. In half of the bolts or studs I have seen broken off due to a seized nut on the other end, I can confidently say most of those would have cooperated had they been thoroughly soaked with PB Blaster or Aerokroil. Both are top of the line penetrating sprays, although I prefer Blaster, because the ‘kroil is freakishly expensive out here (although from my experience with it I am very impressed). Tapping on fasteners that have been soaked does help the penetrating action and if the nut starts to back off and re-catches, spray it again, tighten it a turn or so and then back it off again.
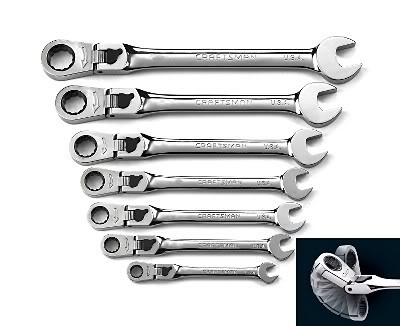
Ratcheting End Wrenches (especially the pivoting ones)
I tend to work on nothing but metric fasteners in cars and because of that I cut my tool budget in half. Which allows me to splurge every once in a while with things like these pivoting head ratcheting end wrenches. They come from a number of different companies: GearWrench, Craftsman, Snap-On, Husky, etc.
There are a few things to look at when you evaluate a ratcheting end wrench set: toggle, internal strength, overall thickness and other features. Toggle is whether or not you can change directions without flipping the wrench over. In my opinion this is useless – especially if you have a set of ratchet wrenches which lack the canted angle of the box end that you find in standard non-ratcheting box end wrenches. The next option is internal strength – this usually goes hand in hand with quality but also with the number of detents in the ratchet mechanism – so ask around to your tool counterman as to which they have seen returned broken the most often. Thickness is also important. A strong ratchet wrench that is nearly as thick as a standard ratchet isn’t going to be helpful in 90% of the places where you need the functionality of a ratcheting end wrench. Finally there are a number of different features in ratcheting wrenches: Some have interchangeable heads so you can get the effect of a ratchet with a through-hole in it. Others have pivoting heads (as shown in the photo) which pivot up to 90 degrees to get into a variety of areas for tough jobs. That set in the photos evidently can actually lock the pivot angle.
Want to read some more about cool tools for your shop and which tools are the best for the job? Check out some of these forums where people regularly discuss tooling and shop layout and practices:
https://www.garagejournal.com/forum/
Got some other forums that you like to browse when choosing tools or choosing plans for your shop? Make a comment here to share with others.