The Ultimate Mazda Performance Guide

A few years ago, CorkSport’s resident racecar driver – Derrick Ambrose – released a book titled The Ultimate Mazda Performance Guide.

The wildly popular book provides beginner and intermediate Mazda/Mazdaspeed owners a solid guide that outlines how, why and when to modify their ride.  Now that the platform is a little older, these second-hand models are more attainable for first-time car buyers and Mazdaspeed Owners specifically are hungry to transform their ride into a +400 WHP BEAST!

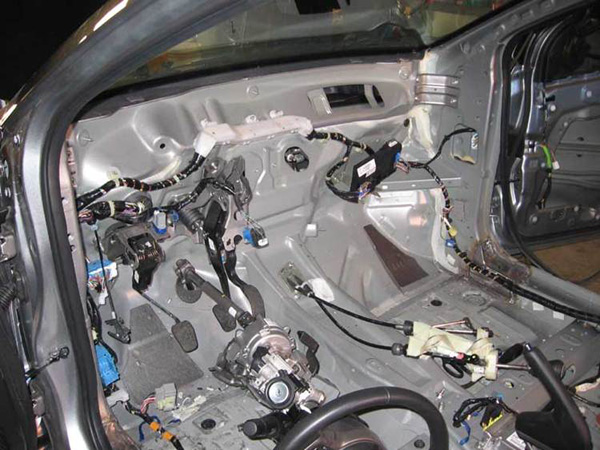
With so many new enthusiasts joining the Mazdaspeed platform, we have been flooded with inquisitive calls and see an increasing number of new owners post up questions about turbos,  High Pressure Fuel Pump Internals, axle back vs cat back vs turbo back exhausts, and what can I do to make 400 WHP or even 600 WHP?

Many of these new Mazda enthusiasts are joining CorkSport’s premier 7th Gear Membership to take advantage of the free swag package, free shipping in the lower 48 states and immense benefits from the troll free and exclusive 7th Gear Facebook Group – Where beginners can ask questions without getting clobbered!

So, whether you’re just starting out with a new to you Mazdaspeed3 or Mazdaspeed6, or you’ve hit the ground running with a new MX-5, Mazda3 or Mazda6 (turbo diesel!?). Our Mazda performance Guide will help answer some basic questions as well as set you on your path to get the most out of your ride.

Previous Interview with Derrick:

CorkSport: What made you decide to write a book about Mazda Performance and why?

Derrick: I really just wanted to give some of the new Mazda enthusiasts some of the knowledge that I have gained about Mazda’s from my involvement with them since the mid 90’s. Many people are just now buying their first Mazdaspeed and don’t really know where to begin. I wanted to help ease them into what they really need to know. It can be quite scary for some to jump into modifying or go into the forums or Facebook groups and not know anything.

CorkSport: We know all about the forums and responses to Newbs on Facebook haha.

Derrick: Exactly, the purpose of the book was to help give people a path and empower them with information that may take a lot of years or a lot of searching to find. I didn’t want it to just be about selling CorkSport parts, we actually mention, and feature, many non-CorkSport parts in the book. That being said, I’m very proud of CorkSport and what we have done to help the Mazda community.

CorkSport: So who is this book really for?

Derrick: I wrote this guide for the beginner to the intermediate Mazda enthusiast that really wants to learn more and really get the most bang for their buck. I wanted to answer some of the most common questions I’ve seen on the forums and in person about aftermarket performance and where to start. If you have changed your turbo or are cross-weighing your coil-overs, you are probably past this book in terms of technical ability. I did, however, include many sources for additional information, contacts and even a brief history of Mazda itself; which is a topic I may even write another book on for the true Mazda fanatic.

CorkSport: I see, what do you think was the most challenging thing about creating a book?

Derrick: Everything, (laughs). When you have no idea what you’re doing as an ‘author’, it takes a LOT more time than you could ever imagine. I was lucky to have a lot of help from some truly amazing people and am very grateful to all of them. Writing a book is a much bigger endeavor than I would have every thought, but having an actual piece of history afterward is truly a special moment. Having that glossy cover in my hands, seeing the ISBN on the back and knowing that I will be in the Library of Congress forever is just an amazing feeling. It’s weird how just making a book can make you feel patriotic, but it really did.

CorkSport: Well hopefully we can talk you into signing a few for us and we look forward to helping to make the next one. Thanks for letting us get a little more insight into this great addition to the Mazdaspeed community.

Derrick: Thanks, I hope everyone enjoys it as much as I did making it. If just one person gets the mod bug I did when I was younger because of this book then I will be happy.

Mazdaspeed3 Build Part 2

Brett’s Car Part 2

Let’s pick up where we left off with part 1! The year 2015, I made my way back to the Golden State from Arizona. At this point in time, I was content with the power, but my Mazdaspeed 3 looked otherwise stock on the outside, so that was my next plan of attack.

Mazdaspeed 3 Sunrise

After a couple of months of settling in, I hashed out my plan. My buddy back in Arizona, Travis was selling his Evo 10 wheels. They were freshly powder coated, and he had the ability to ship them from his work. He was nice enough to make that happen for me. Since I was getting new wheels on the way, I knew it was time to drop it, so I purchased lowering springs. Since my Mazdaspeed 3 only had 15k on it at the time, I opted to keep the OEM shocks and struts, knowing Coil-overs were down the road. But, it is advised to use the upgraded shocks and struts with lowering springs, especially on older suspension.

Mazdaspeed 3 Rear

After it was all said and done, I was happy with this look. It stayed like this for a few months until I got bored again. The mod bug started to itch, so, I decided it was time to upgrade to a 3.5” intake and get a port and polished manifold to see what this KO4 could do. With the 3.5” intake it also needed a battery relocation kit.

Knowing that the Mazdaspeed Big Turbo was down the road, I thought about the future and where I could save potential dollars. We got it up to about 325-330 WHP on the K04 with some e85. For California’s terrible 91 Octane fuel, I was satisfied. I also threw on boost and oil pressure gauges to monitor more in the Mazdaspeed. Oil pressure was the key!

CorkSport Mazdaspeed Boost and Oil Pressure Gauges
Mazdaspeed Boost and Oil Gauges

I got more acquainted with the local Mazda community in Nor Cal and ended up meeting one of the largest influencers for my build this way. Brian of BMSPEC. During this time, BMSPEC was just a side project for him as we worked full time as an Engineer in the cooperate world. He ended up taking me under his wing (No pun intended) and taught me a thing or two. In return, I helped him out after work to make Aero Parts like wing extensions and splitters. I assisted where I could with the dirty work, and my car was one of the beta testers. So, for those of you that wonder where my extension and splitter came from, there is your answer!

Mazdaspeed 3 front view at Golden gate bridge

Brian guided me on the right path to take for setting up my coil-overs and getting my Mazdaspeed 3 to not only handle as well as possible but also look good while doing it. It was awesome for me to be able to represent his parts and start to make my car stand out. I am very fortunate to have had that opportunity and be able to call him my friend.

Mazdaspeed 3 Rolling shot

In early 2016, I was driving behind a semi-truck on the freeway which resulted in pretty a chipped-up bumper. Working closely with my body shop, we got my Mazdaspeed 3 fully repainted (Minus the hatch.) I requested that the mirrors be painted black, Roof black, fog bezels black, and the rear valence black. It took several months for them to finish, as I gave them permission to take their time. But they did an incredible job, and the paint has held up phenomenally.  

Rear Mazdaspeed 3 with upgrade spoiler
Mazdaspeed 3 and Mazda 3 at Golden Gate Bridge

A few months before my move to Washington, I finally hopped on a big turbo upgrade. Paired with this was an upgraded EBCS, and MAP sensor. The Mazda Intercooler was also upgraded from a TMIC to an FMIC. She was starting to turn into the car I had aspired to build. But, as all us car guys know, this just means the bar gets raised higher and our aspirations grow further! An upgraded intake manifold was also added to even out air flow between runners even more.

The time is now late 2016. I got offered a job with CorkSport right after Thanksgiving. So I packed up, said goodbye to all my close friends to set out on a venture in the PNW. Things were beginning to get more interesting, and the journey for my Mazdaspeed3 would continue.  Stay tuned for part 3!

Moving with a Mazdaspeed

Connect with us

You may also like:

Because Racecar

As some of you have read of the last few years I really like the Mazda 2. Before it was released in the US I had written several blog posts on my thoughts. When we picked up the first Mazda 2 delivered in the US we set out to develop a range of parts for the 2. We have also had a chance to drive 2 in autocross events and down lots of winding roads.

Once you get to the point of completing the parts you need developed on a shop car what happens next? In the case of the CorkSport Mazda 2 you turn it into a B-Spec racecar. Why would you want to do that to a new car I am sure some of you are asking? If you have read the blog about my participation in the SCCA driving school you know that I am working towards my alter ego race car driving dream and the B-Spec racecar gives a good way to approach this being cost effective.

This leads us back to the CorkSport Mazda 2. To make it a B-Spec racer requires some work. Make that a lot of work. The first thing to building the car is to install a roll cage which is it probably one of the most time consuming parts of the job. First you start off with your stock interior and take it out.

Once you finish up that easy task you need to remove all of the sound deadener Mazda installed in the chassis. There are two methods to do this. #1 is with an air chisel and being very careful to not punch a hole through the floor of your car and #2 use dry ice. The dry ice method is something I had not done before but it sounded easy enough. That and if you have left over dry ice a plastic 2 liter bottles can be lots of fun. Check out the video below of me using the dry ice to remove the sound deadener.

If I can offer a tip while doing this is to get 2-3 blocks of the dry ice so you can have several sections cooling down and keep working so you do not have to stock between the freezing of the sound deadener.

Once you completely remove of the insulation you get to start on the roll cage. This takes time and precision to get done. If you have never done this work before, I strongly recommend taking it to a professional to get done. The materials, welds, and design all need to meet the specifications of the racing sanctioning body you will be participating with. In this case we used the specs from the SCCA GCR (General Competition Rules) which are accepted by other road racing sanctioning bodies.

We went with a nascar style door bars to give the driver more space in case there is a side impact and a bit of an angle for easier entry into the car while climbing over the cage.

After all of the hard work is done with the cage getting installed you need to paint it. We wanted the color to match the exterior so we ordered up several cans of the 38P paint code color from an online supplier and got to work. After taping up the interior to limit overspray we got to work with the color and the clear coat. The finished product looks good. The picture below shows the rear section painted with the base coat.

The final product looks great and matches well with the exterior paint of the 2.

Once the paint had dried we got to work installing the safety gear for the car. We went with a set of Sparco 6 point harnesses and a Sparco Circuit Seat.

Mounting the harnesses takes some planning. After getting a good idea of where we were going to mount the seat we got to work on the mounting points for the harness. In the Mazda 2 there is only 1 factory bolt location that we could use for the lap belt. The other side of the factory seat belt mounts to the original seat. The rules require you to have a 4 inch square backing plate for the harness on the back side of the car body to make sure the anchor points for the bolts do not tear through if you are involved in a wreck. We had to do this in three locations on the 2, one for the lap belt on the tunnel side and the two for the sub belt. After planning the hole locations and making sure there was no interference (make sure when you are drilling hole into your car you look at the other side of the panel) parts on the bottom of the 2 which there was since the brake lines and fuel lines pass under the drivers seat, we got to work with drilling the holes and mounting the eyelets. The actual installation of the harnesses is easy, they simple snap onto the mounting eyes and feeding the harness around the cage bar behind the seat.

The seat is a 1 piece FIA approved bucket which is a side mount style. With the Mazda 2 being out on the market for a short time we found there were no mounting brackets available which meant we got to build them ourselves. Thankfully this is a pretty straightforward task in the Mazda 2. After sourcing some inch and a quarter steel we pressed the shapes we needed and mounted up the seat. We set the seat up so there is a slight bend in the drivers legs when the pedals are pulley depressed. This allows you to have leverage and keep a comfortable seated position when driving. We also mounted the seat as low as we could and still give the driver good visibility of the track. A lower position means lower center of gravity in the car and the best handling of the car.

This is where we are at for the moment with the 2. I will be updating the build in the next few weeks to show the final result of the car.

Derrick-