Drag Racing: Just Like the First Time

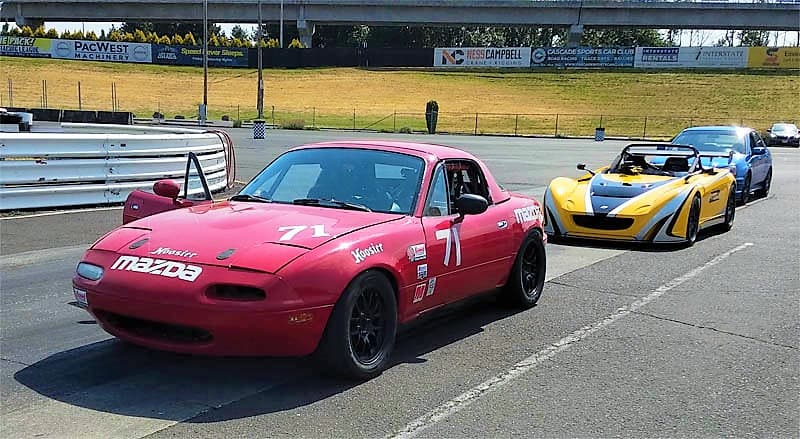
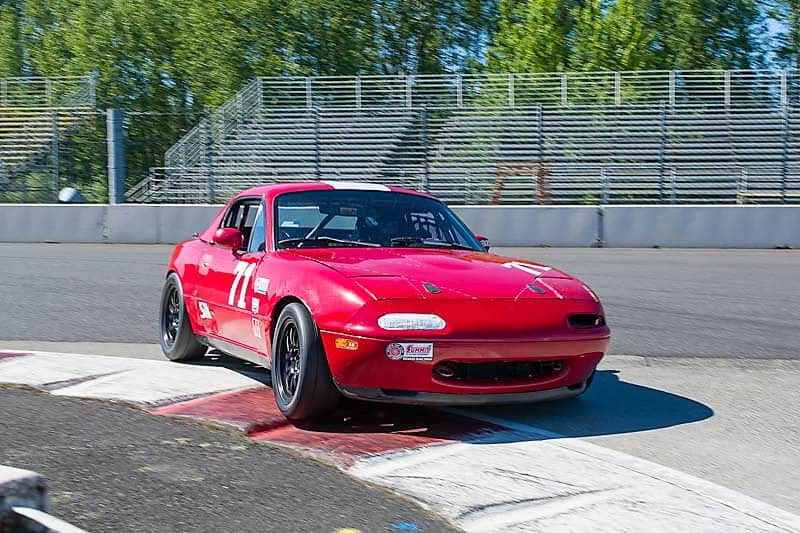
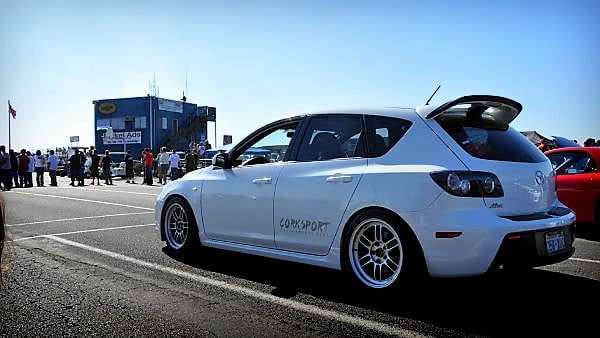
Ask any of my friends or coworkers and they will quickly tell you “Barett Loves Curves!”

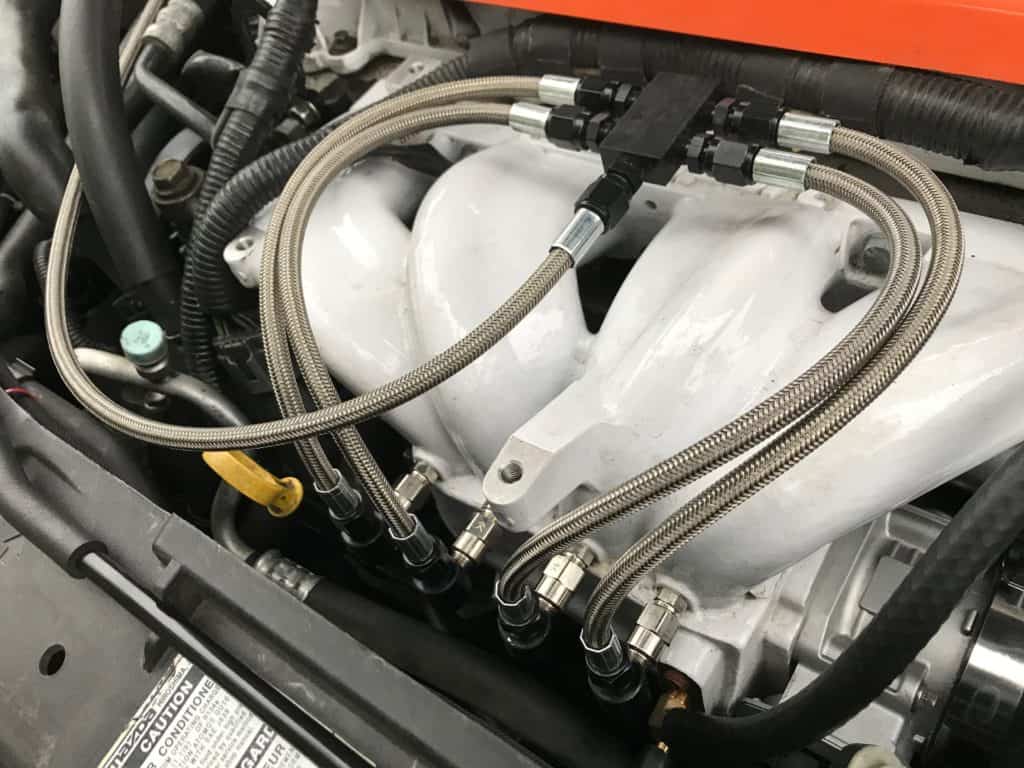
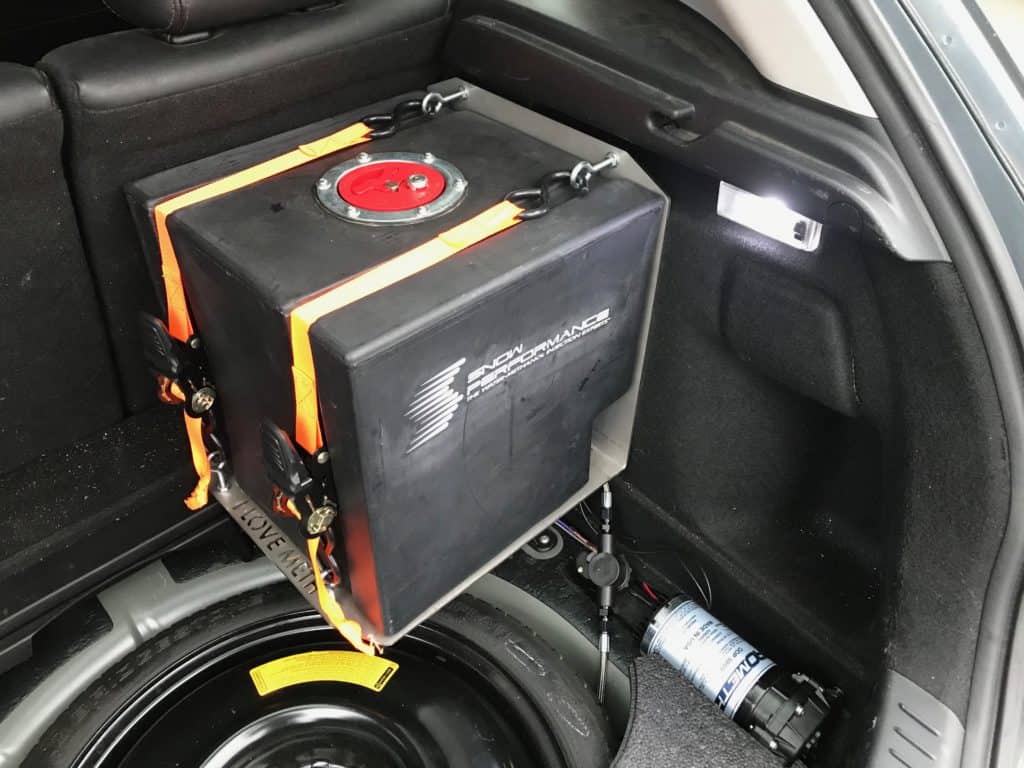
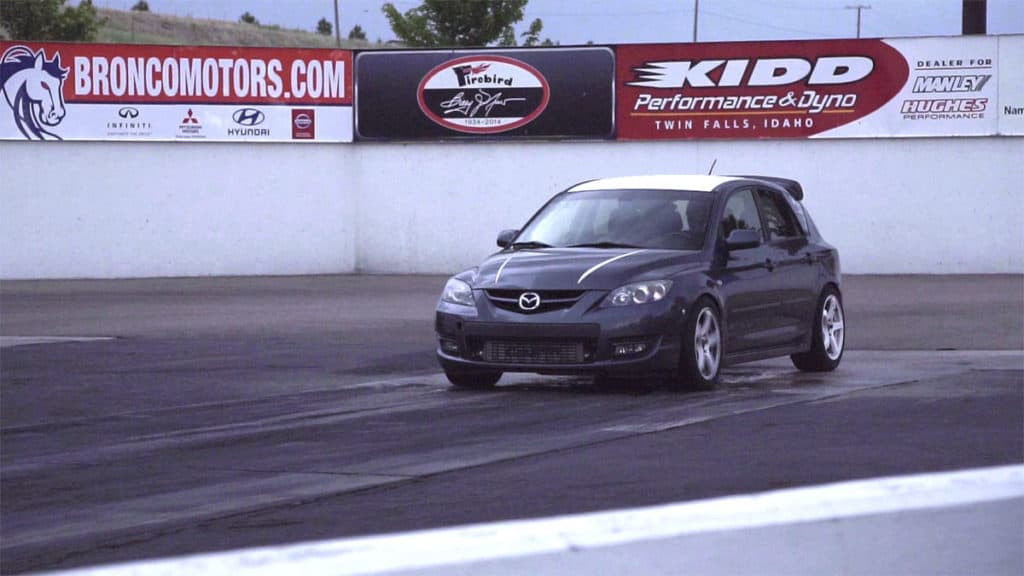
 I’ve always been the first guy to dive into the corner, hit the apex and power out with just a touch of wheel spin.  My car follows suit with its build; upgraded sway bars, big brake kit up front and the steering wheel to hold it all together.  Of course, my friends were always there with the peer pressure to hit 1320Luke McCarvel being the biggest offender (check out his “Drag Strip Checklist”).   However, one day my opinion changed.  

At some point I realized that I can’t knock it until I try it, so I finally succumbed to the straight line life.

So let’s go through the first line up:  Do a burnout…that was much easier than I expected.  

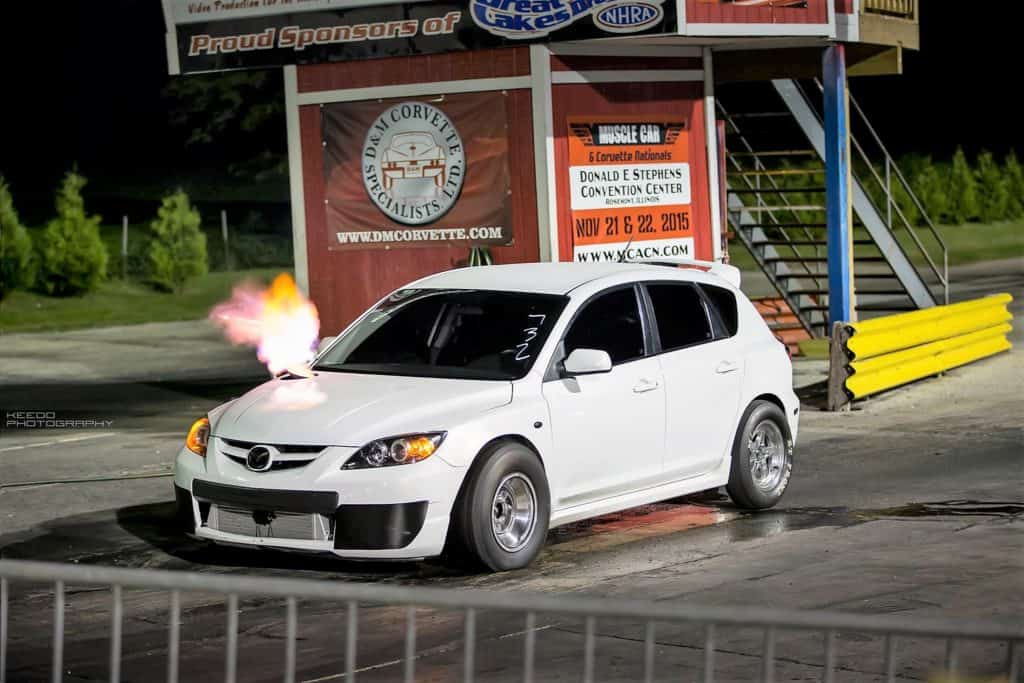
Ok now roll up to the staging line…don’t be that guy that rolls through and has to back up.  Knuckles white on the steering wheel, heart beating in rhythm with the launch control, closely watching the tree light up…GREEN LIGHT!  Launch…wheel spin to redline. Shift…wheel spin to redline. Shift…try to modulate the throttle, but still tons of wheel spin. Shift…finally the car hooks, builds speed then it’s over in the blink of an eye.  

All that build up waiting in line, doing the burnout, staging, launching and rowing the gears for a few seconds of intense adrenaline.  It was an absolute blast; I couldn’t believe how intoxicating just a single pass was. I wanted more and I wanted it immediately. Back in line, I went.  

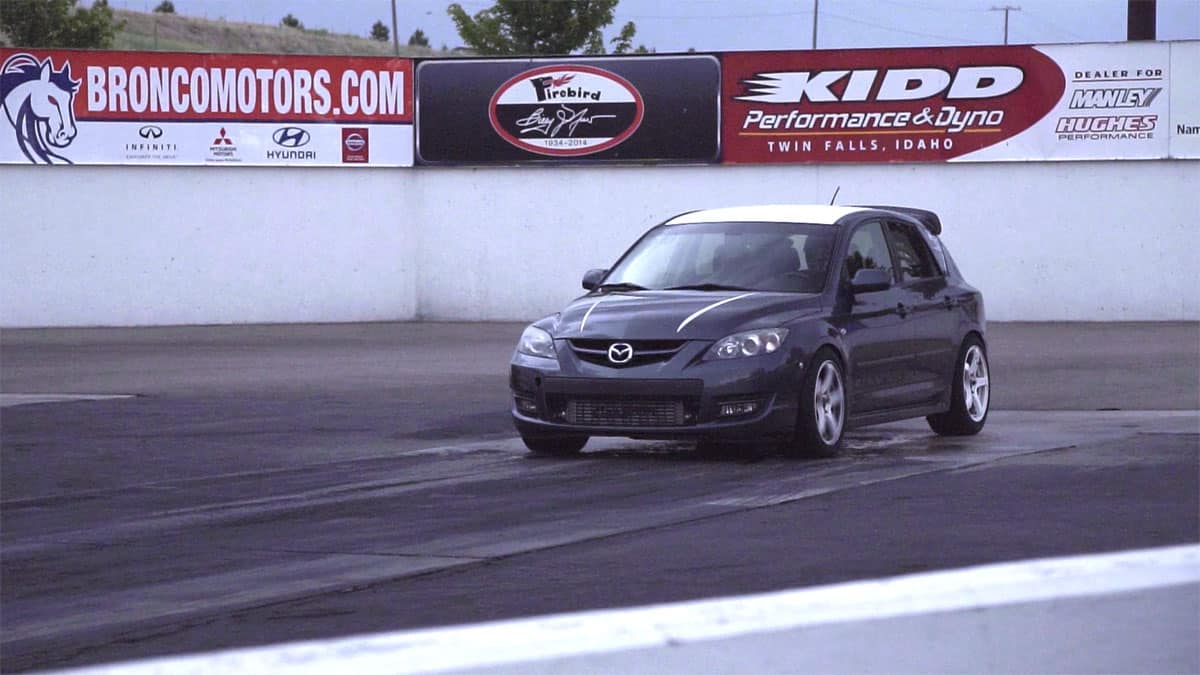
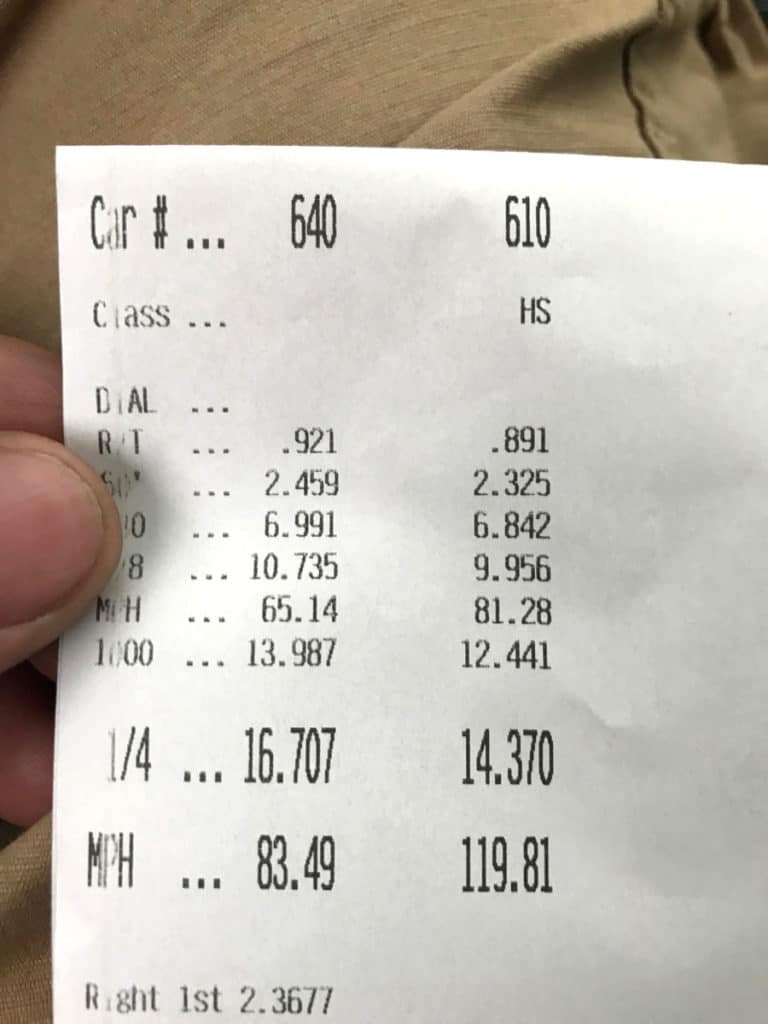
My first pass was an awkward 14.37sec @ 119.8mph.  I say awkward because that is a slow ET for the trap speed.  It shows just how much tire spin I was fighting and how much time I was giving up because of it.  With full interior and street tires this was to be expected, however, the crowd thought it was quite funny either way.  

I proceeded to make 3 more passes as the night progressed.  Each time making a small change to the car or to my approach and control of the launch and throttle modulation.   Each pass rewarded me with a small improvement for my efforts. Each pass down the strip left me wanting more from the next pass.

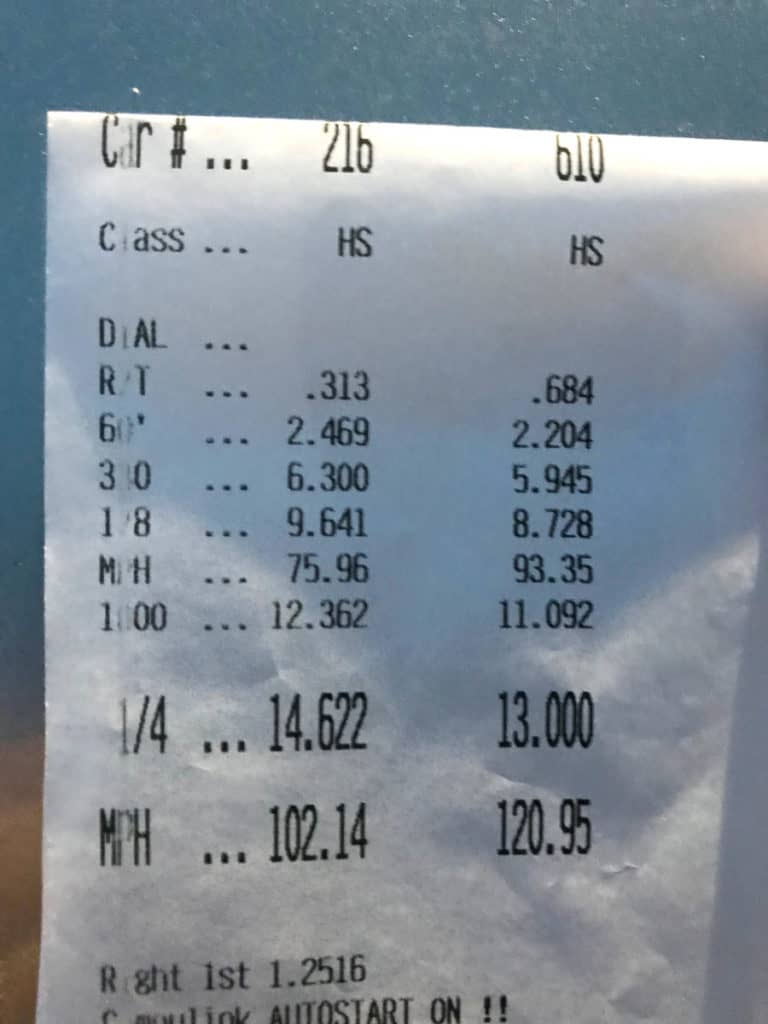
The third pass was the most frustrating of them all.  At the start of the night, I set a personal goal to break into the 12s.  I didn’t know if it was realistic or a complete dream, but I had to start somewhere.  That third pass was also the one that drove me to get my shit together because it teased me with a 13.000sec @ 120.95mph.  So Close!

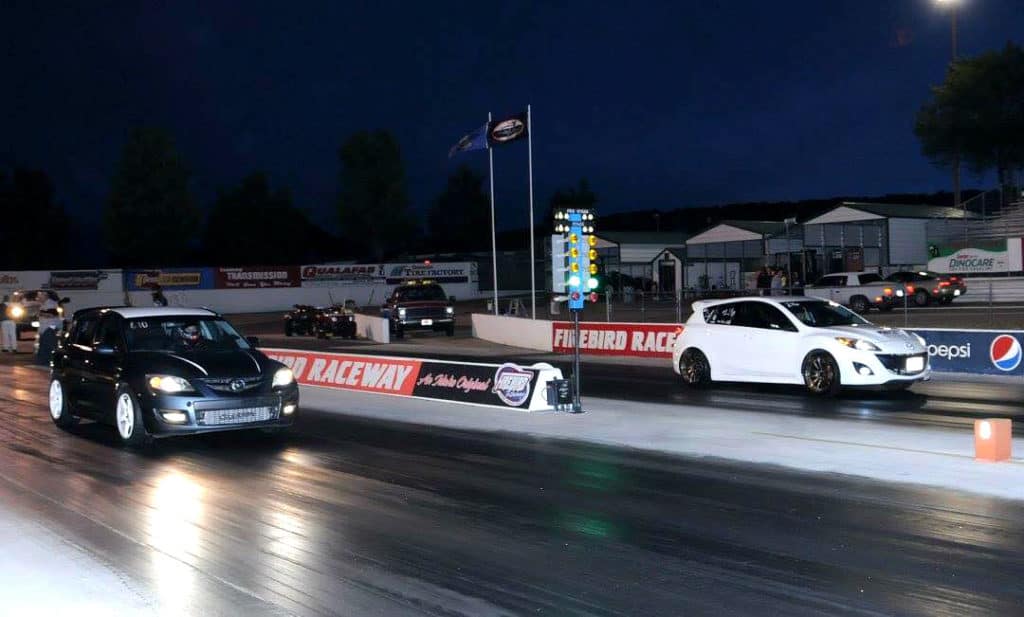
Alright one more pass, this was the one I could feel it.  30 minutes later I’m staring at the burnout box, line up drop 2nd and get the tires nice and hot.  Pull up to staging next to a real crowd killer (I mean Mustang).  

Yellow… yellow…yellow…….GREEN LIGHT!

Launch…little wheel spin to redline.  

Shift…little more wheel spin to redline.  Shift…modulate the throttle with only a tiny bit of wheel spin.  Shift…now the car really hooks but I’m a few lengths behind that Musta…oh shit there’s the turbo…I’m reeling him in…it’s so closeI fly past him with the rev limiter dancing.

 It’s over…deep breath…that was it I know it.

Now the quick jaunt to the end of the strip then back to the little building and the old guy that’s been racing since flatheads were a thing.  

“Car 610?”

“Yes Sir”

“Here’s your slip.  Is that a Maaazda?”

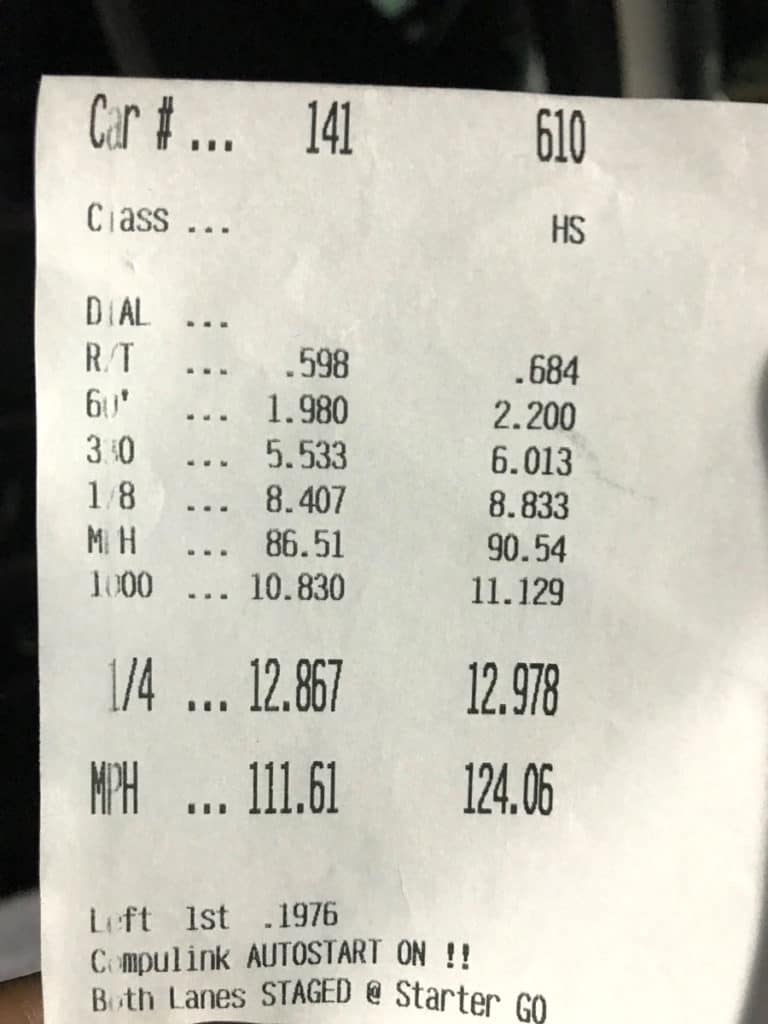
YES! Hit my goal for the night and the car can still drive me home.  I call that a success.

I parked my car, picked up my 120+mph club sticker and enjoyed the rest of the night with my good friends from Idaho Mazda Takeover.  It was a great night and one I plan to top in the near future.

Anybody have some stock brakes and drag slicks I can borrow?


-BS @ CS

Working on the Driver

I have been racing Mazdas on the track in wheel-to-wheel competition since 2013 and I have learned quite a bit.

I am nowhere near being the best driver. I have good moments and plenty of “WTF Derrick” things which happen on the track which are masked by good car control.

2 years ago I bought a Spec Miata (SM). Locally the number of B-Spec and Touring 4 classes are smaller.  This is not great for me, as I find my racecraft suffers when I get too big events where there are more than 5 cars and the racing is close.  I can always fight my way to 2nd or 3rd place but the top step has been elusive.  Don’t get me wrong, I can go to events where there are other T4 cars (they are not unicorns) but the travel cost, time away from CorkSport, and fuel gets pricey really quick when constantly towing to southern California.

I took the SM out a few times last year and found I was way off the pace I needed to be to even get into the top 25% of a Ppec Miata field at any events.  The Northwest has a really strong group of SM racers who are more than happy to beat the illusion out of you that you can drive fast on the track.

This year I have been working on the car setup and updating the drive train to the best I can get for my car.  I worked with Haag Performance to get one of their SM 1.6 engines which have been winning races up and down the west coast. I have been also talking with Joe Jordan on car setup and general SM advice as he has gone down this road before with multiple SM drivers including Joey Jordan and Will Rodgers to get them to the top.

Before the season started I knew I wanted to get some top-level coaching so I looked locally at Pro Drive Racing which offers race school for SCCA certification and high-performance driving classes.  After few emails finding which event I should show up with my SM it was determined the June 5th high-performance school would be the best bet and I could get someone on one coaching with Todd Harris the head instructor.

I have struggled with the braking too much in the corners, as past instructors/coaches I have consistently mentioned this to me. I needed to overcome this if I was going to have a chance to match times with the top 25% of the field. With Todd strapped into the “Thrill Seat”, we hit the first session at speed so he could see how/what I doing and work on it.

This was a good news and bad news sort of ride.  He found my approach and driving style to corners works but it was not the fastest way through them – I was giving up cornering speed and to be able to get back to the throttle quicker. By simply backing up my braking zones I had more control in the corner which allowed me to stay committed to the throttle without having to modulate it after the steering wheel was turned.  This doesn’t seem like a huge thing but the feedback from the SM was drastically different. I was able to roll speed into the corners and carry a few more MPH. Heading onto a straightaway this is huge. I spent the rest of the day fine tuning the changes and making sure they stuck with me.

By the time this blog goes up, I will have raced again at the Oregon Region SCCA event at Portland Intl Raceway and found out how much the school improved my driving technique.  If I don’t screw it up too bad I should be able to take a second out of my lap times which in SM is HUGE! The weekend of June 29th I will be at Sonoma racing against 40 other SM drivers to really get a feel for where I am at skill level wise, I am prepared for this to be humbling, lol.

So, my advice to you, if you ever have a chance to take a driving school I really recommend it and specifically Pro Drive if you are in the Portland Oregon area.  They run a great program and you get one on one seat time with some of the best local drivers and instructors.

Look for future updates here at the CorkSport the blog on how it went.

-Derrick

A Color Change for Your Mazda

Ever sat in your garage looking at your Mazda and starting thinking about what a different color, a new wheel choice, or even some colorful accents would look like on your ride?

Without Photoshop skills, this is usually simply daydreaming without being able to see it in the flesh. Plasti dip can change that by giving you a cheap and easily reversible method to try out a new look on your car. I thought I would share my experiences with plasti dip, and give you all some tips and tricks to help you personalize your ride.

In case you haven’t heard of plasti dip, it started out as a thick paint-like coating that tools were dipped into to provide a rubberized handle for better grip. Eventually, it was put into spray paint cans to make it easier to apply to larger areas. Because it has a rubber-like quality, once it is applied and fully dried, it offers good protection but can also be easily peeled off when the original color or finish is desired.

Check out the wheel below in the middle of getting dip removed – it almost comes off like a vinyl wrap.

Plasti dip comes in a ton of colors so it makes it really easy to get exactly what you want. All the “base” colors come out as a matte finish, however, there are top coats that can give a gloss, metallic, or even a pearlescent color-changing appearance so you can usually find exactly what you are looking for.

From my experience, the horror stories you hear about Plasti dip are from those who are not using the product correctly. To help you avoid these headaches, below are some tips and tricks that have really helped me during my dipping ventures.

If it’s easy to remove; remove it! For wheels especially this makes it so much easier to make sure you get in all the nooks and crannies. Plus, you have to do a lot less masking. For any Mazda that has the front emblem recessed into the grill, remove it-masking is a pain and there are only 4 clips that hold it in.

Leave glued-on emblems on the car. These are a pain to remove and then reposition. If you clean your paint well enough, the dip will peel right off and “cut” itself around the emblem. Give yourself about 1”-2” around the edge of your emblem before your masking. The video below is also a great example of one of the pearlescent colors.

Prep, prep, and more prep. The cleaner your surfaces are the better quality your dip job will be. More protective, better looking, and longer lasting dip all come from good prep work. Using a good degreaser that doesn’t leave any residue works best. Also, make sure parts are completely dry before starting any plasti dip application.

Use the notecard trick for wheels. This works better if your wheels are off the car. Instead of masking the tire, place notecards between the tire and outer edge of the wheel. This gives good protection for the tire while being much quicker to apply and remove than tape.

Apply plenty of coats. This is one of the biggest reasons people have issues removing plasti dip-not enough layers! Your first layer should be a dust coat with pretty poor coverage. Then you should have at least 4 coats on top. These later coats should be wet coats-that is, apply the dip pretty heavy so you have an even, glossy/wet appearance for each coat.

Other simpler tips/tricks:

Get the hard to reach portions of wheels first, and then finish the coat with the face of the wheel for a more even appearance.

Use nickels/quarters in the tapered part of the lug nut holes. This prevents tearing when you reinstall your wheels.

Get plastic “spudger” tools like the ones below. They make it easy to peel hard-to-reach areas like the inside of emblems without having to worry about scratching the paint underneath.

Do your research beforehand. There is a ton of useful information out there to make sure you get your job done right.

Now, I have mainly done wheels and emblems as they are very inexpensive to do and DIY friendly. There are plenty of people out there who do entire cars though. I would highly recommend getting a proper sprayer and liquid plasti dip to prevent the streaking that seems to always show up when rattle canning an entire car. Even with this added cost, you can get a full paint job for only a few hundred instead of a few thousand.

Where Plasti dip can get really interesting is the creativity that comes with it. Personalizing some of the CorkSport parts on your Mazda can really give it that finishing touch. How about a custom color Aluminum Shift Knob that has the added bonus of extra grip? Or even some extra protection for your CorkSport Front Lip or Carbon Fiber Hood Scoop during the winter months. I think some plasti-dipped CorkSport Gauges could look great in the right color. That is what’s great about plasti dip though – try whatever you want, and if you don’t like it, simply remove it and try again!

Let us know what you have plasti dipped down below, and include any other tips if you have them!

-Daniel

Stay up-to-date on the latest news and product updates from CorkSport.

* indicates required

Auxiliary Methanol Fueling for Your Mazdaspeed

The Mazdaspeed platform is a great place to start if you’re looking for a fun tuner car that offers awesome power to money spent ratio.  This holds true until you hit the capacity of the OEM fuel system. If you don’t know it already, the DISI MZR was one of the first gasoline direct injected engines offered in a passenger car.  For its time, the Mazdaspeed 3 was a powerful and capable sport hatch right off the showroom floor, however, this type of fuel system quickly reaches it’s limits and is not easily modified for higher power.  

In this blog, we are going to take a look at auxiliary fueling with methanol and my personal experience taking this path.  

Damn, I’m out of fuel…  You got your Speed setup with all the hard parts (aka fully bolted – HPFP, Intake, Exhaust, FMIC, etc.) and finally pulled the trigger on that big turbo.  Just a few revisions and your tuner is telling you you’re out of fuel and more or less stuck at around 350-380whp (depending on turbo and octane).  It’s time for auxiliary fueling.

Now when considering auxiliary fueling it is critical to consider your goals with the car; the level of complexity and cost are drastically different depending on these goals.  

380-440whp Goal:

With this power goal you most likely have a fully bolted Mazdaspeed and an upgraded turbo such as the CorkSport CST4.  To achieve this power the auxiliary fuel system can be fairly simple.  From my experience, a single nozzle with the appropriate flow rate positioned just before the throttle body can get the job done.  This setup is very simple, consisting of a progressive rate controller, fuel cell, some tubing, nozzle and ideally a check valve on the nozzle.  This will cost you around ~450 to get started.

I personally started with the AEM Methanol Kit, but there are many other kits available such as Devil’s Own, Auqamist, Snow Performance, and ProMeth.  I recommend doing some research to find the best kit for your needs before jumping in.

Note: Since the writing of this post we have since produced an Auxiliary Methanol Tank for the Mazdaspeed 3.

Stay Up-to-date with CorkSport   

Read the Blog on post How To Achieve 400 WHP In Your Mazdaspeed

440-500whp Goal:

Once you break past that ~440whp mark you should really start to consider adding nozzles.  There’s a couple ways to do this.

First, you could maintain your basic system by adding another nozzle with a splitter and another port in your intercooler piping, just before the throttle body.  This can get you close the 500whp mark but is not ideal as you will need to run two very large nozzles. With nozzles, this large the fuel has difficulty atomizing and instead can condense into relatively larger droplets.  This is not ideal; however is only the added cost of a splitter and nozzle.

The other option is running a single nozzle on each intake manifold runner.  Check it out below.

By doing this, you can now run a smaller nozzle that will atomize much better, but since you have four nozzles you can still flow the appropriate volume for your power goal.  However, with this nozzle location, we have made a drastic design change to the system. In a pre-throttle body set up the nozzle never see vacuum, however once located in the intake manifold they will see vacuum which requires additional components to operate correctly.  

To avoid the risk of hydro-locking your engine and awful driving characteristics, we must add a check valve to each nozzle and a solenoid controlled valve to the hose that feeds the nozzles.  Check valves (which you see a close up of in just a bit) allow fuel to flow in only one direction. Along with that, a properly design check valve will have a crack pressure (minimum pressure to allow flow) that is slightly greater than the vacuum force in the intake manifold.  A solenoid is a valve that opens and closes and is controlled by the controller. This allows fuel to flow only when commanded by the controller.

Let’s take a closer look at the nozzles and distribution block necessary for a per-runner nozzle setup.  Looking at the nozzles you’ll see silver cylinder between the nozzle and the black fitting that connects to the hose.  This is the check valve. A simple, but critical part of the system for proper function. Up towards the top of the image, you see a single hose entering a black block along with four separate hoses leaving the block to each nozzle.  This is the distribution block; this can be configured in many ways, but more or less it allows you to direct fuel to each nozzle from a single hose.

So, as you can see moving to a per-runner setup includes a lot more complexity and cost.  This added cost is ~300 on top of the methanol kit you already purchased and not including an intake manifold that is already set up for nozzles.  You could cut a little cost by using nylon tubing versus stainless braided hose, but not much.

It’s also worth noting that the pump that comes standard with most kits will not flow enough fuel to support just under 500whp, so depending on your goal you may need an upgraded pump as well.  If this is the case I would recommend the pump from ProMeth only because it’s the only pump I’ve found that truly flows more.

500+whp Goal:

At this point, I would simply recommend moving to a true port-injection system.  Like the per-runner nozzle setup, a true port injection setup sprays fuel in each runner, but the systems, in general, are very different.  Since port injection alone could be a couple blogs on its own I will give the quick and dirty here. A true port injection setup uses conventional style gasoline injectors that control flow amount directly in the injector itself.  This allows much more precise control and reduces a lot of risks. However, the cost is much higher starting around ~1500-2000.

Lastly, I wanted to mention some things I love about using methanol for auxiliary fueling.  Methanol is expensive, about ~ 8-12 per gallon which is a real bummer, but it does not get used for all driving situations.  You don’t use the methanol unless you are pushing your car to the point that the extra fuel is needed.

The methanol is contained in a separate fuel cell like the image above verses in the OE fuel tank.  Therefore it’s only used when you want to use it. Unlike E85 blends or other exotic fuel that must be mixed and/or used through the standard OE injectors and therefore used for all your commuting.  

Read the blog post on Recipe to Make a 500 HP Mazdaspeed 3

I hope my lessons learned were useful for you and your exploration into methanol auxiliary fueling.   With that, I sign off.

-Barett @ CS

*All pricing based off of price at the time of the blog writing.

What Is Required at the Drag Strip?


Good day all of my CorkSport followers.  Is anyone else excited for warm weather, and track days?  Now is the time to get that Mazdaspeed prepped, modded, and out to the track.  

The CorkSport team has plenty of experience when it comes to track days. We have noticed in the past year more and more people have been getting into a Mazdaspeed platform, and before too long they are modding the car to test its capabilities.  Derrick is our road course guy in his 2015 Mazda 3, and I am the guy that likes the 1320. So what do you need to be able to run at the track? Protecting yourself, and making sure the car is properly put together can affect if you will be able to run your Mazdaspeed down the 1320.

Clothing

You will not be able to race your Mazdaspeed unless you wear pants, and closed toe shoes.  Every track you go to will require you to wear these two things. Every little bit counts especially if you have a high horsepower Mazdaspeed.  We have all seen the videos of accidents happening. I would hate to roll my Mazdaspeed, break glass, and have glass bits hitting my legs. So don’t forget those pants, and yoga pants do not count to all of you lady drivers.

Helmet

Each track has standard rules when it comes to safety equipment.  Depending on how fast your Mazdaspeed runs will determine what safety equipment you will need in order to race.  13.99 and faster you will need to make sure and wear a helmet. Also, if you run 13.99 and faster, you will not be able to have a passenger in the car with you.  If it is your first time at the track and you run faster than a 13.99 without a helmet, the track officials will ask you to wear a helmet moving forward. Failure to comply could get you removed from the track.

Vehicle Maintenance

This is probably the most important part of the inspection process when going to the track.  If you have been racing when oil/coolant dumps onto the track then you know how long it can take to get that stuff cleaned up.  Here are a few things the officials look for when you are trying to race your Mazdaspeed.

These things are non-negotiable.  If your Mazdaspeed does not pass any of these then the track officials will not let you run your car down the track.  All you fast guys out there need to double check with your local track to see what you have to do to the car depending on how fast you run.

Additional Safety Equipment

If you do have a Mazdaspeed capable of 11’s or faster, then you will be required to do a lot more to the car in order to safely run.  I would double check with your local track, but every track I have been to require you to have a roll cage, and a fire suit if you are running 11’s or faster in the 1320.  Also, if you have your battery relocated into the hatch, you will need a kill switch mounted somewhere on the rear of the car just in case you roll when racing.

READERS BEWARE:

Going to the track is highly addicting.  CorkSport will not be responsible for empty wallets in an attempt to make your Mazdaspeed go faster.  CorkSport will also not be held responsible for pulled muscles in your cheeks from having too much fun.  However, if you must modify your Mazdaspeed, CorkSport will be there to help you reach your goals!  Stay safe, and ZOOM ZOOM people.

Cheers,

Luke