2024 looks to be freaking fantastic for the Mazda 3 Turbo performance enthusiast, and here’s why. CorkSport has been diligently developing a Drop-in Performance Turbo Upgrade for the SkyActiv-G 2.5L Turbo engine alongside the dozens of Mazda 3 performance parts we have released to the community.
With recent rumblings of a reworked OEM turbo option circulating through social media, we thought it was time to officially share the R&D we have been quietly working on.
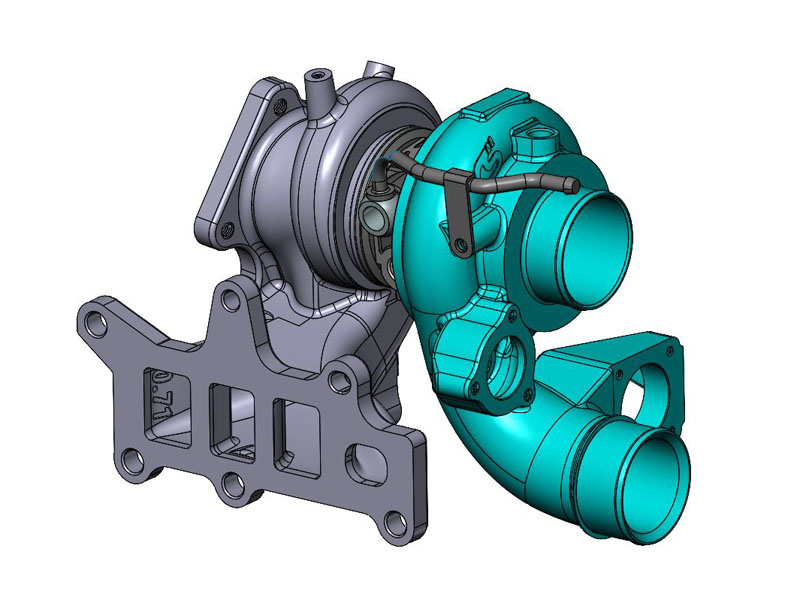
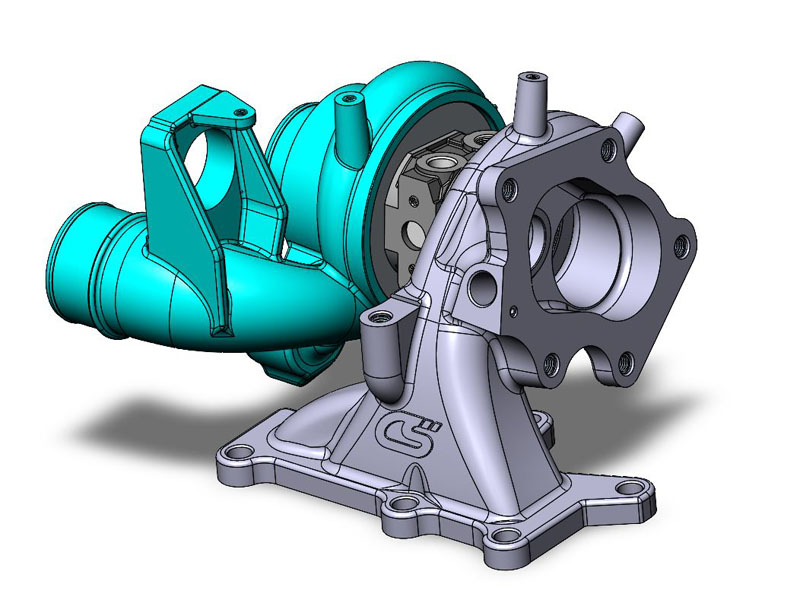
As you can see, we have a 100% complete and new design in the 3D CAD model above. We are developing a performance turbo upgrade from scratch with larger and performance-optimized housings, CHRA, and wheels, all designed to work together.
Choosing this design path takes a lot more time, effort, and money to create a finished product. Despite the increased resource requirements, this is what it takes to develop an efficient and reliable performance drop-in turbo for the Mazda community. Now, let’s apply some context to that statement.
Back in 2018, we wrote a couple of blogs dissecting the OEM turbo found on the Mazda 6 2.5T. At that time the Mazda 3 did not have a turbo option yet.
Read the posts
We inspected the housings, wheels, CHRA, and Mazda’s “Dynamic Pressure” system. We quickly realized that the OEM turbo would be a HUGE limitation on the Mazda Turbo engine’s performance – even once tuning was fully available. Fast forward to the announcement of the Mazda 3 Turbo option, and we got to work on an improved turbo design.
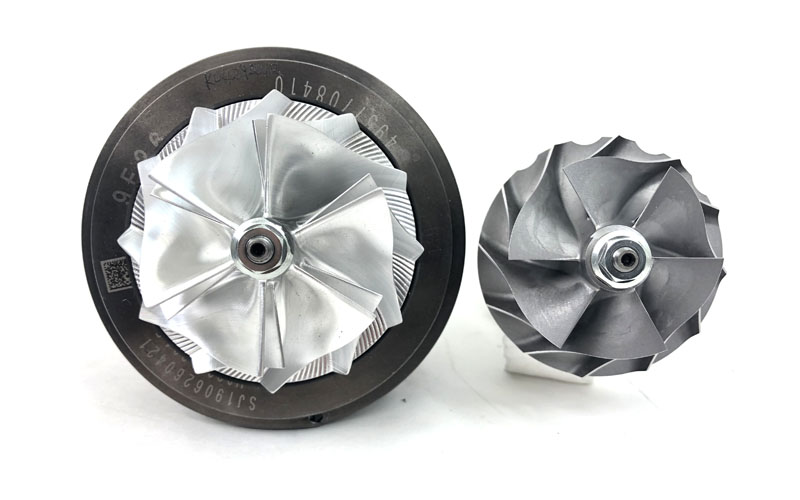
Hybrid Compressor Wheel (left) 50.4mm Inducer & 63.3mm Exducer with extended tip vs OEM ~43mm Inducer & ~56mm Exducer
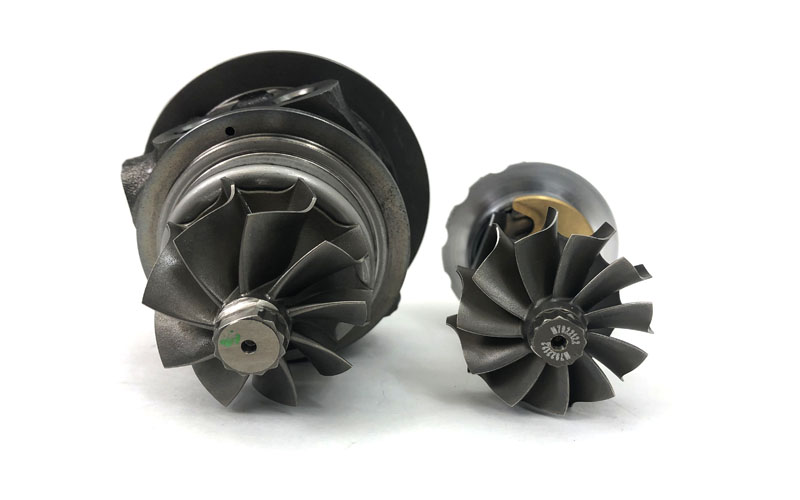
Hybrid Turbine Wheel (left) 50.2mm Inducer & 45.5mm Exducer vs OEM ~47mm Inducer & ~41mm Exducer
The Issues of a Hybrid Turbo
One of the first steps we took was building a “hybrid” OEM turbo to see how that would perform vs the OEM turbo. A hybrid turbo means an OEM turbo that has been modified to use larger than OEM wheels. Above you can see the larger compressor and turbine wheels next to the OEM wheels.
Our testing showed some potential with a “hybrid” setup turbo, but there were still limitations to the power potential. We saw a bit slower spool and a bit more mid-range power potential, but top-end power was still struggling to hold. Granted this was very early in the tuning developments for the platform.
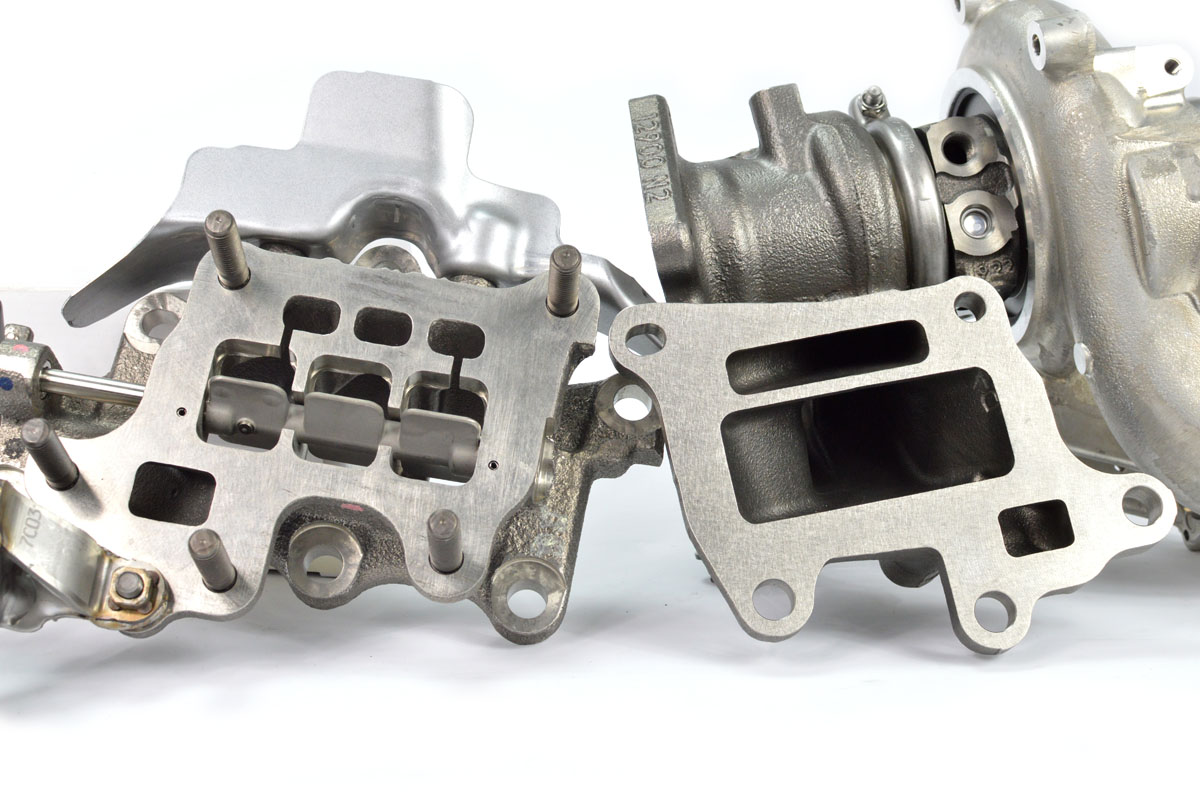
A major concern we had was around the hybrid turbo, was the reliability and further cracking of the OEM housing once it was modified for the larger wheels. The OEM turbine housing is very small, specifically the turbine scroll which is the most critical part of the turbine housing. The OEM housing just didn’t have a lot of extra material to work with (remove) to safely accommodate a larger turbine wheel.
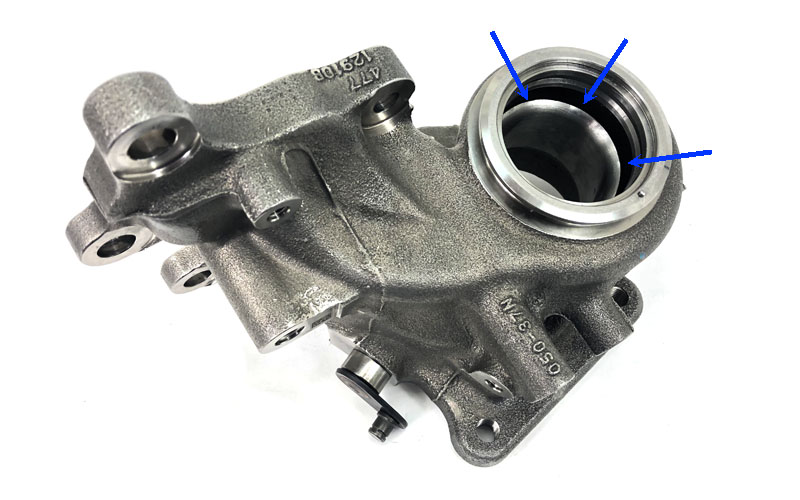
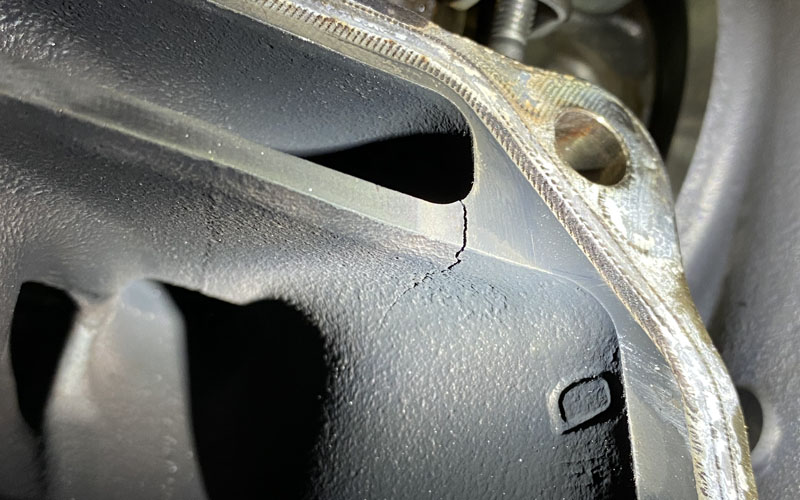
Check out this image of the turbine housing after it was machined to accept the larger turbine wheel. The thin edge marked by the blue arrows is very thin due to removing so much material. This area of the turbine funnels the exhaust gases into the turbine wheel inducer and directly affects the efficiency of the wheel. Had we machined any more material for a larger wheel, we would have started to affect how the exhaust gases enter the turbine wheel.
In the image above, the inlet divider inside the turbine housing is cracking. In the image below, an internal portion of the scroll is cracking as seen through the wastegate port.
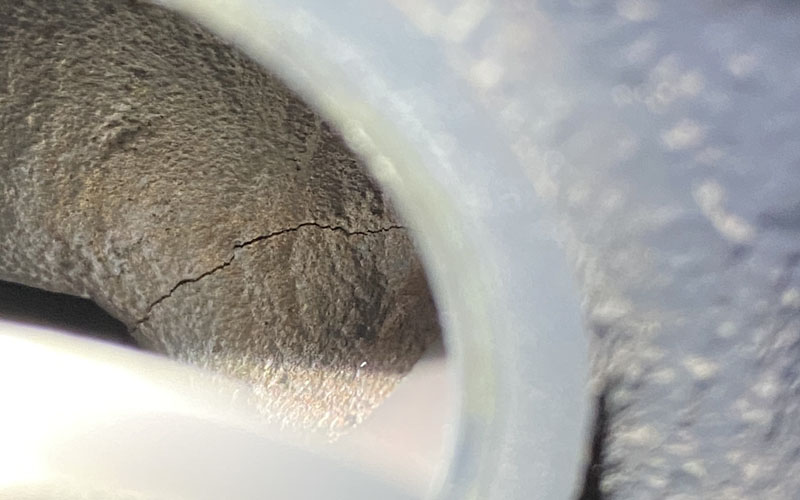
We’ve already seen OEM housings cracking from normal use, so the idea of thinning the turbine housing in critical areas did not seem like the right approach for a performance turbo upgrade.
A hybrid turbo may have a place in the performance aftermarket and it may have some performance benefits (if the housing is up to the task), but if we are going to stand behind the product; we are going to develop it from the ground up to proactively eliminate reliability concerns.
So that’s exactly what we are doing!
Our Development Expertise
Leaning on our development expertise with the CST Turbo line for the Mazdaspeed platform, we are designing a new turbo from scratch for the Mazda 3 Turbo and other models that share the same engine.
Starting from the ground up gives us the ability to optimize the turbo for performance applications. Like the Mazdaspeed CST Turbo line, we can directly control the size of the housings, CHRA, wheels, wastegate, material thickness, and material type.
Designing the Mazda 3 Turbo
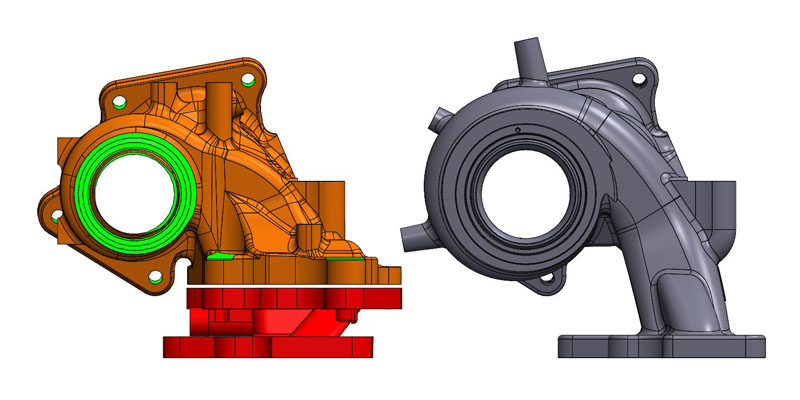
Now let’s dive into the design of the housings for the upcoming Mazda 3 Turbo upgrade. Starting with the compressor housing; A LOT is going on with the compressor housing design. We call this a feature-rich part and you can see why below.
The OEM compressor housing (right) has a handful of integrated features: the obvious compressor inlet and outlets, the electronic wastegate mounting, the electronic bypass valve, and the EVAP/Breather port. When designing a performance drop-in turbo, our goal is to retain all these OEM features so that installation and use are very simple and easy.
Alongside the OEM features are the changes we have made to increase performance potential which includes a slightly larger scroll A/R of 0.60. Note: This even exceeds our CST Turbos and has been proven to be responsive and support a flow of 700whp.
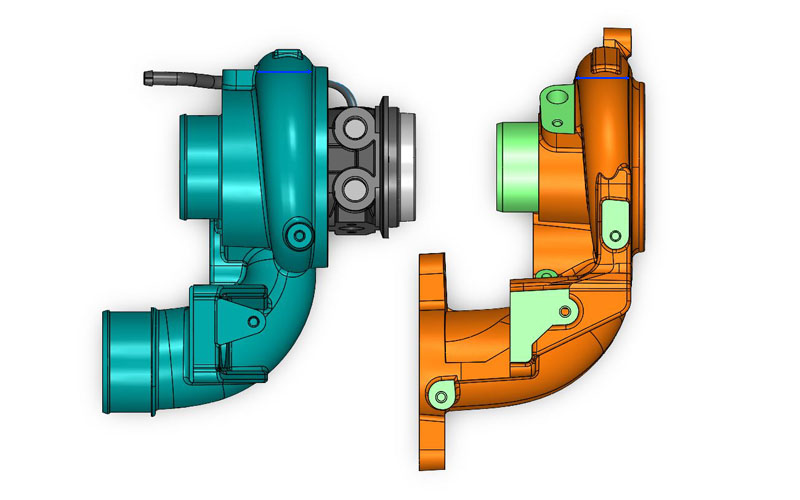
Here you can see the blue lines showing the larger compressor scroll. CorkSport is on the left and OEM is on the right. Increasing the size of the scroll A/R helps improve the compressor wheel efficiency and max flow capacity. Along with a larger scroll, we have also designed the housing to have either a stock-size inlet or a 3.5” anti-surge inlet for the larger turbo option.
Yup…there’s going to be more than one size available. More on that later…
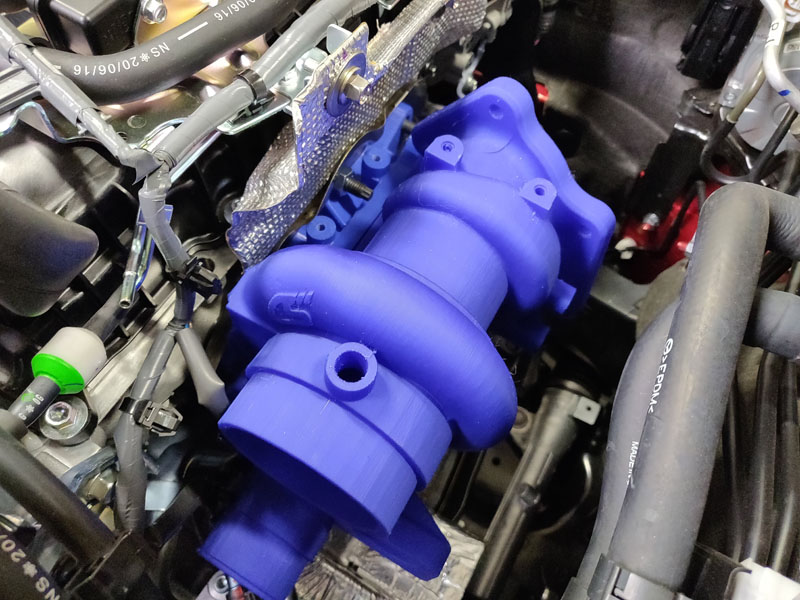
To do this we have to move some things around, but don’t you worry every part of this development is verified on a car with 3D printed prototypes and then functional prototypes. This is a critical part of the development to make sure everything fits like OEM but punches like the hot hatch we all asked Mazda for.
A Larger Responsive Turbo
Now let’s check out the party side of the turbo…the turbine housing. In my personal opinion, turbines make power and compressors just support the required flow. So what are we doing on the turbine side of things to make more power?
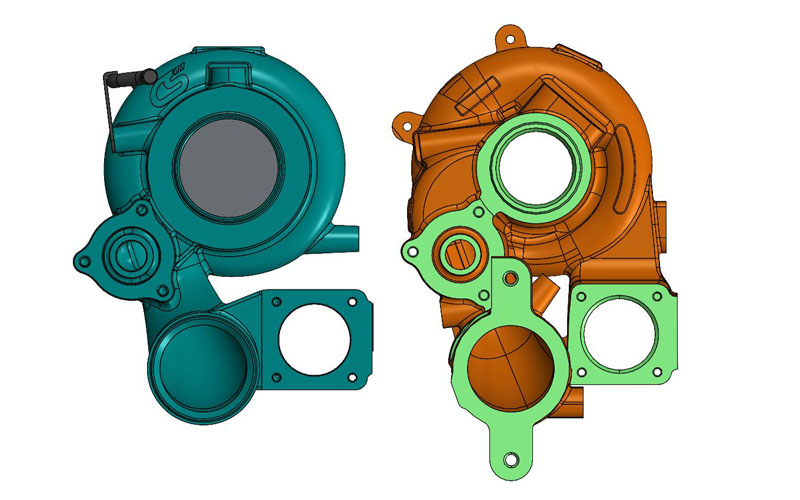
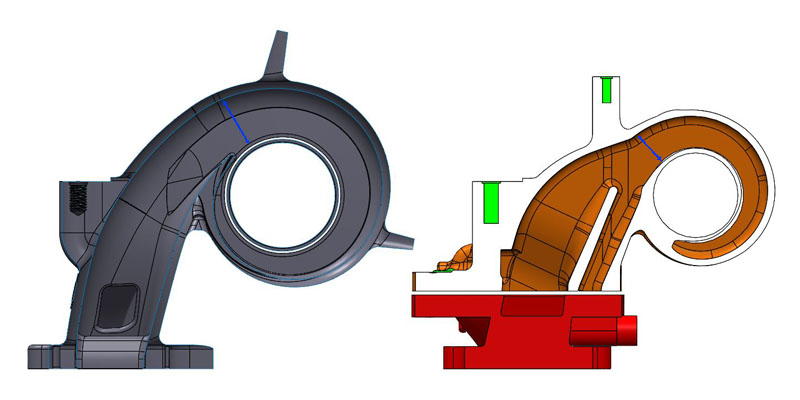
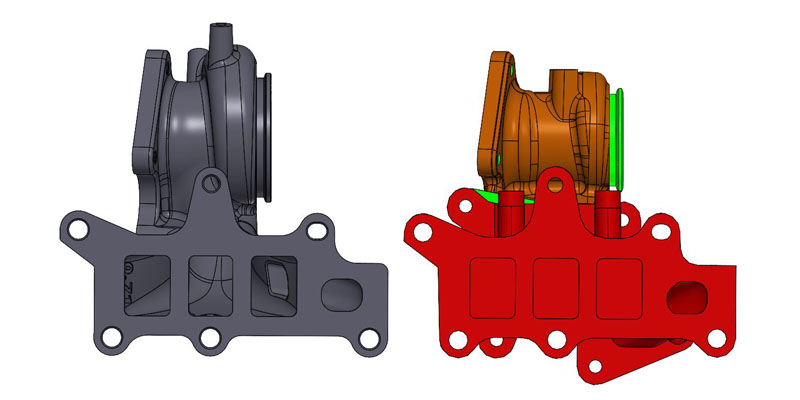
Several changes have been applied on the turbine side to increase performance and reliability. Here are the CorkSport (left) and OEM (right) turbine housings next to each other.

Our goal is to develop a turbo that is fun, responsive, and carries power like you would expect. Referencing the blue lines you can see a drastic difference in the size of the turbine housing scroll. While the CS design is a large increase in size over OEM, it is not “bigger” than a typical aftermarket generic fitment turbo – highlighting just how tiny and limiting the OEM turbine housing really is.
Now let’s take a look inside the housing so you can understand what is changing.
An Improved Design
Both turbines (CS & OEM) are single scroll designs, but you will notice two major differences.
Firstly, the spiral section of the CS design is drastically larger than OEM; this is the true “scroll” of the housing and thus the section of the housing that funnels the exhaust gas into the turbine wheel. We changed two aspects of the scroll design:
- The “swallowing capacity” of the scroll has been increased so that the peak flow capacity of the turbine is much greater than OEM. This is the cross-sectional area at the beginning of the scroll shown by the blue arrow.
- The scroll A/R (Area/Radius) has been increased from 0.53 to 0.71. This ratio number affects how “quickly” the exhaust gas is forced into the turbine wheel. The smaller ratio is a faster spool but poor top-end power and a larger is slower spool but more top-end power. The goal here is to find the right balance of spool/response and top-end power.
Second, you may have noticed the CS turbo is missing the red blocky section that the OEM turbo has. It’s missing for good reason.
In the above image, you can see the OEM turbo with the turbo on the right and the dynamic pressure valve on the left. Mazda uses this control valve to help spool the turbo below 2000 RPM and it seems to do the job, but it has cracking issues from what we’ve seen and is going to be a huge flow restriction on higher power setups.
We are getting rid of it!
The Pursuit of Reliable Performance
In the pursuit of performance and reliability, the dynamic valve and its housing had to go. Like the OEM turbine housing, we’ve seen cracks forming in the dynamic valve housings so we know they are a reliability issues and Mazda knows as well.
Mazda is also getting rid of the dynamic valve system…the CX50 Turbo has a much simpler twin-scroll turbo design with no dynamic valve and I assume that change will find its way into all 2.5T models sooner, rather than later.
To keep things as simple as possible for you, the enthusiast, the CorkSport-designed turbine housing mounts directly to the cylinder head and still takes advantage of Mazda’s trick 4-3-1 exhaust port design. Along with that change, the OEM EGR port is retained and new heat shields will be part of the kit.
That covers the housings for the upcoming CorkSport Drop-In Turbo Upgrade for the Mazda 3 Turbo. We are excited about this project and even more excited to bring this to the community. Who doesn’t love boost right?
Expect to hear more as we roll further into 2024 and until then enjoy these teaser shots of the raw castings.
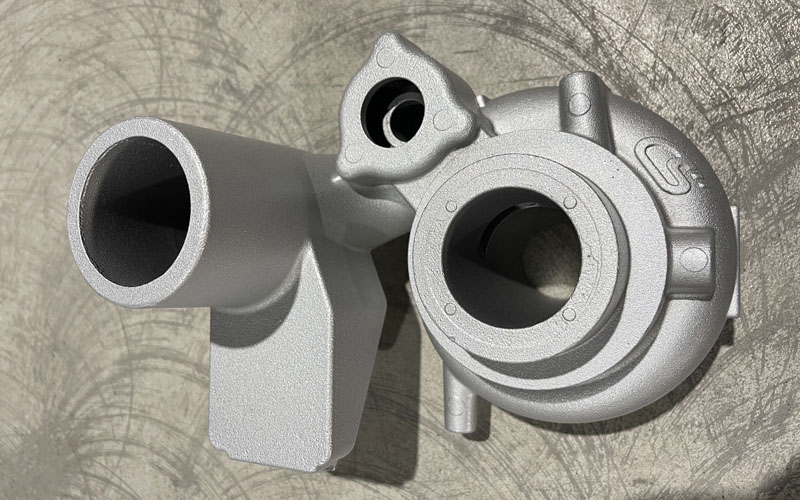
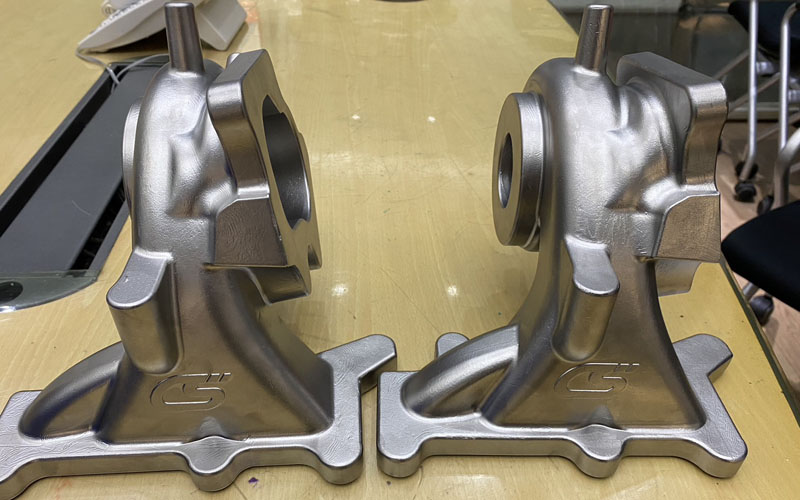
-Barett @ CS
Connect with us
You may also like
- 2021-up Mazda 3 Turbo and CX30 Turbo Intake Heat Shield
- It’s Finally Here! The Performance Turbo Inlet Pipe for the Mazda SkyActiv-G 2.5L Turbo
- 5 Reasons You Need The Cold Air Box Intake System for the 2019+ Mazda 3 Non-Turbo