How to Make A 900 Horsepower Mazdaspeed 3 AWD Swap – CX7 Rear Subframe (Part 3)

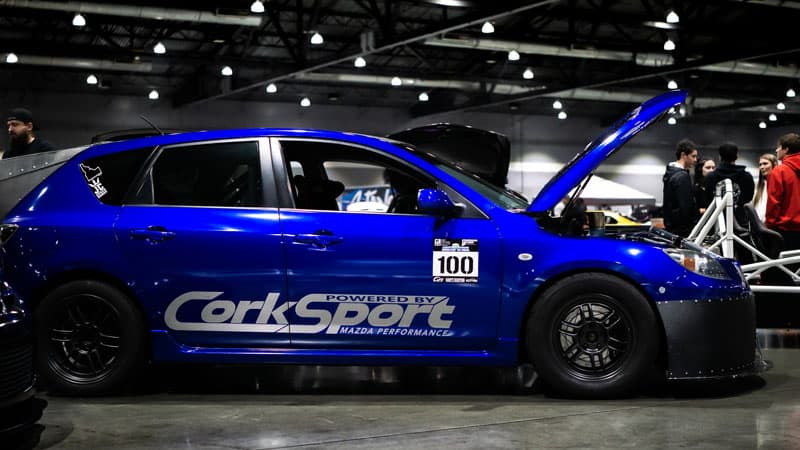
Welcome to part 3 of the Mazdaspeed3 AWD Swap! If you missed part 1 and part 2 blog posts, then catch up by visiting these links.   Lots of images in this blog as I get the CX7 rear subframe installed and figure out the correct control arms to use for the rear suspension. 

Typically when I mention the AWD swap Mazdaspeed 3 to a fellow Mazdaspeed enthusiast, they assume I am using the rear subframe from a Mazdaspeed 6.  While I understand their logic, incorporating one would require extensive fabrication.

Here’s why: the Mazdaspeed 6 has a very different chassis architecture vs the Mazdaspeed 3.  It is important to note because it directly affects the subframe and chassis interface.

If it’s not the speed6 then what do I use?  Good news!  The Mazdaspeed 3 uses a chassis design based on a Ford global chassis used with various models in Mazda, Ford, and Volvo.  Enter the Mazda CX7

Mazdaspeed junkyard performance parts
Car AWD Hunt for CX-7 Subframe

So I went hunting for a Turbo AWD CX7 model year 2006-2007…this is a great time to bring your buddies along for some junkyard fun!

Luckily I found one in a local junkyard that was still complete enough.  Not knowing exactly what I needed from the rear-end suspension and drivetrain, I opted to take everything; driveshaft to differential, plus the ENTIRE rear subframe and suspension.

Mazdaspeed awd swap cx7 rear subframe
CX-7 Rear Subframe

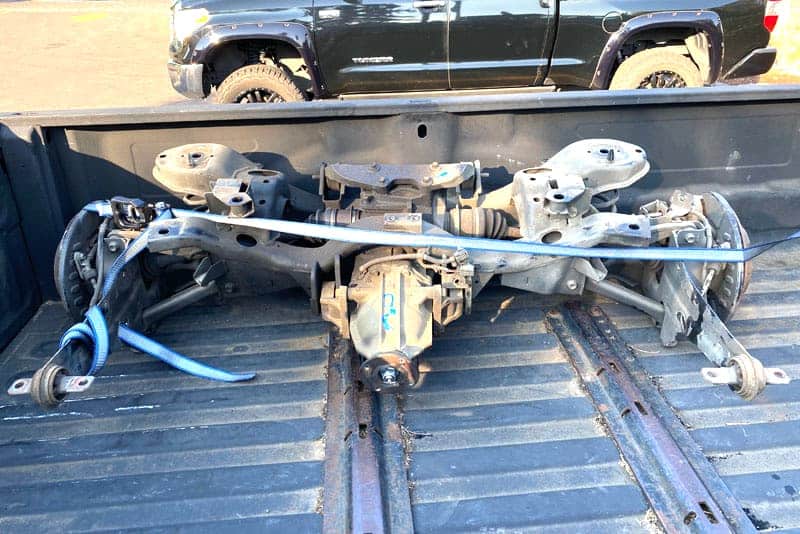
$380 later, we are driving home with our newfound treasure and ready to take on the swap! I was eager to see how this would bolt into the Mazdaspeed 3, so we went straight to the shop.  

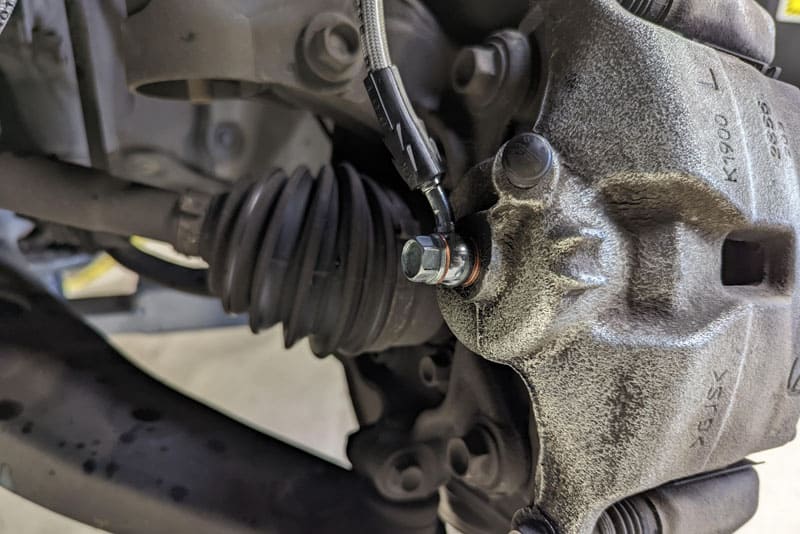
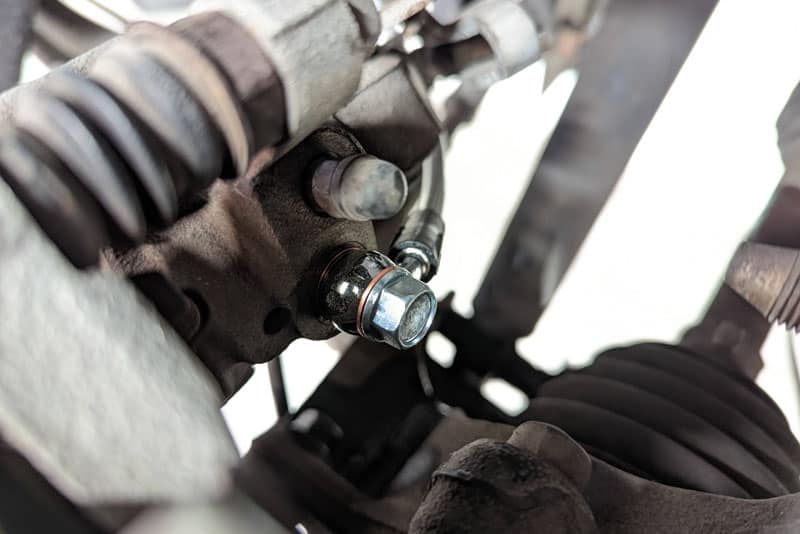
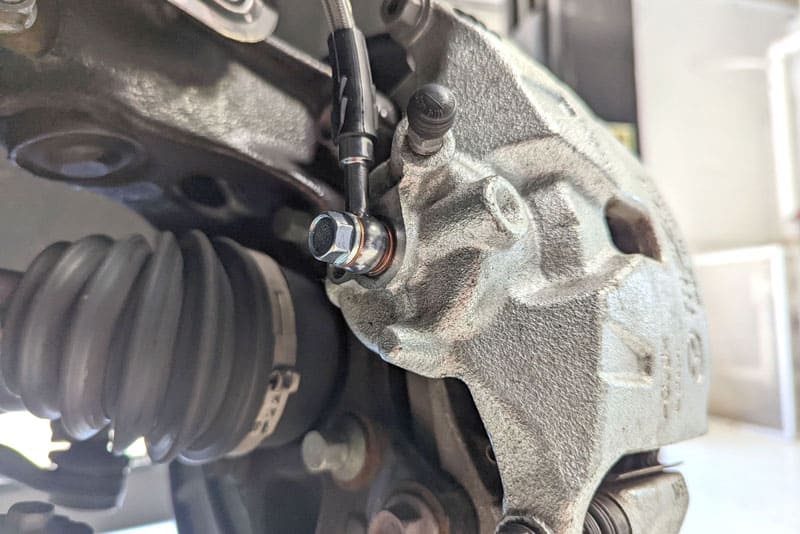
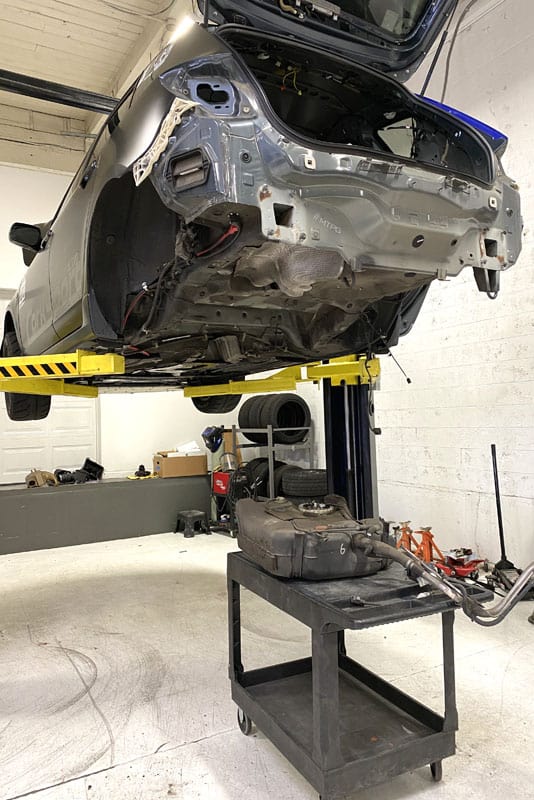
We wasted no time removing the speed3 rear subframe… literally six bolts and removing the brake calipers is all that is required.

Mazda 3 performance parts awd swap ms3
Mazdaspeed 3 Rear subframe removed
Mazda 3 awd swap performance parts turbo
OEM Fuel Tank

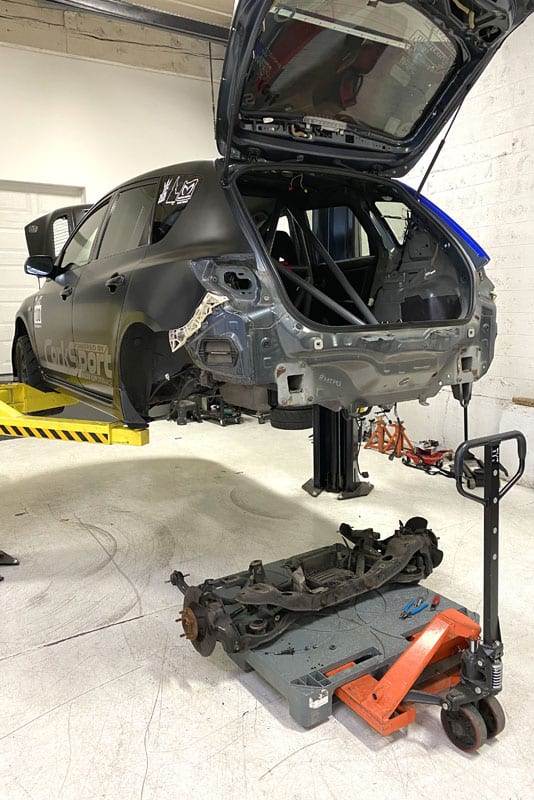
Knowing the OEM fuel tank is in the way of the mid-driveshaft, we opted to just remove it right then as well.  A handful of bolts and some fighting of the fuel tank filler and it’s out also. At this point, we are maybe 1.5 hours into this and the car is ready to accept its fate.

Mazdaspeed fuel tank removal awd swap
OEM Mazdaspeed Fuel Tank Removed
Mazdaspeed 3 no fuel tank under car

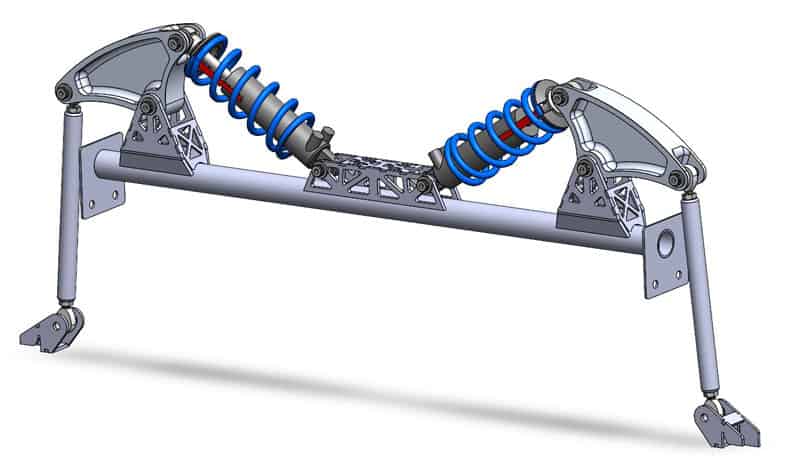
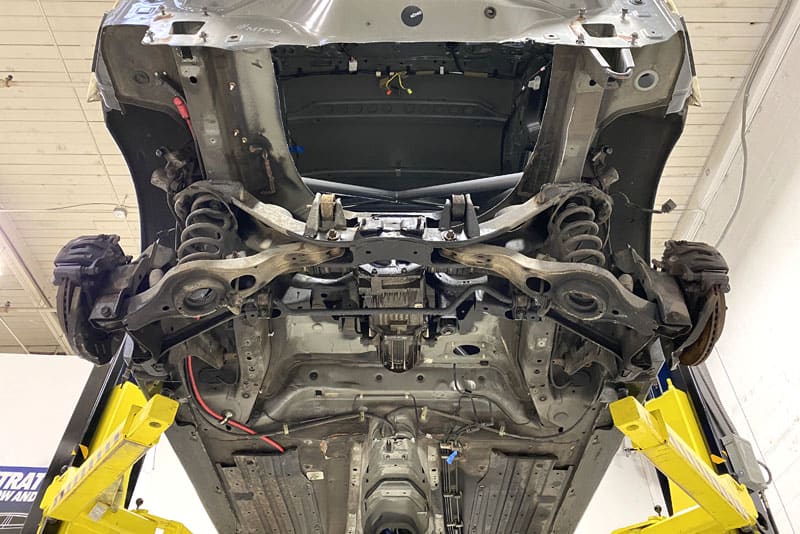
With both the MS3 and CX7 rear subframes out and sitting side-by-side, we took the opportunity to compare them. Checking the most important things first, we looked at the mounting points for the subframe to chassis. These all checked out visually and again after measuring to be the same…but this is where the similarities ended.

Mazdaspeed vs cx7 rear subframe on pallet
Comparison of the Mazdaspeed and CX-7 Rear Subframe Side by Side

The trailing arm/hub assembly is very different between the two models.  The CX7 appears to be much heavier duty and more complex.  Doing some research, we found that the CX7 uses a different style of parking brake.  The parking brake is actually a drum brake inside the rotor hat of the disc.  Either way, the CX7 suspension looks heavy…which is not ideal for Racecar. The width also appears to be wider by a few inches.

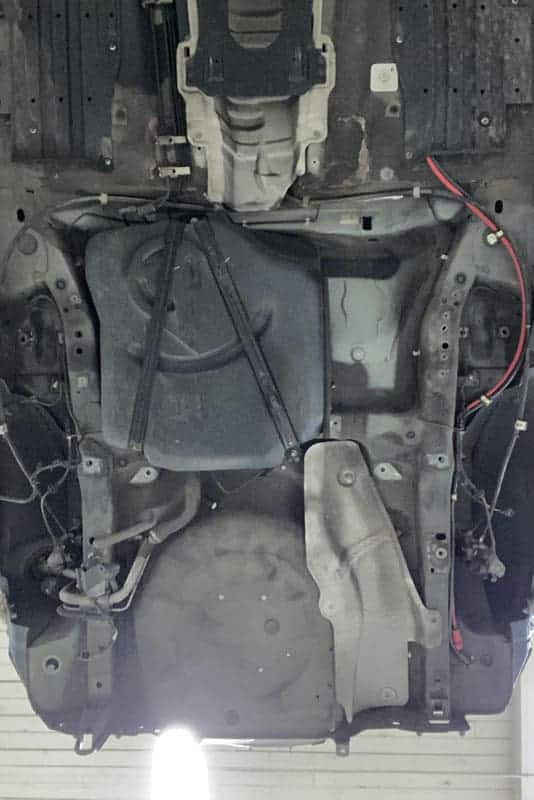
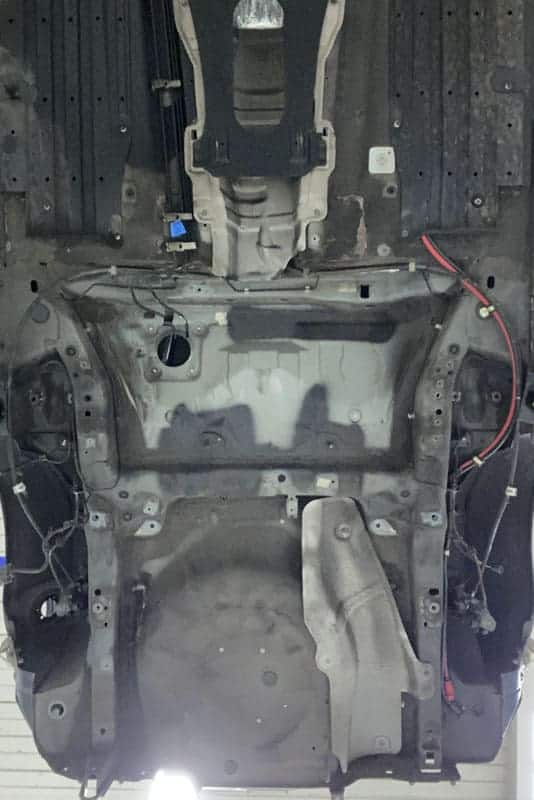
The last noticeable difference is the addition of a rear differential – which is the whole goal of the project – so that is a good thing! That said, the OEM spare tire location in the MS3 will interfere with the fitment of the differential.

Mazdaspeed 3 under car image no drivetrain

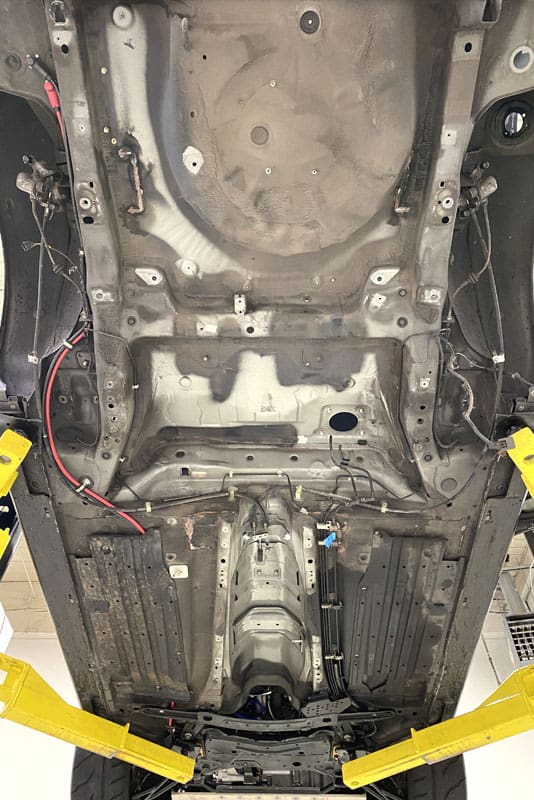
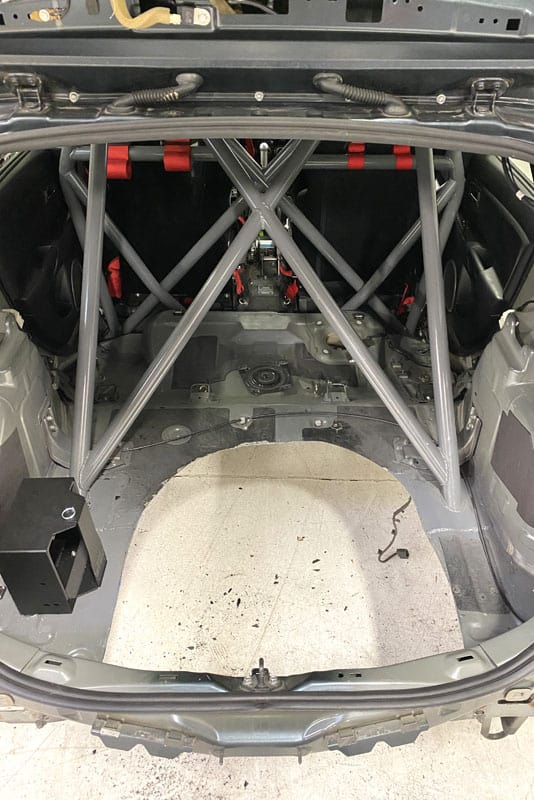
Not an issue for Racecar and my Sawzall!  I cut the entire spare tire tub out since my new fuel cell will be going there.

Mazdaspeed 3 spare tire tub removed
Removed Mazdaspeed Spare Tire Compartment

We are ready to mock up the complete CX7 rear suspension with the spare tire tub removed. Knowing that the mounting points are the same, we installed the entire CX7 system to see how it fit.

mazdaspeed 3 with cx7 rear subframe installed 1

The six mounting points lined up perfectly, confirming our initial measurements – it’s almost as if it was meant to be! Next, we tried to get the trailing arm forward mounting points bolted in but fought them, eventually giving up. We are confident the springs were fighting us, and the trailing arms would have bolted in had we removed the springs.

Mazdaspeed 3 with cx7 rear subframe installed 2
Installing the CX-7 Rear Subframe to the Mazdaspeed

Moving on, we wanted to see how the track width looked before spending any more time on the trailing arms.

Mazdaspeed 3 stance car cx7 width
The Track Width of the New Rear Subframe

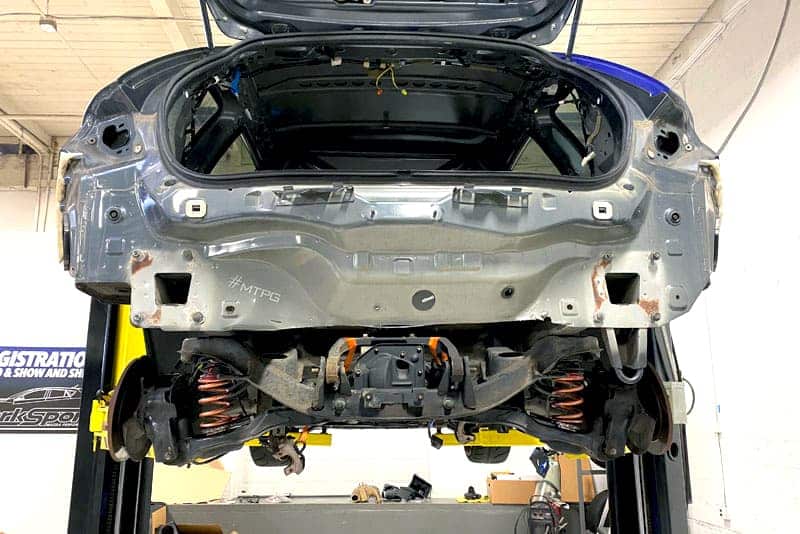
As we suspected, the setup was too wide – unless you want wider – which I did not want for a high-speed straight-line drag racer.

Mazdaspeed AWD swap after CX-7 Mazda intall
Ride Height with the Mazda CX-7 Subframe on Mazdaspeed

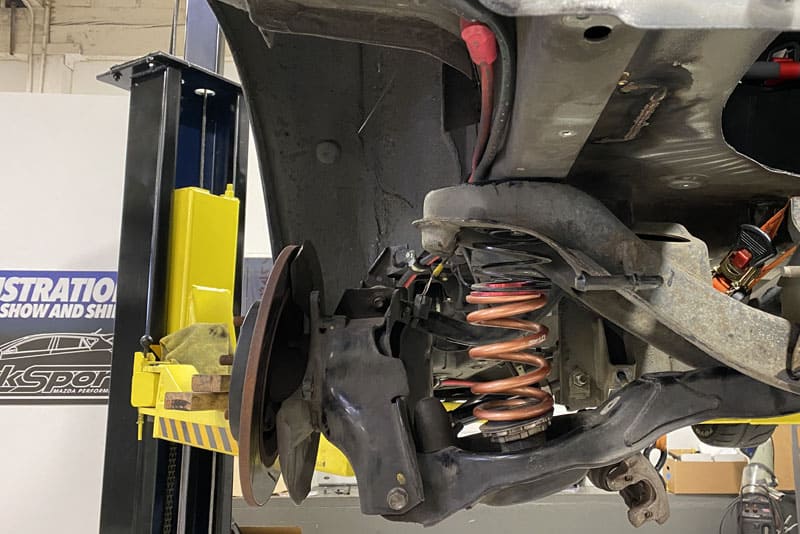
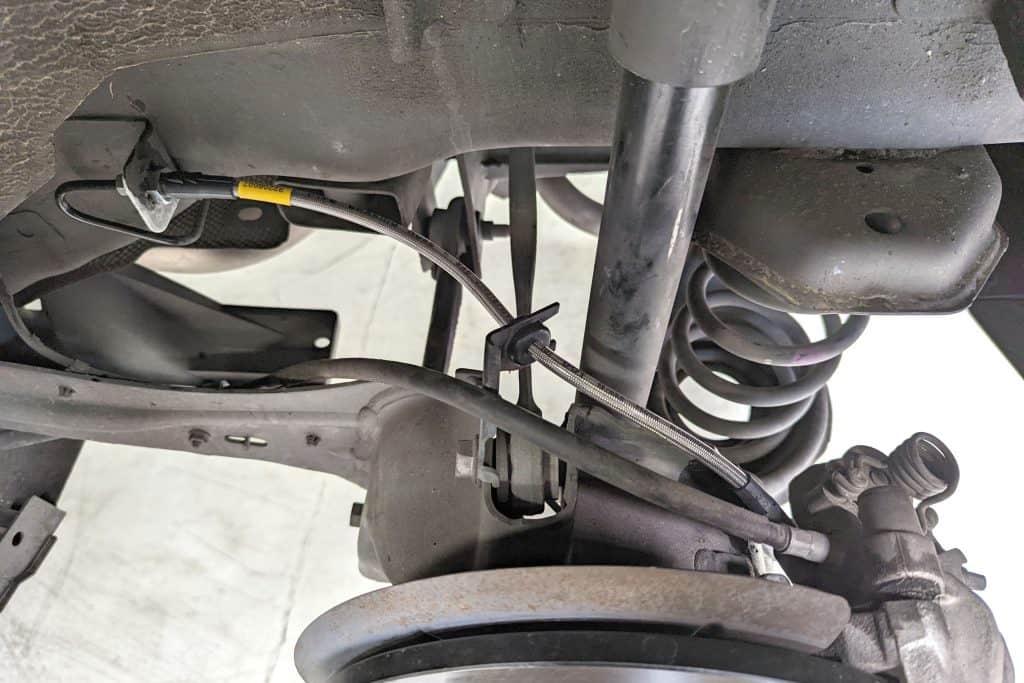
From the side view, the wheel’s centerline looks good, and the meaty 255/50R16 looks badass, but the CX7 springs obviously do not play nice. The monster truck ride height won’t work.  

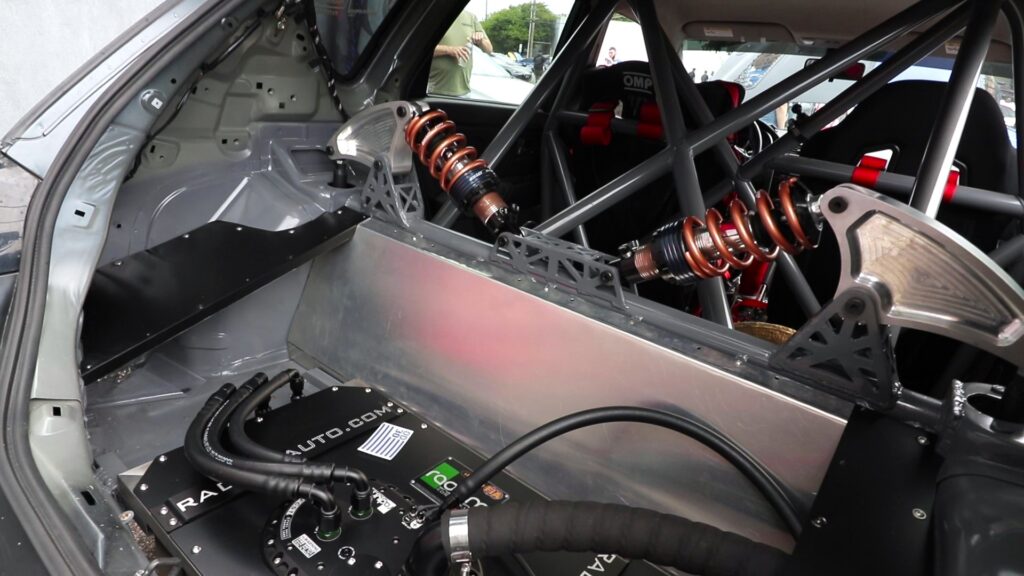
We planned a “hybrid” of CX7 and MS3 suspension parts, as advised by a friend, @junkiebuilt, that did a GEN1 AWD swap using a Honda drivetrain. We will use the CX7 subframe only and the MS3 trailing arm/bearing hub and control arms.

mazdaspeed 3 awd swap done the right way

This combo was the ticket!  The Mazdaspeed 3 control arms bolted into the CX7 subframe without issue, allowing me to retain my CorkSport Camber Arms and CorkSport Toe Arms, as well as the lower OEM control arm.  Along with that, I get to keep the Mazdaspeed 3 trailing arm, which is not nearly as heavy or complex.

Mazdaspeed 3 awd correct trailing arm

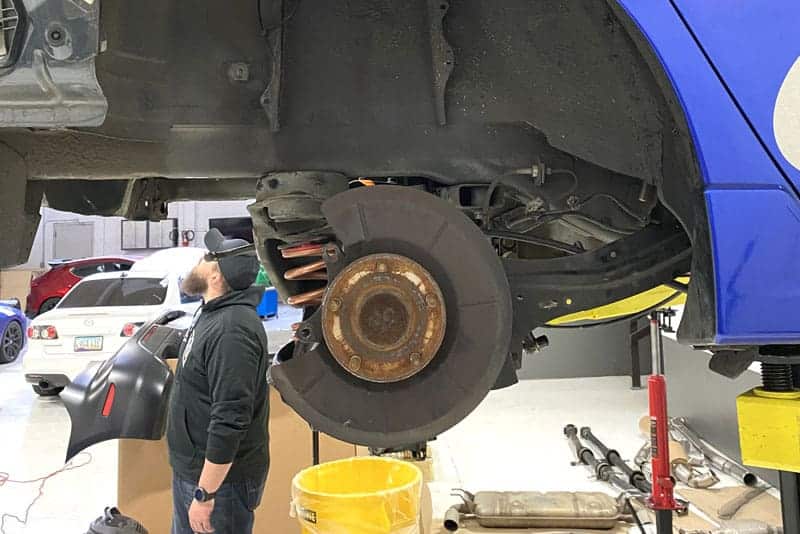
This setup also retains the OEM parking brake, my Mazda 5 rotor, and my MS3 calipers.  Ultimately this is looking like a very straightforward swap with no fabrication.  Don’t mind @farvaspeed6 looking at, um, something.

With the hybrid CX7/MS3 setup on the car, we wanted to see how things were lining up. The meats went back on!

Mazdaspeed 3 stance race tire
After the hybrid swap track width
After adjustments the Mazdaspeed AWD swap ride height
Mazdaspeed AWD Swap Hybrid Ride Height

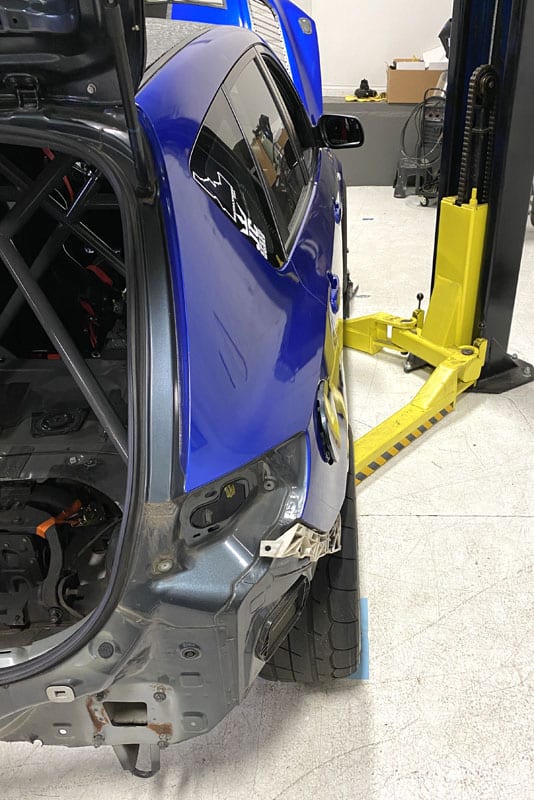
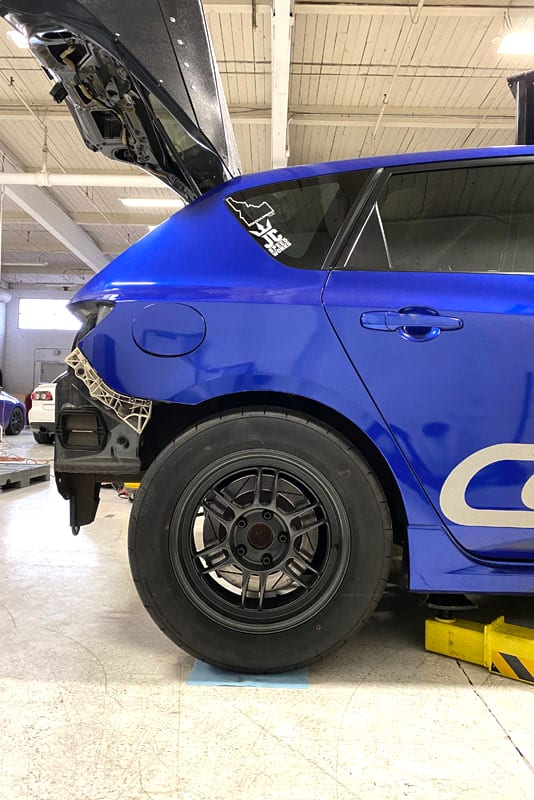
Ah, much better this time.  The wider stance is gone, and the wheel tire looks right at home.  Surprisingly the tire tucks under the fender with just a tad amount of rubbing.  

With the day of excitement winding down, I wanted to check on the last thing to see if this truly was a direct bolt-on swap.  Unfortunately, the OEM MS3 rear wheel bearing is not the same as the CX7 wheel bearing.  Being FWD, the MS3 wheel bearing does not have splines for an axle…duh.  So I have to use CX7 wheel bearings on the MS3 trailing arm/hub assembly. 

This is where my luck ended.

awd swap mazdaspeed 3 cx7 wheel gearing

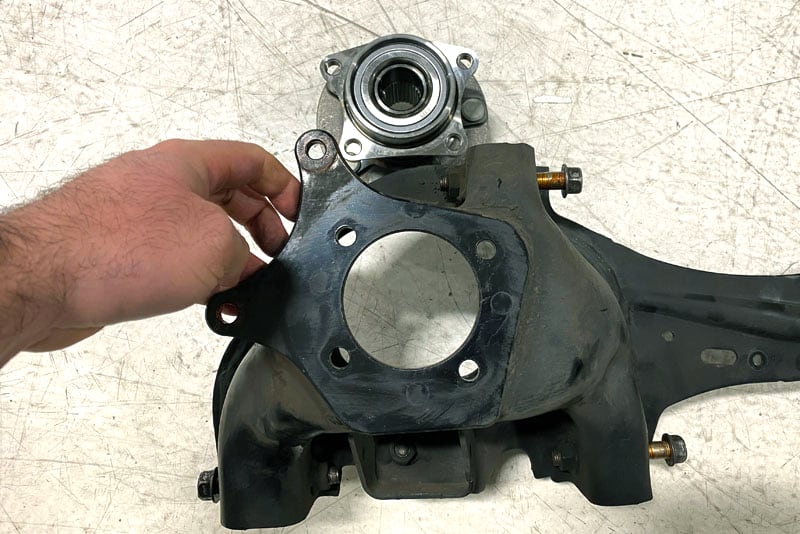
With the MS3 wheel bearing removed and the CX7 wheel bearing set next to the trailing arms…things look good.  But they are ever so slightly different.

awd swap mazdaspeed 3 cx7 wheel gearing 2

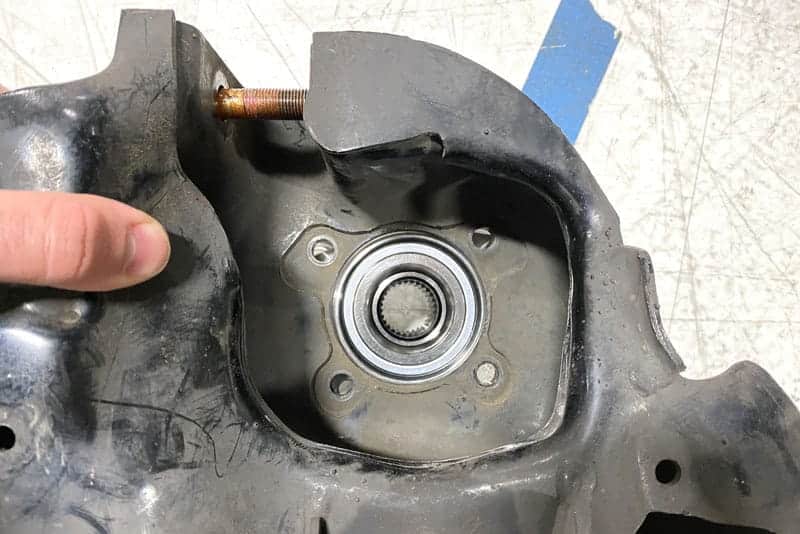
The CX7 wheel bearing has a slightly larger bore size, and the bolt pattern is somewhat different. I will never understand why Mazda went through the effort to make these so close but not the same.  Either way, this was not a job a hand drill and grinder could fix.  This needed proper measurements and machining.  

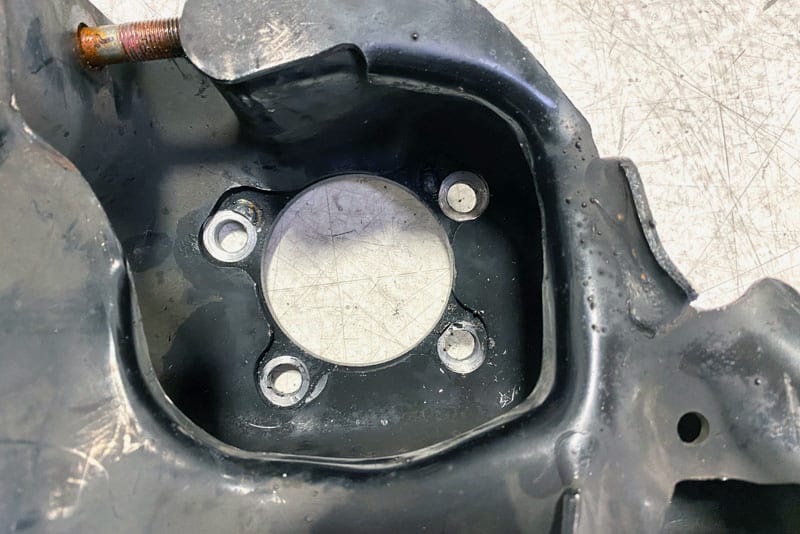
I reverse-engineered the CX7 bolt pattern and hub bore.  3DP printed that to verify then off to the machine shop to get the one-off work done.

CX-7 bolt and hub bore pattern

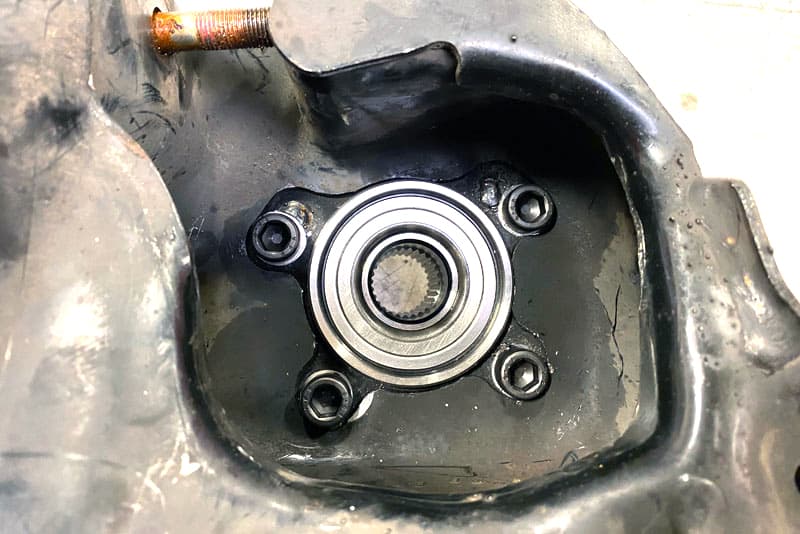
The existing bolt holes were welded closed, the ground flat, and the new holes were drilled following my measurements.  The hub bore was also enlarged to match the CX7 wheel bearing.

Mazdaspeed 3 awd swap machined trailing arm 1

With that one and only fab job complete, we had actually finished the CX7 to MS3 rear swap. 

Mazdaspeed 3 awd swap machined trailing arm 2

Minus the machining for the wheel bearings, the rear subframe, and the suspension swap was actually very easy and straightforward.  This is great news because it could have been the death (or very expensive aspect) of the swap.  Ultimately this part of the swap being so easy makes it a much more viable project for the average enthusiast. 

Alright, that wraps up the rear subframe swap, a huge milestone for the build.  There are plenty more milestones to overcome and those are coming up in this multi-part blog series!

I hope you are enjoying this series about the AWD Swap Mazdaspeed 3, stay tuned for more blogs to come!

You can also find updates on my IG @halfmilespeed3, the CorkSport 7th Gear Membership, and on mazdaspeeds.org.

Thanks for tuning in!

-Barett @ CS

Connect with us

Stay up-to-date on the latest news and product updates from CorkSport.

* indicates required

You may also like

How to Get A 900 Horsepower MazdaSpeed 3 AWD Swap – Baseline Weight & Cantilever Suspension (Part 2)

Part 2 of the Mazdaspeed3 AWD Swap blogs, we are going to get a baseline weight, show you some of the parts going into the car and finally tease you with cantilever suspension.  Have a seat and grab a drink!

Read Part 1 How to Get A 900 Horsepower Mazdaspeed 3 AWD Swap – The Intro

Before I started the AWD swap on my half-mile drag-racing Mazdaspeed 3 I wanted to get a baseline weight and weight distribution.  Without a driver, my 2009 Mazdaspeed 3 weighed in at 3000 pounds on the money with just under 2000 pounds on the front wheels and just over 1000 pounds on the rear axle.

Mazdaspeed 3 weight on scales

Corner weights are actually pretty damn good, but this is without my weight in the car.  Adding me to the equation would throw that off a good amount.  Either we have a baseline that we can compare to later once the car is back to 100% with AWD.  

Now this may not be a perfect back-to-back test but it’s something…which is better than nothing. At the time of weigh-in, the Speed3 has an 8-point cage, composite driver seat and basic reclining aftermarket passenger seat, harnesses for both, stripped interior for everything behind the driver. 

The components that are changing for the AWD swap:

  • Transmission: MS3 to MS6
  • Rear Subframe: MS3 to CX7 
  • Fuel Tank: OEM Fuel Tank to a Radium 10gal Fuel Cell w/Surge Tank built-in
  • Rear Suspension: Changing from outboard OEM style to inboard cantilever style
  • Rear Tires/Wheels: Going from a 17×9+45 w/255/40 tire to a 16×8+38 w/255/50 tire
  • Rear Crashbar: Removing the OEM crashbar for a custom tubular crashbar with parachute mount

The components that are being added for the AWD swap:

  • Transfer Case from Mazdaspeed 6
  • Mid-Drive Shaft connecting the T-Case to the Differential
  • Rear Differential from Mazdaspeed 6 and CX7. (We will discuss this more in a later blog.)
  • Rear Axles
  • Firewall Structure to separate the Radium Fuel Cell from the driver compartment

Alright so let’s talk about some of these components that are changing.  Firstly is the fuel system.  Currently, I am running a dual fuel system featuring the CorkSport Fender Fuel Cell with E98 in it feeding the port injection system and the stock fuel tank with an E48 blend in it. 

mazdaspeed 3 fuel cell fender kit

While this kit has taken me to 650+whp with the CorkSport CST6 Turbo and nearly 900 WHP with a larger turbo and fuel pump…it’s time to really focus the build to a more dedicated racing fuel system. 

Enter the Radium “FCST” System; this is a full standalone fuel system that is FIA-certified and incorporates the 10-gallon fuel cell, an internal surge tank, and a fuel level sensor.  

 mazda radium fuel cell surge tank setup

For my setup, I will be using a single 525LPH “in-tank” pump inside the fuel cell feeding the surge tank which then feeds to external pumps.  This 525LPH fuel pump is mounted to the stainless steel bracket you see below inside the fuel cell. 

mazda racing fuel cell system radium 525lph

Then the external pumps are a Quantum 044 style pump feeding the direct injection OEM fuel system and a MagnaFuel 525 gear-driven pump feeding the port injection fuel system. 

So why the big change?  Well, there are a few reasons really:

  1. With the AWD swap, I couldn’t retain the OEM fuel tank due to the mid-driveshaft so I had to find a new solution.  There is some Volvo OEM fuel tank that works with some basic modifications, but this is a racecar. I did not want to retain the same limitations as OEM. 
  2. With the power I am pushing and plan to push in the future, I need all the octane I can get so it made sense to use a single tank feeding both DI and PI fuel systems. 
  3. Typically, in drag racing, you specifically use a small (less than 3 gallon) fuel cell in the front of the car, much like the CS Fender Fuel Cell.  However, my car still sees street use, at events, and may or may not always be a drag racing-only car so I wanted a fuel cell system that could do anything I wanted now and in the future. 

Next up is the rear suspension…this is my favorite part…except for the actual AWD of course!  With the rear suspension, I am taking a much more unique approach by using an inboard mounting cantilever coilover suspension.  While this seems over complicated upfront, and it is, it will also provide me with a lot of flexibility and control later when using and tuning the suspension.

But what’s wrong with the OEM suspension design?

Mazda 3 performance parts suspension setup

Nothing is “wrong”, it’s just not ideal.  The lower control arm that supports the coil spring is very heavy, the OEM damper mount can’t be used due to the driveshaft so I will need to create a new mount elsewhere with cantilever or OEM style suspension and lastly, I want double adjustable (rebound and compression) dampers which would be more difficult and expensive to source that will work in the OEM style arrangement. 

All of those factors lead me to the path of developing my own suspension setup.

mazda performance parts double-adjustable dampers

Doing some research I found QA1 dampers have great reviews, are very cost-effective, come in many different sizes/lengths, and have double adjustable options.  They seem very fitting for my goals.

Mazda 3 performance parts QA1 coilover

The double adjustable control is important for any type of competitive racing, but with drag racing, I had a specific need.  When the car is launched from a standstill, there is an extreme amount of weight transfer happening that needs to be allowed to “transfer” to the rear but then needs to be controlled and maintained in that position.    

Lastly, what is this cantilever suspension and what does it look like? Here’s a teaser of my design.

Mazdaspeed 3 AWD Swap Cantilever 4

While I am planning to dig into the design around this in more details, that will have to wait til the next blog in this series.  In a nutshell, the outboard suspension that the wheel and tire is connected to pushes a “push-rod” to a larger rocker arm (cantilever) that then pushes a coilover damper and spring setup.  Other than the rod itself, this entire system is inside the car between the rear damper towers.

I hope you are enjoying this series about the AWD Swap Mazdaspeed3, stay tuned for more blogs to come!

You can also find updates on my IG @halfmilespeed3, the CorkSport 7th Gear Membership, and on mazdaspeeds.org.

https://mazdaspeeds.org/index.php?threads/awd-speed-3-project-halfmilespeed3.15154/

Thanks for tuning in!

Connect with us:

Stay up-to-date on the latest news and product updates from CorkSport.

* indicates required

You may also like:

How to Get A 900 Horsepower Mazdaspeed 3 AWD Swap – The Intro

Have you ever felt like you try and try and try, but just can’t get the traction to make forward progress on your Mazdaspeed 3 car build? Ya, it happens to the best of us and the 2022 season was my time…both in literal traction and life.  

If you haven’t seen my build yet, the @halfmilespeed3, go check it out.  It’s an awesome combo of DIY, Teamwork, Innovations, and CorkSport goodies you all love.

Mazdaspeed 3 custom intercooler setup

Back to this traction conundrum.  Racing an 800+hp FWD Mazdaspeed 3 on small airport airstrips with no prep and plenty of dust has proven to be challenging.  There have been many successes and many challenges, but ultimately it comes down to those two tiny patches of rubber that meet the road.

LITERALLY NO TRACTION

Yes, Motec helped substantially with traction control and Justin’s ramp-up in power delivery also helps, but really…I just didn’t have any damn traction.  Sticky tires with meaty sidewalls also help, but again traction was such an issue!  There had to be a better way!

Wheel & Tire Setup:  

Front: Toyo TQ 255/50 on 16×8+38

Rear: Toyo R888R 255/40 on 17×9+45

Mazdaspeed 3 best tires setup for power

And there was and I had been talking about the idea for a year or so already.  Then life happened. 

As you can see with the racecar; I like to go fast.  I carried that enthusiasm into my love of mountain biking one day in June 2022 and well…I got a lesson in physics let me tell you. 

Five broken ribs, a double punctured lung, level 3 AC separation, and a fractured collar bone and scapula.  Resulting in weeks of hospital stays and three surgeries; then months of recovery and physical therapy.  Let’s just say the 2022 season did not go as planned. 

But it did get me focused on solving my traction problems…

Mazdaspeed 3 drag racing 800 hp CorkSport
Mazdaspeed 3 performance parts racing
Mazdaspeed 3 with CorkSport Mazda Performance Parts Back (AKA HalfMileSpeed3)

The Goal…Mazdaspeed 3 AWD Swap

So I decided it was time to stop talking about it and actually take action (well as soon as I physically could that is).  I made a plan and figured out the details and order of operations to finally get my traction back.  

It was time to AWD Swap the Halfmilespeed3.  

While I am not the first to do a Mazdaspeed AWD swap. I did have a goal to make my build unique in the sense that the AWD swap is catered to racing performance.  Meaning the strength of custom parts and the rear suspension design and the new fuel system are capable of handling the 4-digit horsepower goal I have and the abuse of racing.  

Talking horsepower…what does the car make right now?

Dynograph of Mazdaspeed 3 AWD Swap 800 WHP

This is at a modest 40-41psi using a Xona Rotor 9569s with the X3C compressor housing and 1.03A/R turbine housing.  Later Justin @freektune and I turned it up a bit more to see how close we can get to the 600wtq threshold and hold it.  Clipping off an 881whp run…damn!  This was supported by the many CorkSport Mazda performance parts you can get for your Mazdaspeed as well.  From engine mounts to manifolds, anything that isn’t a one-off custom is CS. 

Anyways…I have since updated the compressor wheel to a 99 lb/min design compared to the above 95 lb/min design and a larger compressor housing which is more efficient.  This setup has not been dyno tested yet, but talking to the engineers at Xona…2023 is going to be spicy!

Mazdaspeed 3 XONA rotor turbo 9969s

Close up because who doesn’t like billet turbo shots!?

XONA rotor X4C Mazaspeed 3

Dare I say this is the largest turbo in the stock location ever on a Mazdaspeed?  Go ahead…prove me wrong. To compare, this competes with a Precision 6870. 

Mazda 3 performance parts awd swap Mazdaspeed 3

The Start of the Mazdaspeed 3 AWD Swap

Anyways, this is the introduction to my Mazdaspeed 3 AWD swap here at CorkSport HQ.  I actually started the swap in October 2022 and have been making big steps each month.  We are going to be sharing blog updates rapidly as I wrap up the swap over the next couple of months. 

There will be much more technical info and images coming up so grab a drink and enjoy!

Mazdaspeed 3 team SSRE CorkSport

You can also find updates on my IG @halfmilespeed3, the CorkSport 7th Gear Membership, and on mazdaspeeds.org.

https://mazdaspeeds.org/index.php?threads/awd-speed-3-project-halfmilespeed3.15154/

Thanks for tuning in!

-Barett @ CS

Connect with us:

Stay up-to-date on the latest news and product updates from CorkSport.

* indicates required

You may also like:

The Best CS Stainless Steel Brake Lines For Your Mazda!

Looking for an upgrade to your Mazda that improves braking performance? The new CorkSport Stainless Steel Brake Lines may just be the upgrade you are looking for. We are releasing brake line options for the 2019+ Mazda 3, 2014-2018 Mazda 3, 2004-2013 Mazda 3, both Mazdaspeed 3 generations and the Mazdaspeed 6. Each set of CS Brake Lines is application specific to ensure the best fitment possible. The CS Brake line kits will be available in both front and rear sets to be able to replace all of the OEM lines. So, if you already have the CS Big Brake Kit you can get just the rears to get even more performance out of your braking system. 

CorkSport Brake Lines

The CS Stainless Steel Brake Lines offer the benefits of providing a more responsive and communicative brake pedal feel. This is due to the use of stainless steel in the construction of brake lines. The CS Brake Lines start with a PTFE inner liner that gets surrounded by a stainless steel braid which is responsible for controlling expansion in the line when force is applied to the brake pedal. This better control of expansion leads to an improved braking feel over the OEM lines, which gives you more confidence when reaching the limit. The CS Brake lines are finished off in a PVC coating over the stainless steel braid to help protect the line from road debris and ensure they will not get damaged easily.

Mazda 3 performance brake lines 2019

We can’t wait for you all to experience the improved braking feel of the CS Stainless Steel Brake Lines! Check out the product listing for your specific application for more details and images. If you have any questions on the brake lines, feel free to reach out anytime.

2014-2018 Mazda 3 Brake Lines Stainless Steel
2014-2018 Mazda 3 Brake Line
2006-2007 Mazdaspeed 6 Brake Lines Stainless Steel
2006-2007 Mazdaspeed 6 Brake Line
2004 - 2013 Mazdaspeed 3  & Mazda 3  Brake Lines Stainless Steel
2004 – 2013 Mazdaspeed 3 & Mazda 3 Brake Line
2019+ Mazda 3 Brake Lines Stainless Steel
2019+ Mazda 3 Brake Line

Connect with us

Stay up-to-date on the latest news and product updates from CorkSport.

* indicates required

You may also like

New CorkSport IWG & EWG Turbo Blanket Produced From Volcanic Rock!

Have you been running a CorkSport IWG or EWG turbo for a while now or just picked one up? Well if you have upgraded to a CS Mazdspeed turbo then we are excited to offer the CorkSport Turbo Blanket that works with whichever setup you are running. The CS Turbo Blanket will help protect surrounding components under your hood and increase the efficiency and performance of your CS turbo. Scroll down for more details on how the CorkSport Turbo Blanket will make your Mazdaspeed even better. 

Mazdaspeed turbo blanket installed

The most important aspect of any turbo blanket is the material that it is made out of. The CS Turbo Blanket utilizes an outer material made of volcanic lava rock that is manufactured into a fabric that has a direct contact temperature rating of 1800°F and can withstand radiant heat temperatures up to 2500°F. The CS Turbo Blanket also features an internal layer of calcium magnesium silicate wool that works as an insulator that can withstand continuous temperatures of 1832°F and peak temperatures of 2300°F. This inner insulating layer is held in with high temp stainless steel mesh to further improve durability and makes sure the CS Turbo Blanket can hold up in the most demanding situations. 

Product photo for the Mazdaspeed turbo blanket

Next up is the design of the CorkSport Turbo Blanket which we are offering in configurations for both IWG and EWG CS turbos ranging from the CST4 Turbo to the CST6 Turbocharger. The CS Turbo Blankets were designed so that they cover the most amount of the turbine housing as they can to provide the best insulation performance. The CS Turbo Blanket also comes equipped with stainless steel springs that hold the blanket tight to the turbo so the installation of the blanket is made quick and can be easily done on the Mazdaspeed. This also applies to the removal of the blanket so you don’t have to bother with undoing the wire if you ever need to take off the turbo blanket. 

CorkSport Turbo blanket on Mazdaspeed turbo

Now with the turbine housing being covered with the CS Turbo Blanket, how does it help the performance and efficiency of your Mazdaspeed turbo?  The basic idea is that since less heat is allowed to escape from the turbine housing, the heat and energy are instead transferred into the exhaust turbine which reduces the time it takes to spool the turbo, making it more efficient. It also helps keep the compressor side of the turbo cooler since the heat is being retained in the exhaust system and away from the compressor or top mount intercooler which leads to colder boost air temps and the potential for more power. Another bonus of containing the heat from the turbine housing is that other nearby components in the engine bay also benefit from the lower operating temperatures seen when using the turbo blanket. 

Mazdaspeed turbo with turbo IWG blanket installed

If you’re looking into getting a CorkSport turbo or further improving the performance of your CS Turbo then the CS Turbo Blanket is a perfect part to complement your build. Go and check out the product listing for additional photos and video on the CorkSport Turbo Blanket and let us know if you have any questions. 

Get the Turbo Blanket for the CST Mazdaspeed

Get the Turbo Blanket that’s designed to increase the efficiency and performance of your Mazdaspeed Turbo!

Connect with us:

You May Also Like:

Subscribe to stay-up-to-date on the latest CorkSport News & Product Releases!

* indicates required

Please select all the ways you would like to hear from :

You can unsubscribe at any time by clicking the link in the footer of our emails. For information about our privacy practices, please visit our website.

We use Mailchimp as our marketing platform. By clicking below to subscribe, you acknowledge that your information will be transferred to Mailchimp for processing. Learn more about Mailchimp’s privacy practices here.