Today is a huge day for the Speed community; one that has been coming for a long time with both celebration and frustration. Never the less time is up and this project is ready for the community as a whole!
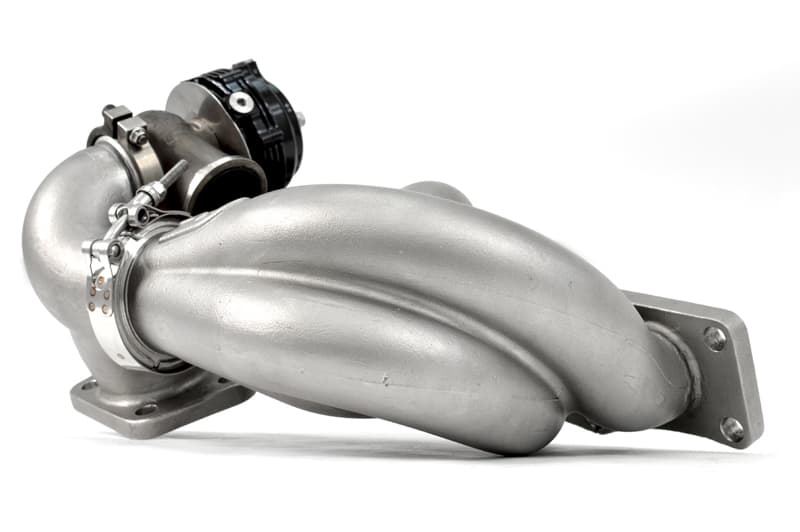
We are proud to announce the Performance Exhaust Manifold for the Mazdaspeed 3 & 6! With over 2 years in development, the MPS exhaust manifold has been long waiting, but for good reason. A project of this scale does not happen overnight; many variables have to be considered, evaluated, and verified.
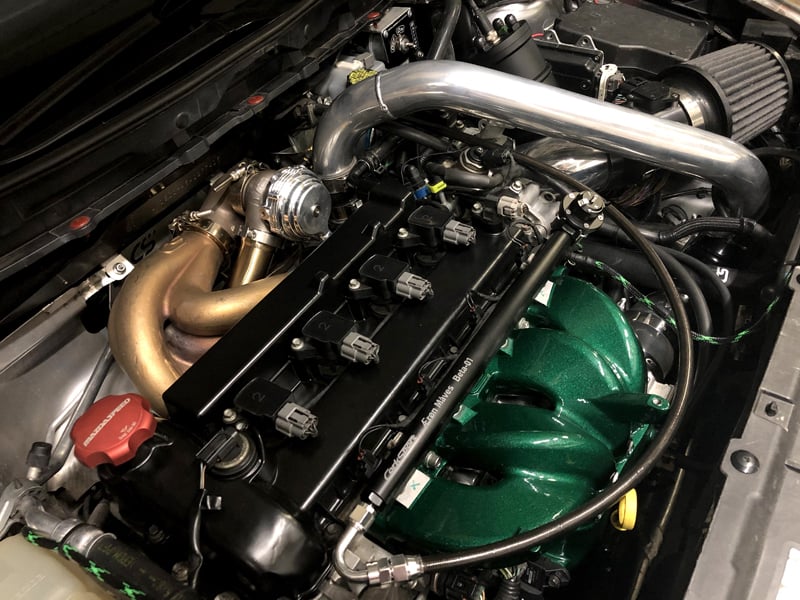
I’m confident you have seen “leaked” images from our 6 Alpha and Beta testers over the recent month, but we can make it official.
Stay Up-to-date with CorkSport
But with so many options currently available what makes the CorkSport option compelling? Why should you care?
Those are great questions and can easily be answered with multiple great reasons. The most obvious is the design: this includes the overall shape and the type of material & manufacturing.
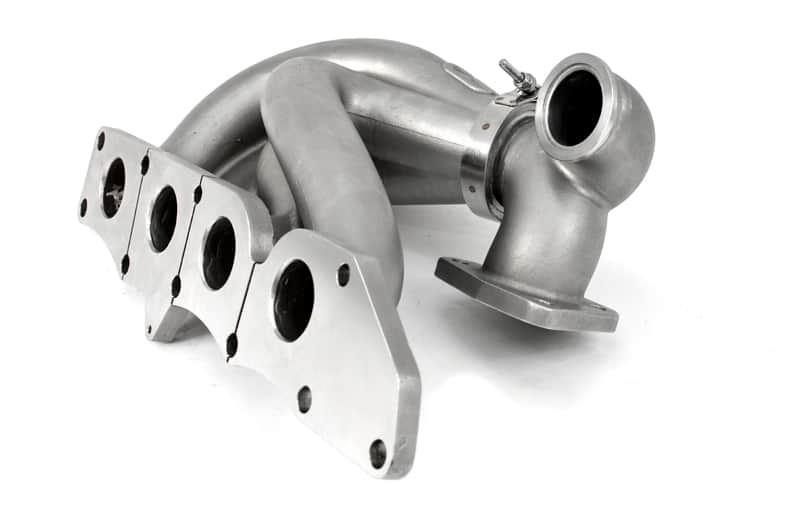
Material & Manufacturing: In our initial investigation and vetting of this project we strongly considered two primary manufacturing methods; Casting and Tubular fabrication (check out the blog here). In a nutshell, we opted for a cast manufacturing method because it reduced the chance of failure modes, reduced the overall size and weight, and gave us more flexibility in design.
Like most exhaust manifolds, we opted to use 304 stainless steel because it is corrosion-resistant, handles heat well, and is a common and cost-effective material.
Following up is the Design of The Exhaust Manifold
The list of details that went into the design is far too long to list here, but we can cover the major items that define the CS Exhaust Mani. With investment casting, we had a lot more flexibility in design with the bend radius, diameters, and wall thickness of the individual runners. This allowed us to increase the inner diameter of the runners to 1.59 inches, achieve a 0.200-inch wall thickness, and fine-tune the path and bends of each runner to optimize runner length and flow.
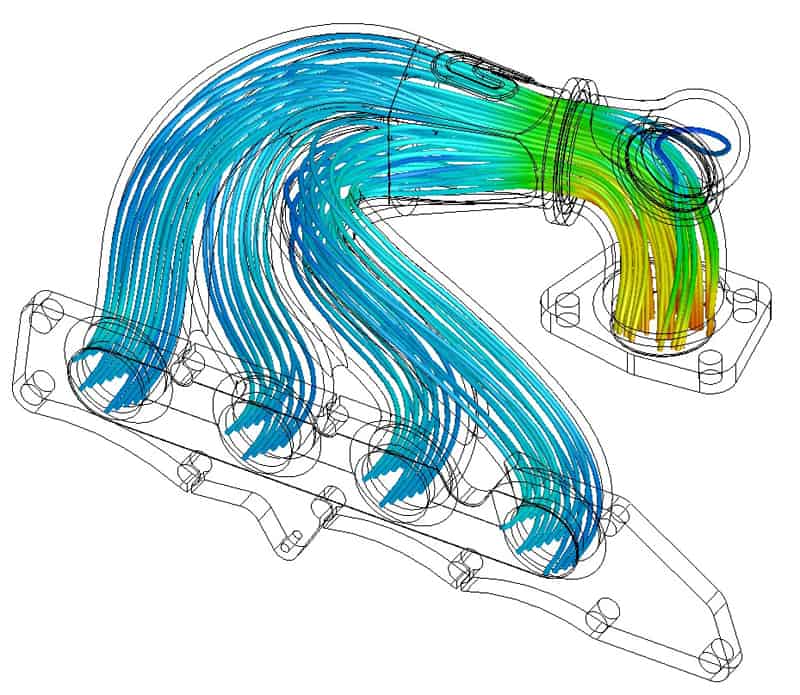
With that flexibility in design, we were able to increase peak flow and improve flow balance per runner. Overall we were able to increase peak flow 45% over the OEM manifold and 33% over the XS Power V3.
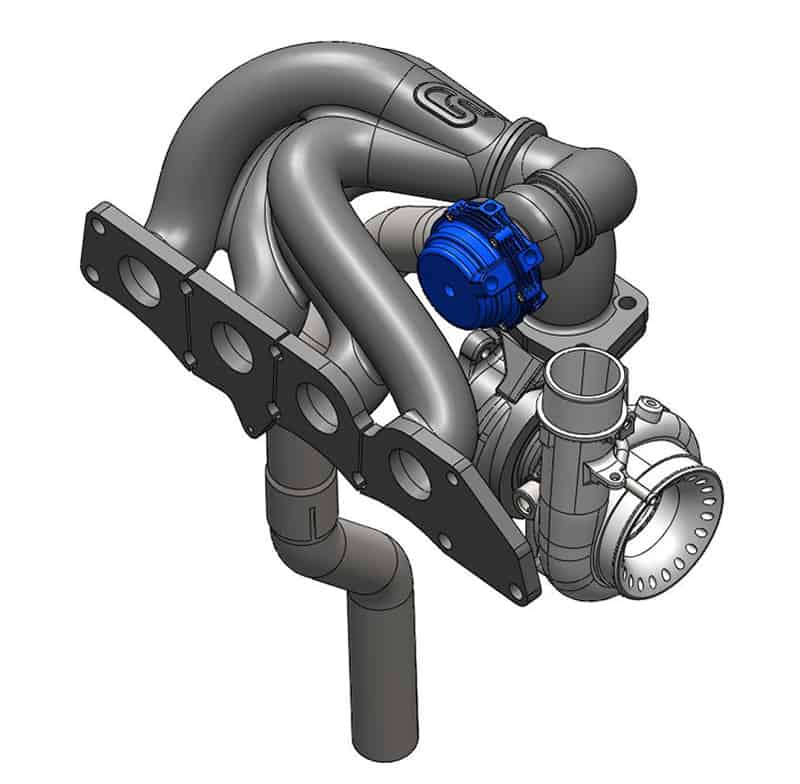
Next up in design, and arguably the most exciting and unique aspect, is the modular flange system.
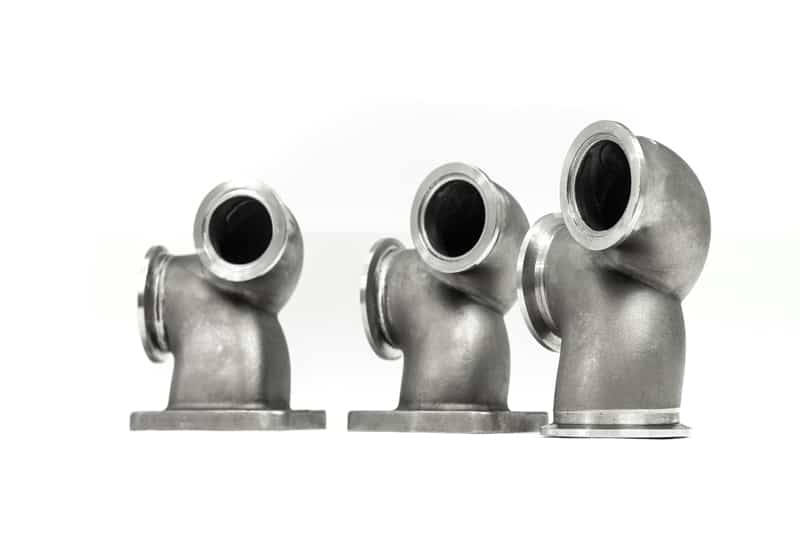
This is unlike any other manifold available for the Mazdaspeed today…you can choose your flange between OEM Stock Flange, Precision V-Band, or T3. Sure all these options are available today from other options, but none are modular. Say you pull the trigger on the OE Stock Flange today, but a year from now you want to upgrade your build to a Precision V-band flange. With any other manifold, you would have to buy another $900+ manifold to get the new flange, but with the CorkSport Exhaust Manifold, you just have to get the new flange elbow for your setup. This is MUCH MUCH cheaper and easier to change!

Speaking of install, compared to the typical performance exhaust manifold the CS design is cake to install. With the modular design, you are not fighting the entire bulk for the manifold and flange at the same time. You can leave you turbocharger unmoved connected to the downpipe and intake system, you just install the flange elbow after the manifold is in and bolted to the engine.
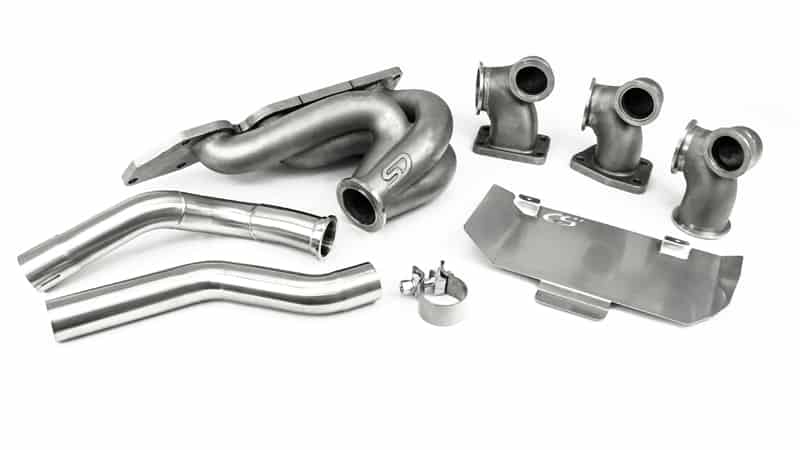
Making life even easier…we opted to develop a pre-fabbed dump tube (screamer pipe) for the Tial 44mm EWG. This is an optional feature for the kit, but one we highly suggest because it’s just so damned easy. Designed for MPS 3 and MPS 6, it fits around most standard downpipes and dumps below the sub-frame right behind the drive axle. Also included with each kit is a SS heat shield that is required for the GEN1 and GEN2 Mazdaspeed 3. You Mazdaspeed 6 guys just get a cool garage ornament.
So how does the CS exhaust manifold stack up on power?
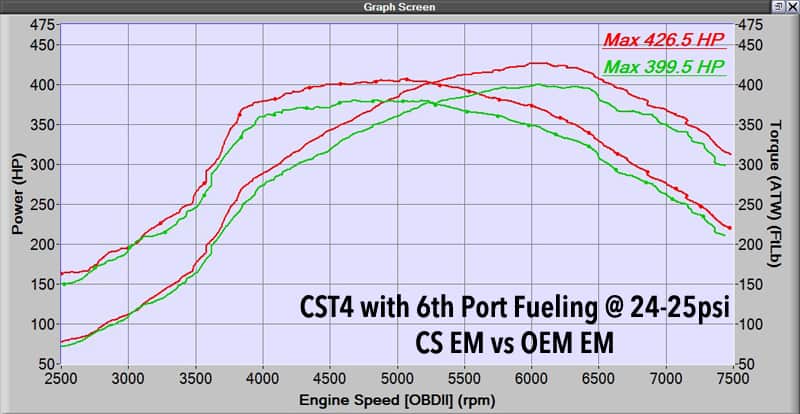
First up is a fully bolted CST4 MS3 with a 6th port fuel system: Comparing the CS EM to the OEM EM, this drop-in test we found that the turbo was spooling faster, carried more mid and upper range power and held that gain through to redline. Overall it improved power under that curve which is what truly makes a car fast and fun to drive.
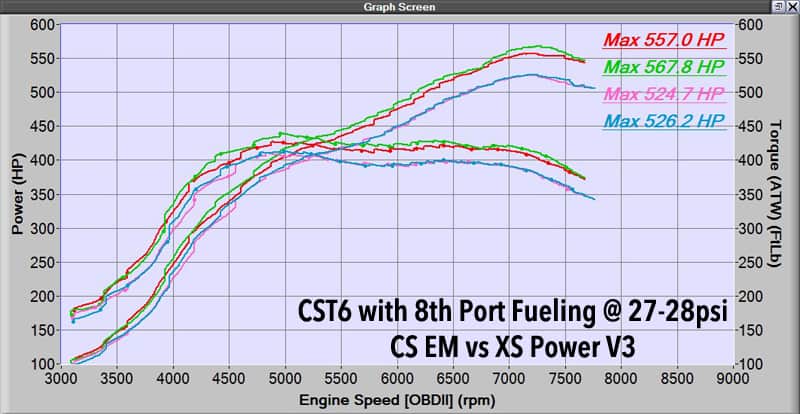
Next up is a fully bolted and built CST6 MS3 with 8th port fuel system: Just like the previous graph, we saw an improvement in spool, mid and upper rpm ranges, and carried it to redline. The difference here is the exhaust manifold we are comparing. This is showing the difference between the CS EM and the XS Power V3.
With that being said, the CorkSport Exhaust Mani has been proven to 685whp on this same car and with the Mazdaspeed CST6 Turbo. We are confident the CS exhaust manifold has far more capacity to support; if we have anything to do with that we will prove it.
Lastly is sound…we’ve been asked a lot about the sound. How will it affect the sound? Will it sound like a Honda now? Will it be louder?
We knew the sound was critical because let’s be honest…we are all car guys/gals and Mazdaspeed has a great unique sound to it. We did not want to lose that so we did our best to hit performance goals without sacrificing the Mazdaspeed grumble.
One of our Beta testers put together a great video comparing the sound of OEM vs CorkSport. The car is a GEN1 MS3 with a built engine, full bolt-ons, CST4 Turbo, and Cobb Exhaust system. Check out this video link for sound!
In our design, we kept a varied length runner design to help maintain the Mazdaspeed grumble. We believe we succeeded in keeping that classic grumble, but also refined the sound a bit. We like to describe it as exotic. Either way, the grumble lives on, and honestly, none of our beta testers can stop grinning ear to ear with every WOT pull.
With that being said act fast! We know these are going to fly off the shelf and we are going to do our damn very best to keep them in stock for everyone, but don’t wait!
Thanks for tuning in with CorkSport Mazda Performance.
-Barett @ CS