Many community members are asking, “What clutch should I buy for my Speed3/Speed6?” or “What’s the best clutch for Mazdaspeed 3/6?” and there isn’t a perfect answer because the right answer depends on your goals with your car.
While I can’t say what the best clutch is, I can share my experience to date with my Twin Ceramic Rigid Disc X-Clutch in my Mazdaspeed 3.
First Impressions
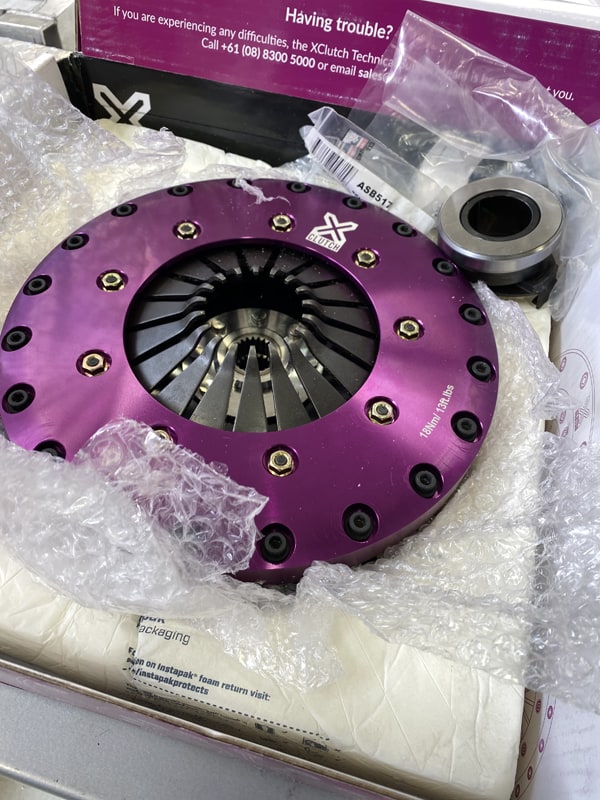
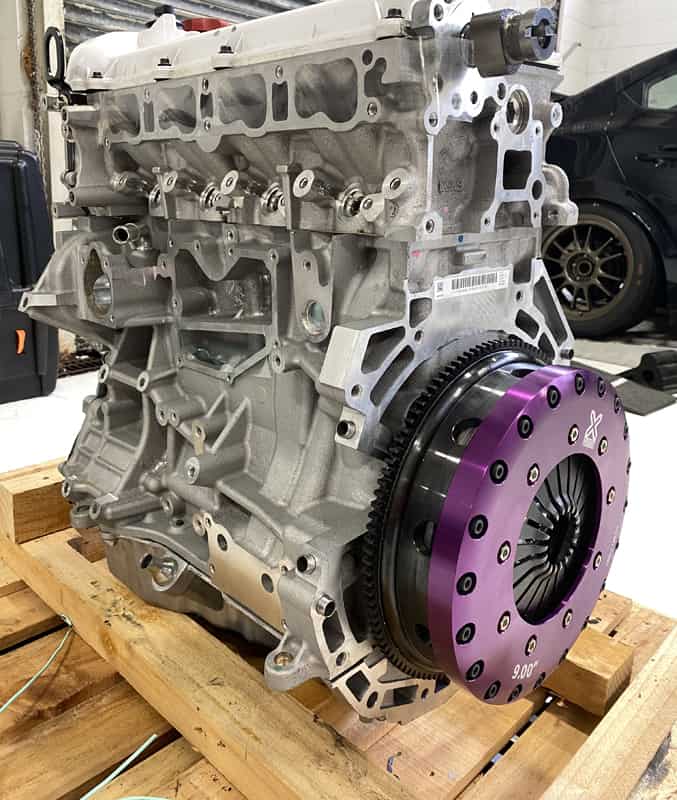
Opening the box I found a very well-packaged assembled clutch kit. This included the assembled pressure plate, discs, and flywheel along with a new throw-out bearing, flywheel to crank bolts, and a nice alignment tool. XClutch also included some generic instructions – They certainly don’t rival CorkSport instructions, but are better than most clutch instructions I have used.
Getting into it
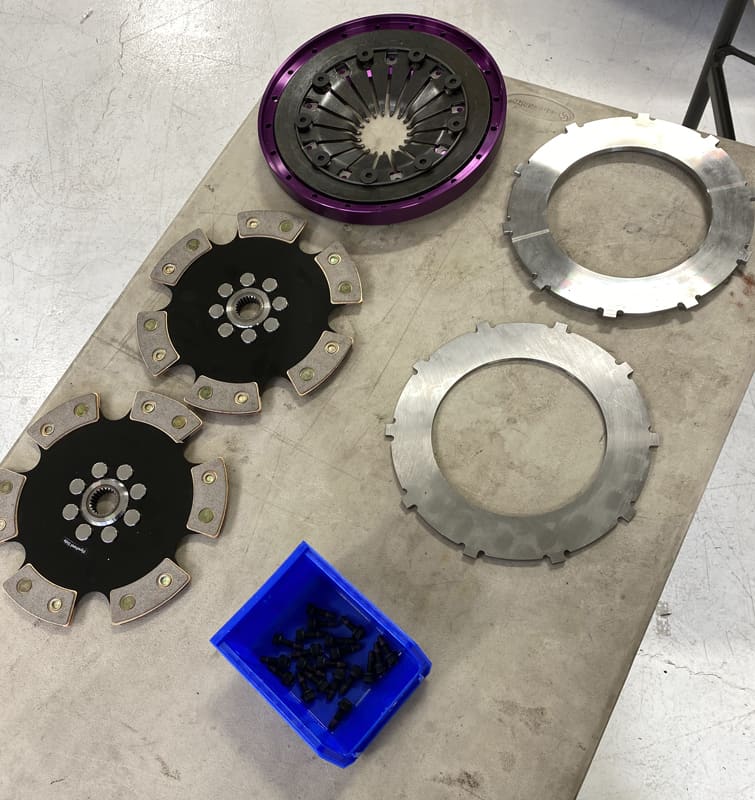
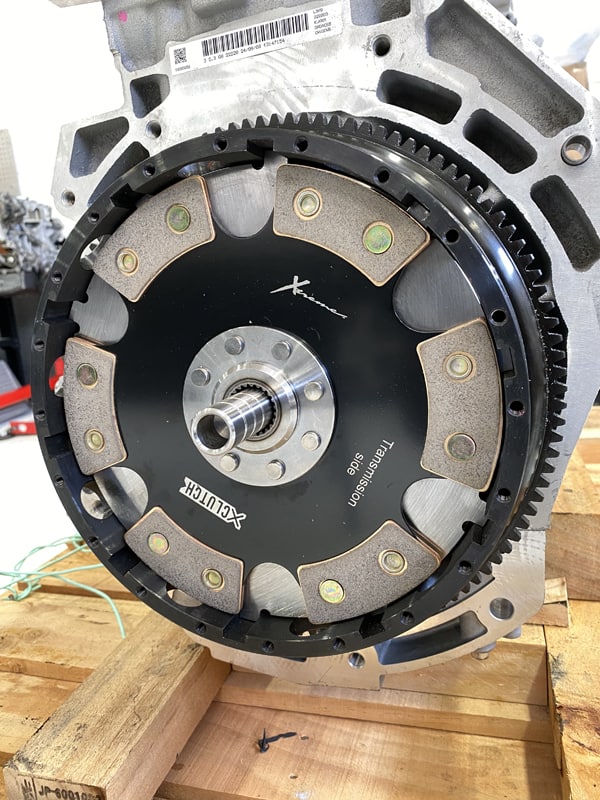
After disassembling the clutch assembly, I found some nicely constructed components. The material fit and finish was great along with the identification of transmission vs engine side of the discus laser engraved was a nice touch.
Something worth noting: Some clutch kits come to you in separate pieces. This makes you 100% dependent on their instructions for the assembly process (and a lot of times those instructions are lacking), but with the XClutch the whole thing came assembled. I like this because it gave me the chance to see how it was assembled and therefore made me more confident I would assemble it correctly on the engine.
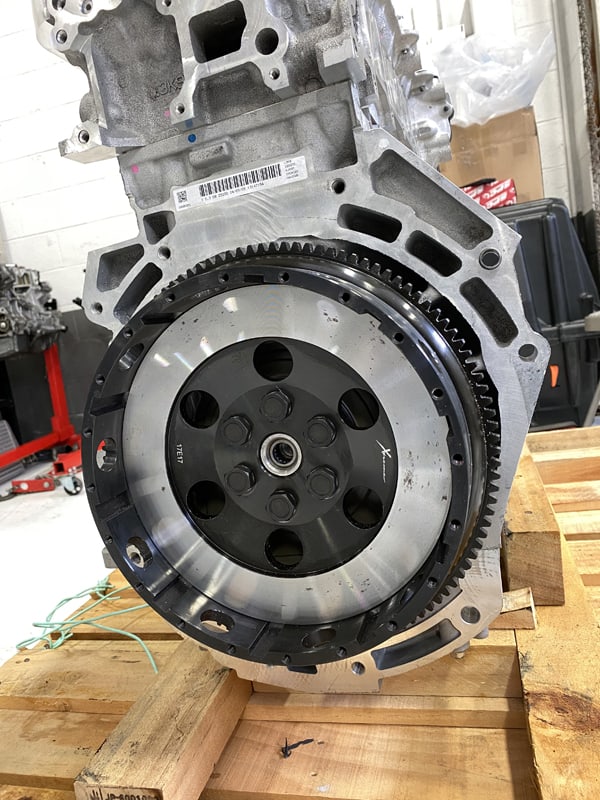
Now let’s get the clutch on the engine. After disassembling the clutch kit, the first part to go on the engine is the flywheel after a quick cleaning of the machine parts and surfaces. Using the provided hardware and some lock-tight the flywheel gets torqued down. The flywheel was a perfect fit on the snout of the crank…a little persuasion was needed which tells me the flywheel will be perfectly centered.
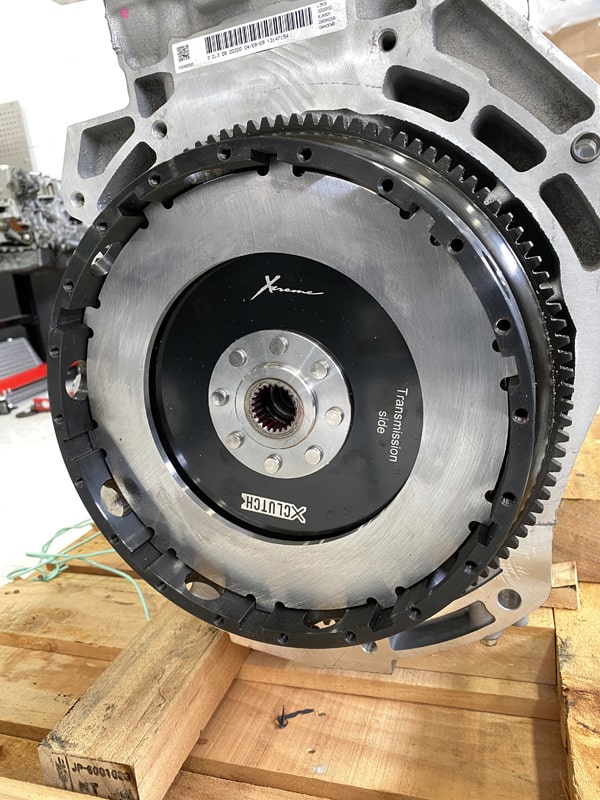
Next is the first clutch disc (make sure you can read “transmission side”) then the middle floater plate. Following that is the next clutch disc (and again make sure you can read “transmission side”) along with the provided alignment tool.
The Tool
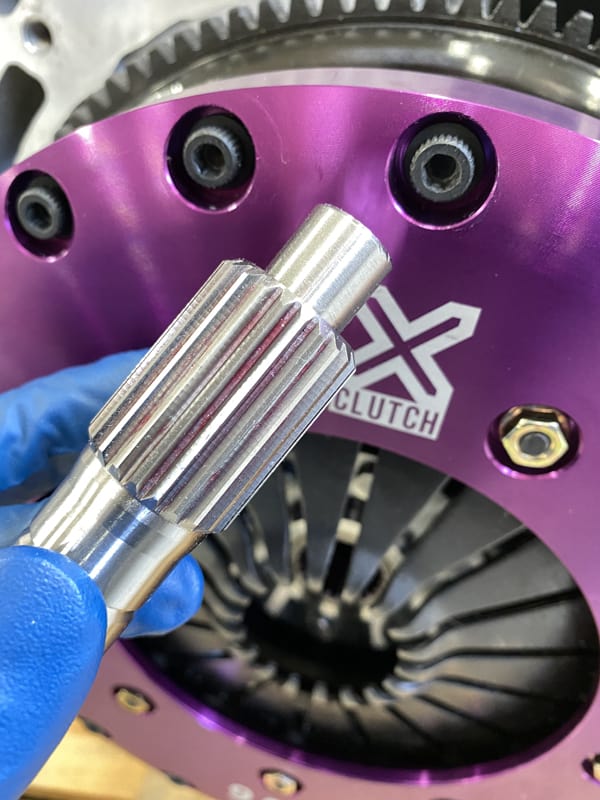
So I want to take a minute to talk about the alignment tool. I’ve installed many clutches in many vehicles throughout my life ranging from an OE replacement in my 92’ Mazda b2600i, Mazdaspeed3, and a twin-disc in a Dodge. Every single kit came with the generic plastic alignment tool that doesn’t fit great and flexes.
But not X-Clutch, their kit included a very nice billet steel alignment tool that fit snugs and did not sag or move when installed. This seemingly simple tool made a huge difference in the whole installation process.
Back to the install steps; next up is the pressure plate floater plate. Typically this is part of the pressure plate assembly, but with the Xclutch design, this is separate.
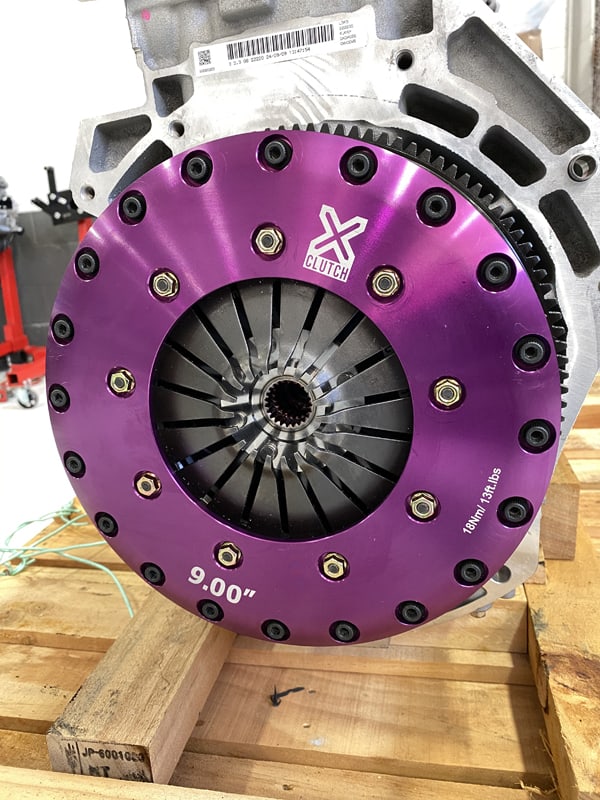
Last is the pressure plate itself, which applies force to the clutch discs. The installation of this is slow and tedious, but important to follow. The hardware must be installed and torqued down evenly around the perimeter, much like torquing a wheel but with a lot more lug nuts.
X-Clutch has clear instructions on this so don’t worry.
Bringing it back together
So your clutch is all buttoned up and now it’s time to attach the transmission to the engine. I’ll admit this was a task I was dreading…many times, I’ve fought this process because the damn input shaft in the transmission just would not line up with the clutch disc and crank, but I was pleasantly surprised.
I don’t know if it was luck or if the alignment toll was really that perfect, but in one try the transmission slid right onto the clutch and aligned perfectly. It was honestly shocking. I can only hope your installation goes as smoothly.
Now the review you have been wanting…
First impressions are great. The peddle pressure is very similar to OEM, maybe just a hair stiffer, but is nearly identical so if you’re worried about a stiff pedal DON’T, it’s cake. The engagement point is around the middle right now, but I expect it to move up in the pedal stroke slightly as it breaks in further. I like this, but this is a preference thing.
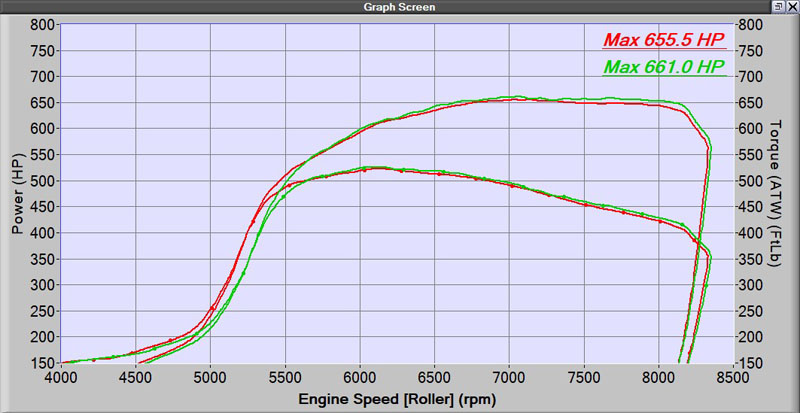
Engagement control is interesting. Going from an ACT 6-puck ceramic to this is very similar in the “grabbiness” of the clutch since they are both ceramic puck discs, but the X-Clutch I would say is a bit more aggressive. This makes sense with the rigid disc design and the very high torque capacity…1,350 ft/lbs!
So here’s my suggestion and you can check them out here. Learn More!
Conclusion
If you want a OE replacement with a bit more headroom for power then the Street single disc organic is going to be your closest bet. If you want good street manners but have more power to hold then the Street Plus twin disc organic is going to be your best balance. Lastly, if you are pursuing motorsports and high heat capacity then the Race twin disc ceramic will be your go-to clutch kit.
Connect with us
Connect with us
- The New CorkSport Adjustable Short Shifter
- How To Achieve 400 WHP In Your Mazdaspeed
- The CorkSport CST4 – The Best Turbo for the Mazdaspeed 3/6