Because Racecar

As some of you have read of the last few years I really like the Mazda 2. Before it was released in the US I had written several blog posts on my thoughts. When we picked up the first Mazda 2 delivered in the US we set out to develop a range of parts for the 2. We have also had a chance to drive 2 in autocross events and down lots of winding roads.

Once you get to the point of completing the parts you need developed on a shop car what happens next? In the case of the CorkSport Mazda 2 you turn it into a B-Spec racecar. Why would you want to do that to a new car I am sure some of you are asking? If you have read the blog about my participation in the SCCA driving school you know that I am working towards my alter ego race car driving dream and the B-Spec racecar gives a good way to approach this being cost effective.

This leads us back to the CorkSport Mazda 2. To make it a B-Spec racer requires some work. Make that a lot of work. The first thing to building the car is to install a roll cage which is it probably one of the most time consuming parts of the job. First you start off with your stock interior and take it out.

Once you finish up that easy task you need to remove all of the sound deadener Mazda installed in the chassis. There are two methods to do this. #1 is with an air chisel and being very careful to not punch a hole through the floor of your car and #2 use dry ice. The dry ice method is something I had not done before but it sounded easy enough. That and if you have left over dry ice a plastic 2 liter bottles can be lots of fun. Check out the video below of me using the dry ice to remove the sound deadener.

If I can offer a tip while doing this is to get 2-3 blocks of the dry ice so you can have several sections cooling down and keep working so you do not have to stock between the freezing of the sound deadener.

Once you completely remove of the insulation you get to start on the roll cage. This takes time and precision to get done. If you have never done this work before, I strongly recommend taking it to a professional to get done. The materials, welds, and design all need to meet the specifications of the racing sanctioning body you will be participating with. In this case we used the specs from the SCCA GCR (General Competition Rules) which are accepted by other road racing sanctioning bodies.

We went with a nascar style door bars to give the driver more space in case there is a side impact and a bit of an angle for easier entry into the car while climbing over the cage.

After all of the hard work is done with the cage getting installed you need to paint it. We wanted the color to match the exterior so we ordered up several cans of the 38P paint code color from an online supplier and got to work. After taping up the interior to limit overspray we got to work with the color and the clear coat. The finished product looks good. The picture below shows the rear section painted with the base coat.

The final product looks great and matches well with the exterior paint of the 2.

Once the paint had dried we got to work installing the safety gear for the car. We went with a set of Sparco 6 point harnesses and a Sparco Circuit Seat.

Mounting the harnesses takes some planning. After getting a good idea of where we were going to mount the seat we got to work on the mounting points for the harness. In the Mazda 2 there is only 1 factory bolt location that we could use for the lap belt. The other side of the factory seat belt mounts to the original seat. The rules require you to have a 4 inch square backing plate for the harness on the back side of the car body to make sure the anchor points for the bolts do not tear through if you are involved in a wreck. We had to do this in three locations on the 2, one for the lap belt on the tunnel side and the two for the sub belt. After planning the hole locations and making sure there was no interference (make sure when you are drilling hole into your car you look at the other side of the panel) parts on the bottom of the 2 which there was since the brake lines and fuel lines pass under the drivers seat, we got to work with drilling the holes and mounting the eyelets. The actual installation of the harnesses is easy, they simple snap onto the mounting eyes and feeding the harness around the cage bar behind the seat.

The seat is a 1 piece FIA approved bucket which is a side mount style. With the Mazda 2 being out on the market for a short time we found there were no mounting brackets available which meant we got to build them ourselves. Thankfully this is a pretty straightforward task in the Mazda 2. After sourcing some inch and a quarter steel we pressed the shapes we needed and mounted up the seat. We set the seat up so there is a slight bend in the drivers legs when the pedals are pulley depressed. This allows you to have leverage and keep a comfortable seated position when driving. We also mounted the seat as low as we could and still give the driver good visibility of the track. A lower position means lower center of gravity in the car and the best handling of the car.

This is where we are at for the moment with the 2. I will be updating the build in the next few weeks to show the final result of the car.

Derrick-
2014 MX-5 Going SkyActiv Turbo

We have blogged about what’s to come for the 2014 Mazda MX-5 in the past. At the time it was reported that the MX-5 Miata was going to be lighter than the current model by around 720 lbs and when I reported on this last August, the word was that the MX-5 would come with a 1.5-liter SkyActiv-G four-cylinder engine that would produce up to 160 horsepower and would be mated to a six-speed manual transmission with an option to change to a dual-clutch semi-automatic transmission.

It appears though that Mazda still has not settled on which engine will make its way into the next generation MX-5. Auto Guide reported last month that the engine originally planned for the MX-5 didn’t cut it and neither did a version of their current SkyActiv 2.0L four-cylinder engine. The 1.5 did not meet Mazda’s performance requirements and the 2.0L didn’t have the fuel economy.

So what now? Well it seems that the solution may come in the form of a 1.8L SkyActiv four-cylinder 1.3L or 1.5L turbo-charged engine. The new turbo engine will employ SkyActiv technologies like variable cam phasing with lower friction parts to boost performance and fuel economy and will also be mated to reduced-friction transmissions.

Whichever powerplant Mazda decides on, you can expect the car to produce roughly 150 hp with about a 10-percent improvement in fuel economy from the current MX-5’s (22 city/28 highway mpg). The new Miata is scheduled to make a debut by mid-2014 and will be priced under $25,000.

Gwynne-

The Journey from Concept Car to Production

the recently released Mazda CX5 has been met with rave reviews for both its styling, ride quality and fuel efficiency and initial sales of the vehicle reflect that. In Japan Mazda has sold 8000 units in the first month with an expectation of only selling 1000.

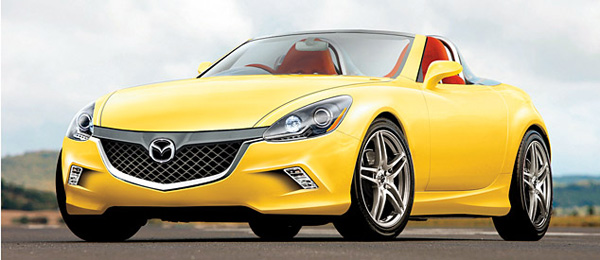
When the first rumors came out about the CX5 years ago there was picture of a vehicle released which you can see below.

The picture was essentially Mazda 3 with Mazda 2 headlights and some changes made to the body of the vehicle to give the general idea of what Mazda was shooting in a small cross over SUV.

The actual concept compact SUV was since designed fresh from the ground up with no hand-me-down components so when the vehicle concept debuted, the Minagi, it reflected Mazda’s transition to the KODO style.

There are several styling effects on the car which you can tell would not make it to production, for example the mirrors and the bar across the headlights, but it really showed what the CX5 was going to be.

The released CX5 below is the final production vehicle which has been on sale now for a month.

Almost all of the body styling from the Minagi concept stayed on the production vehicle. The headlights were changed to meet government regulations and the showy mirrors were replaced with something more practical that would survive a hit from another car, wall, or inanimate object.

For the replacement of the current Mazda 6 we have been teased with pictures and concept vehicles but looking at them you can really see what we are going to get for a new Mazda 6. Mazda showed off the Shinari concept car back in 2010 seen below.

This was a great concept vehicle with really accentuated Kodo styling shown off in a very aggressive way. This is also a pretty big jump from the current Mazda 6 styling that makes the current Mazda 6 it look really dated.

The Takeri concept which was introduced last fall at the 2011 Tokyo Auto Show was confirmed to be the redesigned 2014 Mazda 6 by Mazda executives at the 2012 New York Auto Show.

In this concept vehicle, the roof line grew from the chopped top look for the original concept as well as some cleaned up styling areas around the front bumper and the grille area.

Looking at the jump between the Minagi and the CX5 you can get a good idea of what the new Mazda 6 will look like when it is released. The headlights will be changed a little bit, the mirrors will get changed to a different style and DOT crash bumpers would round out the changes.

Based on the release of the Cx5 and the what we can see of the Takeri concept, the new Mazda 6 will be a good-looking car. The production version of the new Mazda 6 will be unveiled this fall at the 2012 Paris Auto Show, and the car will go on sale in spring 2013..

-Derrick

Featured Car of the Month – Tony’s 2011 Speed3

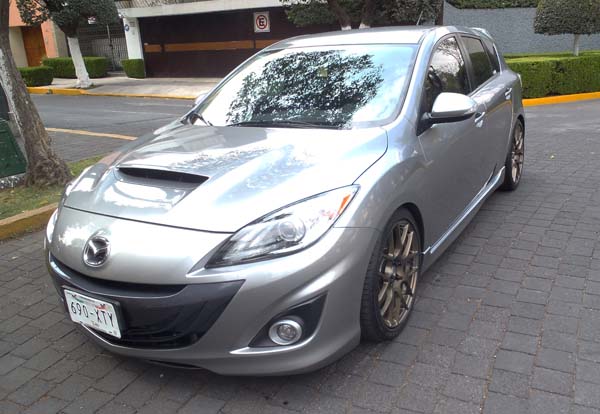
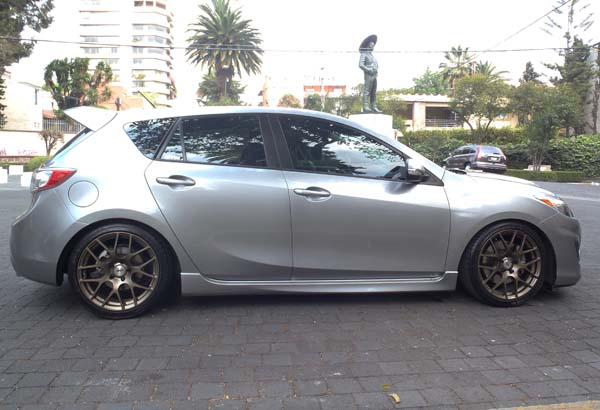
Mazdaspeed 3’s are a rarity in Mexico. Only 500 are imported a year, so when Tony decided to buy his 2011 Mazdaspeed 3, it took three months for the car to arrive.

Tony has been a car fanatic since he was very young. He learned to drive at the age of eight with a set of pillows and coke cans so he could reach the pedals and at age 12, this Mexico native started driving his first 1947 Ford F1.

Tony drove German cars for the better part of his life and even raced amateur and DE in TX in a 2005 911GT3, but when he decided to get a new car in 2010, he looked at some of the vehicles that were not available in the US like the Puget 307 and the Alfa, but at the end of the day it came down to two cars, the Speed3 and the Focus RS. What swayed him to the Speed3? After a lot of research and decided he wanted a car that had a good performance support from companies like CorkSport!

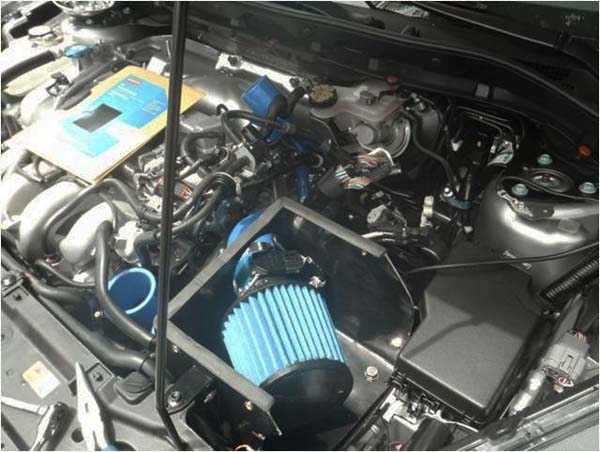
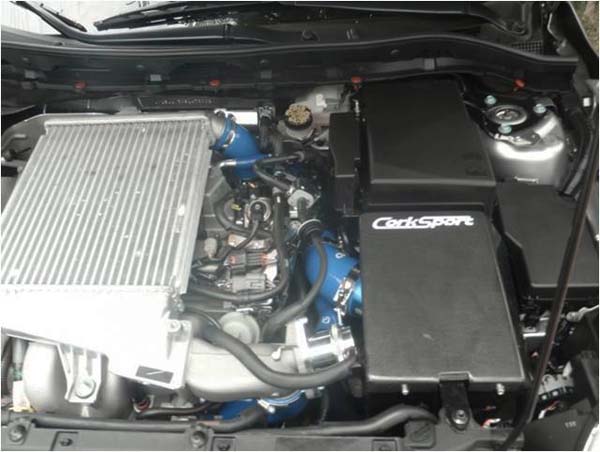
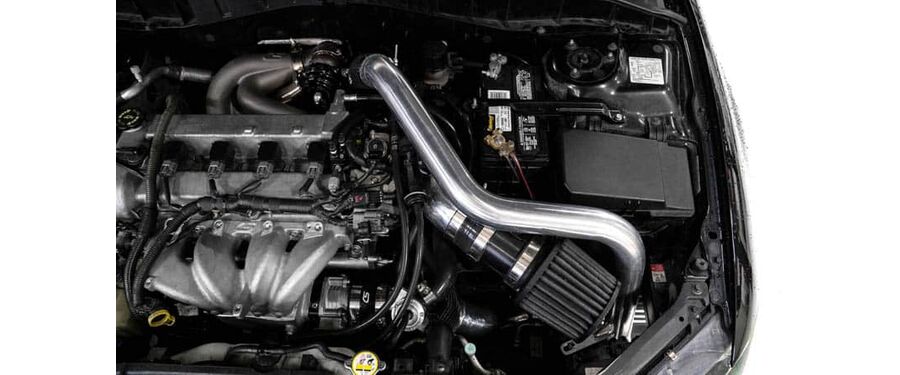
When his car finally arrived in Mexico, he got straight work on his mod’s. He started by adding a CorkSport Stage II Power Series Short Ram Intake and CorkSport Airbox, CorkSport DISI Silicone Boost Tubes and Silicone Bypass Valve Hose, and a Forge stock location recirculation valve. He also added a large top mount intercooler and downpipe along with upgrading his fuel pump.

He upgraded his lighting with the CorkSport LED DRL kit, LED Interior Light Kit, and LED Underhood Light Kit and adjusted the drivetrain with a short shifter and engine mounts.

To improve handling Tony added a CorkSport Mazdaspeed 3 Front Sway Bar and Front Tower bar, a CorkSport Adjustable Rear Sway Bar and CorkSport Lowering Springs. To compliment his TSW wheels, he added CorkSport Lightweight Lug Nuts.

“After the suspension was done on the car, the change was so dramatic that it felt like it handled as well as the GT3” said Tony, “The first time I tested it out on the open road in Mexico, I blew by a couple of AMG 6.3’s and M3’s. The look on the the owners faces in my rear view mirror was priceless!”

Tony has no projects for the speed 3 planned until he moves back to the states, but as far as we are concerned, CorkSport is well represented in Mexico when Tony is around!

Gwynne

Product Release! CorkSport Mazdaspeed 6 FMIC for SRI

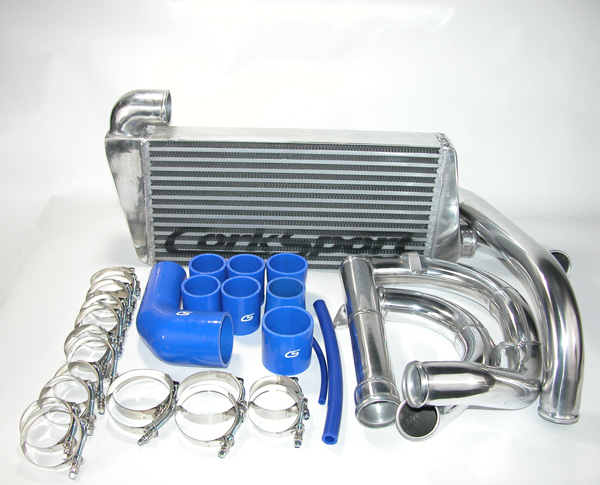
Many of our Mazdaspeed 6 customers have been eagerly awaiting this announcement and today CorkSport would like to end the wait and announce the newest addition to our Front Mount Intercooler line with the CorkSport Front Mount Intercooler Kit for Short Ram Intake designed specifically for the Mazdaspeed 6!

Mazdaspeed 6 Front Mount Intercooler kit for an SRI

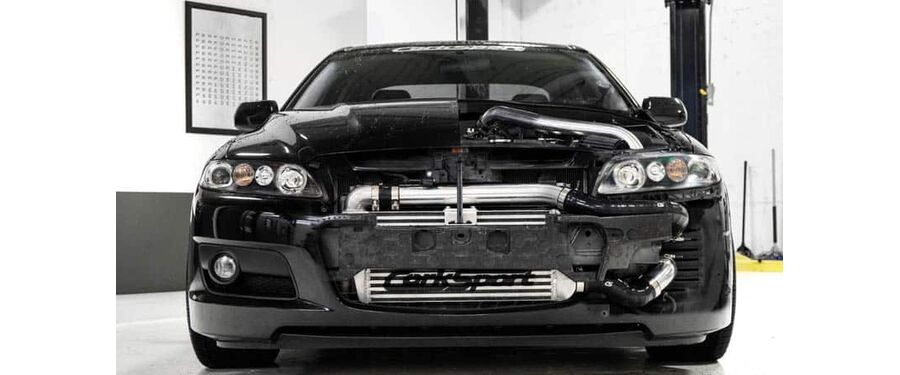
Designed to replace the restrictive top-mount intercooler, the CorkSport front-mounted kit has been developed for optimal placement in the path of the inflow ambient air, allowing for maximized heat dissipation and reduced heat soak, a common problem associated with the stock top-mounted intercooler location.

Black Mazdaspeed 6 with visible Front Mount Intercooler

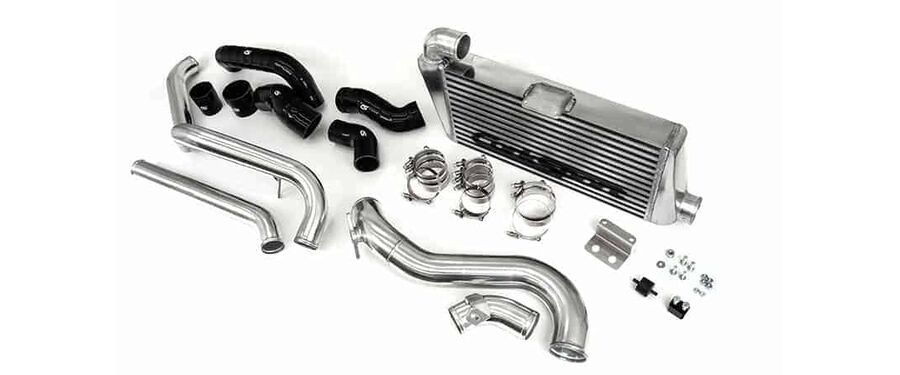
The kit features a 21x10x3” bar and plate intercooler core, mandrel bent and TIG welded polished aluminum intercooler piping and custom-reinforced silicone connectors made from multi-layer nylon braid to provide strength and a smooth internal transition for less turbulent airflow. The kit includes stainless steel T-bolt clamps to ensure an airtight seal all of the needed installation hardware and detailed installation instructions.

Front Mount Intercooler Product for 2006-2007 Mazdaspeed 6

During extensive testing, the CorkSport Mazdaspeed 6 Front Mount Intercooler showed an average pressure drop of 1.5-2 psi and a 10 to 1 temperature drop, meaning for every ten degrees of inlet temperature, the outlet temperature of the intercooler only goes up one degree.

The kit has been designed to integrate seamlessly with our popular CorkSport Stage II Power Series Short Ram Intake and can be purchased as a standalone kit to compliment your current short ram intake or can be purchased with the CorkSport Power Series Short Ram Intake for additional savings and power gains.

Mazdaspeed 6 Front Mount Intercooler with SRI and CorkSport Products

Get the products

Connect with us

You may also like

Stay up-to-date on the latest news and product updates from CorkSport.

* indicates required