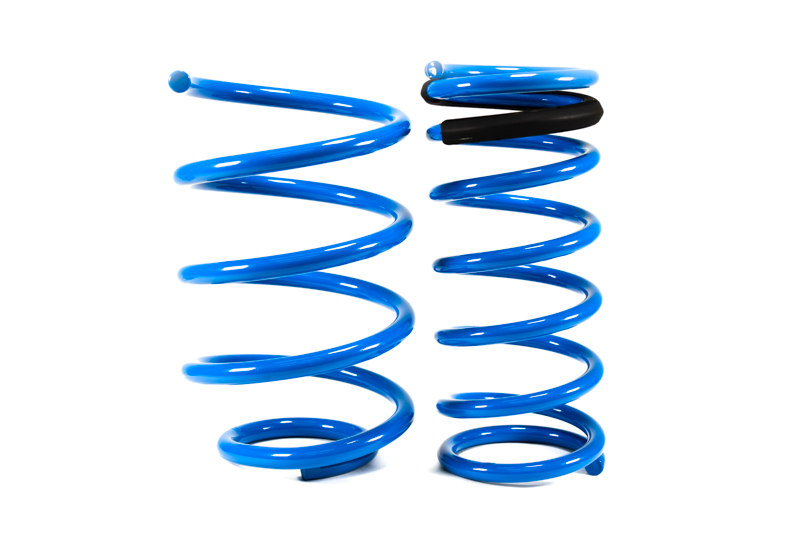
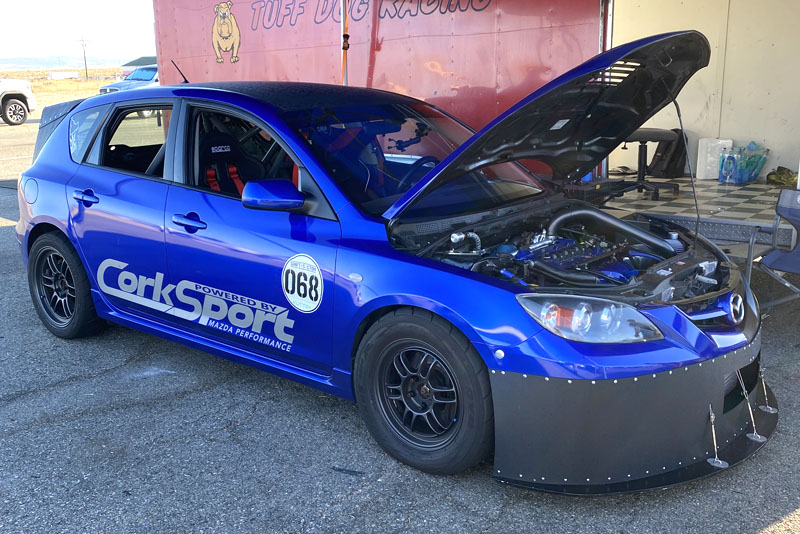
CorkSport is proud to announce the new and improved Version 2.0 Lowering Springs for the 2007 – 2013 Mazdaspeed 3. While the changes are subtle, it never hurts to go back and refine a product that is so well loved by the community
When designing performance lowering springs we want to find the right balance in performance, comfort, and style. When done right, performance springs can make a huge improvement in the vehicle’s overall driving experience. That is our goal at CorkSport HQ.
The CorkSport V2.0 springs are very similar to the V1.0 with a ride height drop of approximately 1.1” front and 1.2” rear. This is a fairly aggressive drop, but does cooperate with the stock struts after a bit of bump stop trimming. That is all clearly laid out step-by-step in the included installation instructions.
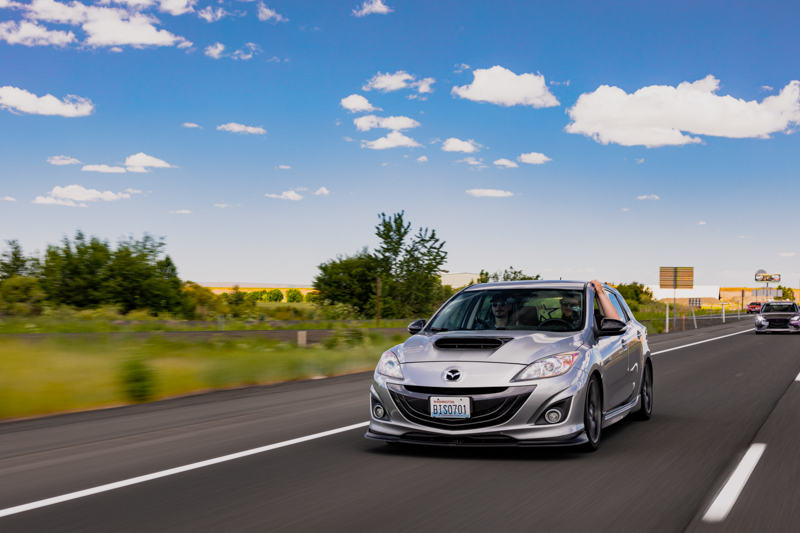
Now ride height isn’t everything. While it looks great, it also needs to perform great. The CorkSport Suspension Springs have specific spring rates so that they perform and feel great for the spirited and daily driven Mazdaspeed 3.
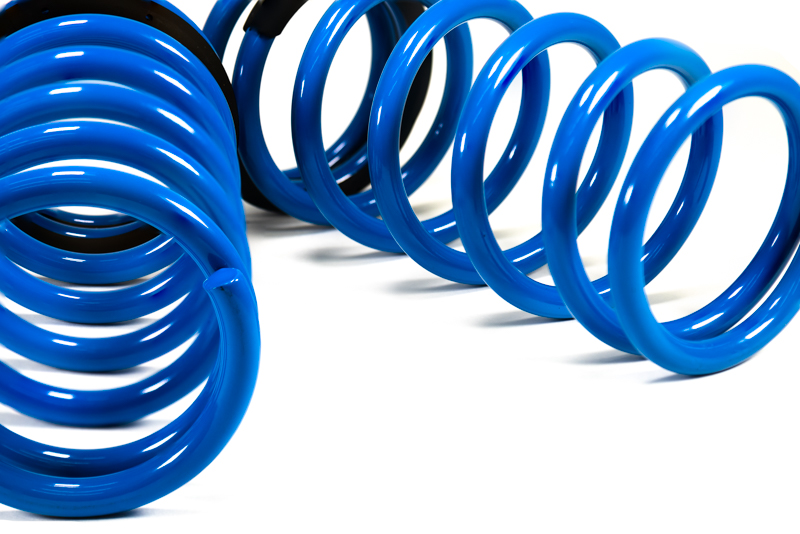
Up front the spring rate is a linear 3.5K and the rear is a linear 4.5K. We specifically design the springs with a higher rear spring rate to help the vehicle understeer vs oversteer characteristics and maintain a proper suspension frequency so your Speed feel solid and planted through the curves and over road imperfections.
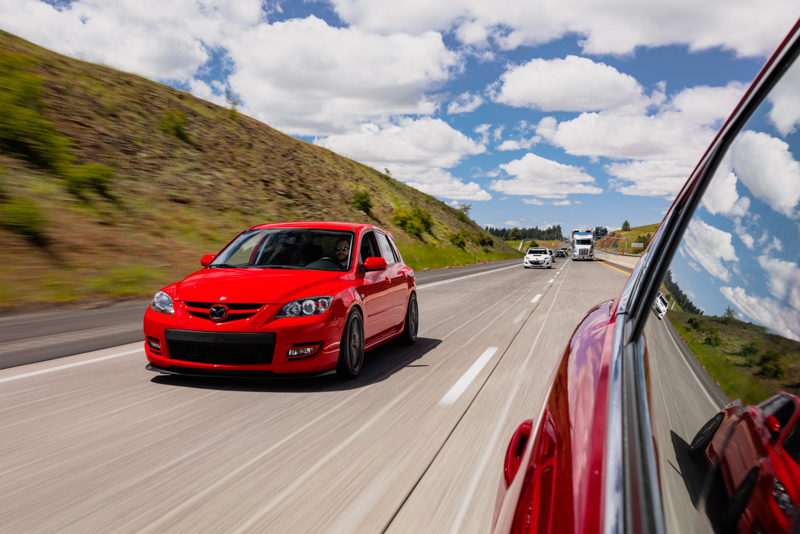
Overall, the car is going to feel more lively and connected to the road, giving you more feedback and control to enjoy your Mazdaspeed 3.
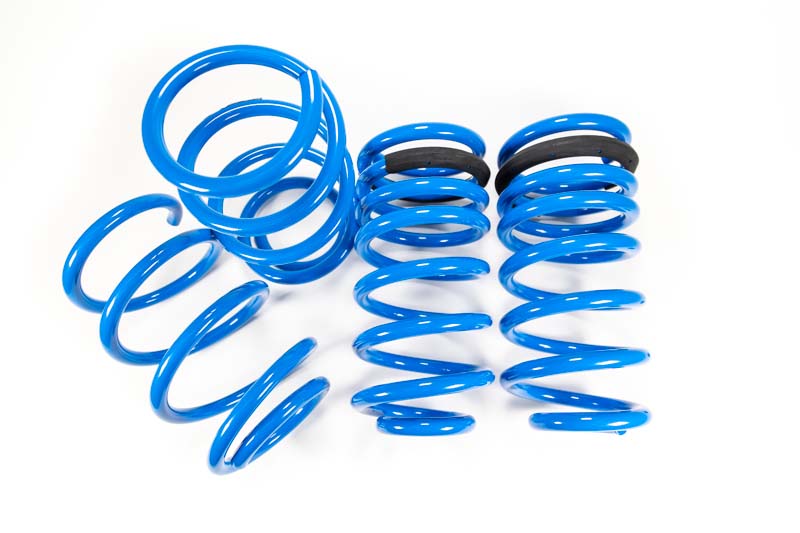
You probably also notice a new color! Yes, our new V2.0 are now blue via a durable and corrosion resistant powder coat finish.
Thanks for checking out the new CorkSport Lowering Springs for the Mazdaspeed 3. If you have any questions, you can connect with us via Facebook, Email, or give us a call; we’d love to help.
Time for more horsepower and boost with the Skyactiv 2.5 Turbo engine.
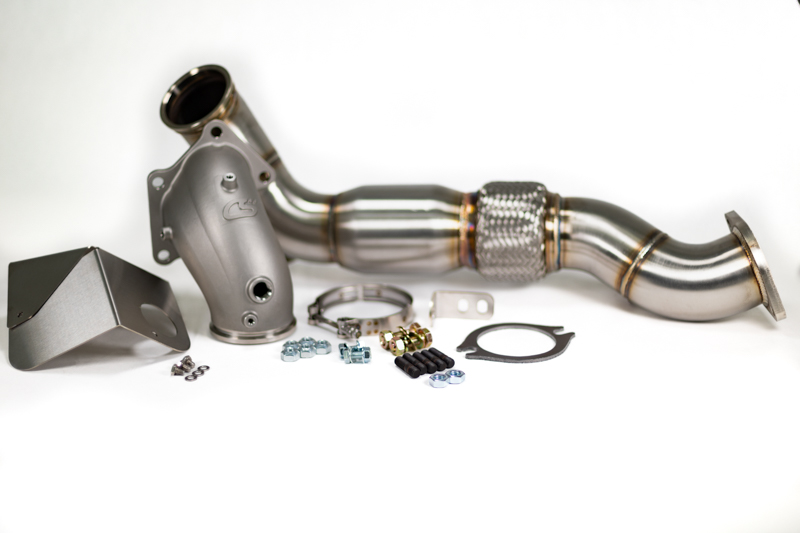
The Mazda 6 just got its next upgrade in the form of the CorkSport Downpipe for 2018-2022 models equipped with the 2.5L Turbo engine. We took the OEM downpipe and improved on it in every way, including sound, flow, power potential, and even ease of install! Help unlock power with the Mazda6 Turbo downpipe and take a step forward to more making power!
Stay Up-to-date with CorkSport
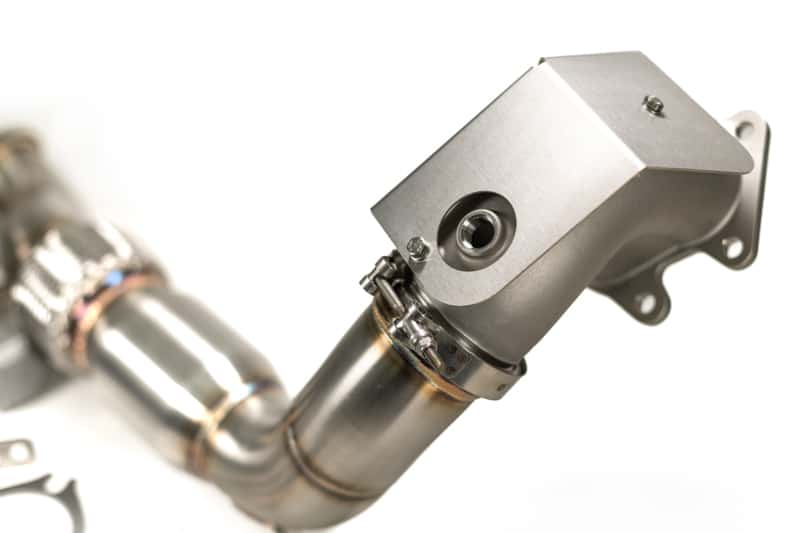
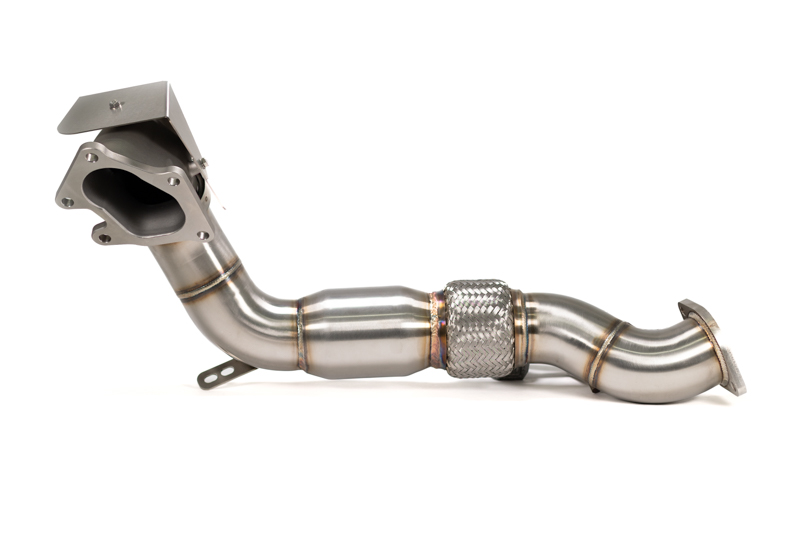
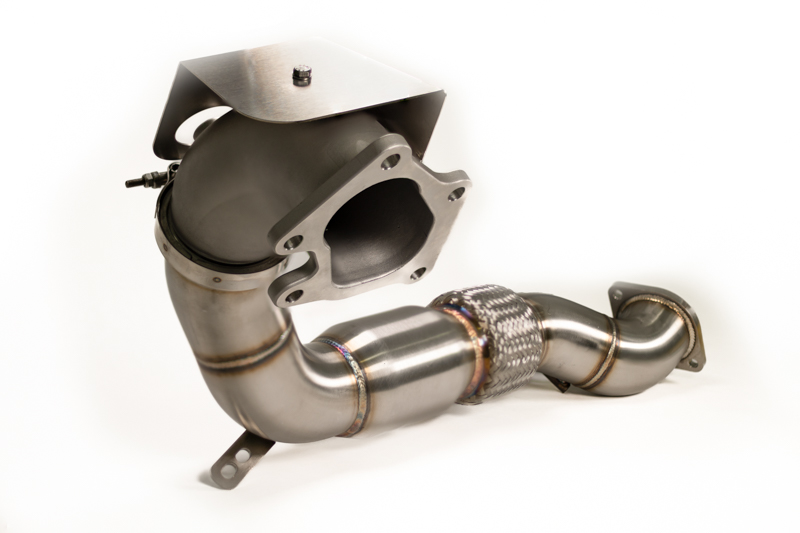
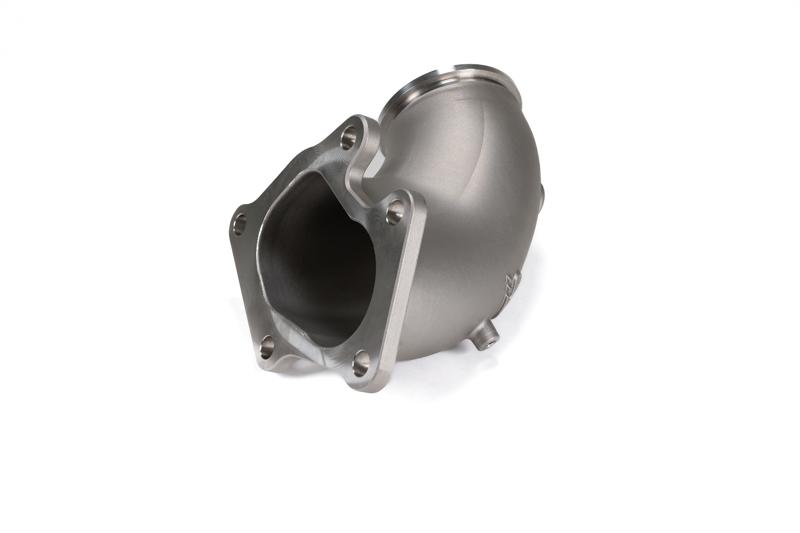
The CorkSport downpipe uses a 2-piece design that starts with a cast 304 stainless steel bellmouth. This provides a high-flowing, smooth transition from the turbocharger to the piping that will stand up to the test of time and the high heat of the turbo. The piping is upgraded from the OEM 65mm diameter to 80mm mandrel bent piping to maximize flow and reduce restrictions. The bellmouth is joined to the piping using CNC machined v-band flanges which ensures a leak-free seal.
The two-piece design is not all about flow through. We optimized the casting design to be easy to install and tighten all the hardware. Since you do not have the piping in the way, like you would with a one-piece downpipe, the mounting hardware at the turbo is very easy to access! Fitment is also spot on, as we used 3D scan data from the OEM downpipe when designing the CS downpipe. That means great fitment with your existing aftermarket exhaust, or even the OEM one! With exhaust, the CorkSport downpipe will change the exhaust note of your Mazda 6. With the full CS catback exhaust, we noticed a different tone with some extra “growl” and a very slight increase in volume. This goes for both the catted and catless setups, with just a hint more drone with the catless setup.
All of the efforts to reduce flow restrictions are in the name of power! By smoothing the exhaust path and eliminating restrictions, the turbocharger can breathe better. While we have not been able to fully tune the car to take advantage of the flow gains (more on that later), typically an upgraded downpipe offers faster spool times, better peak power, and can help hold power better at higher RPMs. We hope to be able to test & validate the power potential of the MZ6T downpipe soon, but for now, know that the CorkSport Downpipe has enough flow capacity to efficiently support 500+ WHP, assuming you’ve got the mods to make that power!
So the elephant in the room: tuning. While the CorkSport Downpipe can be installed and driven on an otherwise stock Mazda 6 Turbo, we strongly recommend a tune after installing the CS downpipe. There are some fairly strict limits to airflow and torque in the OEM tune that can result in some mild surging or “hiccups” especially when at wide open throttle. This is simply the car hitting those limits and pulling back power. We have experimented with these limits and have found no long-term effects of hitting the limits or even going beyond. They are very conservative limits for safety with stock parts. With more efficient parts, your engine works easier and is able to produce added power/torque and consume more air so the limits are simply hit easier.
Let’s go through some housekeeping on the Mazda 6 Turbo downpipe. We offer the downpipe in both fully catless and with a high flow 300cel cat. As modifying or removing the primary cat is illegal in most areas, both options are sold for off-road or race use only. The fully catless setup will be the best for power gains but also comes with an all but guaranteed check engine light. The catted option cuts down on the smell of a fully catless setup but will sometimes still throw a CEL. This CEL can however be disabled with a tune.
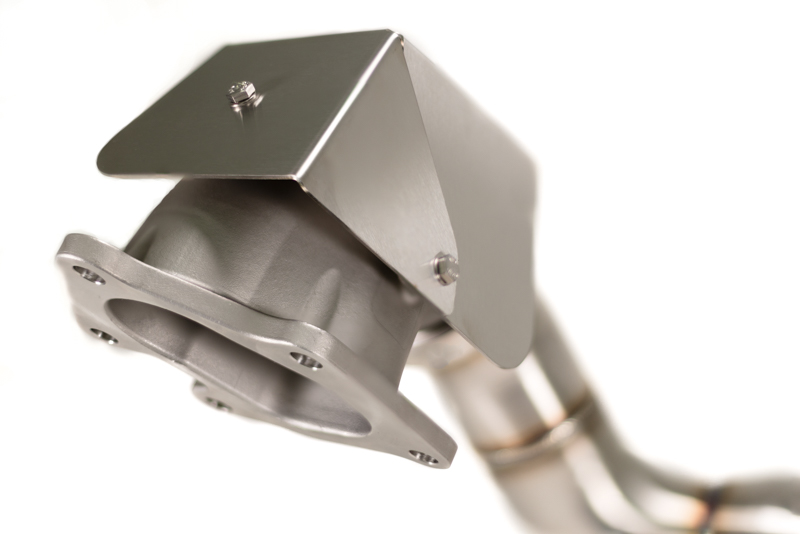
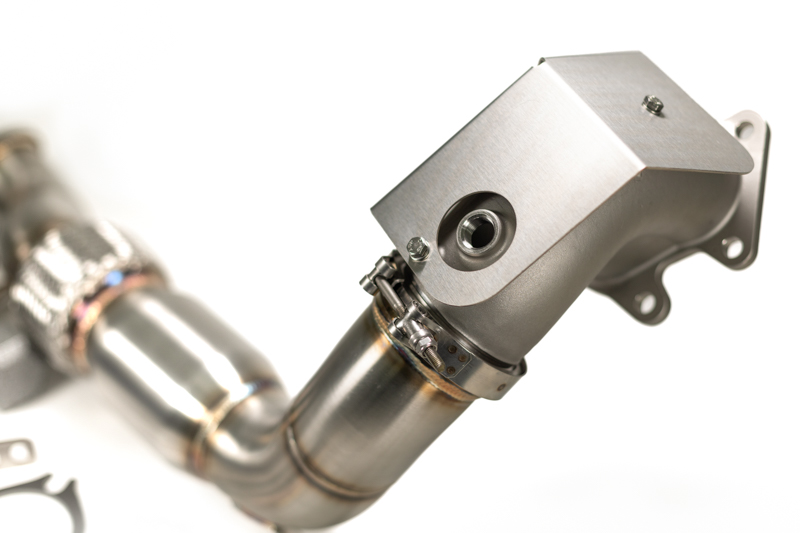
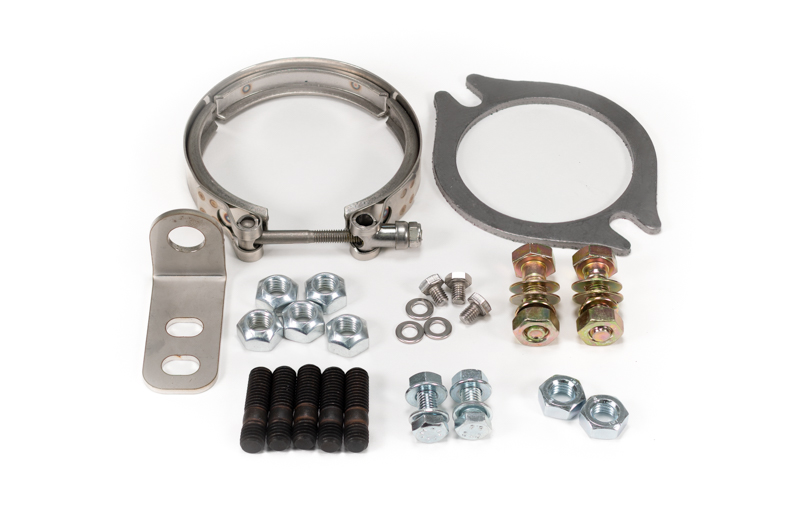
Finally, what comes in the box with your MZ6T downpipe? Each kit comes with all the hardware needed for installation. This includes new turbo studs & crimp nuts, exhaust connection hardware, a Remflex exhaust gasket, and the stainless steel v-band clamp for connecting the upper and lower sections. Also included is a support bracket for the downpipe and even a custom heatshield to deflect heat away from engine bay components. Both come with required mounting hardware as well!
Be sure to check out the product listing HERE for more images, a product teaser video, and pricing. Ready your Mazda 6 Turbo for some big power with downpipe kit from CorkSport!
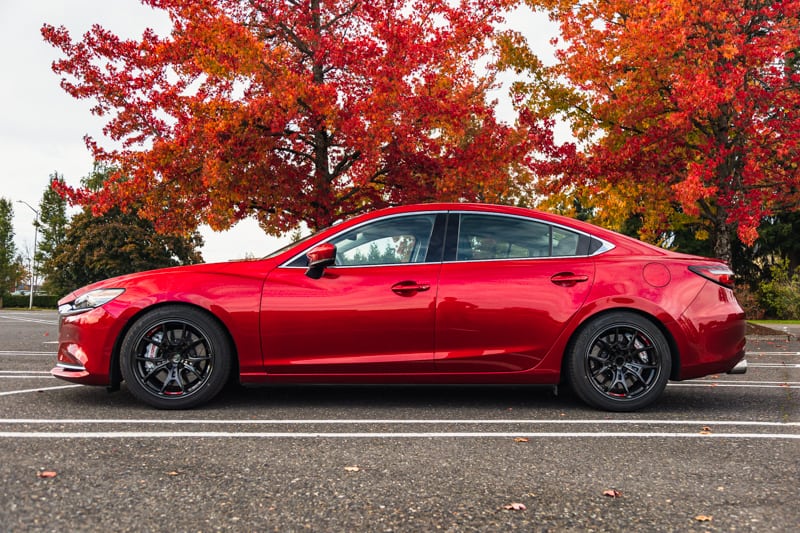
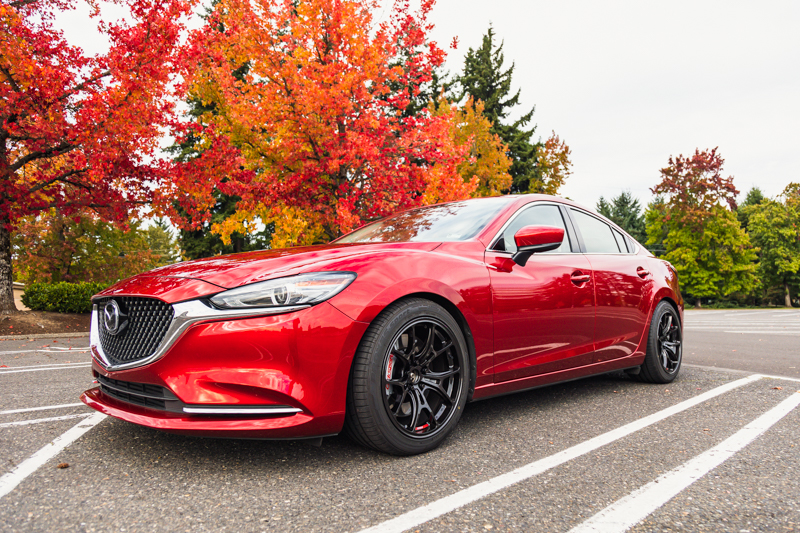
A couple years ago we developed performance lowering springs for the new 2018-2021 Mazda 6. Read the Release Blog. Our goal was to transform the full-size sedan from a commuter to a fun luxury sedan you can daily and enjoy in the back country roads. While we succeeded, we also heard from the community that you wanted more LOW LOW. V2.0 Mazda 6 Lowering Springs gives you exactly that!
Stay Up-to-date with CorkSport
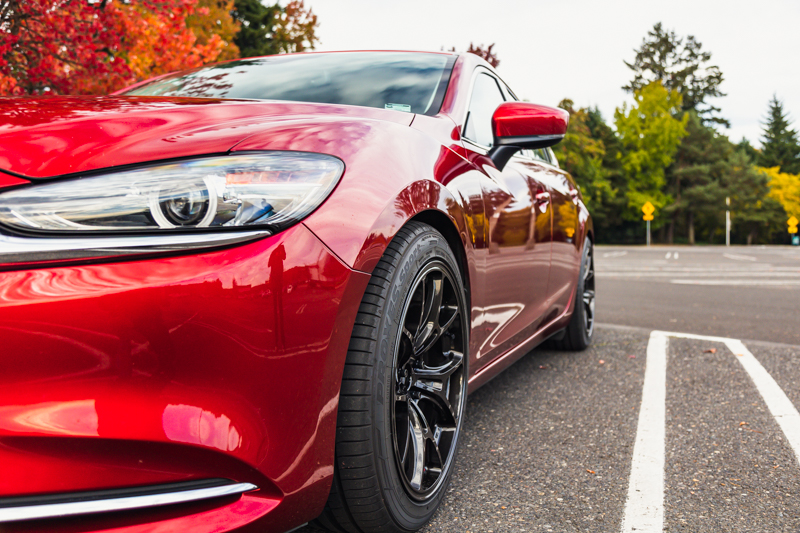
Let’s start off with the big one: ride height changes. The Mazda 6 Lowering Springs V2.0 springs offer a more aggressive drop from the stock springs with about 1.75 inch lower in the front and about 2.00 inches lower in the rear. This height is more aggressive than the previous CorkSport Sport Lowering Springs (1.00in front & 0.75in rear) while still maintaining good ride characteristics for the daily commute.
The height drop will be noticed when you’re outside the car, but the handling improvements will be apparent when driving. By lowering the center of gravity and stiffening the springs, body roll is reduced in corners, giving you extra confidence when attacking that backroad. In addition, we stiffened the rear springs more than the fronts, reducing understeer. By number, this meant 4.6K front springs and 8.1k rear springs). Derrick, our resident racecar driver and Mazda 6 Turbo owner, loves the new V2.0 springs and is sitting on some Rays 57FXZ 18×10+40 with 265/40 tires.
While this may sound like a big jump, they ride very similar to the OEM springs, but do feel stiffer. We used natural frequency analysis to ensure we achieved comfortable characteristics. This affects how the car feels and responds when going over bumps, braking, accelerating, and through corners. While the overall spring rates are stiffer, the overall ride quality will not suffer like a Honda Civic on cut stock coils.
Last but not least, the CorkSport Lowering Springs are made from high tensile strength spring steel and come powder coated in our new CS Blue for long-lasting quality and corrosion resistance. They install just like stock, reusing all your OEM components. The only permanent modification is trimming the bump stops to match OEM suspension travel.
Be sure to check out the product listing HERE for more images, a product video with more comparisons to OEM, and pricing. Make your new Mazda 6 yours with just the right styling and handling boost from CorkSport.
Can you believe it’s already August of 2021? It’s crazy how this year has flown by! Between the engineering projects at CorkSport and the racing with @halfmilespeed3…the weeks have become a blurr. BUT sometimes you just have to put your foot down and go racing. That’s what I want to tell you about.
Barett here, Driver of Halfmilespeed 3, where my goal is to race a 2009 Mazdaspeed 3 in the standing half mile. Much like the quarter-mile drag racing you have most likely seen or even participated in, but we stretch the race an extra ¼ mile and we race on no-prep airstrips. The added ¼ mile helps us reach speeds of 150+ up to 250mph for the crazy 2500whp builds. I’d like to invite you to see what’s happened with my 09’ Speed 3 over the last few months and what we hope to achieve at Shift Sector Indy this coming weekend (August 14th – 15th).
Let’s jump back to April 2021; the first race of the season at Coalinga CA. Like all the half-mile races I am participating in, this race was hosted by Shift Sector. If you want to check out Shift Sector more or see if they race you check it out here.
Anyways, the lesson learned was “Don’t change a bunch of shit on your car before the race”. I realize that’s extremely difficult it seems but trust me.
We nuked 3rd and 4th gear in my transmission Saturday AM because we thought it was a great idea to change the shifter assembly and cables a few days before the race. Those take time to get set up correctly or you can do damage…obviously. So, we found a used transmission locally (albeit a GEN 1 trans which is not ideal gearing) and got to work. By 330am (Sunday AM) we had the car running again and back in the trailer…off to the track by 8 am that morning.
Long story short, the car did drive off the trailer but then had an electrical issue that never let the car run again that day. The event was a bust…we eventually figured out the electrical issue was bad ground that was caused by the midnight transmission swap. Lesson learned!
The next event was a Roll Race hosted by Shift Sector down south at Willow Springs Raceway. I was excited to do my first roll race because we all know these cars are not great from a dig, but from a roll, they can really kick some ass.
If you haven’t done a legit (non-Mexico) roll race and get the chance…do it! It was an awesome experience and will be doing many more in the future. With that being said the race was held on the front straight of Big Willow Racetrack…so that meant we were lining up and launching at the exit of the last corner…that was interesting to say the least. The morning was four hours of practice and testing. The car was doing great, but the heat was really starting to wear on me and the car. By the end of practice, I was starting to see the heat really build up with 180+ degF intake temps and boost air temps in the 140+ degF range.
We let the car sit for almost a couple hours before the actual competition started. This helped alot, but damn was it still hot outside with ambient air temps over 100 degF. When my race came along I lined up with a 335i with a big single turbo and hood exit exhaust…we set off with a target hit speed of 40-50mph. Luckily this was right in the sweet spot for 3rd gear and just a bit of brake boosting to hit the launch hard. As we got to the finish line the light flashed and we went for it….but the heat said nope.
Unfortunately my car stumbled and cut power. I went a bit to aggressive on the brake boosting and super-heated my boost air temps. This caused the ECU to pull power for a split second…just enough for the BMW to pull ahead.
Despite this I pushed forward and was reeling him in but there just wasn’t enough straight to catch him.
Video Link if Possible: “Built with Barett Episode 3”
Another lesson learned…I need to get my cooling in check before the next event. That next event is Shift Sector Indy. This is a standing half mile drag race at Marion Municipal Airport in Marion Indiana.
Image: shift-sector-indy-2021
As I write this, my Speed is sitting in a transport truck operated by English Racing along with nine other cars going to the same event. Quoting Myles Kerr @ English Racing…”4 GTR’s, 2 damn Honda’s, a Mazda, NSX, 570 and a 720.”
Yup, the Mazda is riding with the big boys. If I could take a guess, those two big rigs are holding upwards of 15,000+ whp of racecar…HOLY SHIT. I think my humble little Mazda is the only car not making 4 digit power…
Anyways, we made some changes for the Indy race for power, traction, heat control and reliability.
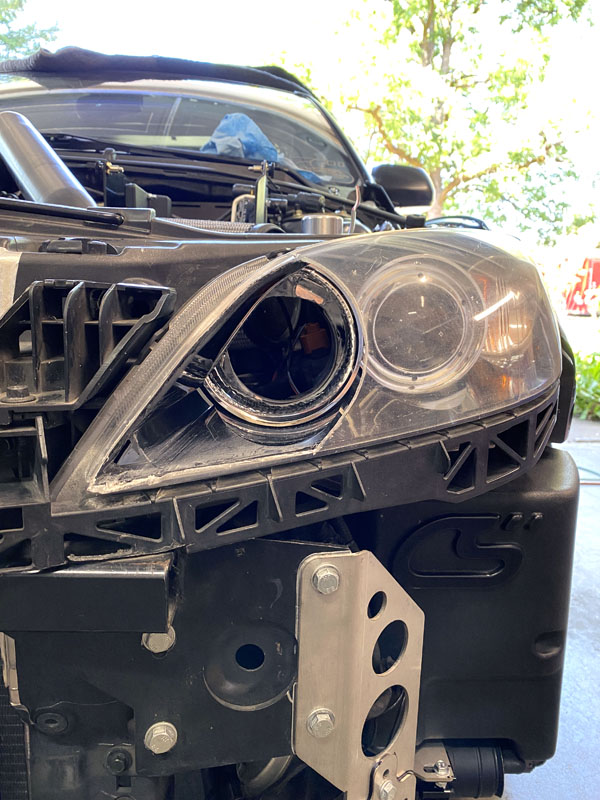
Heat killed us last time so let’s resolve that with a hole in the headlight (haha yes I said that) and force CO2 cooling on the intercooler.
So, to solve the high intake air temperature issue I cut a big ol’ hole in my headlight. Now I have a direct source of ambient air hitting the air intake system. Unfortunately, the CO2 cooling system did not arrive in time to get installed so let’s just hope it’s not so damn hot in Indiana.
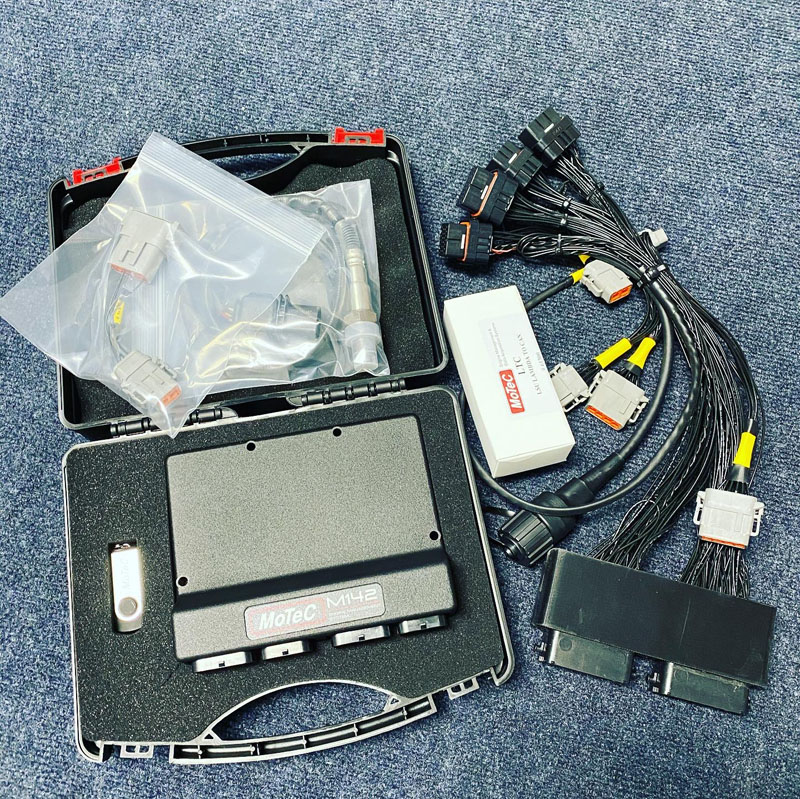
For power and traction, I have finally moved from the restrictive stock ECU to the amazing Motec M142 ECU. With help from some awesome friends, I was able to get the Motec installed and running most of my desired auxiliary sensors (coolant pressure, oil pressure, PI fuel rain pressure, eMAP, EGT). There are two major benefits of Motec over the stock ECU (right now).
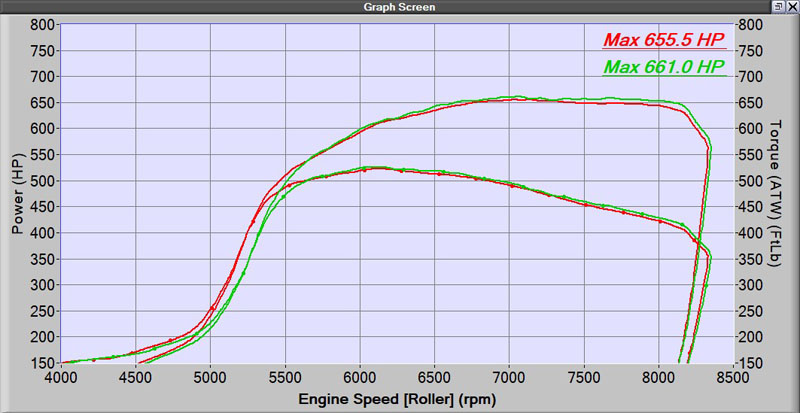
First, the Motec allows proper tuning control to 10k+ engine RPM whereas the stock ECU in the GEN1 flat lines control at 7k RPM. While the car/engine can rev out past 7k, the ECU stops actively controlling the tuning, and therefore power falls off. The new power band for the halfmilespeed3 carries to 8500rpm thanks to Motec and Justin @ Freektune!
Video Link if Possible: “Built with Barett Episode 4”
So with that wish me luck and I hope to see you at the airstrip. Get out and drive your car…you don’t have to have a bonkers build and power number to compete and enjoy your Mazdaspeed. Go get a number and send it down a runway!
Image: how-to-race-your-mazdaspeed
Thanks for checking out the latest update with @halfmilespeed3. Follow on Instagram for more updates and checkout the live link for the Shift Sector Indy event in my bio.
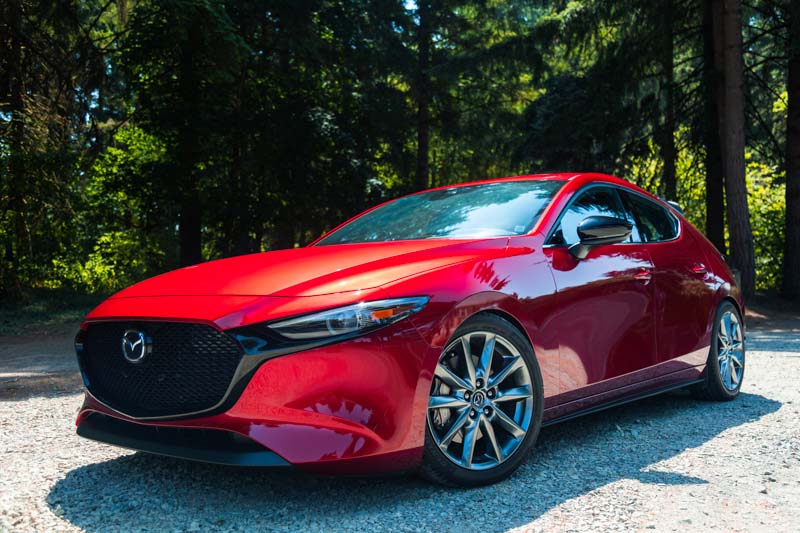
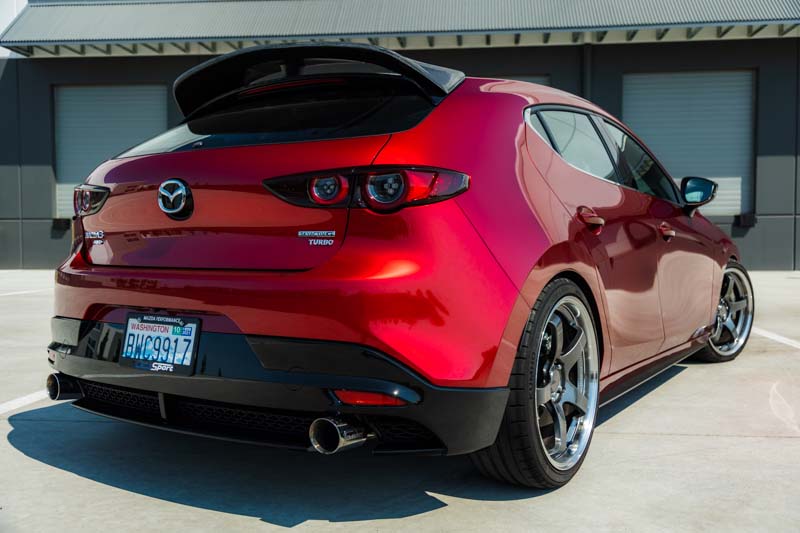
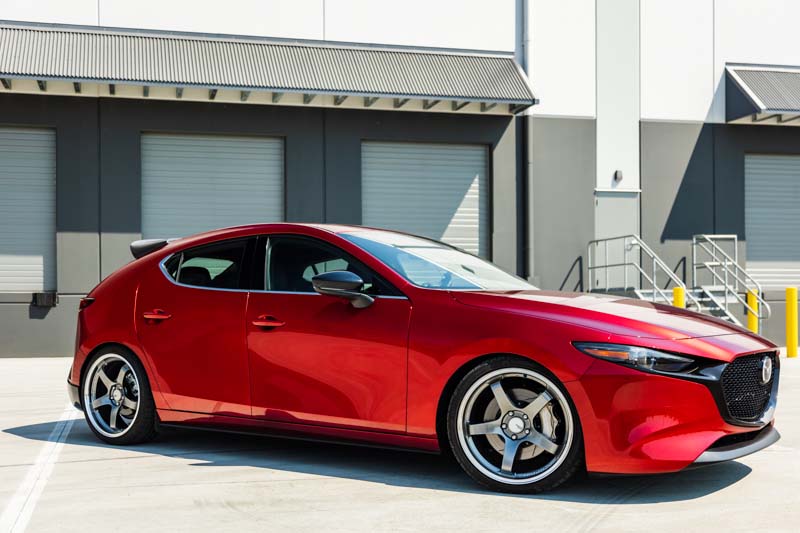
Putting a turbocharged engine in the GEN4 Mazda 3 was a step in the right direction for Mazda but it still misses the mark of a “hot hatch”. Well, that’s where we come in! Introducing the CorkSport Lowering Springs for 2021+ Mazda 3 Turbo. We took what we learned from the naturally aspirated Mazda 3 and applied it to the slightly heftier turbo models. This resulted in a great new ride height and improved handling to push the GEN4 closer to a hot hatch, without ruining the daily driving comfort. Read on for full details and images of the great new look!
Let’s start off with what everyone wants to know: ride height! With only one driveline & transmission option, we could really dial in the ride height for both turbo hatchback and sedan models. The CS lowering springs for the turbo models offer a similar ride height drop to the N/A models. For the turbo hatchback, this means a ride height drop of approximately 1.5” in the front and 1.8” in the rear. For the slightly heavier turbo sedan, expect a drop of 1.5” in the front and 1.9” in the rear. While the sedan is a slightly larger drop in the rear than the hatchback, it still sits level and looks great!
Stay Up-to-date with CorkSport
This ride height is low enough to look great yet not too low to cause you issues on your daily commute. We found that this ride height can clear most driveways and speed bumps no problem. On really steep driveways, taking it slow and at an angle will help you keep your front bumper safe. We haven’t really found a driveway that was an issue though! One final note: we did test our regular, non-turbo Mazda 3 lowering springs on a turbo car. While they fit, the extra weight from the turbo system had the car sitting way too low in the front & looking ugly. We would not recommend doing this!
Moving on to the next best benefit from lowering springs: handling! The CorkSport lowering springs offer some much needed sharpness to the MZ3-T. By lowering the ride height, you lower the center of gravity of the vehicle. Combining this with stiffer than OEM spring rates, body roll is reduced, which greatly helps driver confidence through the twisties. We carefully chose our upgraded spring rates to also help reduce understeer when at the limit of traction. By increasing the rear spring rate more than the front, your turbo 3 gets better turn in and more neutral handling.
The final spring rate numbers for the Mazda 3 2.5T lowering springs actually surprised us. We tested a few different spring rate combinations to find the best balance of ride and handling. Ultimately, the same spring rates as the naturally aspirated Mazda 3 won out (this was due to both cars using the same suspension design). A 3.4K front spring and a 5.9K rear spring offered a compliant ride for daily driving, yet great handling characteristics on a backroad. The OEM dampers on the turbo models are just a hair stiffer as well, so the increase in spring rate fits fantastic with no bouncy ride!
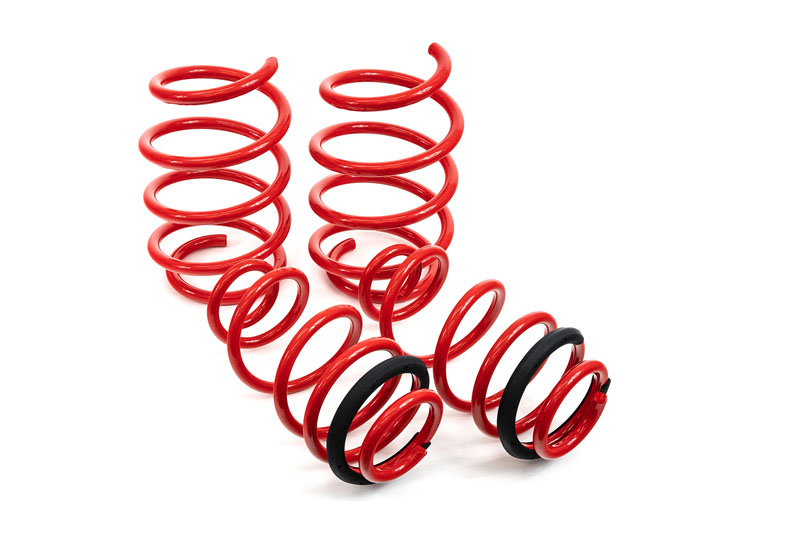
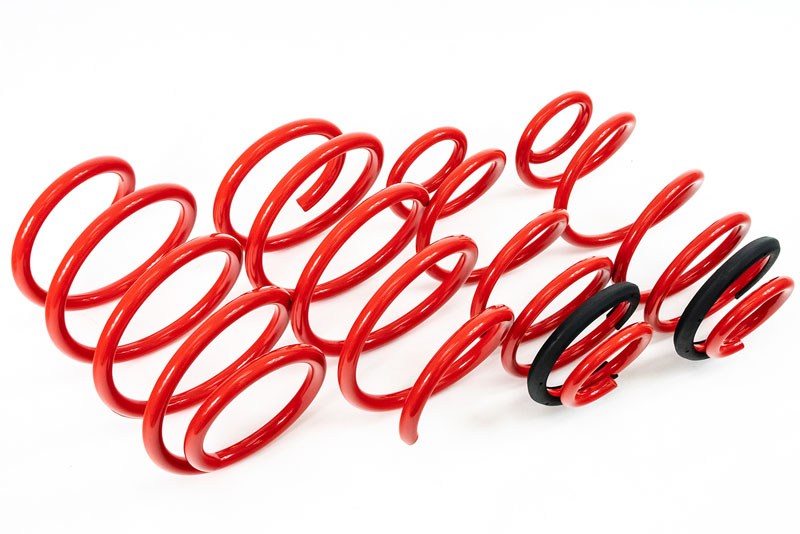
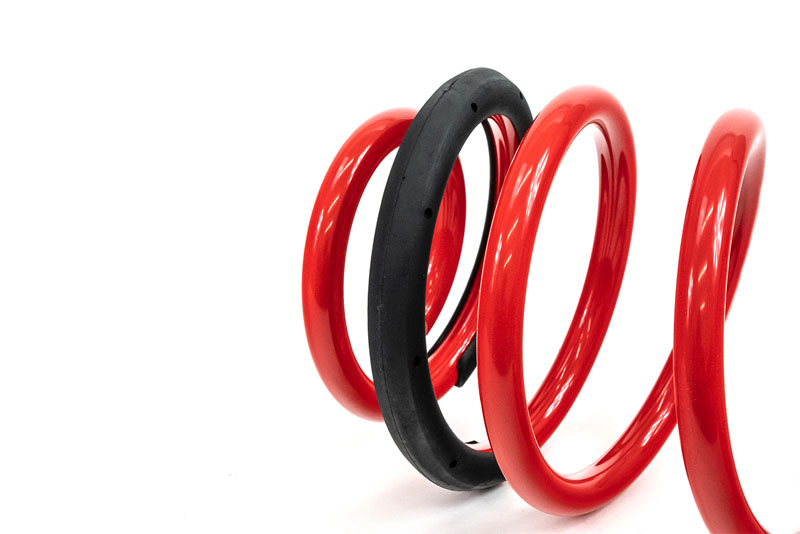
Each set of CorkSport lowering springs for Mazda 3 turbo are made specifically to fit directly in place of the OEM springs. The only small modification that is needed is to trim the bump stops to allow for correct suspension travel before the bump stop is contacted at the new lower ride height. The springs are all made from high-tensile strength spring steel. This ensures a consistently performing spring that will stand the test of time and will not settle. We finish off each spring with a powder coated red finish. We chose red instead of the typical CS blue to help the turbo models stand out and because red things are proven to go faster! We even include a spring silencer on the rear springs to prevent any noise.
That about wraps up the launch of the CorkSport Lowering Springs for Mazda 3 Turbo. Check out the product listing at the link below for more pictures. Be sure to give us a call with any questions you have, we’re happy to help!
P.S. The car in the above images is riding on Advan GT wheels in 19×8.5 +38 size, wrapped in Kumho 235/35 R19 summer tires.