A few years back, I had grand plans of going Spec Miata (SM) racing with a good friend in southern California during the winter months, intent on improving my on-track driving and racecraft overall. After the 1st event, things changed as my friend passed away.
My SM was only raced a few times during 2022 season, but after that, it was parked along with its fellow spec Miatas.
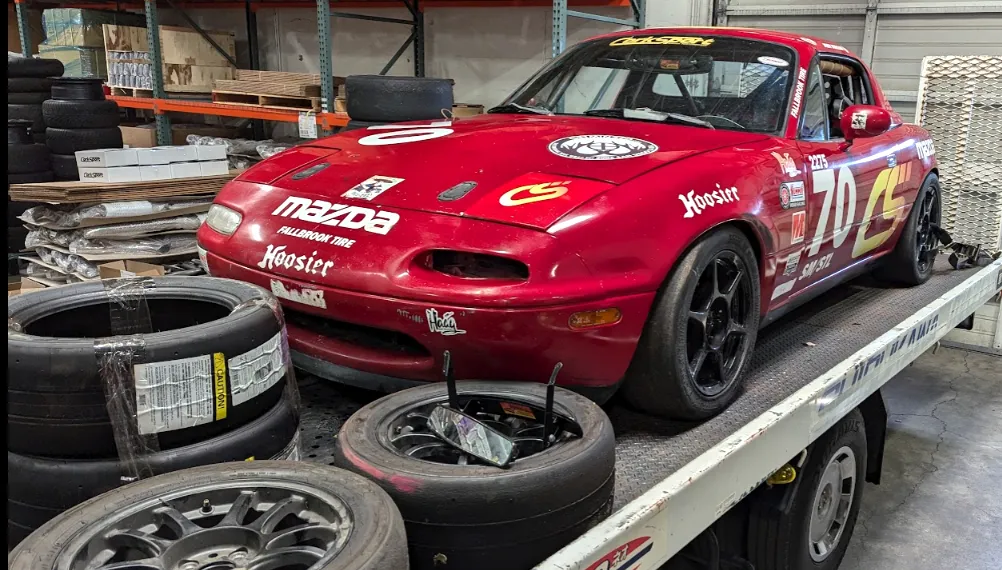
I brought the car back home in December 2023 along with an additional spec Miata on the trailer – with the intention of racing this year. I finally got the car out of the trailer to start cleaning it up and making sure it was solid to race.
Besides cleaning the car inside and out, and ensuring all its safety parts were still good, the car was pretty much ready to go. The biggest challenge was cleaning up from the cheese bois, which made the trunk a party house for a while.
I had several sets of Toyo RR tires that had been purchased back with the grand plans that were made in 2021. They had been sitting in a trailer since then and baking in the California sun. I chose a few that looked like they may still be soft and signed up for the race weekend.
The Friday test day, gave me a few chances to remember how to drive this car fast, as it had been more than five years since I raced an SM at Portland Intl Raceway. I double-checked the alignment settings and headed off to my weekend racing adventure.
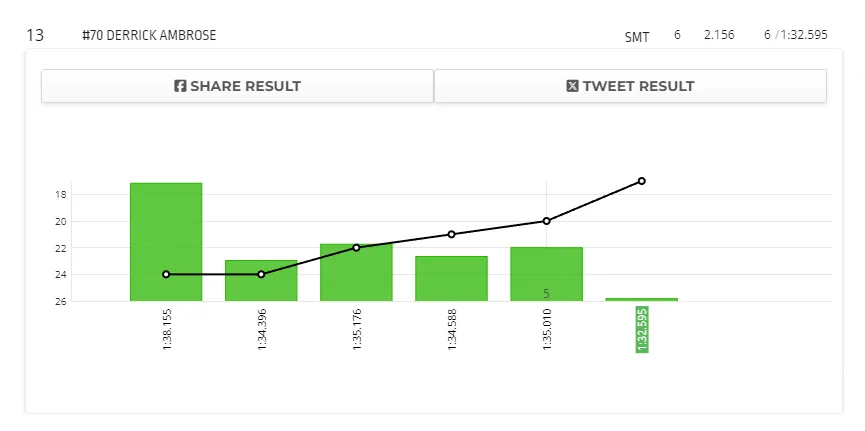
Test lap times were pretty slow compared to what I needed for the PNW Spec Miata Tour. I was turning 1:35 lap times, and if you want to be in the top ten, low 1:32s or better were going to be needed to get there. I focused on cleaning up the exits to turn 7 and 12, which lead onto the straights, as these were the sections of the track I was losing time according to my lap timer.
After consulting a few friends about the tire pressure settings and how to close up the gap, I headed out Saturday morning in qualifying to see what I could do. After dealing with a bit of traffic, I got some breaks from people who let me through, and I hit a 1:32.595, which I felt was about as good as I was going to get, so I called it quits for the sessions.
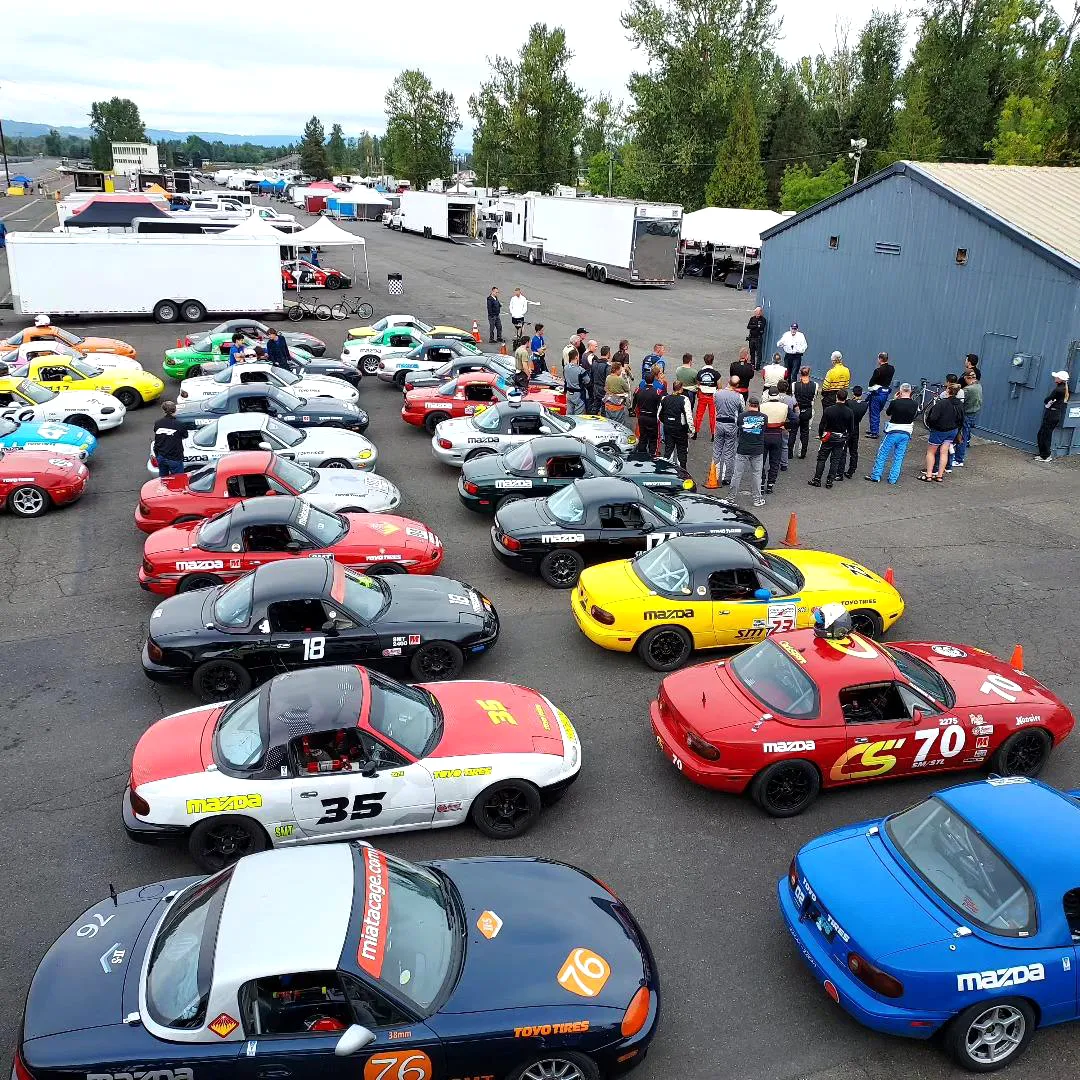
After a quick driver’s meeting and 30 minutes doing a nut and bolt check, I was ready for the afternoon race, which is a 25-minute affair. I have been racing for ~13 years now, and it is fun how you still get the butterflies heading around the last corner in double formation for the start heading for the green flag.
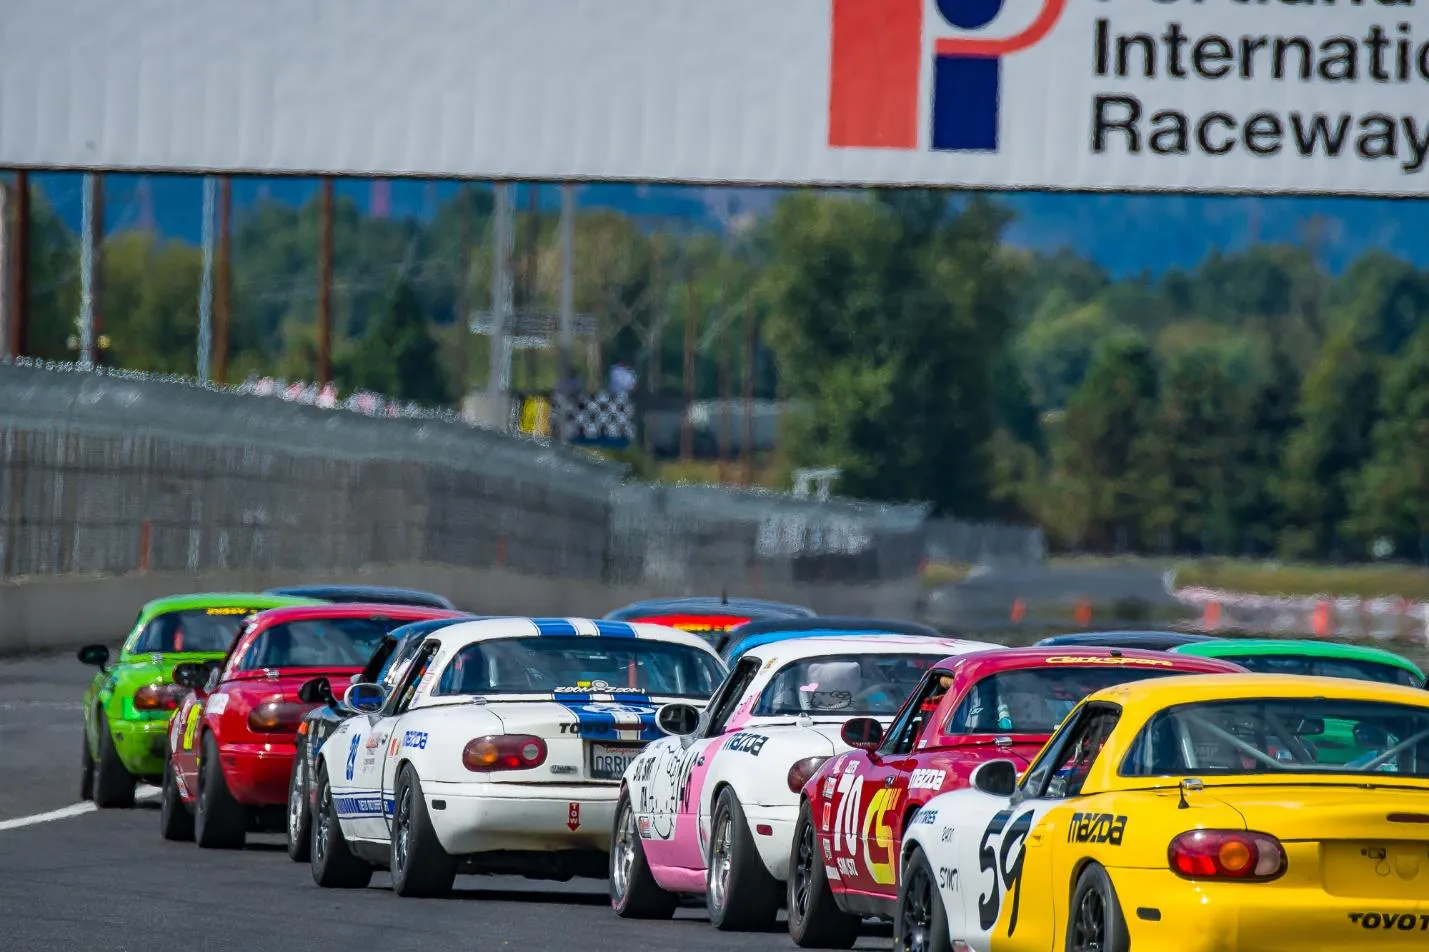
The starts at PIR, as always, are pretty wild mid-pack, and everyone is trying to get an edge on everyone else around you. I made it through the first corner without hitting or getting hit and proceeded close up on the car in front of me as much as possible.
During the race, I noticed that the car felt a little numb on feedback, and I found myself waiting for my Miata to respond to inputs. Waiting is relative, as I am talking about milliseconds, which seems like forever when racing cars. There were plenty of spots swapped, people spinning off the track, and great race action!
I started in 13th, and by keeping it clean and on track, I made it up to 11th place when the check flew. My goal was to be in the top 10, so I was pretty happy that I ended up 11 out of the 32 cars that had signed up for the weekend.
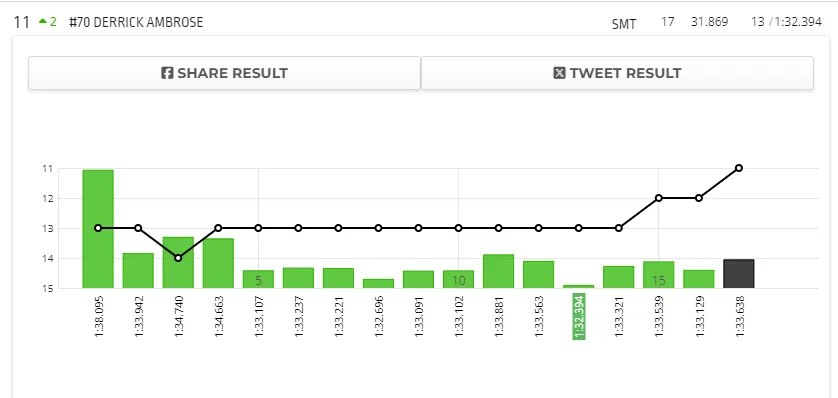
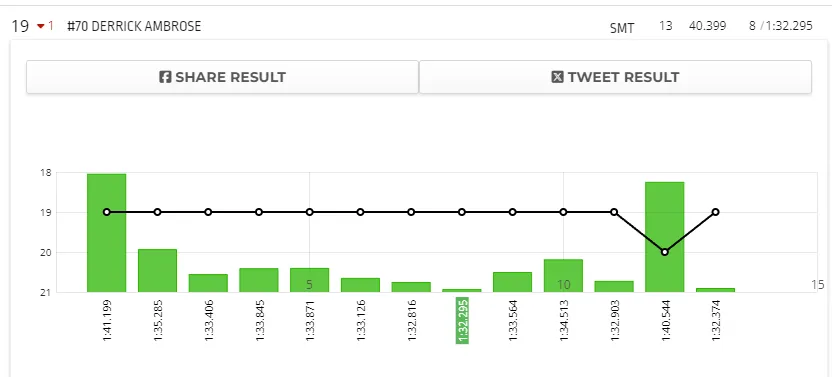
I also improved my fastest race lap, which means I would start higher up the field. I wasn’t the only one who was faster, so starting on Sunday for race #2, I was in 18th, and it was all downhill from there…

Race 2 TL;DR
I spun a few times and lost one spot overall during the race. Long version, the “wait” for the front end to turn was getting worse as the race progressed. There wasn’t a lot I could do with that so it was a race full of trying to drive around my problem by braking in different areas and turning in early to try to hit the apex and marks to make the corners.
Race 3
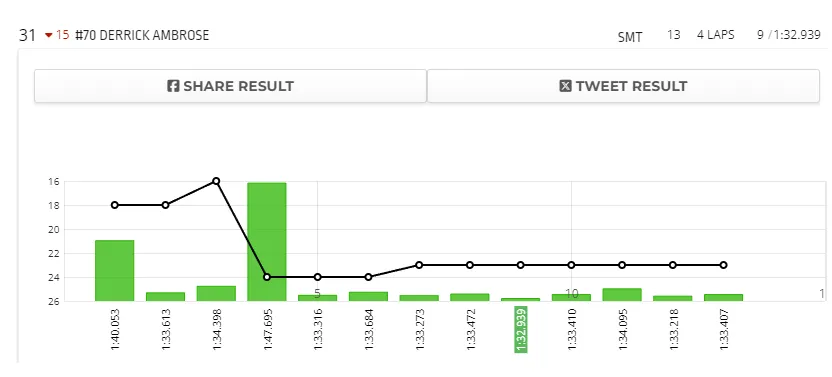
I got to start in 18th place again, as no one made up any more time/places in order to change the starting position in the middle of the field. The start went okay, and I didn’t make up or lose any spots as the field sorted itself out.
Lap 4 I went up the inside of another driver into turn 4 and lifted as I felt the car start to slide out. This was the wrong thing to do as it upset the chassis as I was ½ on a curb and ½ on the track, so around I went off into the grass. I felt a little boop from the other driver I was passing as he bailed out. I got stopped before the tire wall and headed back on the track now in 24th position. I was able to get a pass on another car and get back to the 23rd position, but I was really struggling to get the car to bite on the front-end grip.
Lap 13, heading into turn 1, aka the chicane, the car pitched more into the corner than I expected, and I looped it. I got going again and in turn 4 the car cut out briefly which means I was running out of gas. I limped it back into the paddock and called it a day.
I made sure to go talk to the other driver, which I failed to execute the pass on, and apologized for dragging us both off into the grass. He was pretty cool about it, but his wife gave me the stank eye the whole time. There is not much you can do but go say sorry, and he was happy with that. I would be if I were in the same position.
The fuel calculation miss was all on me. You usually run a specific amount of fuel per lap and toss in some extra for wiggle room. I did not put any wiggle room in the SM, so I ran out.
The front-end grip problem was due to the tires. When you usually get off track, you can feel the heat from the wheels and tires. After many sessions, you can barely touch the wheel because the heat is being transferred from the brakes to the wheels and the tires. The tires are normally very warm/hot to the touch after coming off the track. The Toyos were barely warm, which means they were not hitting the operating temperature, which is needed to generate maximum grip and allow me to do what I wanted to with the car.
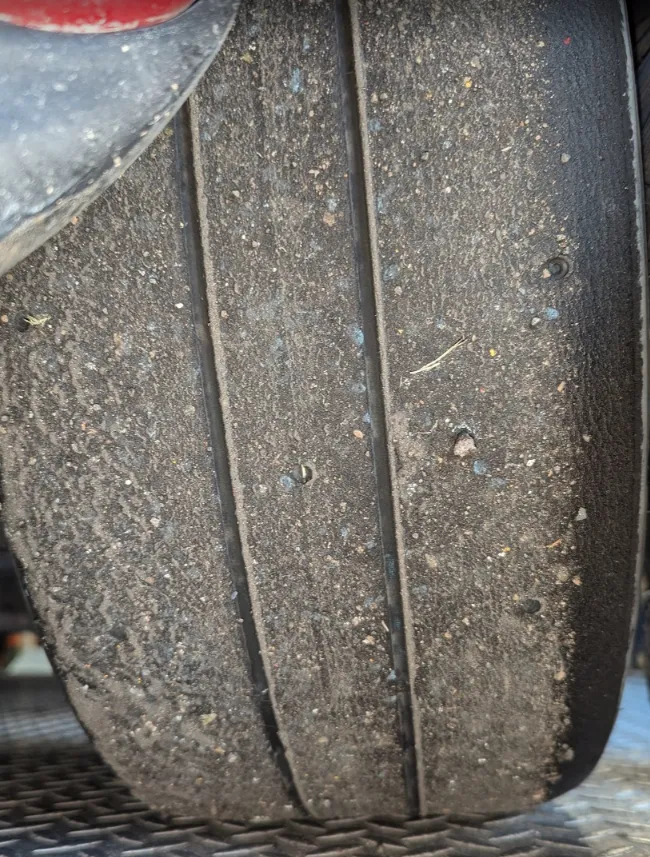
The picture above of the left front tire from the car after 3 test sessions, a qualifier, and 3 races looks like it has been out for a warm-up only. The left front tire takes all the abuse at Portland, so it should show signs of heavy wear. The racing season is over for the Northwest, so I will be sure to get some newer tires on the car next season.
Want to race Spec Miata with the rest of the NW people? The PNW Spec Miata tour page is NWmiata.com. Shout out to A-Aron for hanging out and watching me spin off the track and having a good time doing race car stuff.
-Derrick
Connect with us
You may also like