Half Mile Drag Racing Mazdaspeed – @halfmilespeed3 Goes to Indy

Can you believe it’s already August of 2021?  It’s crazy how this year has flown by!  Between the engineering projects at CorkSport and the racing with @halfmilespeed3…the weeks have become a blurr.  BUT sometimes you just have to put your foot down and go racing.  That’s what I want to tell you about.  

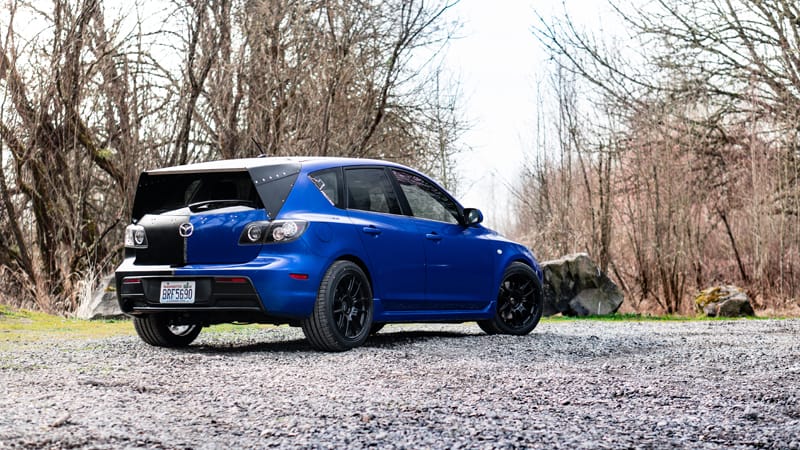
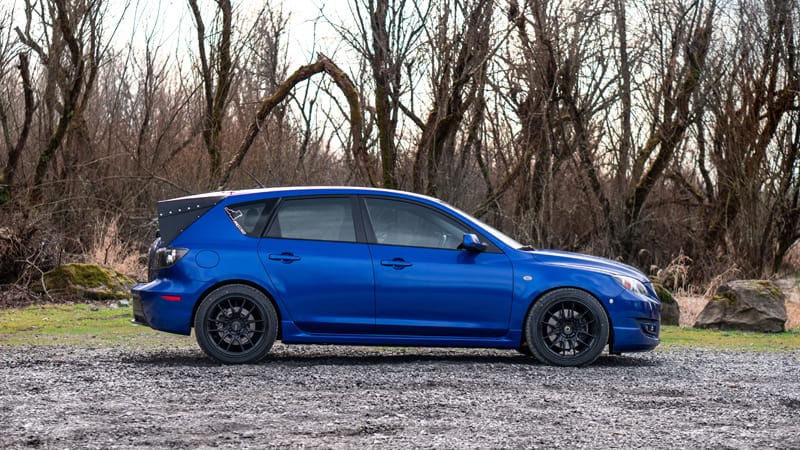
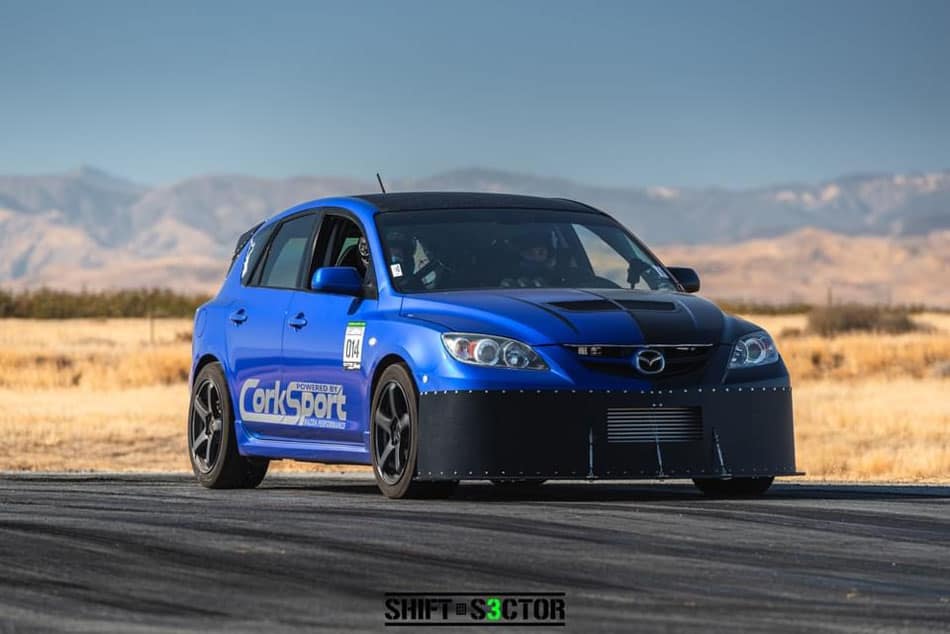
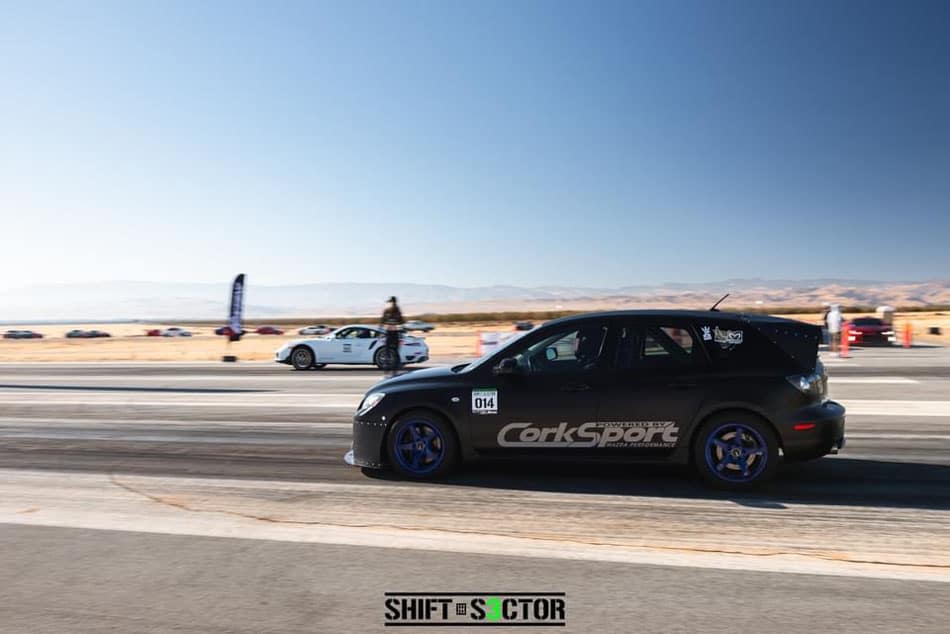
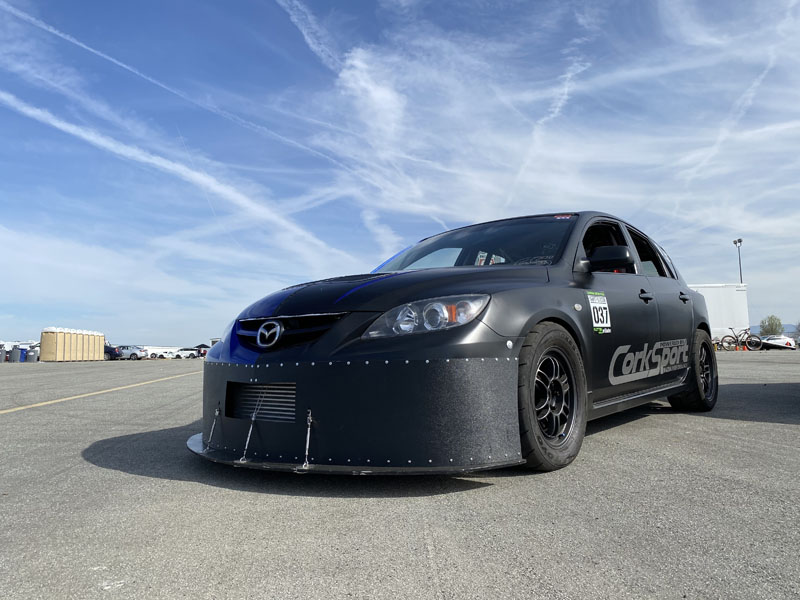
Barett here, Driver of Halfmilespeed 3, where my goal is to race a 2009 Mazdaspeed 3 in the standing half mile.  Much like the quarter-mile drag racing you have most likely seen or even participated in, but we stretch the race an extra ¼ mile and we race on no-prep airstrips.  The added ¼ mile helps us reach speeds of 150+ up to 250mph for the crazy 2500whp builds.   I’d like to invite you to see what’s happened with my 09’ Speed 3 over the last few months and what we hope to achieve at Shift Sector Indy this coming weekend (August 14th – 15th). 

Let’s jump back to April 2021; the first race of the season at Coalinga CA.  Like all the half-mile races I am participating in, this race was hosted by Shift Sector.   If you want to check out Shift Sector more or see if they race you check it out here.   

Anyways, the lesson learned was “Don’t change a bunch of shit on your car before the race”.  I realize that’s extremely difficult it seems but trust me.  

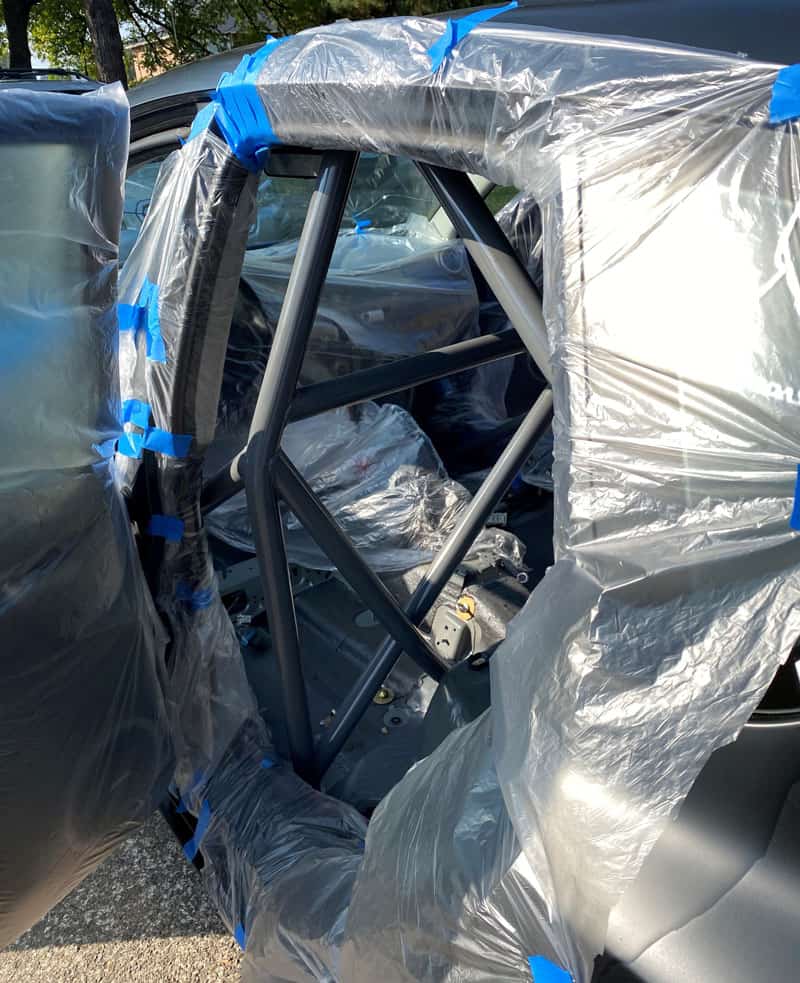
We nuked 3rd and 4th gear in my transmission Saturday AM because we thought it was a great idea to change the shifter assembly and cables a few days before the race.  Those take time to get set up correctly or you can do damage…obviously.  So, we found a used transmission locally (albeit a GEN 1 trans which is not ideal gearing) and got to work.  By 330am (Sunday AM) we had the car running again and back in the trailer…off to the track by 8 am that morning.  

Long story short, the car did drive off the trailer but then had an electrical issue that never let the car run again that day.  The event was a bust…we eventually figured out the electrical issue was bad ground that was caused by the midnight transmission swap.  Lesson learned!

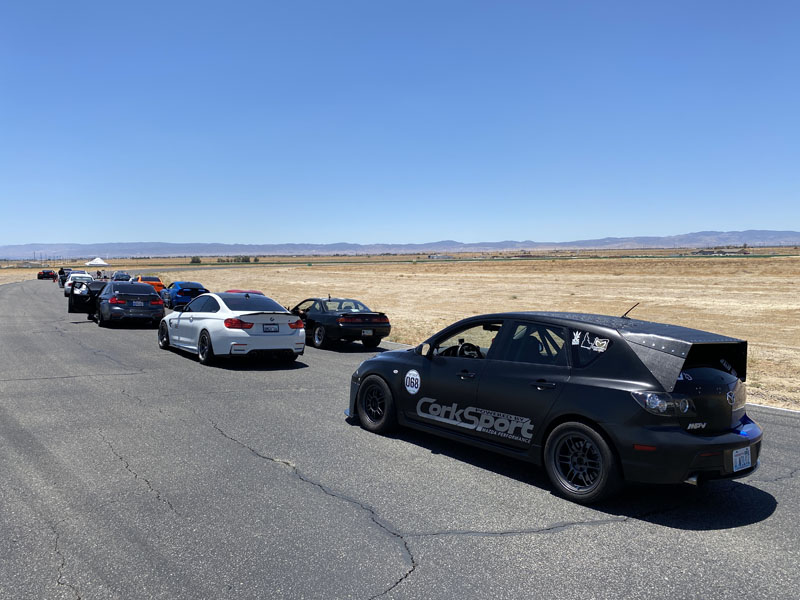
The next event was a Roll Race hosted by Shift Sector down south at Willow Springs Raceway.   I was excited to do my first roll race because we all know these cars are not great from a dig, but from a roll, they can really kick some ass.  

Barett Halfmilespeed3 Mazdaspeed 3

If you haven’t done a legit (non-Mexico) roll race and get the chance…do it!  It was an awesome experience and will be doing many more in the future.  With that being said the race was held on the front straight of Big Willow Racetrack…so that meant we were lining up and launching at the exit of the last corner…that was interesting to say the least.  The morning was four hours of practice and testing.  The car was doing great, but the heat was really starting to wear on me and the car.  By the end of practice, I was starting to see the heat really build up with 180+ degF intake temps and boost air temps in the 140+ degF range.  

Barett Halfmilespeed3 Mazdaspeed 3

We let the car sit for almost a couple hours before the actual competition started.  This helped alot, but damn was it still hot outside with ambient air temps over 100 degF.  When my race came along I lined up with a 335i with a big single turbo and hood exit exhaust…we set off with a target hit speed of 40-50mph.  Luckily this was right in the sweet spot for 3rd gear and just a bit of brake boosting to hit the launch hard.  As we got to the finish line the light flashed and we went for it….but the heat said nope.  

Unfortunately my car stumbled and cut power.  I went a bit to aggressive on the brake boosting and super-heated my boost air temps.  This caused the ECU to pull power for a split second…just enough for the BMW to pull ahead. 

Despite this I pushed forward and was reeling him in but there just wasn’t enough straight to catch him.  

Video Link if Possible: “Built with Barett Episode 3”

Another lesson learned…I need to get my cooling in check before the next event.  That next event is Shift Sector Indy.  This is a standing half mile drag race at Marion Municipal Airport in Marion Indiana.  

Barett Halfmilespeed3 Mazdaspeed 3

Image: shift-sector-indy-2021

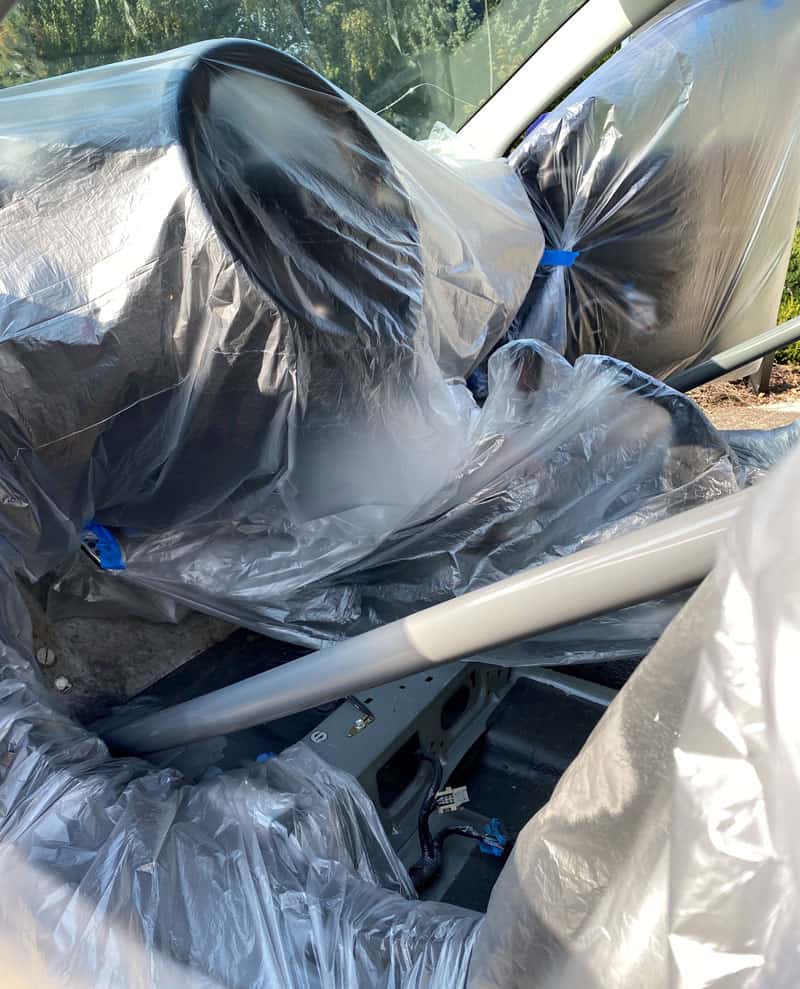
As I write this, my Speed is sitting in a transport truck operated by English Racing along with nine other cars going to the same event.  Quoting Myles Kerr @ English Racing…”4 GTR’s, 2 damn Honda’s, a Mazda, NSX, 570 and a 720.” 

Barett Halfmilespeed3 Mazdaspeed 3

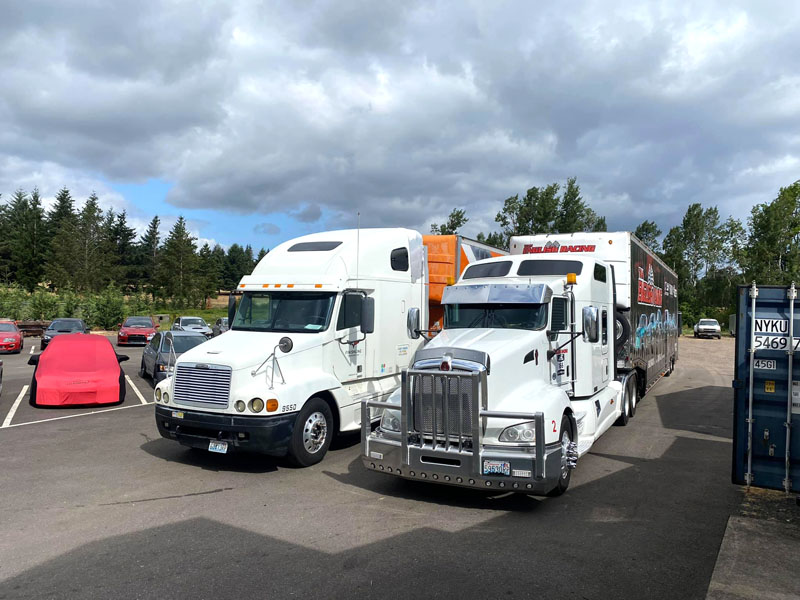
Yup, the Mazda is riding with the big boys.  If I could take a guess, those two big rigs are holding upwards of 15,000+ whp of racecar…HOLY SHIT.  I think my humble little Mazda is the only car not making 4 digit power…

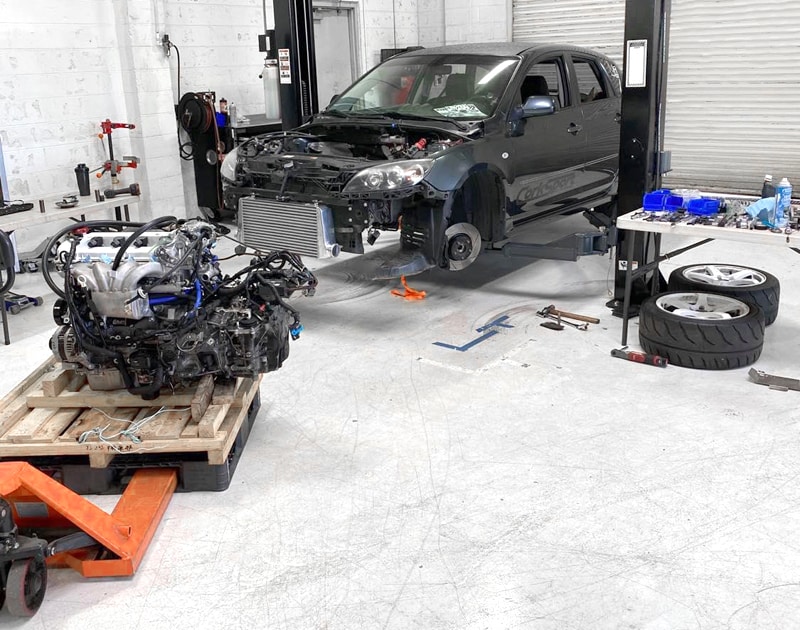
Anyways, we made some changes for the Indy race for power, traction, heat control and reliability. 

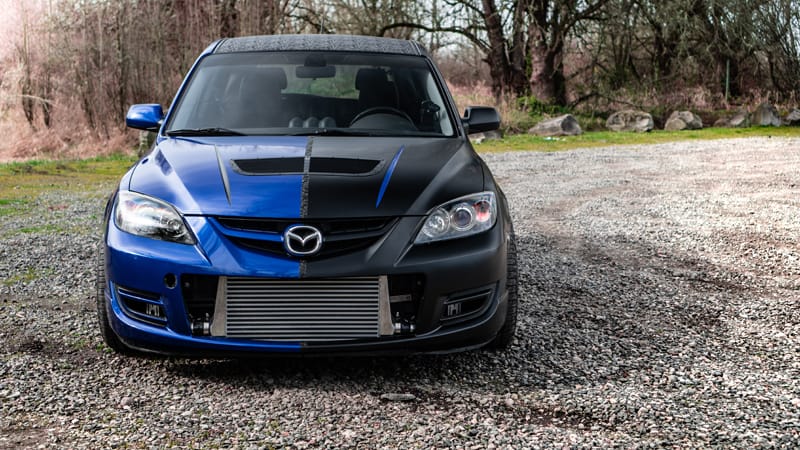
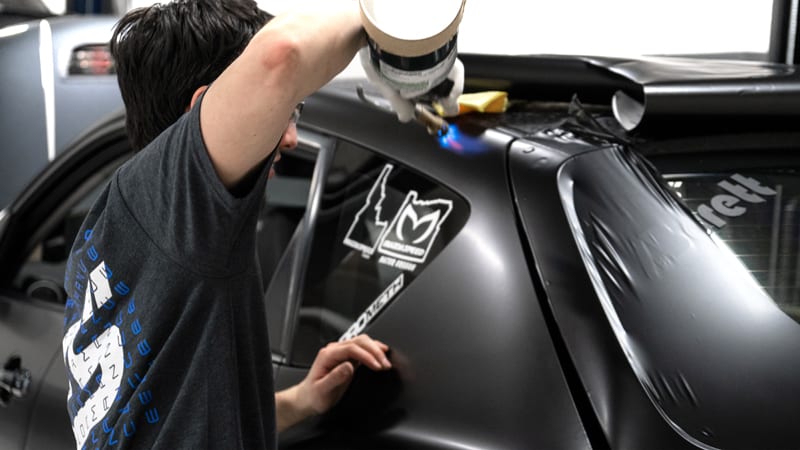
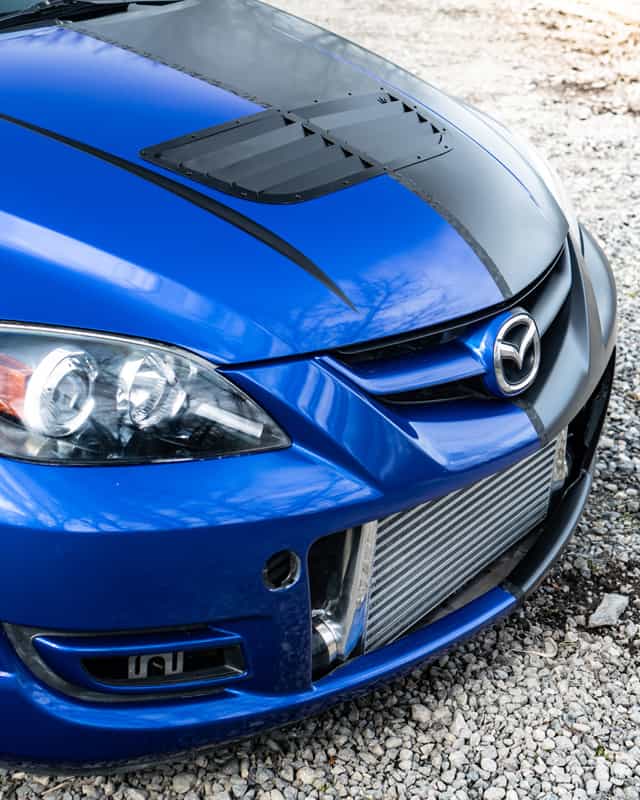
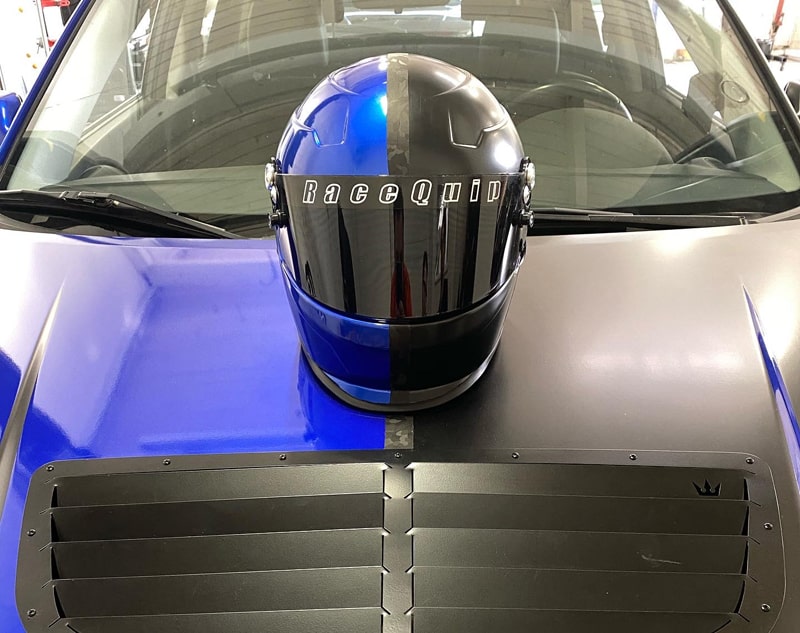
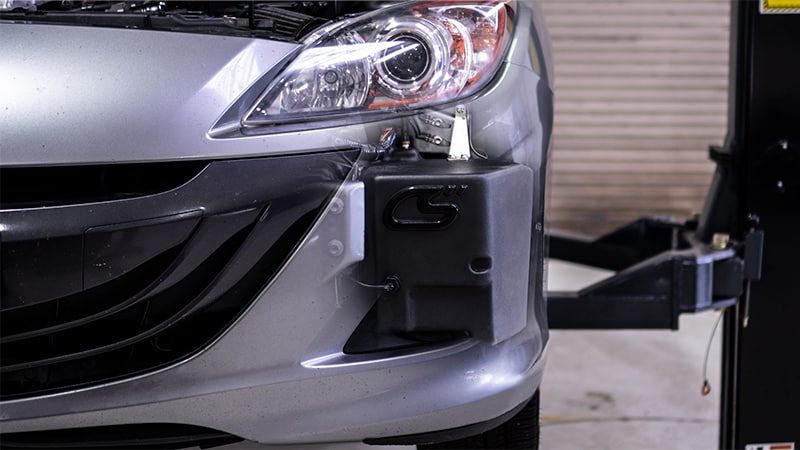
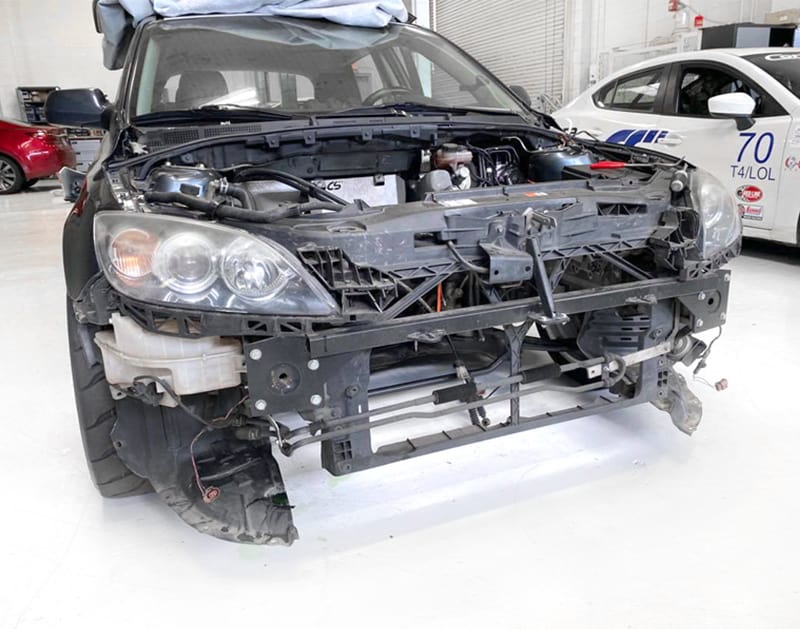
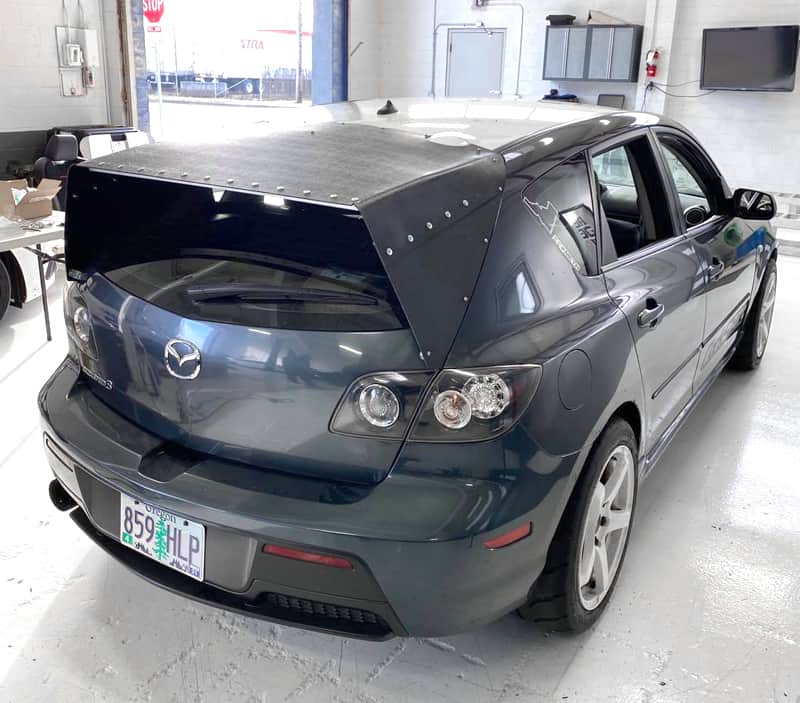
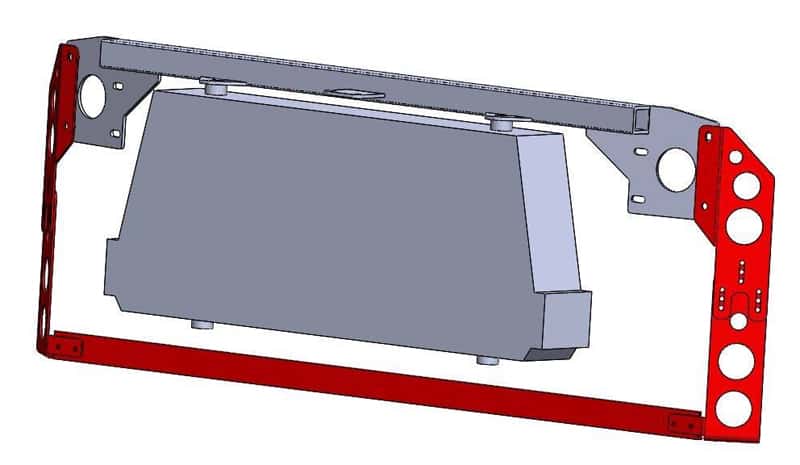
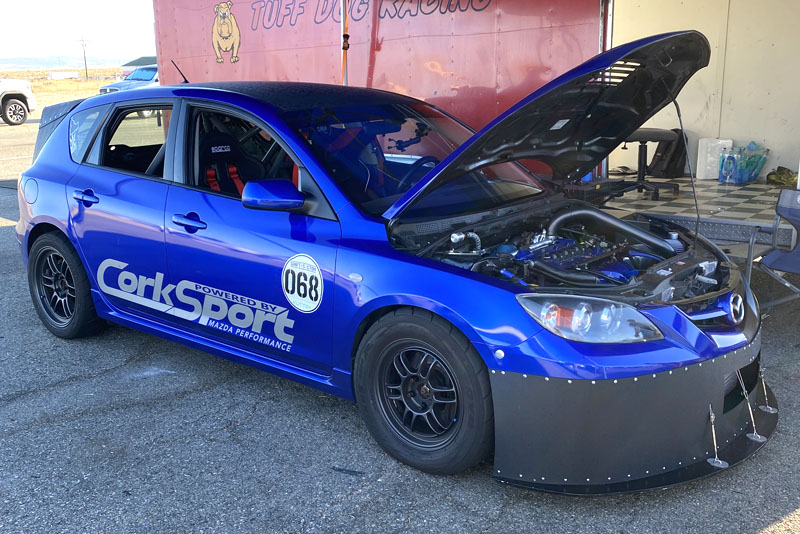
Heat killed us last time so let’s resolve that with a hole in the headlight (haha yes I said that) and force CO2 cooling on the intercooler.  

Barett Halfmilespeed3 Mazdaspeed 3

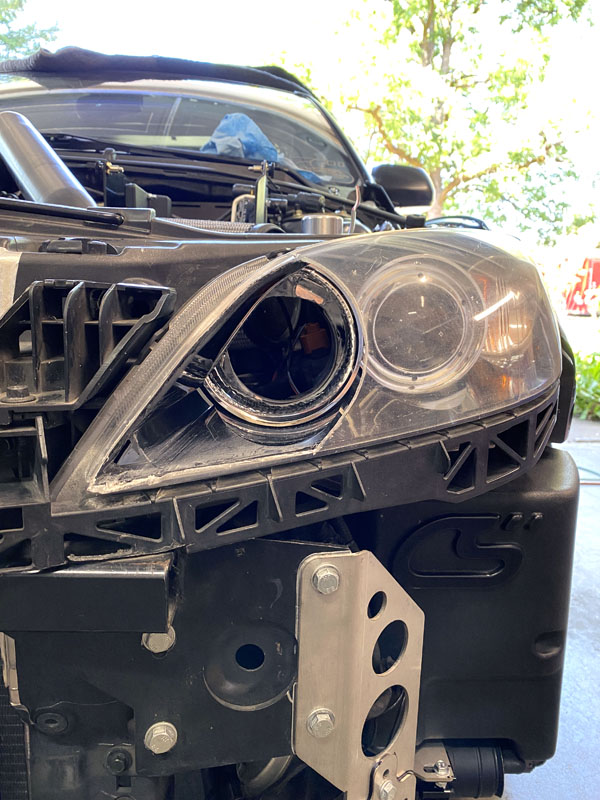
So, to solve the high intake air temperature issue I cut a big ol’ hole in my headlight.  Now I have a direct source of ambient air hitting the air intake system.  Unfortunately, the CO2 cooling system did not arrive in time to get installed so let’s just hope it’s not so damn hot in Indiana.  

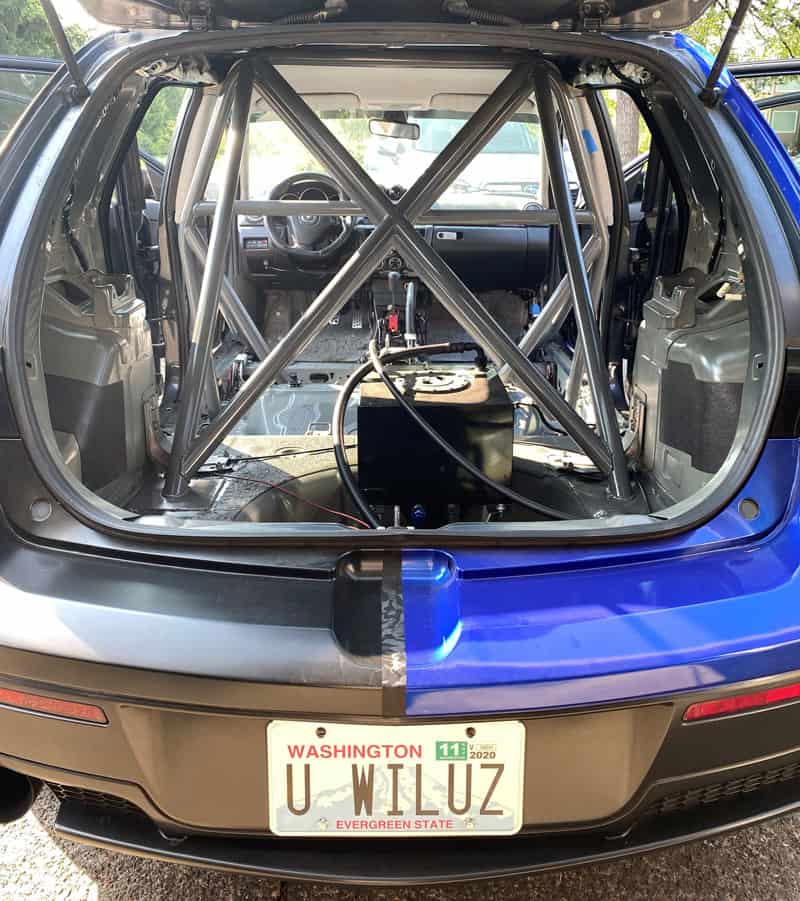
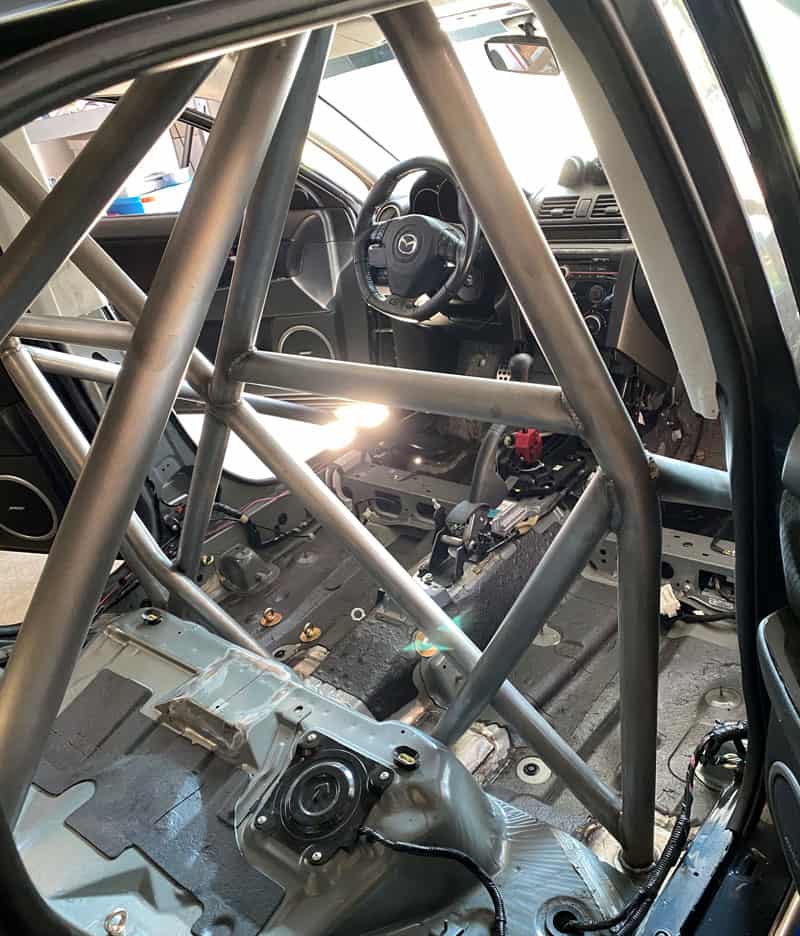
For power and traction, I have finally moved from the restrictive stock ECU to the amazing Motec M142 ECU.  With help from some awesome friends, I was able to get the Motec installed and running most of my desired auxiliary sensors (coolant pressure, oil pressure, PI fuel rain pressure, eMAP, EGT).  There are two major benefits of Motec over the stock ECU (right now).  

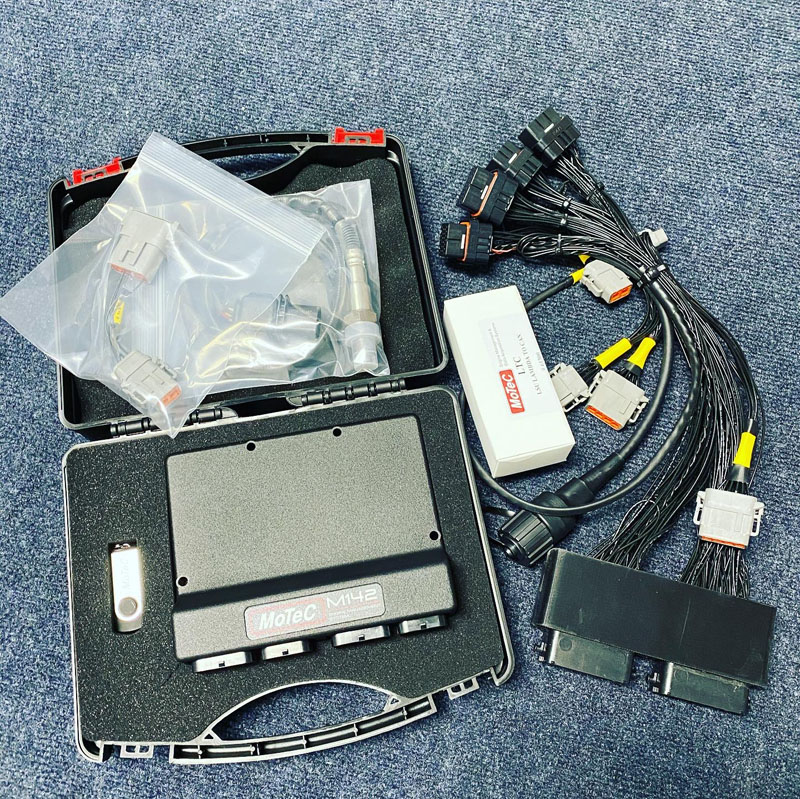
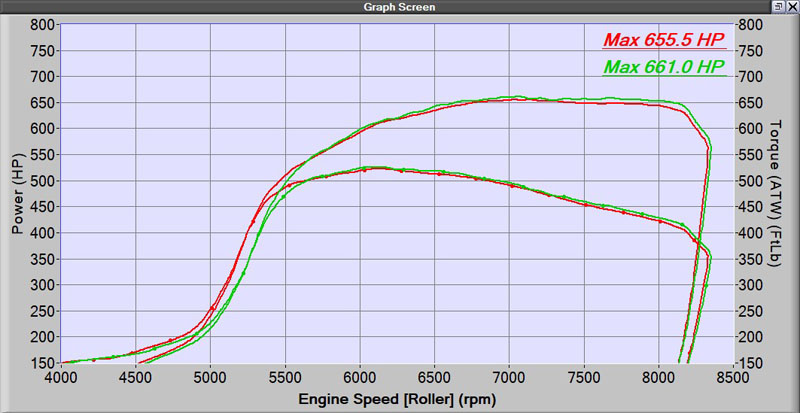
First, the Motec allows proper tuning control to 10k+ engine RPM whereas the stock ECU in the GEN1 flat lines control at 7k RPM.  While the car/engine can rev out past 7k, the ECU stops actively controlling the tuning, and therefore power falls off.  The new power band for the halfmilespeed3 carries to 8500rpm thanks to Motec and Justin @ Freektune!

Dyno charts of WHP for the Mazdaspeed 3

Video Link if Possible: “Built with Barett Episode 4”

Just so you are aware, the engine is a complete CorkSport catalog build featuring an Overspeed Built Block (for 1000hp) with CorkSport manifolds, 4” intake, 3.5” exhaust, port injection fuel system and Kelford D camshafts. The turbocharger is still a stock flange CorkSport CST6

So with that wish me luck and I hope to see you at the airstrip.  Get out and drive your car…you don’t have to have a bonkers build and power number to compete and enjoy your Mazdaspeed.  Go get a number and send it down a runway!

Image: how-to-race-your-mazdaspeed

mazdaspeed 3 how to race

Thanks for checking out the latest update with @halfmilespeed3.  Follow on Instagram for more updates and checkout the live link for the Shift Sector Indy event in my bio.  

  • Barett @ CS

Stay up-to-date on the latest news and product updates from CorkSport.

* indicates required

Vinyl Wrap With a Split Personality

Stickers are worth 5hp right?…So it was only logical to wrap the whole car in a GIANT sticker!  Anyways, on a real note we knew that the @Halfmilespeed3 couldn’t just be fast, it had to look good and what Car Guy or Gal doesn’t want their car to look good?

We have a plan at CorkSport to wrap all of our R&D Shop Cars with an awesome blue that aligns with our “CorkSport Blue”, but we want each car to have a little unique character to it.  Thinking about the halfmilespeed3 build and goal we had the brilliant idea of a split wrap…seems fitting right? Half and Half…

So what did the car look like before the wrap?

2007-2009 Mazdaspeed 3

Metro Grey Mica is the color name and its pretty bland in my opinion.   I added the white roof and hood accents along with white wheels to help brighten up the car, which it did, but it was time for change.  Oh yeah; white wheels and track spec brake pads don’t mix, just an FYI. 

So what is like to get your car wrapped?  What’s the process?  I can’t personally give you details as I did not do the wrap myself, but I was close to the action and watched it all come together.  Respect to those that take this on themselves and to the professionals out there.  It is a tedious process that requires attention to detail to get a great final result.  

Mazdaspeed Vinyl Wrap

A local friend is a professional and was open to doing the work in the CS shop since the Speed was not in a running and driving state at the time.  

Mazdaspeed Vinyl Wrap

Saul S. (@saulywood) did the work over a few weeks’ time in evenings and weekends.  He kicked a** on a project that turned out to be a bit more difficult than expected.  

Installing a wrap is a process of pulling, stretching, heating, cutting…lots of different skills and abilities to get the job done.  All this has to happen without damaging the vehicle you are wrapping.  It’s quite a feat.  

Mazdaspeed Vinyl Wrap

Going through the process the build kind of evolved if you will.  Luckily Saul was very open-minded to it and even a bit eager to try some new things. 

Probably my favorite aspect of the wrap is the unique and new wrap from 3M.  Called “Shadow Black” this wrap has a slight texture to it that depicts patterns sort of like camouflage.  

Mazdaspeed Vinyl Wrap

We used this on the roof and in a narrow strip over the seam between Satin Black and Blue Gloss; it really added a unique aspect to the look and style and brought the two colors together.  Pictures just do not give it justice nor can you feel the texture.  

Halfmilespeed3 build

So let’s wrap this up (see what I did there?) with some finished images.  

Halfmilespeed3 build

I have to admit I’ve fallen in love with my car again.  The exterior of my car was pretty beat up and neglected with rock chips, scuffs, and just generally not well taken care of paint.  With the new wrap there is a whole new rush of pride and enthusiasm to keep it looking amazing. 

Lastly, and this is bit cheesy, I requested Saul to match my helmet to the car…

Halfmilespeed3 build

Why not right?  It’s not just another black helmet and I love it.  

With that I hope you enjoyed this sneak peek into wrapping a Mazdaspeed.  Stay connected as we share more and more about the @halfmilespeed3 build…engine, seats, roll-cage, and power!  At some point this season an event will open and we can actually race!

-Barett @ CS

Connect with us:

Stay up-to-date on the latest news and product updates from CorkSport.

* indicates required

Mazdaspeed Roll Cage Painting, a Necessary Evil

Safety first right?  As much as I want to survive an unfortunate incident while racing my 650+whp Mazdaspeed3…I have a bone to pick with safety.  Sometimes it’s a real pain in the A**.  

Let me explain…and hopefully help you learn from my experience. 

Mazdaspeed3 Drag Racing

Today we are talking about how to paint a roll cage, specifically one that has been custom built to fit tightly inside the cab of a GEN1 Mazdaspeed 3.  How does this relate to safety?  Well…a cage is made from raw steel in “mild” or “chromoly” materials.  Both of these metals will corrode/rust over time. Not only will this result in a very ugly cage inside your car, but it could eventually affect the structural integrity of the roll cage, and that would defeat the whole purpose of it.  

With that I decided to paint the roll cage in my Mazdaspeed 3.  I daily drive and race the car AND I live in the PNW which has lots of rain and moisture.  In fact, in the couple weeks that I did drive the car with the raw cage, I was already getting surface rust build up…gross. 

Mazdaspeed Roll Cage Prep

To add to the difficulty, the cage in my Mazdaspeed was custom built from scratch vs a kit so it was very tight fitting and I have extra “X-bracing” added for increased roll over protection.  This just added to the amount of surface area to paint and the number of locations with bars very close to each other.   

The roll cage/hoop in my #halfmilespeed3 is technically a 8-point cage with an added X-brace in the main hoop and between the rear strut braces.  The X-bracing is what helps with high speed roll over protection, but with a weight penalty.  Go look at any modern rally car and you’ll see X-bracing plus lots more. 

Mazdaspeed Roll Cage Prep

Ok, time to get our hands dirty.  Here are the major items you will need to paint your cage:

  1. Paint – I used a rust-oleum paint & Primer Combo.  Make sure it works with a metal surface.  2-3 cans will be needed to complete the job and I’d suggest a high gloss enamel finish.  It will be much easier to clean.
  2. Safety Equipment – Goggles, Face Mask (a real one with a rating for fine dust), Bunny Suit (because you will get paint ALL over you), Gloves
  3. Scotch Brite Pads – You will need this so you can remove any rust build up (assuming it is minor, if you have a heavily rusting and rough cage then you will need to get far more aggressive)
  4. Cleaner and Rags – Gotta clean the cage after the scotch brite process
  5. Plastic Wrap – This is like industrial size cling wrap.  Easily found at Home Depot or other hardware shops in the painting isle.
     
  6. Blue Tape – A few rolls of the 1.5” will do. 

Step 1: Remove everything you can from the interior (which may not actually be much if you have a cage.  Take your seats out, carpet (what’s left), center console, …etc

When I had the cage installed I decided I wanted to keep the front two seats as factory as possible.  With that I have kept my carpet, center console, dash, door cards, roof upholstery…other than the door bars from the cage, you would have no idea the car has a cage when sitting in the front seats. 

Step 2: Scotch Brite Time!  Grab a pad and start giving your cage a nice rub down. You need to go over all surfaces of the cage if you want good adhesion of the paint to the metal surface.  Once done, do a quick check and I bet you find some missed spots.  Get those also…

Step 3: Clean up time! Grab some clean rags and a cleaner that does not leave any residue.  Clean all the cage surfaces to remove any dust and/or oil.  This is equally as important for good paint adhesion.   

Mazdaspeed Roll Cage Prep

Step 4: Time to seal up the car.  My number one advice here is avoid wind if possible.  This plastic sheet loves to blow away in the wind…it can be very frustrating.  If you have a friend that can help, that would be a great idea. 

You basically want to cover all exposed surfaces inside the car and a lot of the outside of the car.  While you are spray painting, you will be creating a lot of overspray mist floating in the air.  This will settle on all surfaces inside and out.  

I completely wrapped my doors and door edges, inside and outside of the car a bit. 

Mazdaspeed Roll Cage Prep

I completely covered my dash and shifter assembly. 

Mazdaspeed Roll Cage Prep

For the roof upholstery I did not use the plastic wrap, I actually used a piece of cardboard to act like a shield.  I held the cardboard with one hand, shielding the roof while I sprayed the upper sections of the cage.  It was effective and much easier than plastic wrap for that area.  

Step 5: Time to actually paint.  First you need to get into your bunny suit, get your gloves on, your face mask and goggles.  Be proud of how ridiculous you look!

Before you start spraying, make sure you are in a well ventilated area and do not have any other cars or items in close proximity; they will get paint on them. 

Actually Painting: I would advise starting with the hard to reach arrears first.  You are essentially painting inside a jungle gym so get to the hard to reach areas first so you don’t have to worry about touching wet paint later.  I started in the center and top of the cage because I had to be in the car to do so.  Then was able to get to the more outer parts of the cage while outside of the cage.  

Applying the paint is a bit of an art.  You want to apply smooth and consistent layers.  Your hand is always moving side to side as you spray.  Don’t point and shoot or you will get runs in the paint. 

Do a first coat that mostly covers all the surface area, then let it tach up for about an hour or reference the instructions on the can.  Then apply another coat of paint.  Trust me you will find thin or missed spots.  

Mazdaspeed Roll Cage Prep

Step 6: Get out of the bunny suit.  Hahaha ya this can be a process

Anyways, I pushed my car back into the garage and let the paint cure overnight before removing the plastic wrap.  I didn’t want to risk the plastic wrap touching/sticking to the fresh paint.  You may not have that luxury and if you don’t I would at least give the paint a couple hours to cure before removing the plastic. 

Other takeaways – this was an ALL DAY PROJECT.  I thought I could get it done in half a day, but with the concerns about keeping the still installed interior looking good, I was extra cautious with the plastic wrap which added time.  I also did not want to do this again later so I was extra detailed with the painting process.  Checking for missed spots and thin areas after each coat.  

However, the result was well worth the work and I have no regrets about painting the cage.  I can now drive my car without worry of the cage getting ugly or losing strength due to corrosion.  I highly recommend that you take the day or so to make this happen in your car.  

CorkSport Shift S3ctor

I hope you enjoyed this blog and thank you for following along with the @halfmilespeed3. Stay connected (instagram, blog & “Built With Barett” video series) as we share more and more about the @halfmilespeed3 build…engine, seats, roll-cage, and power!  Rolling into the Shift Sector 2021 season we will have more great content to share!

-Barett @ CS

Connect with us:

Stay up-to-date on the latest news and product updates from CorkSport.

* indicates required

Speed 3 Auxiliary Fueling Tank

Mazdaspeed 3 Auxiliary Fuel Tank

Mazdaspeed 3 Auxiliary Fuel Tank
Auxiliary Fuel Tank

The time has come to reveal our Mazdaspeed 3 Auxiliary Fuel Tank design!

Years ago there was an option to run Port Injection or Methanol Injection without the requirement of a smelly and messy tank in your cabin.  Sadly that option disappeared and left the community with a need for another purpose-built and designed option for high power Mazdaspeed 3s.

That’s right! There is soon to be another fender mounting fuel cell for the 2007-2013 Mazdaspeed 3 and it’s packed with more capacity, durability, and functionality.  

Stay Up-to-date with CorkSport   


We approached this project with a clean slate and set a goal to maximize capacity, work with both GEN1 & GEN2 Mazdaspeed 3s, and provide the functionality needed for both methanol and E85 port injection auxiliary fueling.  

This was no easy task; we encountered many challenges that forced us to look to different methods and innovations to succeed.  However, through those challenges we developed a tank like no other available for the Mazdaspeed community.  

Mazdaspeed 3 Auxiliary Fuel Tank
Auxiliary Fuel Tank

The greatest challenge we faced was the manufacturing method.  We originally approached the design with the intent to use cut, formed and welded sheet metal as the material, but this quickly proved to create many unwanted issues.  Cost, design flexibility, capacity, durability are just a few of the issue we faced with sheet metal.  With that we looked to other processes…what about a gas can?  Those are plastic and have very irregular shapes…

From there we identified that rotomolding was the ideal path to pursue.  It helped us maximize capacity, incorporate the features needed, reduced cost, and increased durability/reliability of the tank. 

Speaking of durability first…

Mazdaspeed 3 Auxiliary Fuel Tank
Auxiliary Fuel Tank

Yup…we parked a truck on the tank and it took it like a champ.  As you can see there is a small amount of deformation, but that’s it!  After that we wacked the tank with a 3 pound sledge hammer on the front face (much like if you hit an object on the road) and again it took it like a champ!

Mazdaspeed 3 Auxiliary Fuel Tank
Auxiliary Fuel Tank

Upon closer inspection we did not find any cracks forming due to the truck test or the impacts of the sledge hammer.  After letting the tank sit for a bit we found that the tank actually formed back to its original shape before the testing.  

Mazdaspeed 3 Auxiliary Fuel Tank
Auxiliary Fuel Tank

So what makes the CorkSport Auxiliary Fuel Tank strong and durable?  Two things:

  1. The material used is Cross-Link HDPE (High Density Polyethylene) which is a very durable and resilient material by itself.  Add in the cross-link reinforcement in a 0.190” wall thickness and you now have a material that can handle a large amount of impact force and yielding (bending) without failing.  
  2. The manufacturing process is the other key aspect here.  Unlike welding, there are no seams or welded joints that can fail.  In the rotomolding process, the HDPE is poured into a mold that is heated to the plastic molten temperature.  This powder melts and creates one continuous structure with an average wall thickness of 0.190”.  Even the brass threaded inserts are embedded into the plastic with no seam or seal to leak.  
Mazdaspeed 3 Auxiliary Fuel Tank
Auxiliary Fuel Tank

Speaking of those threaded inserts, those are really neat.   When the mold is assembled, there brass threaded inserts are fixture inside the mold in set locations.  These give us the flexibility to have integrated mounting points for the brackets that mount to the vehicle AND for both methanol pumps and the standard 044 style fuel pump bracket.  

Now let’s look at a cutaway of the Computer Aided Drafting Model of the tank so we can see a couple other key design features.  BTW these would not have been possible (or atleast not cost effective) with sheet metal. 

Mazdaspeed 3 Auxiliary Fuel Tank
Auxiliary Fuel Tank

Probably the most critical and useful features of the fuel cell is the integrated sump for the pump feed.  This is the little area under the blue line.  This “low” zone is called the sump and the point is to create a lower spot for the pump to be fed fuel.  This reduces the chance of fuel starvation during braking and cornering as well as allows you to get the full capacity of the tank to your pump. 

Next you can see a “chamber” on the left side.  This actually sits under the frame rail a bit which allowed us to increase the capacity to ~2.6 gallons but it also serves another purpose.  If you are running a port injection auxiliary fuel kit then you most likely have a fuel return from the regulator; this is where that return line connects.   The low ceiling in this chamber helps reduce aeration of the fuel due to the return line flow.  This green line also sits just below the low level sensor so you’ll know when you are getting close to this threshold.  

Mazdaspeed 3 Auxiliary Fuel Tank
Auxiliary Fuel Tank

Alright let’s wrap this up.  Designed specifically for the 2007-2013 Mazdaspeed 3, you can utilize the tank for methanol or ethanol fuels and you can switch from either or if you change your setup.  Durable and chemical resistant material used can take beating and once installed the tank and black filler cap basically disappears from view.  

We are stoked to bring a new and innovative option to the Mazdapseed Community very soon.  

  • Barett @ CorkSport

P.S. – that stainless bracket in the last image is my splitter mounting system for my 2009 Mazdaspeed 3.  Check out @halfmilespeed3 for more details!

Stay up-to-date on the latest news and product updates from CorkSport.

* indicates required

Barett’s 1/2 Mile Mazdaspeed 3 Build – Part 1

Hey Everyone, if you don’t know me already I’m the engineering manager at CorkSport Performance & @Halfmilespeed3.  I want to make a formal greeting and invite you to follow along as I take the next huge step with my personal build.  I drive a 2009 Mazdaspeed 3 that has been through many iterations.  I bought it nearly 6 years ago and have since used it in excess to support CorkSport R&D.  Hundreds if not thousands of passes on the dyno with so many parts…it’s been a beaten test mule.  The time has come to set a focus.

2007-2009 Mazdaspeed 3 Crashbar

Now, with the 4th engine going in it, I’m setting the build focus for ½ Mile Drag Racing.  Power, Aero, and some “Mad Scientist” R&D is going into this build.  (see WTF is THAT)

Mad Scientist Add-ons
600hp Mazdaspeed Build Path – CorkSport Barett’s 2009 Mazdaspeed

My goals are 700whp on the CST6 stock flange (with Will @ PD Tuning giving it the sauce) and 180mph in the standing ½ mile.  I plan to play in the 1320, but half mile is the focus.  My first event was going to be Never Lift @ Coalinga Munical Airport in Late March, but with recent events, this was canceled and a new date has not been set.  Fingers crossed the country gets through this and the next events hosted by Shift S3ctor Airstrip Attack in June and November hold.

Back to the build…I know that pushing a Mazdaspeed through the air at 180mph is a lofty goal and that physics are against me.  With the help and advice of Aaron O’neal @ English Racing I am exploring high-speed aero design. 

Gen 1 Mazdaspeed Parts

The primary goal is stability at high speed.  I want to be safe in this type of racing so I need to do what I can to make the car stable and predictable at speed.  This means I need the car to cut through the air as smoothly as possible, and if possible, generate downforce. 

To do this I’ve made a prototype drag wing (which I will share more detail on in a later blog) per the advice of Aaron and my research.  This wing is two feet long at the top! And with the closed sides, this should reduce the amount of lift generated at the back of the car.

There is still a lot more work to do here but you get the idea so far.

Splitter Mount
CorkSport

Upfront I am still very much in the conceptual phase of design.  Nearly the whole front bumper will be sealed off with a single sheet of ABS plastic formed to the front of the car.  The only opening will be a rectangle about the size of the intercooler for cooling airflow.  I also plan to build a chassis mounted splitter.  The red parts in the image above are the one-off brackets I designed to mount the splitter to the chassis and still be able to adjust the height (Again I’ll share more detail in future blogs as the prototype comes together).

CorkSport

The other less intuitive aero bit I’m doing on the front of the Speed is hood venting.  Thanks to Jonathan Castro @ JC Speedworks for the hood vent I’m able to kill two birds with one stone here.  If you’ve done any type of racing you know heat is a killer and must be managed.  With this hood vent, I am both evacuating any high-pressure air build up in the engine bay and promoting more efficient airflow through the intercooler and radiator. 

With the 300 miles I’ve put on the car, I can already see a huge difference in normal operating temps.  Maybe more vents are in the works? 😉 Oh and shout out to @mz_rawr (Aaron Maves) for cutting holes in my hood.

CorkSport Mazdaspeed 3 Transmission Mount Blog

In the process of getting the engine and transmission together, I wanted to fix a 2nd gear drop out issue I had.  Over a weekend @thatonepnwguy (Bryce Peterson) and I split my transmission and replaced the shift forks.  We certainly did it the wrong way and had to chase some balls around and get them back into their respective locations; despite all that, don’t be afraid to tear into things and learn the hard way. 

How To Achieve 400 WHP In Your Mazdaspeed Blog

The powerplant made it in the car and is running great.  Right now I’ve got about 300 miles on the engine.  I’ve been working out some little details with heat management and setup of the Vacuum Pump (WTF is THAT).  I am just now starting to do logs and tuning with Will Dawson at Purple Drank Tuning.  With these goals, I still intend to keep the car street legal and driven on a nearly daily basis (I wish you could see the stares I get from people).  I’m putting this out to all of you as an invite to follow along with the build on Instagram @halfmilespeed3.  All the inside info and goodies are there for you to see along with @corksport for other stories and build updates.  I’m stoked for this season and to explore a racing series that has largely been untouched by the Mazdaspeed community.  I will be finding limits and new challenges for the platform that I hope to overcome.

Connect with us

Stay up-to-date on the latest news and product updates from CorkSport.

* indicates required