CorkSport’s Favorite Part of the Week: Week One

Mazda 3 Rear Sway Bar

Good day, CorkSport family! I’m proud to announce our new blog series: “Favorite Part of the Week.” I’ll be talking about my favorite parts weekly until I have nothing left to talk about! Also, I want to say thank you to all of the people who follow our blogs and continue to be dedicated CorkSport customers. We appreciate the business and we’re happy to have such a great group of people in our corner — you guys make our days great!

Mazda 3 Rear Sway Bar

Let’s get down to business. To kick off this series of sweet blog posts, I want to start by highlighting our 2014+ Mazda 3 Rear Sway Bar. As we all know, increased handling on the car is a must. There’s nothing better than going into a turn on a curvy road and being able to hit the APEX with more confidence and speed than ever before. If that’s how you like to drive, then this sway bar is a must. Unfortunately, the stock rear sway bar on the Mazda 3 doesn’t properly control body roll in corners. Fortunately, with CorkSport’s adjustable sway bar, you have the ability to stiffen up the rear suspension to decrease body roll in corners. By decreasing the body roll of the car, you’re able to hit corners at a faster speed and still feel like the car is hugging the road.

A few of the bar’s features:

  • Two different stiffness settings: 130 percent stiffer and 220 percent stiffer than stock.
  • Single piece design: No need to worry about welds breaking with this bar.
  • Billet aluminum brackets: Peace-of-mind knowing your brackets can take any abuse and not break. [Note: Brackets are normally priced separately by themselves, but we include them with the bar — a great value!]

Mazda 3 Rear Sway Bar Brackets

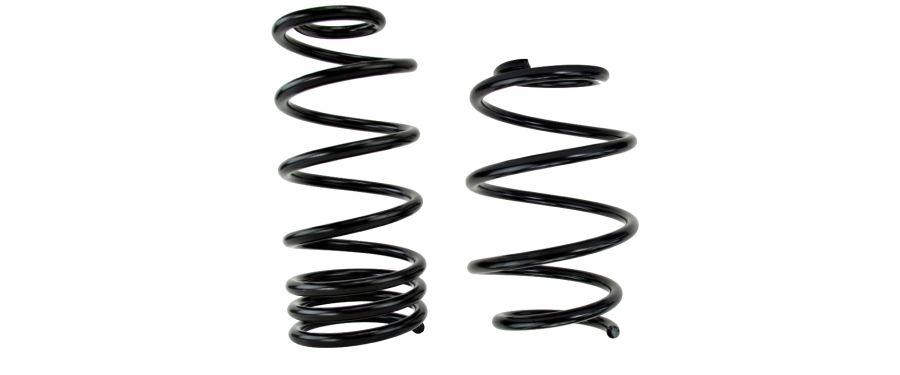
The 2014+ Mazda 3 Rear Sway Bar is priced well and, at CorkSport, we believe you’re getting the most out of your dollar with this bar and brackets. Whether or not you autocross or just drive aggressively, it’s a must to increase your vehicle’s handling. Pair this with the lowering springs and you can change the entire experience of driving your new Mazda 3. We highly recommend this as one of your first suspension upgrades!

Keep an eye on our blog; the lowering springs post will be coming to you at a later date.

Cheers,

Luke @ CS

Mazda 3 Suspension and Handling Guide

Corksport Mazda 3 racer

I want to know…who is excited for summer to begin!? The Pacific Northwest has given us a roller coaster of winter and just doesn’t seem to want to let go of the rain, but there is light at the end of the tunnel and that light comes in the form of car season.

In preparation for summer (that is welcome to show up any time now) I thought I put out a summer setup guide for all you car enthusiasts to consider. This week I’m going to start with suspension and handling, then move on to power and styling in the coming weeks. Grab a beer, take a seat and let’s get started.

Mazda 3 Modifications in a Shop
A look inside the CorkSport shop.

For the sake of helping car enthusiasts at any level of modification, let’s pretend I just bought a brand new 3rd Gen Mazda 3; a clean slate to modify and define as my own. I have had the car about a month now and love it. I’ve put it through its paces on the back roads and really appreciate what it can do in stock trim, but I’m ready for more.

Now here comes the first big decision; what do I do first? This could be highly debated and I’m sure there are many paths to success so I’m just going right to how I would proceed, but first some technical backstory.

Going through college and being a major part of the Portland State Formula SAE program, I was taught that suspension that moves is a suspension that works. Long story short, slamming the car to the ground with overly stiff coils is not the path to a compliant suspension that also performs.

There are three major aspects to your vehicle’s suspension: bump, roll stiffness, and damping. Bump (and/or squat) are mainly managed by the spring rates. Stiff springs are great for the track where you have a very smooth and consistent surface, but out on the public streets this is not the case so let’s not go crazy with the spring rates.

Next is the roll stiffness of the vehicle. This is managed by the springs and the swaybars, but ideally mostly by the swaybars. Sway control is important to keep the body roll in check while entering, apexing, and exiting a corner as well as many other vehicular maneuvers. The front and rear roll stiffness also dictates the oversteer and understeer characteristics of the vehicle so this can be a major tuning tool.

Lastly is the damping of the struts and shocks. This is the fine tuning of the springs and sway bars and also the main reason why your car does not continually oscillate up and down like a boat after hitting a bump. These are very important.

Winding Road
Ahhh, dreaming of summer fun!

First Modifications To Make

The first modification I would do is…swaybars! Here’s why. Bumping up the roll stiffness has two major benefits. First, it’s a great way to “tidy up” the body movement without adding much harshness to the ride quality so you’re not giving up much for this modification.

Second, most passenger cars are setup to understeer from the factory. There’s good reason for this as the solution to control understeer is to apply the brakes which is most people’s automatic response in an adverse situation. If you’re more experienced, then getting the car to a more balanced under/oversteer setup will be great. The vehicle will be much more alert and predictable. Side note: to me both of the benefits mentioned above also inspire more confidence while driving which is a huge bonus.

So what do you need for this? A new performance Rear Swaybar would be the first choice and I would set it on the softer setting. This will make the car more balanced while still defaulting to understeer. If you are really serious then step up to the Front Swaybar as well to really get the roll stiffness in check with the rear bar on the stiffer setting.

Mazda 3 swaybar
CorkSport Swaybar installed on a Mazda 3

Springs, Shocks, And Struts

The next modification I would do is a set of performance springs and shocks/struts. (Coilovers now available!) I really suggest doing these at the same time because that is how you are going to get the most out of them. The performance springs are going to add a bit more roll stiffness and bump/squat control while also lowering the car a bit which will help with the center of gravity. You will sacrifice some ride quality, but your car is going to feel like it’s on rails.   (Earlier I said don’t go too stiff and that holds true, most performance springs range from 10%-40% stiffer than OE which is usually still softer than a coil over setup).

Now the shocks/struts combo is important because with the higher spring rate you will need more damping to keep it under control and with the rebound adjustability you will be able to fine-tune the damping. It’s a win-win.

CorkSport Adjustable Shocks and Struts for Mazda 3

Now you’re probably wondering if these can be broken down and purchased separately. Yes, they can. There is no issue with purchasing the shocks/struts first as they will complement the swaybars and work fine with the OE springs. For example, the CorkSport Adjustable Shocks/Struts are designed with this in mind. The softest rebound setting basically matches OE damping, but you also have the adjustment range of up to 70% stiffer rebound to accommodate fine-tuning and stiffer performance springs. Now doing the springs first may result in some compromise.

Due to the stiffer spring rate, you will have a bit bouncier ride quality since the OE damping was not designed for the higher spring rate, but you will survive, I promise. So if you need to break it into chunks then I would start with the shocks/struts first. Do note that it’s recommended that you get rear camber arms and front camber plates with lowering springs so you can get the camber back to OE specs or to have the ability to set the camber.

CorkSport Camber Arms for Mazda 3

Wheels, Tires, And Brakes

Lastly and arguably the most important handling modification is a set of tires! If you have never indulged in a set of high-performance tires then wow, you don’t know what you are missing. Tire technology has improved leaps and bounds over the last decade and because of that there are many performance all –season tires available, but a jack of all trades is a master of none. I highly suggest this tire and wheel combination.

Get yourself a set of performance wheels (I know there are at least a few brands that can be had for less than ~200/wheel and weight less than 20 lbs each) and throw some high performance or ultra high-performance tires on them for the summer. These tires are usually in the 200-300 treadwear rating and cost 2-3 hundred each depending on size. Do this NOW! I’m serious! And keep you OE wheels for some dedicated winter tires which again will blow you away with how much better they are than all-seasons.

CorkSport Big Brake Kit for Mazda 3

Let’s wrap this up with one last suggestion if everything above isn’t enough for you. Brakes… The best way to go fast is with better brakes. There are a few options you can take here. A set of performance rotors and pads would be a great budget-friendly setup with great benefits. If you want to step it up even further than I suggest a Big Brake Kit like the one above.

Performance breaks are a great addition to any vehicle for both performance and safety. Performance wise you can dive into corners later and harder without worry. Safety wise I think it’s pretty obvious. Have you ever rear-end another vehicle and thought “if only I could have stopped five feet sooner”, well there you have it.

Alright, one last thing before we wrap this up. Now that we have a really well setup Mazda 3, go to a track day! Yes, take your daily commuter to the track one day so you can find you and your car’s limits. I can’t express this enough. First off its so much FUN! Really it’s a blast and it’s safe. Most track days like High-Performance Driving Education (HPDE) events even provide you with an instructor. This also gives you a chance to safely push the car to the limits and even past them. This provides much more confidence on the public roads and avoiding accidents.

Corksport Mazda 3 racer
#BecauseRaceCar

Alright, I’m done. I hope you enjoyed this and look forward to the next blog! I’m going for a drive!

-Barett @ CS

Feel like a Mazda Pilot in the new Shinshi Concept

Mazda Shinshi Concept front-end

From the Batmobile to Knight Rider’s KITT, futuristic supercars have captured adult and adolescent imagination alike for generations. You may be more a fan of the souped-up vehicles of “Death Race 2000” or the more grounded tricked out rides of the “The Fast and The Furious” franchise, but we guarantee some Hollywood-style car has caught your eye and affixed itself permanently in your brain. You might be focused on the here and now of your car and it’s modification or issues, but fueling the imagination never hurts.

For those of you in our CorkSport community who always thought Speed Racer’s powerful Mach 5 was dope, you’re going to love this new concept Mazda: the Mazda Shinshi.

The Mazda of the Future?

Mazda Shinshi Concept front-end

Designed by Barcelona’s Miguel Angel Bahri, the Mazda Shinshi looks ready for the mean streets of “Akira’s” Neo-Tokyo. “After the initial thoughts, the challenge was to develop a concept inspired by the Japanese culture,” Nahri explains. “Taking, also, influence from nature and the ocean, with the stingray and the samurai’s DNA serving as a bridge to connect the SHINSHI proposal with Mazda’s design philosophy.” You can delve into all his influences and design process more deeply, from fighter pilots to James Franco, but we think he’s delivered on his inspiration in spades.

With 4 in-wheel electric motors and integrated systems, Bahri didn’t just look at a sleek exterior, he put some attention to performance, as well. The wheel systems are fed by a graphene-optimized supercapacitor and a rotary bio-fueled engine boost that main battery for a clean energy car that might make you scoff, until you see his specs have it max out at 310 kph (192 mph) — still some good race track fun to be had from this environmentally-conscious concept car!

Get ready to Top Gun this ride, Maverick!

Mazda Shinshi concept steering wheel

The feature that really makes this design feel futuristic, though, is the flight control-like steering wheel.

How a wheel like this really functions on the road is pure speculation, but you’ve got to admire the design sense. “Blade Runner”-style flying cars might be many years away, and — let’s be honest — would probably take the fun out of curve-hugging road driving, but a Mazda that makes you feel like a test pilot would be worth a test drive, at least.

What do you think of the Mazda Shinshi concept? Too high tech? Just right? Let us know in the comments below. And keep following the CorkSport blog for more modification advice and tips, Mazda lifestyle talk, and — as the arise — speculation on far out Mazda concepts.

How to Diagnose A Misfire

Diagnosing a Misfire
Mazdaspeed Engine for example diagnosing a misfire

It’s safe to say that most of us who are into modifying cars have seen this delightful CEL pop up on our dash. The P0300 (random/multiple cylinder misfire) can be one of the most annoying codes when it comes to drivability.

Diagnosing a Misfire, check engine light with Accessport code

Sometimes a P0300 is very simple to sort out. Other times, it may take all day to track down. That said, here’s a user-friendly guide for those modders who are learning and would like to figure out the problem themselves.

Break down of combustion

In order to properly function, an internal combustion engine has four basic requirements:

  1. Air (O2)
  2. Fuel
  3. Compression
  4. Spark (or ignition)

Loss of one or more of these will cause a misfire. Understanding these requirements will better allow you to diagnose a problem and make an educated decision about what the problem might be — rather than just throwing parts at the car.

Types of misfire codes

There are two types of misfire codes. The first, P0300, means the misfire is happening on more than one cylinder (and/or happening randomly) and the powertrain control module (PCM) isn’t able to find where the misfire is originating from. The other type of misfire code is anything above P0300: P0301, P0302, etc. The last digit indicates the cylinder number that the misfire is occurring on. This means that there is a clear pattern for a misfire occurring on that specific cylinder. These codes are much nicer — and simplify the diagnosis of your misfire without a doubt.

Misfires from cylinders - Coil packs from a Mazdaspeed

Diagnose This First

Let’s go ahead and start with the easier type of code.

One day, you’re driving down the road. The car feels a little bit rougher than normal, then your CEL comes on, and the P0304 code comes up on the Accessport/Scan Tool. This means that cylinder number four is having a misfire. Here are a couple of steps to figuring out the culprit.

We already know what the four basic combustion requirements. Typically, the easiest and first thing to check would be your ignition system. So we’ll start the diagnosis with the spark plugs and coil packs.

  1. Since the code was for the number four sensor, you’ll start on that cylinder. Number one is on the side where your drive belts are and, in this case, they progress from left to right.
  2. There are two components that could cause an ignition failure, assuming that your PCM is in good working order. These components would be your spark plugs and coil packs. It’s as simple as playing some musical chairs with them to see which one is the culprit.
  3. Take your number four spark plug and swap it over to your number one cylinder. Now take your number four coil pack and put it on your number three cylinder.
  4. If the misfire jumps to the number one cylinder, you know it’s your plug. If it follows to number three, then we know it’s your coil pack. If it stays on number four, then we’ve eliminated the ignition system and can proceed to the next step.

Now your remaining options are either a problem with your fueling or a problem with the compression of your specific cylinder. To check this, perform a compression and a leak down test to verify the health of the motor, which will give you some peace of mind. However, if you find that the compression is low, or your leak down was excessive, you’ll have your answer right there. Typically, low compression and excessive leak down can be a result of valves not seating correctly, warped cylinder walls, bad piston rings, or other similar issues.

If you’ve done these two tests and everything has come back good, then we can cross that off the list (phew!) and move on to what’s next!

Misfire Due to Fuel Pressure

If you have an AccessPort or readily available scan tool, checking your fuel pressure in regard to a misfire will be very easy. If your car is not direct injected you probably won’t be able to monitor it on your electronic control unit (ECU). So, you’ll more than likely need to hook up an inline fuel gauge to make sure you’re getting adequate pressure.

In this case, with our Mazdaspeed3, we’re able to see the PSI of our high-pressure system which makes diagnostics on this easier. Pressure, at idle, should be somewhere in the range of 400+ PSI for this vehicle. If you’re seeing a PSI under 100, then the pump is not creating any pressure and it’s just flowing through from the in-tank pump. If you’re seeing a PSI in the 200s, then your pressure relief valve may need to be replaced.

Monitoring your fuel pressure can give you lots of good information that can potentially tell you what’s causing a misfire. These issues aren’t as common, but they do still happen. If the pressures and fuel pump check out, then you’re on to the next step!

Misfire Due to Injector Seals

Injector seals are a very important part that often gets overlooked. On higher mileage cars, or cars creating more power, the injector seals are a contributor to misfires and loss of performance.

As you can see in the image, the upgraded injector seal on the left has a much more rigid design. These seals have a proven design that, believe it or not, don’t have a single reported failure! You can find those injector seals here. As well as the fuel injector puller!

While you’re working on this area, it’s a good time to clean out any carbon build-up in the ports and on the tips of the injectors. Carbon that builds up on the tips can keep the fuel from properly atomizing, so clean them as best you can. Make sure the seals, as well as the seats for the seals, are very clean so they can adequately seal.

The chance of an injector failing is very small on this platform, but it’s still possible. If you have a cylinder-specific misfire code, and you’ve eliminated all other possibilities, it’s time for a new injector.

Misfire Due to Air (O2)

Back in the good old days, your engine used carburetors to moderate fuel/air intake. The engine would suck in air, and in turn, use the Venturi effect to draw in fuel. The more air that got drawn into the engine, the more the fuel would automatically get sucked in. Although this method works, it’s inefficient and not as reliable. When the weather changes, it may not always work or need to be adjusted.

Today, a car’s ECU uses sensors to monitor how much air comes into the engine. Once it knows how much air is coming in, it can appropriately choose how much fuel to inject to achieve the targeted air/fuel ratio (AFR) in the ECU’s mapping. If this monitoring system is not working correctly, the car will run poorly and probably sputter when you apply any throttle.

Mazda Air Intake

In Mazdas, the vehicle uses the mass air flow (MAF) sensor to detect how much air is entering the motor. The ECU reads this on a scale of 0–5 volts. The higher the number, the more air. This sensor also works in conjunction with the manifold absolute pressure (MAP) sensor. This sensor tells the ECU what boost/vacuum reading is for the air entering the motor. If either of these is not operating correctly, misfire codes are very possible.
You can tell when these sensors are giving improper readings by using your AccessPort or scan tool to monitor MAF grams/sec or the MAP readings. If they are sporadic, or not within specifications, then you know you have an issue.

Air-related issues, such as vacuum leaks or sensor-related problems, are more prone to causing a P0300 code — they affect more than just one cylinder. So, if you have a P0300 instead of a specific cylinder code, it wouldn’t hurt to start checking here!

I hope this helps you have a better understanding of why misfire codes happen and how you can find a resolution. If you ever have any technical questions, please you guys give us a ring at 360-260-2675! We’re always happy to help!


Connect with us

You may also like

Stay up-to-date on the latest news and product updates from CorkSport.

* indicates required

CorkSport’s Mazdaspeed 3 Stage II Engine Mount

Mazdaspeed 3 rear engine mount installation

You may be surprised to hear that there is yet another Rear Motor Mount available for the Mazdaspeed 3 platform in a market with more than a handful of options; however, this one is different. This RMM takes the idea box and kicks it to side as it makes a great leap towards style, performance and refinement. Ladies and Gentlemen, this is the new CorkSport Stage 2 Rear Motor Mount.

Mazdaspeed 3 stage 2 rear motor mount
Mazdaspeed 3 Stage II mount

If you are even remotely familiar with the OE style (and many aftermarket options) RMM then you can clearly see that the CorkSport Stage 2 RMM is drastically different. Now let me explain why this is a good thing.

We all understand that the engine mounts isolate the engine from the chassis in an attempt to reduce and/or eliminate undesirable vibrations and noise experienced by the driver. That’s great and all, but what is really important is how the isolation is executed, specifically by the RMM. First, some background information.

There are three motor mounts working together to suspend the engine so let’s talk about the other two real quick. The transmission and passenger side motor mounts reside on the furthest ends of the assembled transmission and engine, respectively. These do most of the work supporting the engine given their positions, but a side effect of that is the aggressive rotational force they allow the engine to exert due to their transverse setup. This is where the rear motor mount comes in by managing the rotational force from the engine when applying power to the axles/tires.

Let’s take a look at the diagram below:

Mazdaspeed 3 OEM rear motor mount

In the diagram, we are looking at the OE RMM installed on the vehicle. This view is looking at the RMM from the right-hand side of the vehicle. The diagram also attempts to show the general location of the transmission mount which is approximately where the transverse pivot point of the engine lies.

The engine exerts the rotational force onto the RMM shown with the double-end red arrow. This can be further broken down into directional components as shown with the blue arrows. The forward force is unavoidable due to the design of the system in a whole, but the downward force can be reduced or even eliminated with a clever design such as relocating the damping material from the OE location to a location closer to the engine pivot point. Note the length of the blue arrows as it will be different in the following diagram.

Rear motor mount placement on Mazdaspeed 3

There are two key aspects of the CorkSport Stage 2 RMM that contribute to its superior performance and low NVH (noise, vibration, & harshness). First is the rigid design of the mount that installs into the sub-frame. This nearly eliminates any up and down pivot capabilities at the sub-frame thus reducing the magnitude of the up/down motion the RMM will allow. This feature has been used by a couple of other manufacturers in the community because of is superiority. Second, and more importantly, is the location and orientation of the polyurethane bushings. The horizontal orientation of the bushing allows the bushings to function and support the load in the same direction the engine exerts force. This results in a more durable design with less NVH.

Now comes the big game changer…the location of the bushings is in a location never done before in the Mazdaspeed 3 platforms. Comparing the OE RMM pivot location vs the CorkSport pivot location you will see that the CorkSport design moves the pivot point of the RMM forward in the vehicle. This is important because of how it relates to the natural pivot location of the entire engine/transmission. Moving the RMM pivot location further forward reduces the amount of downward force applied to the RMM at the sub-frame, thus reducing the NVH without compromising performance. This is shown by the different lengths blue arrows in the diagram. This allowed us to use very stiff 95A durometer polyurethane without compromising driver and passenger comfort.

Anyways, enough with the technical stuff; check out this video comparing the OE RMM and CorkSport Stage 2 RMM in action.

If this hasn’t blown you away already then let Jason Atwell’s Beta test review set it in stone for you…

“Tested out the new CS RMM and I’ve gotta say; I was dead set on the gold RMM I was currently using. Once I got the CS one, I installed it right away. The fitment was spot on, I hopped in the car and took it for a drive and noticed an even more solid feel in the shifts. The vibes are about the same as the gold RMM so all in all I’d have to say it’s a fantastic product and would recommend it.” – Jason Atwell

Get your CorkSport Stage 2 RMM today here!

Connect with us

You may also like

Stay up-to-date on the latest news and product updates from CorkSport.

* indicates required