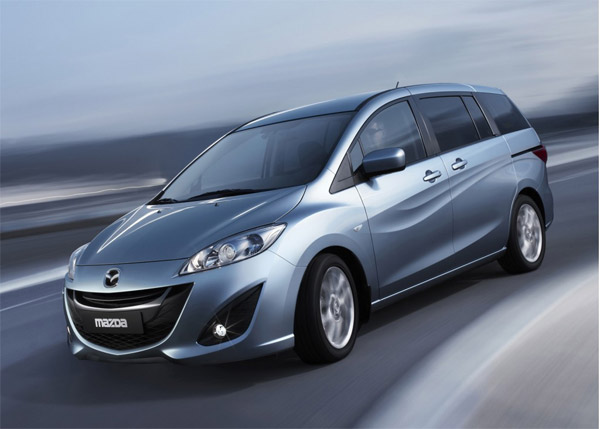
Mazda is continuing to keep the smiles coming for the entire product line. The 2011 Mazda 5 will be shown at the upcoming Geneva Motor Show in March. The new model really gets the Nagare styling (Nagare means flow in Japanese) even more so than the upcoming Mazda 2 and current Mazda 3.
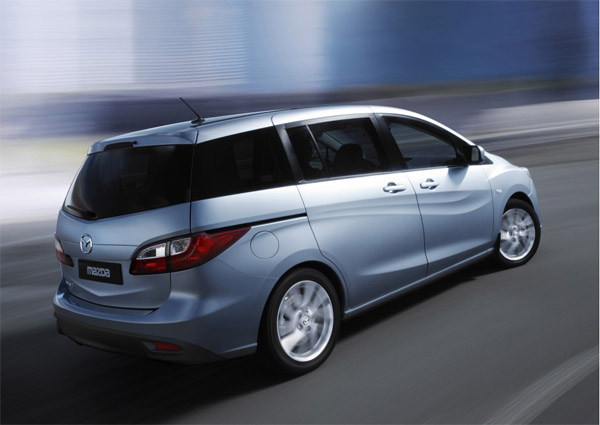
So why am I writing about the Mazda 5? The new models that come out point to styling changes and show the direction Mazda is headed for future models. There is a chance for a new RX-7 in the future, and this gives us some idea of what kind of styling we can expect from Mazda. Overall I like the look of the new 5. The flowing lines on the side break it up a bit and it looks less like a box compared to the current model.
The most interesting item I see when I look at the new model is that I almost see a knife/sword image in the flowing style of the van. In the above pictures it really stands out. It makes me wonder what Mazda is saying.
I looked up the vehicle market share to see how Mazda did in the US over the last year. I was surprised to find that Mazda only accounts for 2% of the market. I have known Mazda is a smaller player in the market but I didn’t realize it was that small. If you look at what Mazda brings to the table you realize they do very well with what they sell. Looking at the product lines, Mazda has a vehicle in most of the segments like compact, mid size, sports car, etc. which is an accomplishment for a smaller manufacturer.
Mazda has great enthusiast support for their vehicles as well. Mazda advertises that more of their models are out racing on any weekend than any other manufacturer, and Mazda is only a 2% percent market share. They also brought us the Miata, the best selling sports car of all time, with over 890,000 sold to date! It does make you wonder what those other manufacturers are doing with their time. This also means we at CorkSport, like you, chose Mazda over some other brand based on the cars being fun to drive.
A strong component of the fun to drive crowd is the demographic of a Mazda owner. The mean age of Mazda owners is 42 years old. Only Scion has a younger average owner age, and they are a brand marketed directly to younger buyers.
There has been some news circulating about Mazda not being able to build new platforms since Ford and Mazda are not longer going to share resources. I don’t think this will be a problem for Mazda. There has been some shared chassis between Mazda and Ford in the past but Mazda has often developed their own platforms to build cars on. They have the engineering capabilities to do so in the future as well.
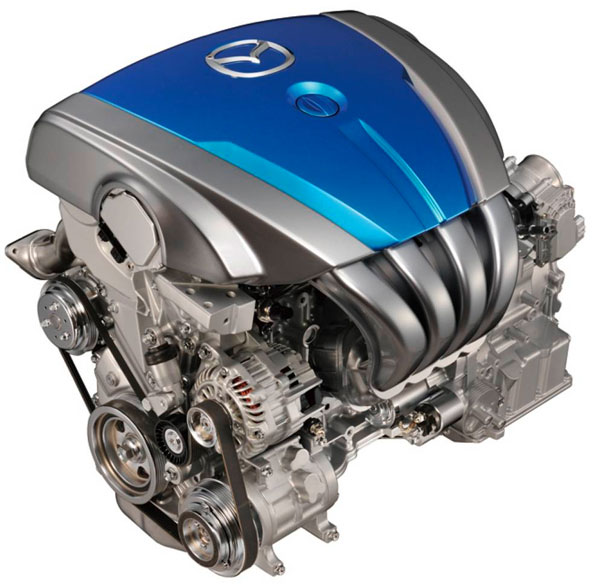
Mazda has just recently raised a huge amount of capital to fund its engine research for their new SKY engine series, and other projects which are not going to be shared with Ford. Mazda announced they want to increase the fuel economy by 30% in the upcoming years. Expect to see more direct injected motors in the future from Mazda to meet that goal. I am really hoping we get the direct injected diesel engines in the upcoming Mazda 2. The engine gets incredible fuel economy and meets ULEV (Ultra Low) emissions requirements for Europe.
Mazda SKY Engine
Mazda is not the biggest manufacturer of cars and probably never will be, but we can count on them to keep producing great vehicles for us to drive. With the visible plans Mazda has set out I expect to see some great products in the future.
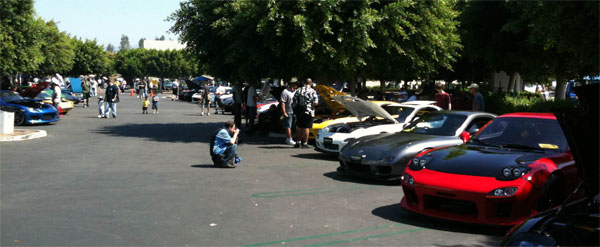
CorkSport attends Mazda events throughout each year which include some of the larger get togethers like the OCC Mazda Meet last May or Sevenstock in September. There are also smaller events like our local club Mazdas Northwest which has a monthly meeting. This is a chance for CorkSport to come out and meet our fellow like-minded Mazda enthusiasts. This is also a chance for us to show you, our customers some of our cars like the CorkSport project 2010 Mazdaspeed 3 and the RX-8.
With a new year coming up we are working on planning our schedule and are offering you all the chance to influence where we show up. So far we are planning on definitely attending Sevenstock XIII, the SEMA show in Las Vegas, various Mazdas Northwest events, Mazfest in SoCal, and RPNW monthly meets.
If you have a Mazda event you are working on planning in 2010 let me know about it. It can be local to us in Portland, OR or on the other side of the planet in Geneva, Switzerland. If you have an event or know of one that has Mazdas present let me know as I am open for suggestions. This does not mean that we will be able to make every event, but if we know about your event there is a much better chance of us supporting the event. Feel free to send me an email or a call me on the phone at 360-260-2675 with your suggestions and events!
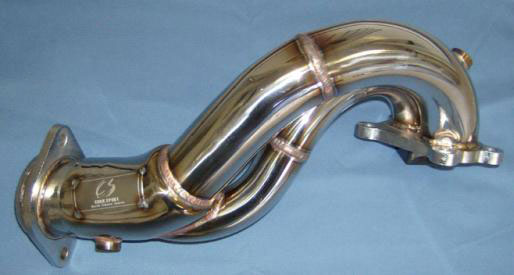
We have had some interesting times with the development of our downpipe for the 2010 Mazdaspeed3. Downpipes on the 1st Gen MS3 have historically been a bit of a puzzle to work around the dynamics of the factory computer’s expectations for what should be seen at the two oxygen sensors on the upstream and downstream side of the factory catalyst. From our research, customer feedback and experience, our designs are able to avoid throwing a check engine light on first generation DISI equipped vehicles. Other manufacturers of downpipes are hit and miss depending on the manufacturer, with some throwing the occasional random CEL for slow response time and others being more pervasive.
The 2010 model is more finicky. Initially, we faced some check engine lights resulting from the vehicle not seeing what it expected at the secondary oxygen sensor, but we made some adjustments to the O2 sensor and have thus far run our test car for ~30 warmup cycles without any sign of a CEL. The 2010 Mazdaspeed3 runs a different algorithm than the 2007-2009 models and this results in a little less tolerance to radical changes in downpipe design.
That being said, the codes we initially were getting were based on a slow response time of the O2 sensor -a code that one of our local customers was getting on his bone stock 2010. We have had our downpipe on the car for nearly three months now. We’re proceeding with caution and planning on getting a handful of downpipes out into the public on a limited release to test the waters and ensure that the design will be free of any CEL activity for all of our customers and not just the single test case of our shop 2010.
If you’ve been chomping at the bit to get ahold of our downpipe, drop Derrick an email or call us at 360-260-2675 and we’ll get one out to you. We would also be very interested in getting one of these out to someone in our local area with an otherwise stock vehicle so that we can do some before/after dyno testing. We’ve done the staged dyno on our 2010, now we’d like to do a run with the downpipe to see how well it performs on its own.
It really doesn’t feel like 20 years since the Miata was introduced by Mazda back in 1989. I remember the first time I saw one of them. I was on a family vacation to Canada riding bicycles on Vancouver Island in British Columbia and I saw one in a parking lot. It made me stop and go “Wow, that’s a Mazda?” I was still in high school at the time and my only experiences with Mazda were older RX-7s and getting rides to school on snowy days in a 323GTX.
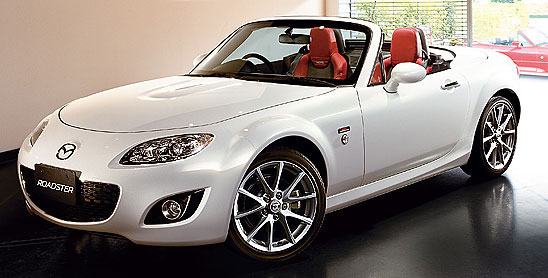
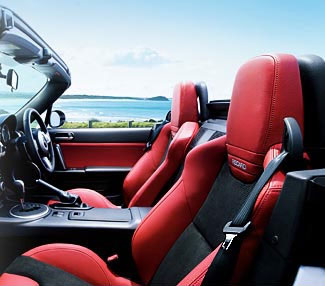
Now, 20 years have past and Mazda is offering a special anniversary edition of the MX-5 (called a Roadster) in Japan. The car is going to be offered with either a power retractable hardtop or a soft top, in special all white paint. The car is equipped with Bilsteins shocks, “20th Anniversary” badges, and heated red Recaro seats with suede inserts, which can be seen below. Some of the optional equipment available are the Bose Audiopilot system and multi-spoke BBS wheels.
My only hope is that North America gets the special edition MX-5 as well. Look at the following the 10th anniversary RX-7 received back in 1988, they are still one of the RX-7s to own for the 86-91 models if you are a die hard collector. If the 20th anniversary model MX-5 makes it here I am sure it will sell out.