Because Racecar

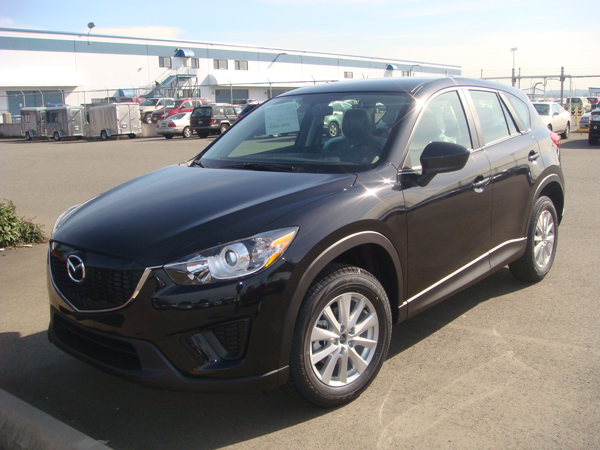
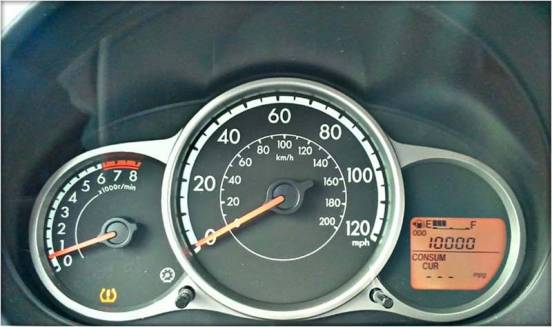
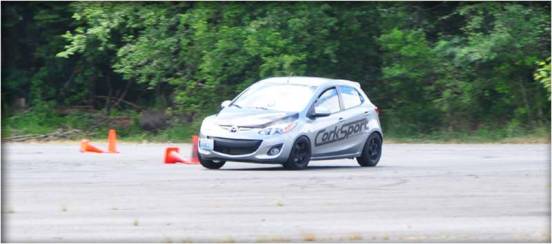
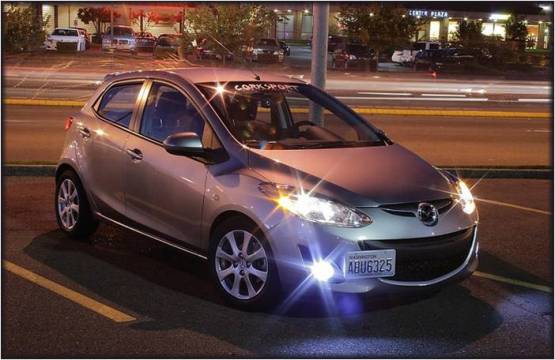
As some of you have read of the last few years I really like the Mazda 2. Before it was released in the US I had written several blog posts on my thoughts. When we picked up the first Mazda 2 delivered in the US we set out to develop a range of parts for the 2. We have also had a chance to drive 2 in autocross events and down lots of winding roads.

Once you get to the point of completing the parts you need developed on a shop car what happens next? In the case of the CorkSport Mazda 2 you turn it into a B-Spec racecar. Why would you want to do that to a new car I am sure some of you are asking? If you have read the blog about my participation in the SCCA driving school you know that I am working towards my alter ego race car driving dream and the B-Spec racecar gives a good way to approach this being cost effective.

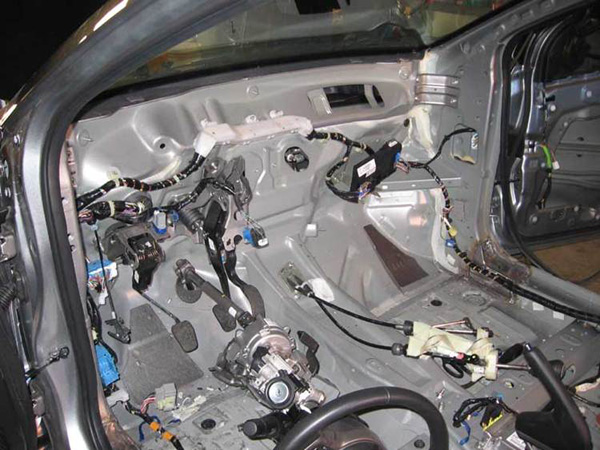
This leads us back to the CorkSport Mazda 2. To make it a B-Spec racer requires some work. Make that a lot of work. The first thing to building the car is to install a roll cage which is it probably one of the most time consuming parts of the job. First you start off with your stock interior and take it out.

Once you finish up that easy task you need to remove all of the sound deadener Mazda installed in the chassis. There are two methods to do this. #1 is with an air chisel and being very careful to not punch a hole through the floor of your car and #2 use dry ice. The dry ice method is something I had not done before but it sounded easy enough. That and if you have left over dry ice a plastic 2 liter bottles can be lots of fun. Check out the video below of me using the dry ice to remove the sound deadener.

If I can offer a tip while doing this is to get 2-3 blocks of the dry ice so you can have several sections cooling down and keep working so you do not have to stock between the freezing of the sound deadener.

Once you completely remove of the insulation you get to start on the roll cage. This takes time and precision to get done. If you have never done this work before, I strongly recommend taking it to a professional to get done. The materials, welds, and design all need to meet the specifications of the racing sanctioning body you will be participating with. In this case we used the specs from the SCCA GCR (General Competition Rules) which are accepted by other road racing sanctioning bodies.

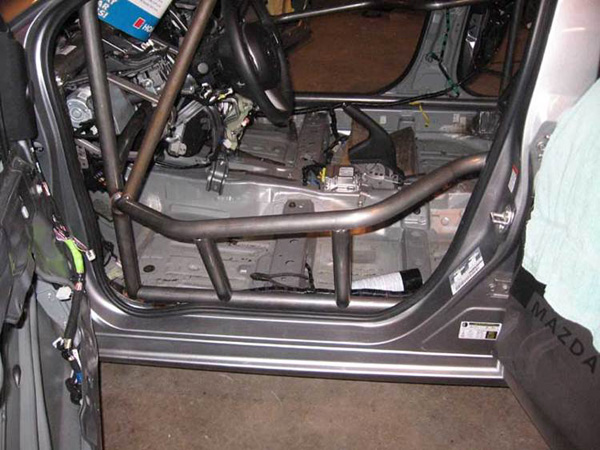
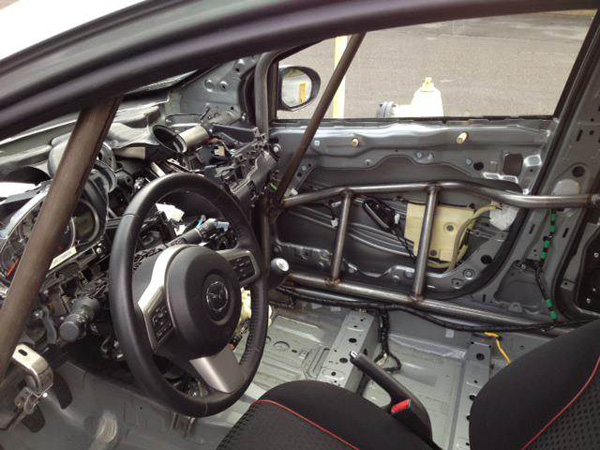
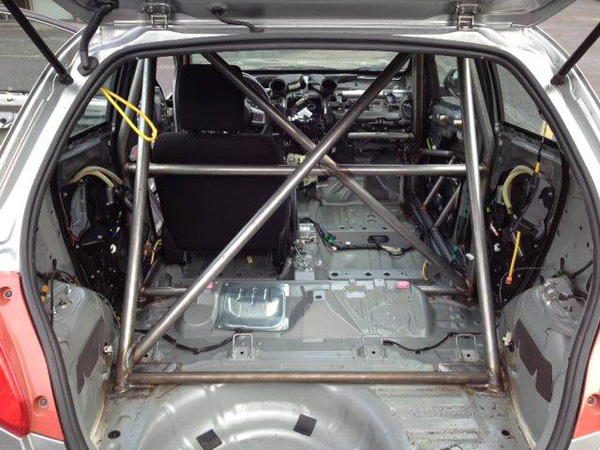
We went with a nascar style door bars to give the driver more space in case there is a side impact and a bit of an angle for easier entry into the car while climbing over the cage.

After all of the hard work is done with the cage getting installed you need to paint it. We wanted the color to match the exterior so we ordered up several cans of the 38P paint code color from an online supplier and got to work. After taping up the interior to limit overspray we got to work with the color and the clear coat. The finished product looks good. The picture below shows the rear section painted with the base coat.

The final product looks great and matches well with the exterior paint of the 2.

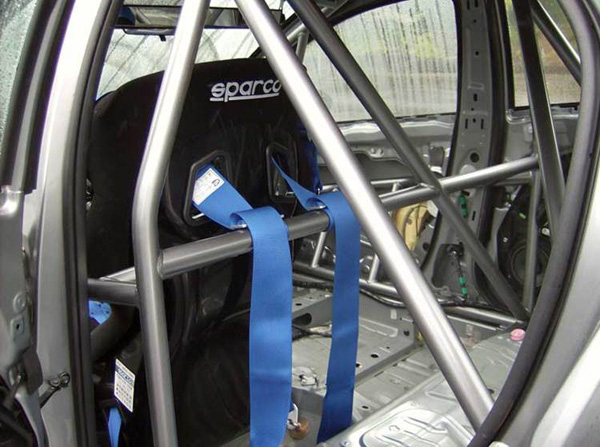
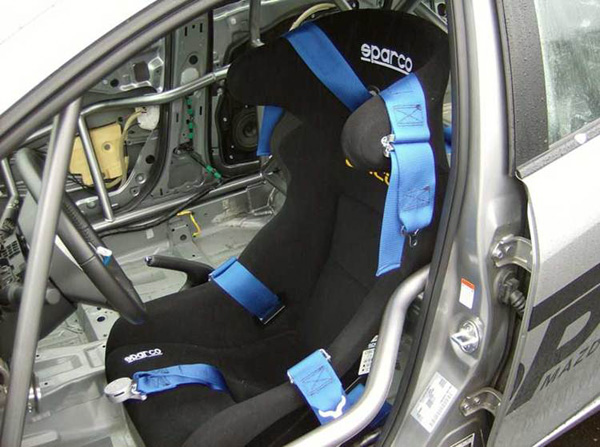
Once the paint had dried we got to work installing the safety gear for the car. We went with a set of Sparco 6 point harnesses and a Sparco Circuit Seat.

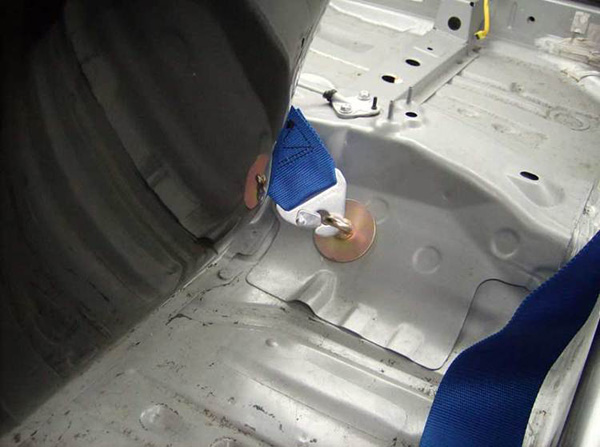
Mounting the harnesses takes some planning. After getting a good idea of where we were going to mount the seat we got to work on the mounting points for the harness. In the Mazda 2 there is only 1 factory bolt location that we could use for the lap belt. The other side of the factory seat belt mounts to the original seat. The rules require you to have a 4 inch square backing plate for the harness on the back side of the car body to make sure the anchor points for the bolts do not tear through if you are involved in a wreck. We had to do this in three locations on the 2, one for the lap belt on the tunnel side and the two for the sub belt. After planning the hole locations and making sure there was no interference (make sure when you are drilling hole into your car you look at the other side of the panel) parts on the bottom of the 2 which there was since the brake lines and fuel lines pass under the drivers seat, we got to work with drilling the holes and mounting the eyelets. The actual installation of the harnesses is easy, they simple snap onto the mounting eyes and feeding the harness around the cage bar behind the seat.

The seat is a 1 piece FIA approved bucket which is a side mount style. With the Mazda 2 being out on the market for a short time we found there were no mounting brackets available which meant we got to build them ourselves. Thankfully this is a pretty straightforward task in the Mazda 2. After sourcing some inch and a quarter steel we pressed the shapes we needed and mounted up the seat. We set the seat up so there is a slight bend in the drivers legs when the pedals are pulley depressed. This allows you to have leverage and keep a comfortable seated position when driving. We also mounted the seat as low as we could and still give the driver good visibility of the track. A lower position means lower center of gravity in the car and the best handling of the car.

This is where we are at for the moment with the 2. I will be updating the build in the next few weeks to show the final result of the car.

Derrick-

CorkSport Welcomes the CX-5 to the Family!

CorkSport is the proud new owner of Mazdaโ€™s newest addition to its line-up, the CX-5. Picked up straight from the port of Tacoma yesterday, the sporty new CX-5 will be helping CorkSport develop a new line of Mazda performance parts aimed at fulfilling the performance potential in the new SkyActiv engine technology line.

The CX-5 is available in three trims, Sport, Touring, and Grand Touring. We opted for the base sport trim which is currently the only option available with a manual six speed transmission. The Sport comes standard with seventeen-inch alloys, push-button start, tilt/telescopic steering, and cruise control.

The design is based on the Minagi concept car, and is Mazdaโ€™s first production vehicle to utilize the Kodo design language. The new five-point grille gives a real feeling of width, as it cuts into the headlights before leading to the lower center portion of the front grille and the interior is modern and clean and the driver-centric cockpit features a small, sporty steering wheel.

The CX-5 has the new SkyActiv 2.0-liter four-cylinder engine and includes a direct injection, variable valve and exhaust timing, a specially designed exhaust manifold and a high compression ratio of 13.0:1. The engineโ€™s broad torque band, the new transmission, and the reduced weight work together to deliver good acceleration. The quick revving engine has an excellent mid-range punch and the engine delivers a smooth, bossy engine note.

The electric power assist steering system offers crisp, quick steering and highly precise control. The geometry of the suspension links and the bush characteristics are optimized to ensure light, linear steering response at mid-to-low speeds and excellent high-speed stability.

We have already began development of a new SkyActiv short ram intake which will be launching later this year along a with a number of other performance parts to support the new SkyActiv suspension and engine.

CorkSport is happy to add the CX-5 as our newest project car!

Gwynne-

10,000 Miles Later – CorkSport Mazda2 Update

Our CorkSport Mazda 2 hit a milestone today and turned 10,000 miles on the odometer. It has taken us a little over a year to hit this point in the cars life which brings up some interesting points.

Our Mazda 2 has been a test vehicle for all of the Mazda 2 products we have engineered here at CorkSport. We get questions about our products asking how well they work and how they are tested. Our northwest location gives us a full range of weather conditions including snow, rain for days, and 90+ degree weather that we can test our parts in and with the company vehicles being driven daily, we get a chance to do real world testing constantly.

The CorkSport Short Ram Intake was one of the first parts we installed on the 2. So far we have put just under 9000 miles of combined road use and auto crossing on this intake with zero problems and great results.

Next came the CorkSport LED lighting kit along with the LED DRL kit. Now I wouldnโ€™t normally bring up the LED light kit as you would not expect any problems with this type of modification, but I have seen posts on forums about people who have purchased from e-bay or another vendor saying their LED lights are failing after only a few months of use.

I can confidently say you will not have any problems with the LED lights purchased from CorkSport. One added bonus with our Mazda 2 kit is the front turn signals have built in resistors so your turn signals will flash at the normal speed.

The last piece we have had on the car for the longest period of time has been the CorkSport Rear Torsion Bar. When we took the Mazda 2 out to an autocross a few weeks after purchasing the car, we discovered the 2 was really biased to under steer, so we immediatly set out to correct this and came up with our rear torsion bar. The torsion bar made the 2 more neutral in handling and I couldnโ€™t imagine driving a Mazda 2 without one now.

We are looking forward to developing and releasing some great parts for the Mazda 2 in the coming year and our customers can have confidence that any CorkSport brand part we develop has been thouroughly road tested and we have real world experience with the parts and their ability to improve the overall performance of the Mazda 2.

-Derrick

Featured Car of the Month – Mackey’s Mazda 3

The CorkSport Sponsored 2010 Mazda 3, driven by Josh Mackey, photographer and marketing specialist by day and Editor and Chief of NWMotiv.com by night, has gotten a lot of attention lately (including a feature in the December issue of Import Tuner Magazine), and for good reason. Mackey started his 2010 Mazda 3i Sedan project in June of last year with the goal of taking the mid-range sport compact car to the next level using a variety of styles and showcasing realistic modifications that anyone could do while maintaining a practical everyday car.

Mazda 3 driving fast

Josh was attracted to the Mazda 3 because of the loyal community and followers, the price point and the suspension that, even from the factory, was sportier and more fun than anything else he had test driven. Even so, he immediately set to work improving the suspension of the 3 by adding a CorkSport Front Strut Bar, CorkSport Lower Rear Sway Bar, and Stance USA GR+ Coilovers. He also replaced the tires and wheels with Konig Lace 18×8โ€ +35 wheels and Hankook V12 215/40/18 Tires.

strut bar and sway bar by CorkSport

Mackey went with the 2.0 liter base model Mazda 3 so that he could design the car from the ground up by starting with the most common package that the everyday tuner might select, so when it came time to upgrade the engine and exhaust, Josh knew to get the vehicle to the next level he would need the trifecta of I/H/E (Intake, Header, and Exhaust).

He added the CorkSport Power Series Short Ram Intake and opted for the addition of the CorkSport Performance Power Series Cat Back Exhaust that features dual resonators, a single tailpipe design and a 60mm racepipe. He finished off the engine modifications with a MSDS 4:1 Ceramic Header.

corksport mazda exhaust pipe and cat back exhaust

Once the Mazda 3โ€™s suspension and basic engine modifications were complete, adding the proper equipment to stop it was a no brainer so Josh went to work on some brake modifications with the CorkSport Stainless Brake Lines, EBC 3GD Zinc Coated Slotted Rotors, EBC Red Stuff Brake Pads and Motul Brake Fluid.

Mazda brake lines and suspension products

A fan of clean lines, Josh has also done some tasteful exterior modifications that include a 3M 1080 Carbon Wrapped Roof, V-LED Platinum LED bulbs and V-HID lighting, a CorkSport Front Plate Relocation Kit, Mazda Accessory Side Skirts and a 35% Matching front and rear tint.

Continuing with the same exterior design, Mackey wanted to make a point by taking his interior to a whole new level with a full leather installation provided by Katzkin Leather. Two-tone leather interior combining dark midnight grey leather that is stitched together with dark slate perforated suede is installed in both the front and rear seats and the door cards. Stage 2.0 of the build will focus on finishing the rest of the interior by wrapping the headliner and pillars in the same material. The rest of the interior is accented with 3M carbon wrap installed by Graphix by Tex and soon-to-be-installed SRP Racing two-tone aluminum racing pedals.

2nd Gen Mazda 3 Interior

This particular Mazda 3 did not come with the aftermarket BOSE system that most Mazdaโ€™s get from the factory. Mackey knew that if he wanted to take this project to the next level and maintain a competitive level with other Mazdaโ€™s in the industry, a completely new audio system would be needed. Diamond Audio provided a complete setup of front and rear component speakers, amps, and low-profile subwoofer. The entire system was expertly installed by James Anderson, all controlled by an Alpine In-Dash DVD/GPS Head unit.

Mazda 3 audio setup

Whatโ€™s next for the NWmotiv Project 3? โ€œLots of tiny little things that need to be finished up, new bumper lenses, new wheels, front lip, maybe a dptune ecu upgradeโ€ said Mackey โ€œThe NWMotiv Project3 takes everything that Iโ€™ve learned from the years. Clean lines, clean mods, nothing overdone, and everything tasteful.โ€

Mazda3 with mountain in background

If you want to follow Josh Mackey’s progress on his project3, you can check out his regular posts at https://www.nwmotiv.com

Connect with us

Stay up-to-date on the latest news and product updates from CorkSport.

* indicates required

The Time has Come – Project 2 Update

The time has come for what you say? The time has come to give our Mazda 2 Project Car a real stereo.

Instead of going with the usual tunes only deck, we decided to give the Mazda 2 a really big upgrade. We chose the Pioneer AVH P3300BT which includes DVD video, MP3 playback, iPod/iPhone direct control, and the option to listen to Pandora using the iPhone Pandora app. This top of the line system includes a 5.8โ€ wide screen size with a 16:9 aspect ratio, touch panel operation, built in amplifier, rear view camera input and dual zone audio/video.

To install the system in our project car, we went with the Japanese made Kanatechs Mazda 2, 2 din installation kit. The Kanatechs kit uses an OEM quality, exclusive panel, designed to fit the Mazda2’s unique dash and includes pre-formed steel mounting brackets. The other kit on the market, the Metra, uses plastic brackets for a rather flimsy installation and gives car stereo thieves easy access.

The installation kit from Kanatechs is thorough and very easy to follow. After giving the instructions a once over I was ready to get to work. The interior in the Mazda 2 is surprisingly easy to take apart and came out with a Philips screw driver and an M10 headed bolt. The harnesses for the installation kit and the pioneer are all color coded so that was a snap to get connected as well. Overall I spent 2 hours installing the new deck.

The installed unit looks like it belongs in the Mazda 2. Too bad it wasnโ€™t an option when the car was purchased.

There are a few notes from installing the unit which I would keep in mind for future installs.

1st – If your original set-up has steering wheel volume controls, get the steering wheel adapter unit from Kanatechs. It allows you to retain the volume controls on the steering wheel if your new audio unit supports IR control.

2nd – The information display selector will be disabled when the original stereo is removed. I recommend you choose your favorite setting and leave it there. With the stock unit unplugged you will have it set forever.

After a few days driving around in the Mazda 2 with the new unit, I am really enjoying the features. I can just plug in a SD card or a USB flash drive with whatever music I want and I am down the road.

-Derrick