Keeping you up to date with the latest CorkSport Mazdaspeed news!
Category: MazdaSpeed 3
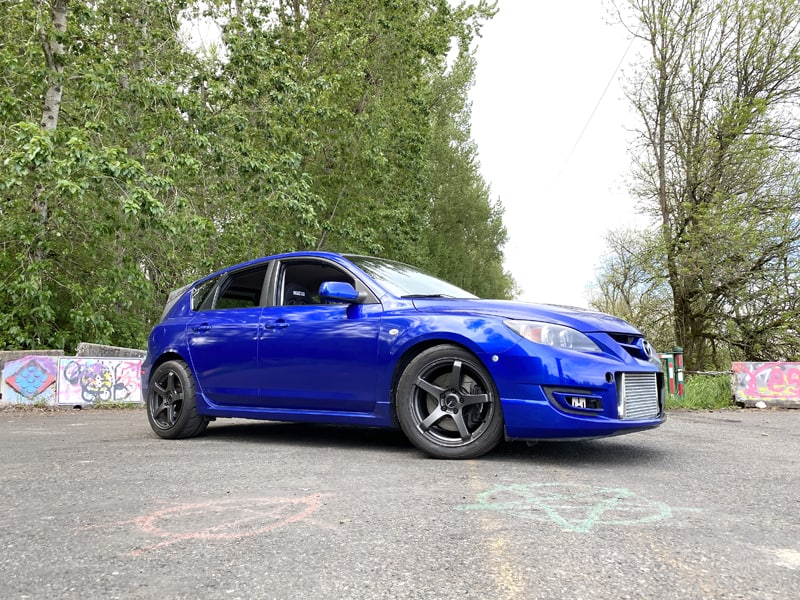
Mazdaspeed 3 was one of the most powerful FWD models Mazda ever built for production. It was turbocharged and had a 6 speed transmission and more torque steer than you could ask for.
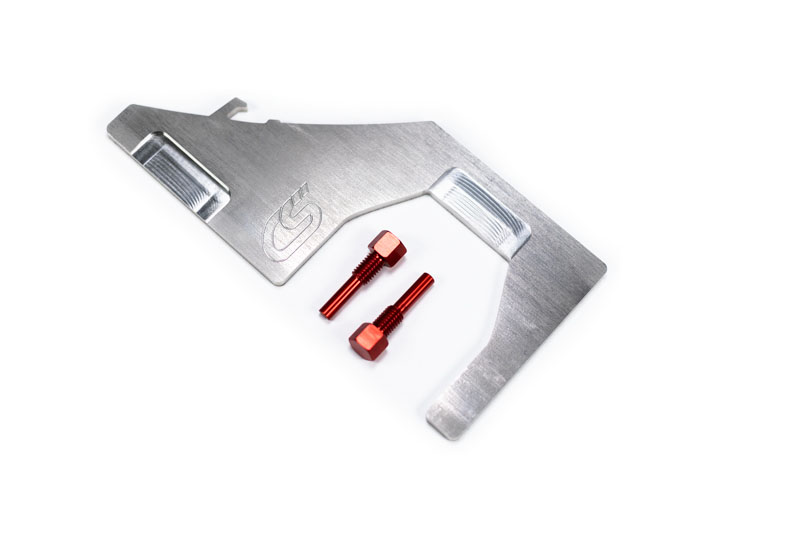
Have you ever seen a timing kit with an integrated bottle opener? I didn’t think so! We here at CorkSport know that when replacing the timing chain or installing other modifications that require you to time your 2.3L DISI MZR engine, something cold and refreshing is a must-have. That’s why we chose to make the CS Timing Kit with a bottle opener so that it can be more than a tool that is just used for timing your motor.
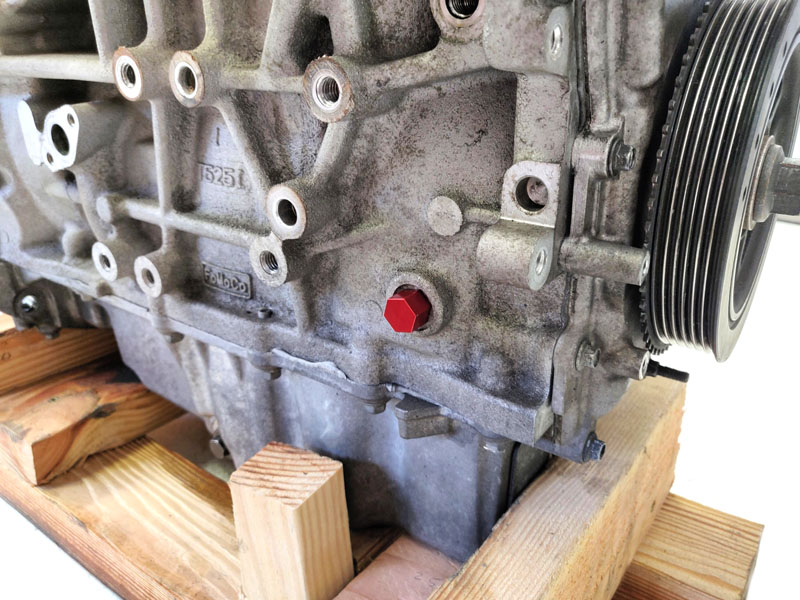
Included in the CorkSport Timing Kit, are two 6061-T6 aluminum crankshaft timing pins. The timing pin is used to set the number 1 piston to the Top Dead Center (TDC), which is a necessary step when timing the 2.3L DISI MZR engine – especially after replacing your refreshing Mazdaspeed 3 or Mazdaspeed 6 with a Mazda OEM VVT Kit!
We picked aluminum over Stainless Steel in this case because if the pin is accidentally left in after the motor has been timed and the motor is turned over, the aluminum pin will give way instead of damaging the motor which could happen if a steel pin is used. This is also why we decided to include an additional timing pin, so you’ll have a backup if needed.
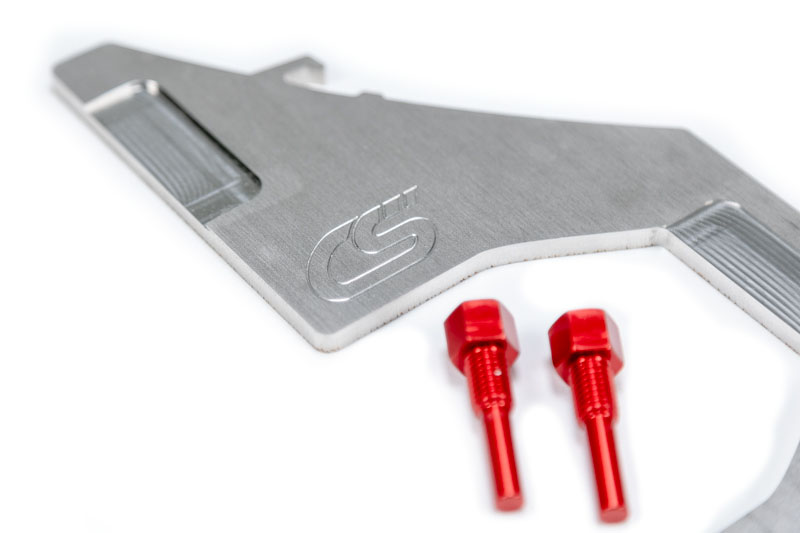
Finally, we chose to anodize the timing pin in a bright red, so that is easily visible when installed in the motor so it doesn’t get left in by accident.
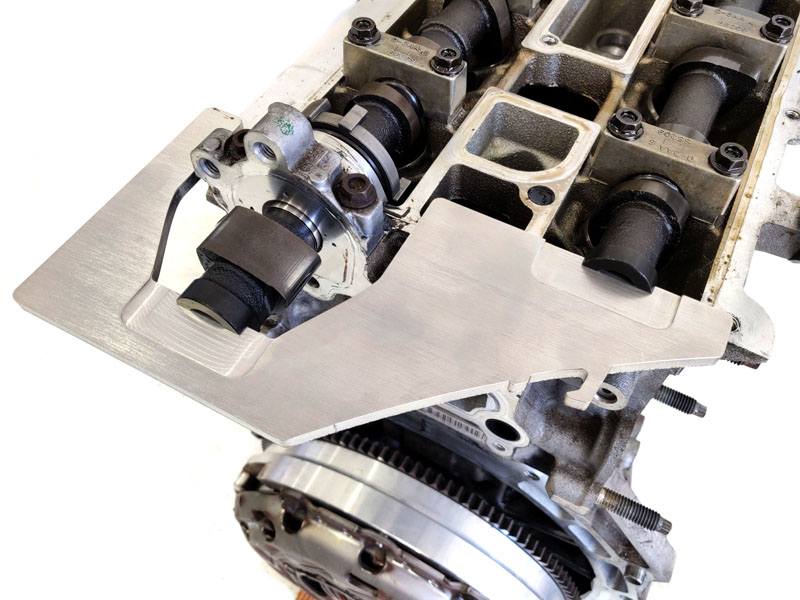
Also included in the CS Timing Kit is the cam alignment plate which is made out of 1/4″ 304 Stainless Steel to provide a long-lasting finish as well as the durability needed to ensure the pockets in the alignment plate stay at the proper specifications.
The cam alignment plate features precision machined pockets that are used to align the cams ensuring a tight and accurate fit. The purpose behind using a camshaft alignment plate during the timing process is that it is used to locate the intake and exhaust camshafts so that they are properly synced with one another.
After the cams have been properly aligned with the timing plate, the camshaft gears that connect the timing chain to the cams can now be tightened using the wrench flats built into the cams to hold them in place while you torque down the cam gear bolts.
Even though similar timing tools have been out for a while, the main goal behind the CS Timing Kit was to provide anyone with a 2.3L DISI MZR engine, a single place where you can get both the Mazda OEM Timing Chain Kit and the tools necessary for the job. We hope that the CS Timing Kit helps gets your 2.3L Mazdaspeed back up and going in no time.
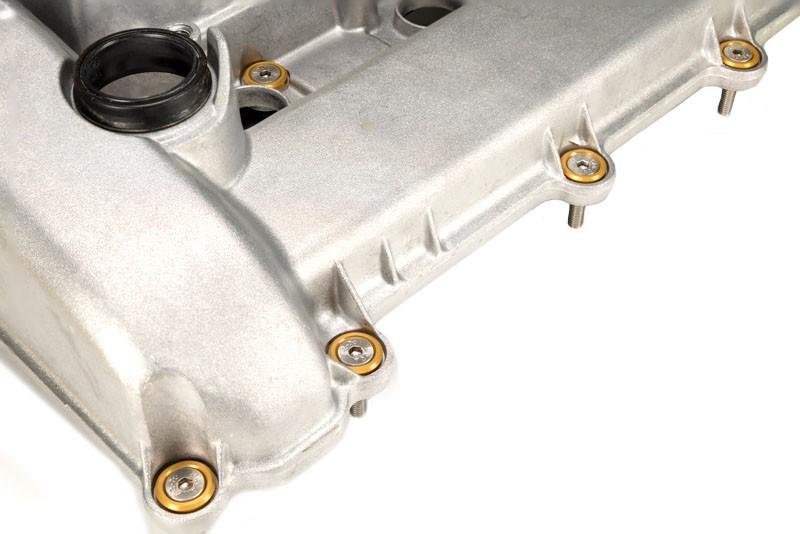
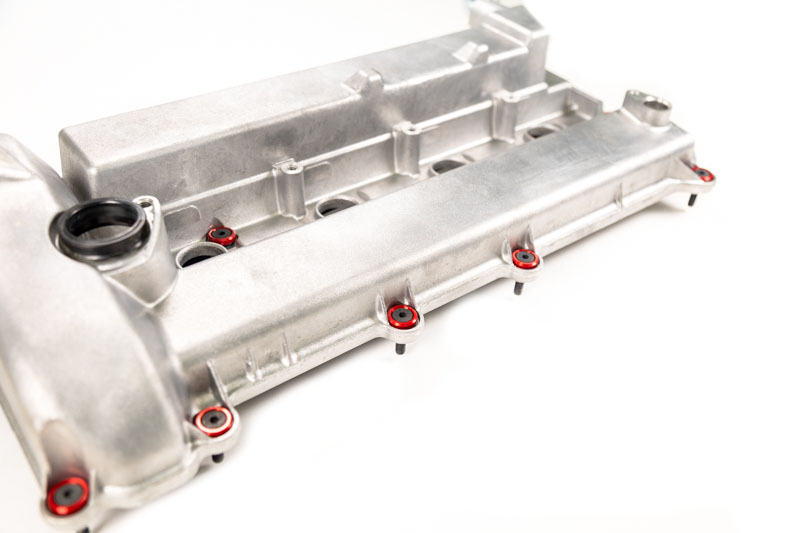
We are all car enthusiasts. We all work hard to make our cars, our Mazdaspeed, the car that performs and looks just how we want…even down to the nuts and bolts. That’s exactly why we have developed a new and unique valve cover hardware kit for the Mazdaspeed DISI-MZR engine!
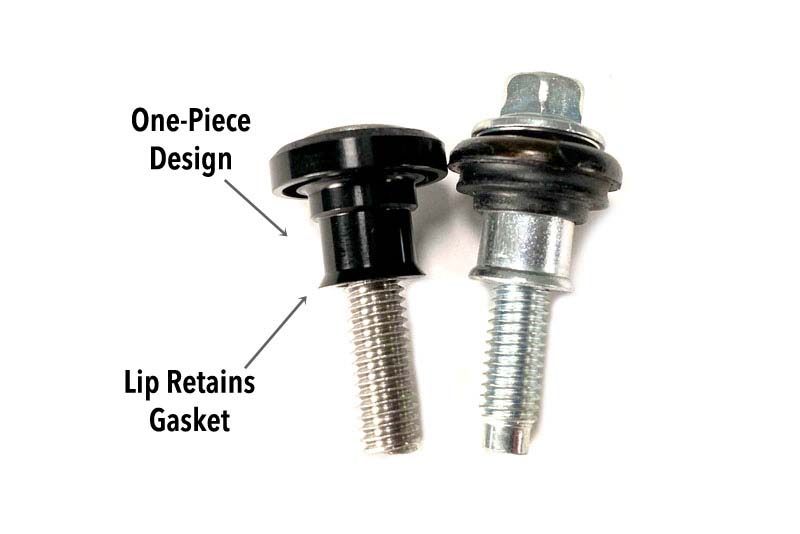
Unlike anything else on the market today, the CorkSport Valve Cover Hardware was developed as a one-piece design like OEM. This is very important for proper installation and use of the hardware!
Like OEM, the lower edge of the spacer has a small lip on it. This lip is critical to the function and installation of the valve cover gasket by holding the gasket in place during installation and use. With that, the lip would be useless without the one-piece design.
Let’s look at how the OEM hardware works: When you remove/install your valve cover, the gasket stays in place on the valve cover. Imagine fighting to keep that gasket in place and lined up when trying to install the valve cover…silly right? Then you get leaks and oil dripping down the side of your engine…nobody wants that.
That’s exactly why we retained the OEM features…the lower lip and one-piece design.
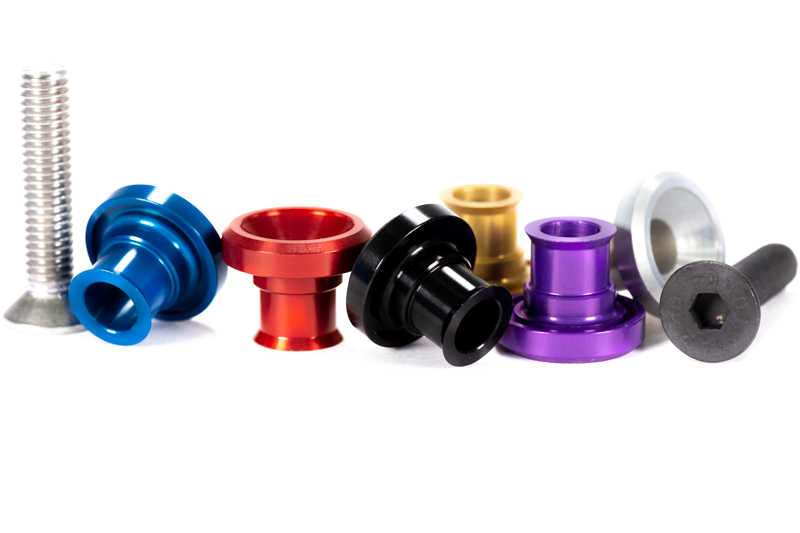
Now what are the colors!? You can choose from Black, Red, Blue, Gold, Purple, and Clear (Raw AL with a clear finish) and you can choose the color of the bolts as well! We will have the option to choose raw stainless (community standard) or black stainless bolts if you want a less bling look.
If you want to add some color to your Mazdaspeed 3, Mazdaspeed 6, or even CX-7 with the DISI-MZR turbo engine AND you want it to work just like OEM then this is the hardware kit for you. Looks fantastic, installation is straightforward and you can choose from an assortment of colors to fit your build.
Many community members are asking, “What clutch should I buy for my Speed3/Speed6?” or “What’s the best clutch for Mazdaspeed 3/6?” and there isn’t a perfect answer because the right answer depends on your goals with your car.
While I can’t say what the best clutch is, I can share my experience to date with my Twin Ceramic Rigid Disc X-Clutch in my Mazdaspeed 3.
First Impressions
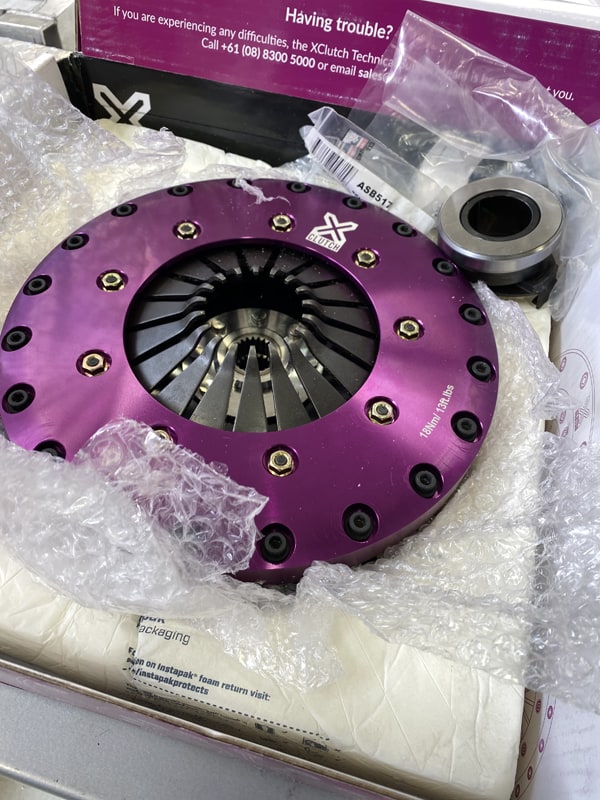
Opening the box I found a very well-packaged assembled clutch kit. This included the assembled pressure plate, discs, and flywheel along with a new throw-out bearing, flywheel to crank bolts, and a nice alignment tool. XClutch also included some generic instructions – They certainly don’t rival CorkSport instructions, but are better than most clutch instructions I have used.
Getting into it
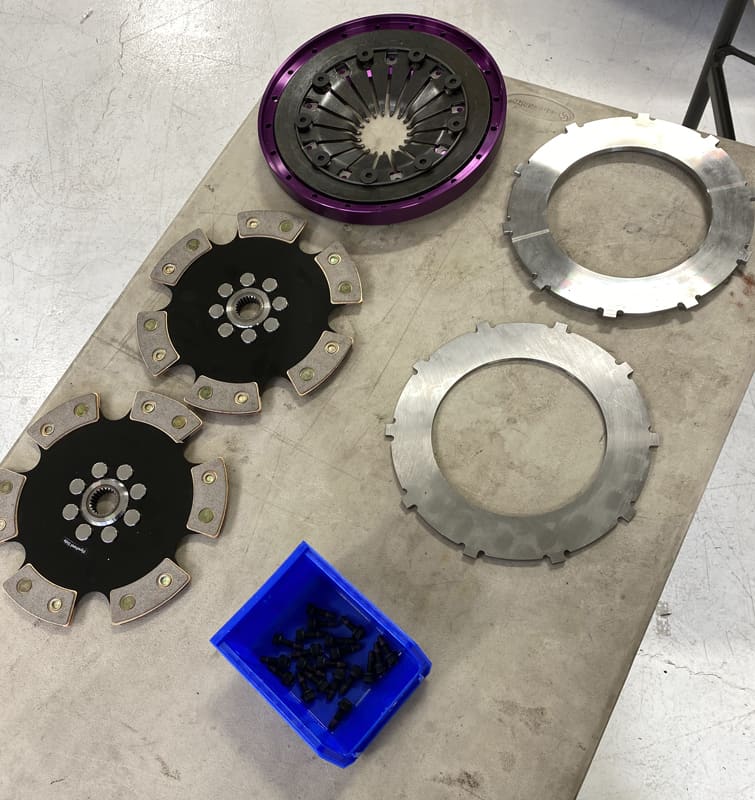
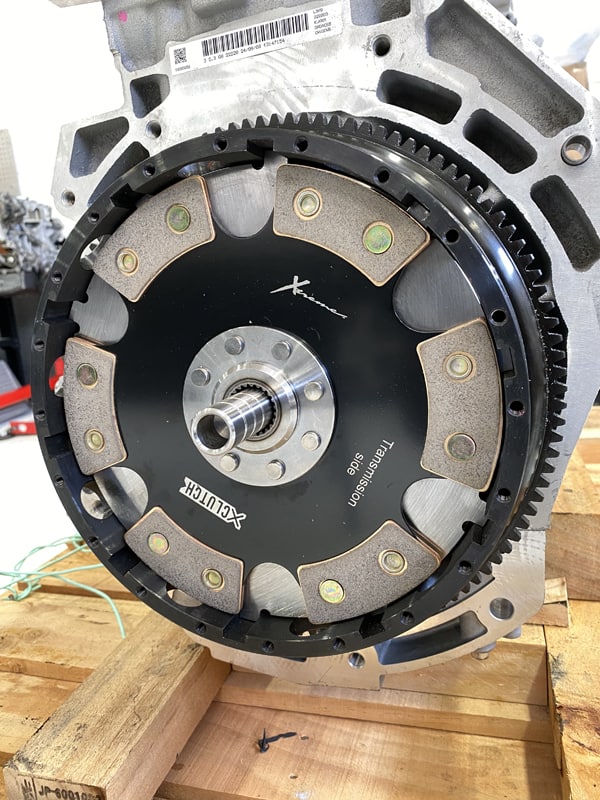
After disassembling the clutch assembly, I found some nicely constructed components. The material fit and finish was great along with the identification of transmission vs engine side of the discus laser engraved was a nice touch.
Something worth noting: Some clutch kits come to you in separate pieces. This makes you 100% dependent on their instructions for the assembly process (and a lot of times those instructions are lacking), but with the XClutch the whole thing came assembled. I like this because it gave me the chance to see how it was assembled and therefore made me more confident I would assemble it correctly on the engine.
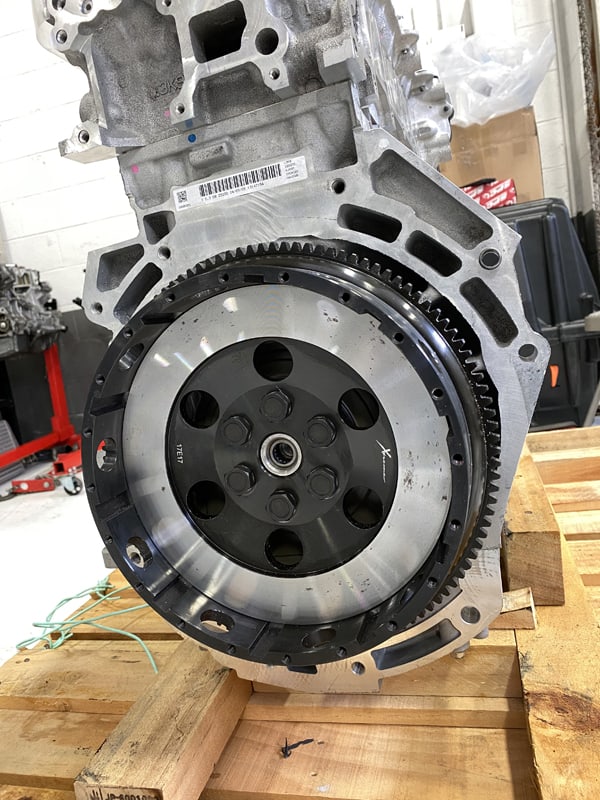
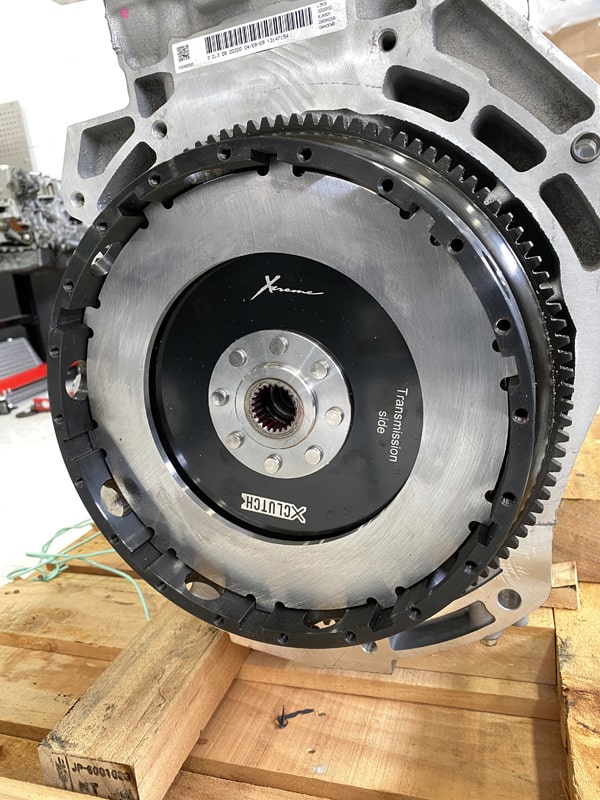
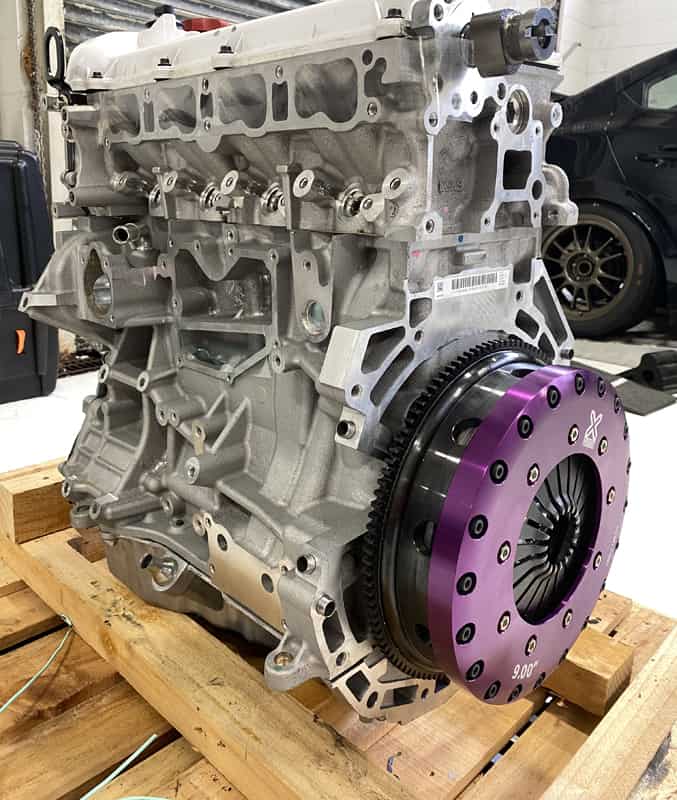
Now let’s get the clutch on the engine. After disassembling the clutch kit, the first part to go on the engine is the flywheel after a quick cleaning of the machine parts and surfaces. Using the provided hardware and some lock-tight the flywheel gets torqued down. The flywheel was a perfect fit on the snout of the crank…a little persuasion was needed which tells me the flywheel will be perfectly centered.
Next is the first clutch disc (make sure you can read “transmission side”) then the middle floater plate. Following that is the next clutch disc (and again make sure you can read “transmission side”) along with the provided alignment tool.
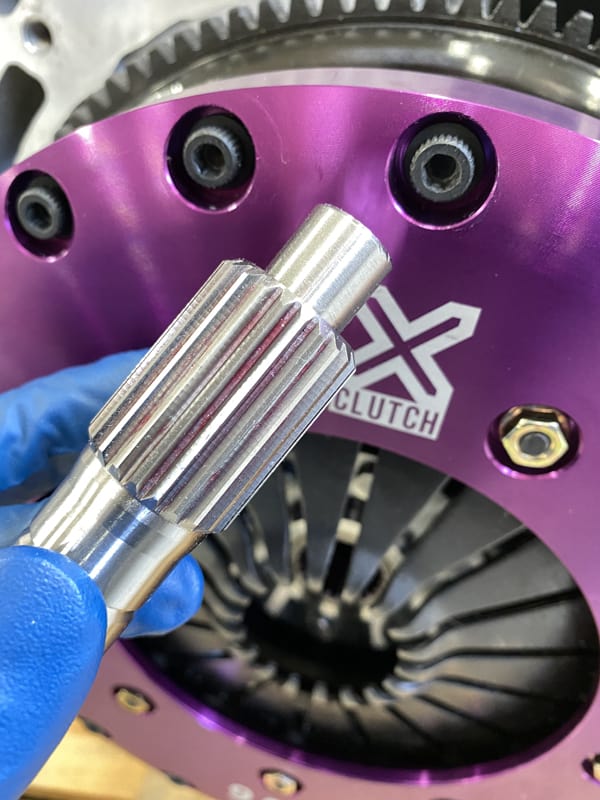
The Tool
So I want to take a minute to talk about the alignment tool. I’ve installed many clutches in many vehicles throughout my life ranging from an OE replacement in my 92’ Mazda b2600i, Mazdaspeed3, and a twin-disc in a Dodge. Every single kit came with the generic plastic alignment tool that doesn’t fit great and flexes.
But not X-Clutch, their kit included a very nice billet steel alignment tool that fit snugs and did not sag or move when installed. This seemingly simple tool made a huge difference in the whole installation process.
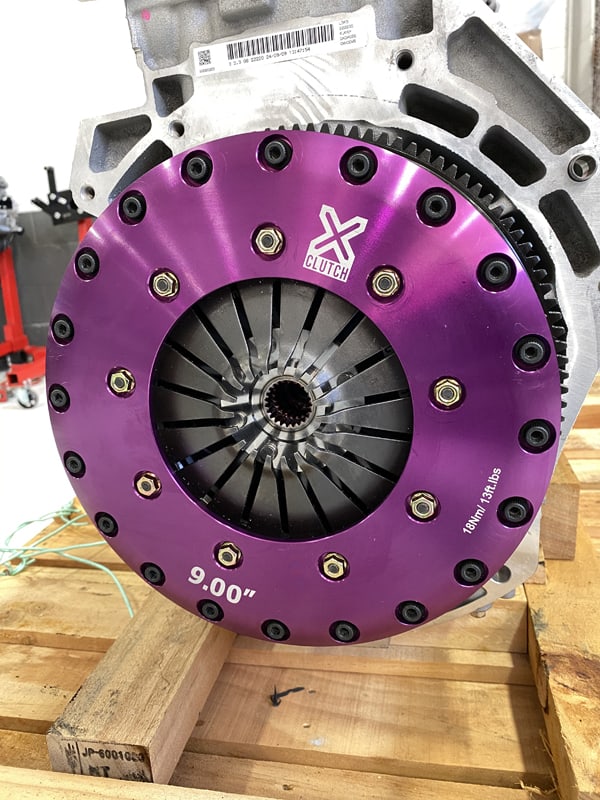
Back to the install steps; next up is the pressure plate floater plate. Typically this is part of the pressure plate assembly, but with the Xclutch design, this is separate.
Last is the pressure plate itself, which applies force to the clutch discs. The installation of this is slow and tedious, but important to follow. The hardware must be installed and torqued down evenly around the perimeter, much like torquing a wheel but with a lot more lug nuts.
X-Clutch has clear instructions on this so don’t worry.
Bringing it back together
So your clutch is all buttoned up and now it’s time to attach the transmission to the engine. I’ll admit this was a task I was dreading…many times, I’ve fought this process because the damn input shaft in the transmission just would not line up with the clutch disc and crank, but I was pleasantly surprised.
I don’t know if it was luck or if the alignment toll was really that perfect, but in one try the transmission slid right onto the clutch and aligned perfectly. It was honestly shocking. I can only hope your installation goes as smoothly.
Now the review you have been wanting…
First impressions are great. The peddle pressure is very similar to OEM, maybe just a hair stiffer, but is nearly identical so if you’re worried about a stiff pedal DON’T, it’s cake. The engagement point is around the middle right now, but I expect it to move up in the pedal stroke slightly as it breaks in further. I like this, but this is a preference thing.
Engagement control is interesting. Going from an ACT 6-puck ceramic to this is very similar in the “grabbiness” of the clutch since they are both ceramic puck discs, but the X-Clutch I would say is a bit more aggressive. This makes sense with the rigid disc design and the very high torque capacity…1,350 ft/lbs!
So here’s my suggestion and you can check them out here. Learn More!
Conclusion
If you want a OE replacement with a bit more headroom for power then the Street single disc organic is going to be your closest bet. If you want good street manners but have more power to hold then the Street Plus twin disc organic is going to be your best balance. Lastly, if you are pursuing motorsports and high heat capacity then the Race twin disc ceramic will be your go-to clutch kit.
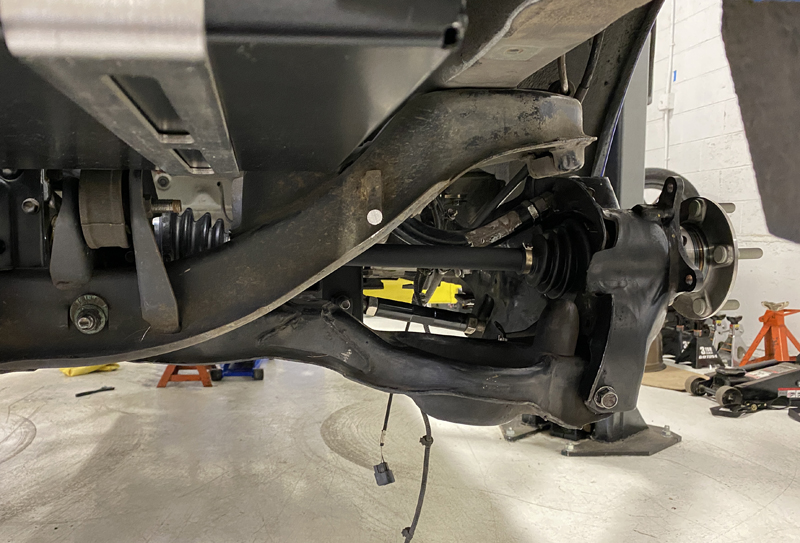
Welcome to part 5 of the Mazdaspeed3 AWD Swap (sorry for the delay; things got really busy for a bit)! This blog covers the rear-end drivetrain and the huge modification that makes it all work.
There are a lot of images and explanations of those images so you can see and understand the differences between the Mazdaspeed 6 and CX7 rear drivetrain.
What is the Rear Differential
Jumping right into it, let’s identify what the rear differential is. The rear differential transfers power from the transfer case via a PTO/driveshaft, through the ring and pinion, out to the axles, and then to the wheels and tires.
CX-7 vs Mazdaspeed Differential Comparison
However, as with many modern AWD systems in compact cars, there is a clutch mechanism between the PTO/driveshaft and the differential. This clutch mechanism controls the percentage of engine torque transferred to the rear tires.
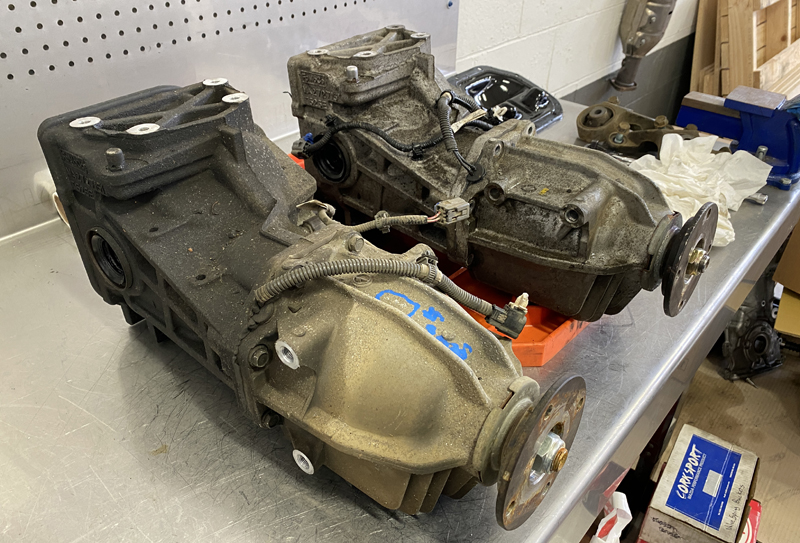
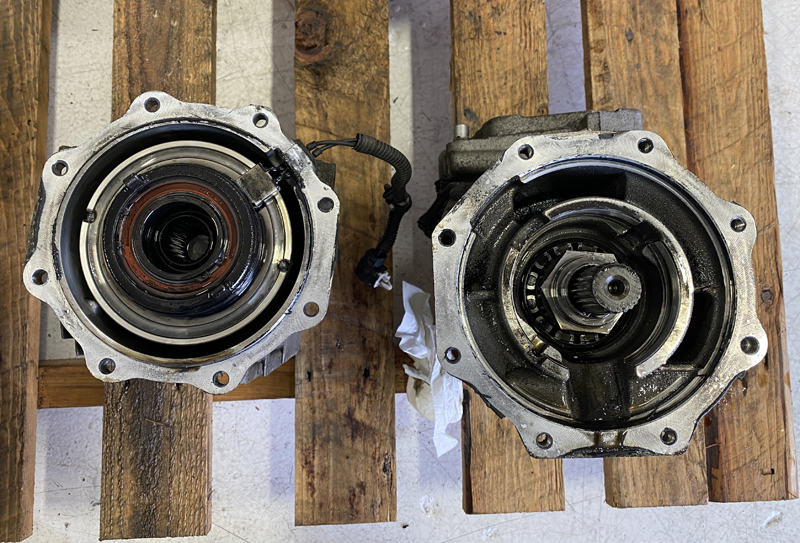
In the diagram below, we’ve identified the two major sections of the differential assembly. The line demonstrates the connection point between the two sections. The rear section is the gear housing, and the front is the clutch housing.
Now that you understand the differential assembly. Let’s identify the difference between Mazdaspeed 6 and CX7. There are two major differences.
Differences In Differential
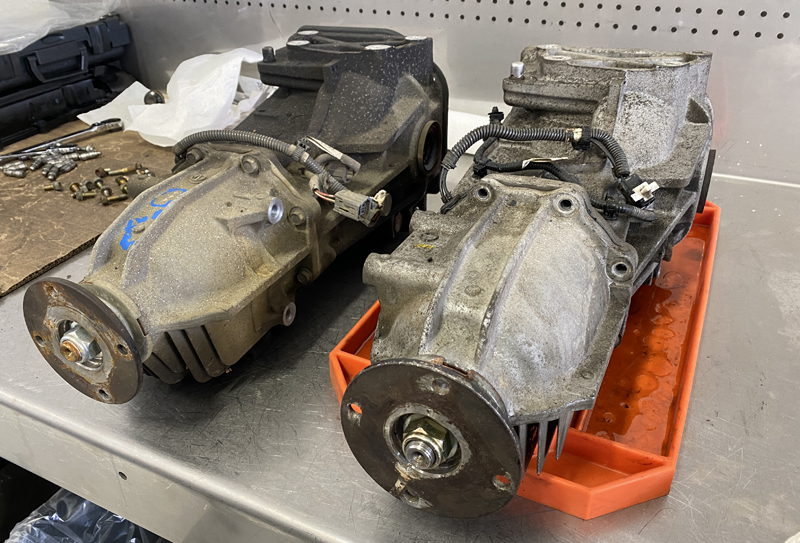
The first difference is the clutch housing mounting points for the front subframe mounting brackets. In the image below, you will see two mounting points with threaded holes on the right side of the differential, while the other differential does not have those mounting points.
The CX7 differential is on the left, and the Speed 6 is on the right. The CX7 on the left)has TWO front mounting points whereas, the Speed 6 only has a ONE mount. While this may not be a big deal for a daily driver with modest power levels, it’s a huge advantage for a racecar with nearly 900whp.
Left to Right: CX-7 and Mazdaspeed Differential
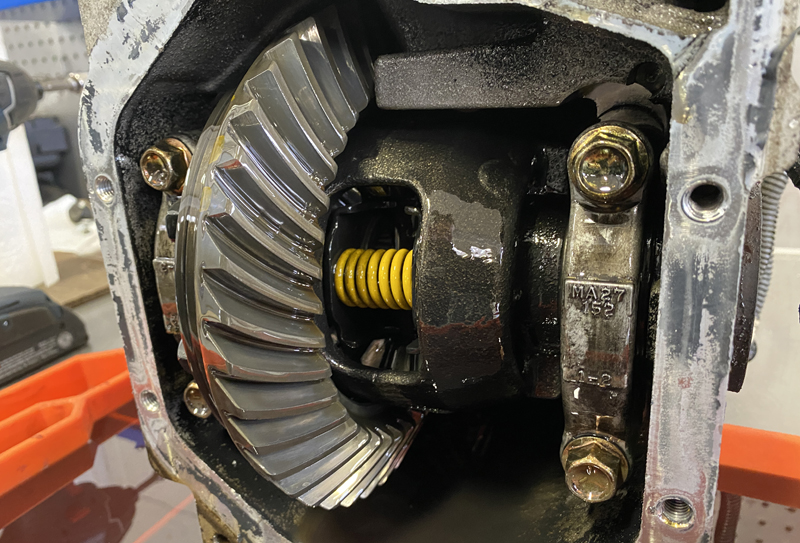
Moving to the inside of the gear housings, the CX7 uses an open differential setup, vs the Mazdaspeed 6, uses a Mazda proprietary LSD (limited slip differential). The LSD is more desirable because it will provide better power distribution to both rear tires vs the open differential.
Fun Fact: the Mazda-developed LSD uses “friction cone washers” sandwiched between the spider gears and differential carrier housing to create the limited slip effect. As load is applied through the spider gears, the increased load presses the spider gears against the friction washer, which makes this a very street-friendly and progressive type of LSD. Check it out below.
Mazdaspeed limited slip differential
So here we are at a point where we need to use the CX7 differential because it has the ideal two-mounting front section, and we have a CX7 subframe, so…duh, but we want the rear LSD for better power distribution.
Time to split these differentials in half and see if we can swap things around.
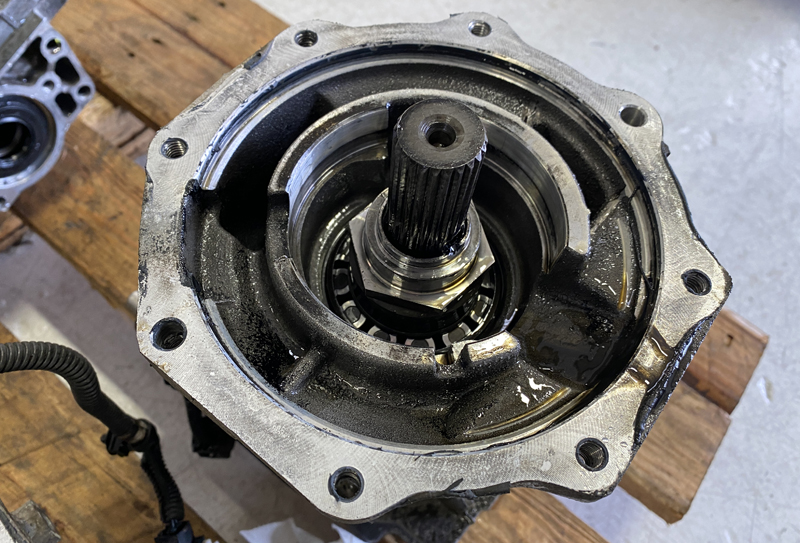
Rear Differential Separated
Splitting them in half to separate the clutch housing and gear housing, we can see a splined connection that interlocks the two halves.
Mazdaspeed 6 Rear Differential Gear Housing
On the gear housing side, the pinion gears are retained by an internal nut, which is good because splitting the assemblies did not affect the pre-load on the bearings.
Mazdaspeed 6 Rear Differential Clutch Housing
Let’s look at the clutch housing side. The clutch pack is retained by the external nut on the driveshaft flange; again, splitting the assemblies did not affect any bearing pre-load.
Things are looking great! And with that, we assembled the CX7 clutch housings with the Speed6 gear housings without issues!
Now to review: if you are doing this swap, you will NEED a CX7 rear differential assembly, but you DO NOT NEED a speed6 rear differential assembly. We only did that to learn and to get the LSD. You can use the CX7 as is because the gear ratio is the same, and the LSD is not required.
Next up are the suspension trailing arms; when using the OEM Speed3 suspension, the trailing arms need to be modified to use the OEM CX7 wheel bearings.
Modifying the Trail Arms of the Mazdaspeed
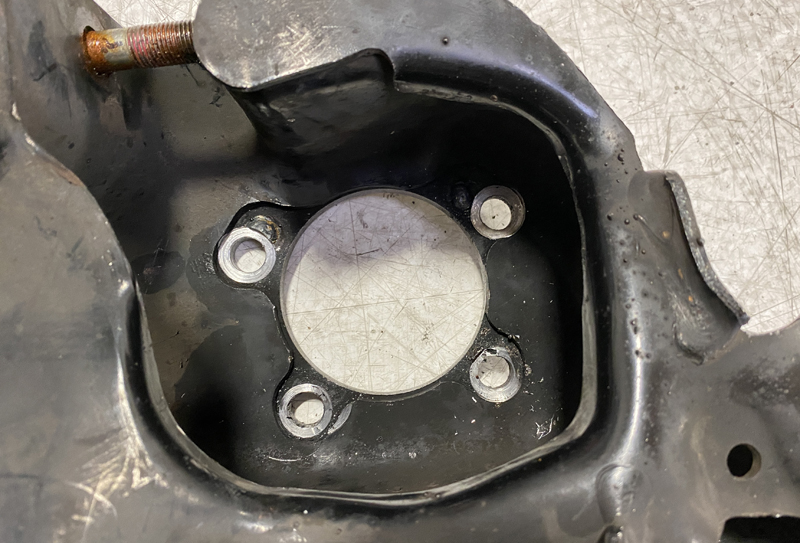
Mazdaspeed 3 Trailing Arm Plate
The OEM trailing arm has a beefy steel plate welded to the stamped steel structure. While the bolt and center holes look correct, they are slightly different in bore and location.
Mazdaspeed Trailing Arm
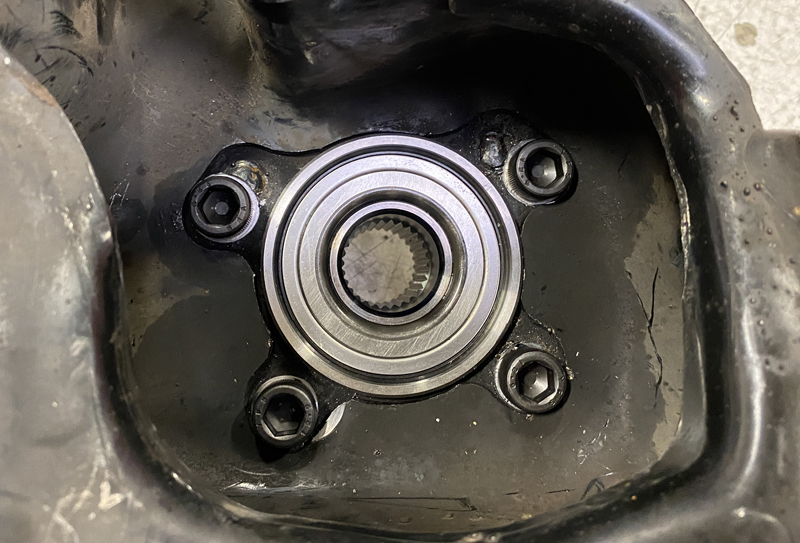
To make the Mazdaspeed 3 trailing arm work, modification was needed via welding the original bolt holes shut and then redrilling the holes in the correct bolt pattern for the CX7 wheel bearing. Along with that, the center bore diameter had to be increased slightly as well.
New Welded Holes for the MazdaspeedFitment of the Rear Trailing Arms & CX7 Wheel Bearing
Modifying the rear trailing arms is only 1 of 3 major fabrication projects needed for the AWD swap. The others are building a Rear Motor Mount (which I designed a badass billet one for) and the center driveshaft mounting plate which I also designed.
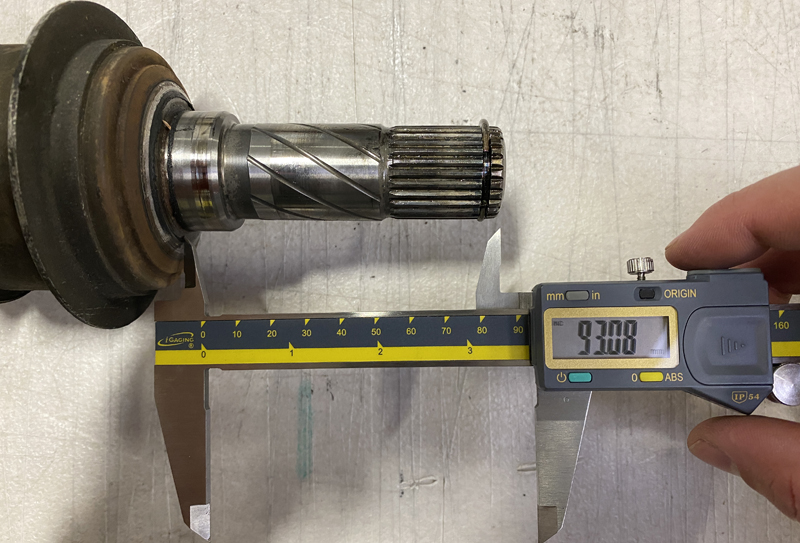
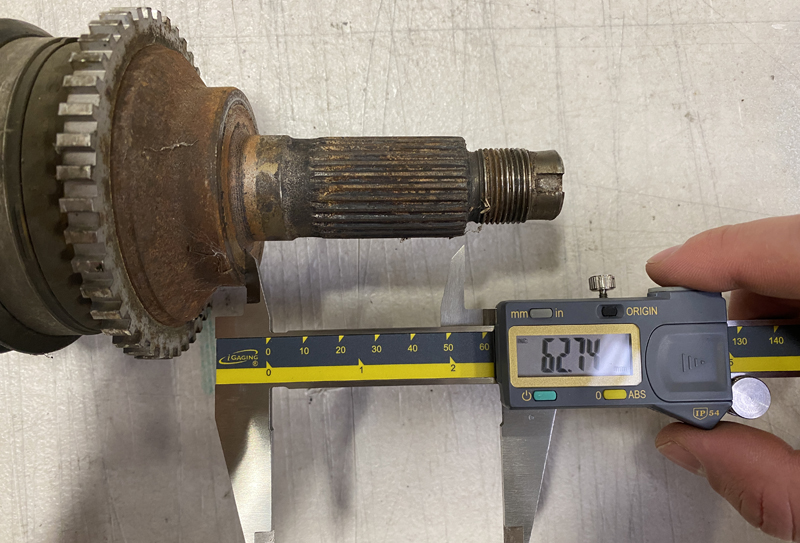
Now, with the trailing arms and wheel bearings in place, we can finally figure out the rear axle lengths. Checking both the Speed 6 and CX7 rear OEM axles, I found they use the same wheel bearing and differential inputs, which is great. However, The lengths are not the same.
Unfortunately, in test fitting the Speed 6 and CX7, we found that both needed to be shorter for the Speed 3 application. With that fact, the cost is a lot more expensive for anyone swapping because of the needed custom rear axles.
I was personally going to get custom rear axles either way due to the power levels and use of the Halfmilespeed3, but it’s not a requirement.
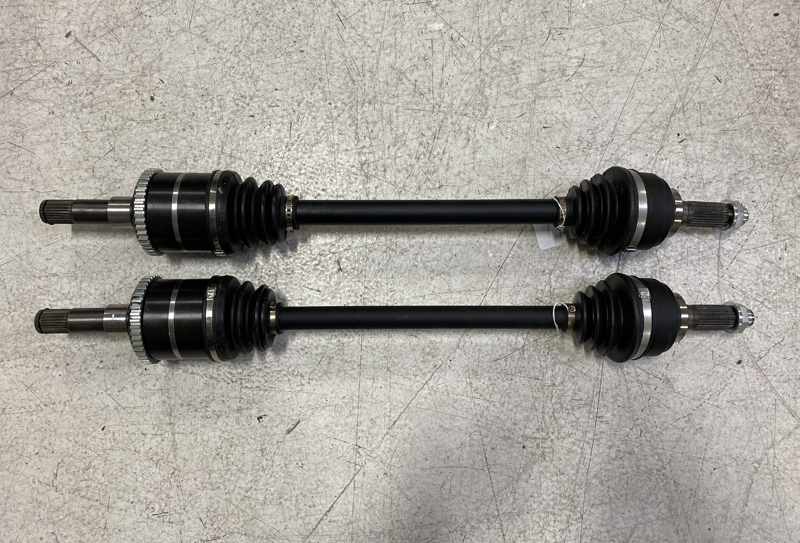
700WHP Rated Custom Rear Axles
Fast forward many weeks, and we have a set of custom-length 700WHP-rated rear axles to compliment the front DSS 5.9 axles.
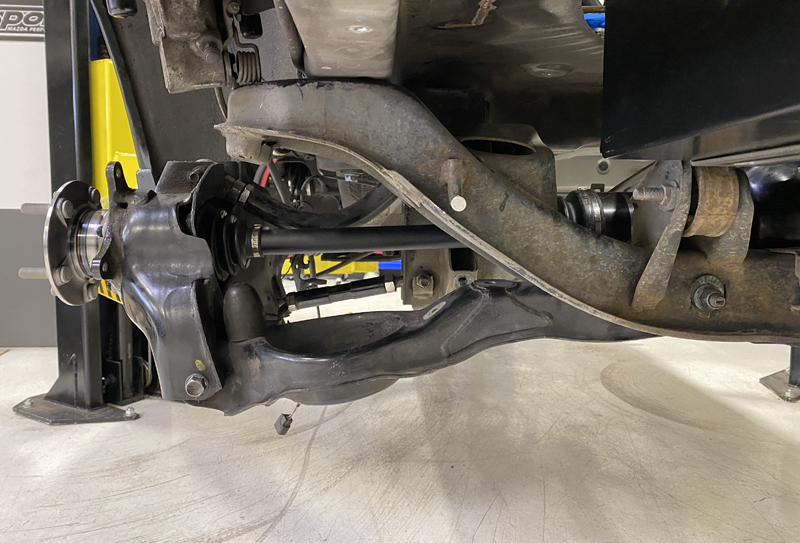
All bolted in and looking great! While doing this I learned a few things and realized that one of my assumptions was wrong.
The front axles work and don’t work from the MS3. The driver front MS3 axles will interface perfectly with the Mazdaspeed6 transmission. However, the inboard CV housing/spline section for the passenger side front will need to be replaced/modified to work with the speed6 intermediate shaft.
The rear ABS sensor for the Mazdaspeed3 will not work with a Speed6-style ABS trigger wheel. They use a much different and more modern magnetic trigger wheel incorporated in the rear ABS sensor for the Mazdaspeed3 will not work with a Speed6-style ABS trigger wheel. They use a much different and more modern magnetic trigger wheel incorporated inside the wheel bearings…which we don’t have when using the CX7 wheel bearings. This has led me to develop custom ABS trigger wheels to work with the OEM Mazdaspeed 3 sensor. More on that later.
Alright, that wraps up the rear drivetrain setup. There are plenty more huge milestones to overcome, which are coming up in this multi-part blog series!
I hope you are enjoying this series about the Mazdaspeed 3 AWD Swap. Stay tuned for more blogs to come!
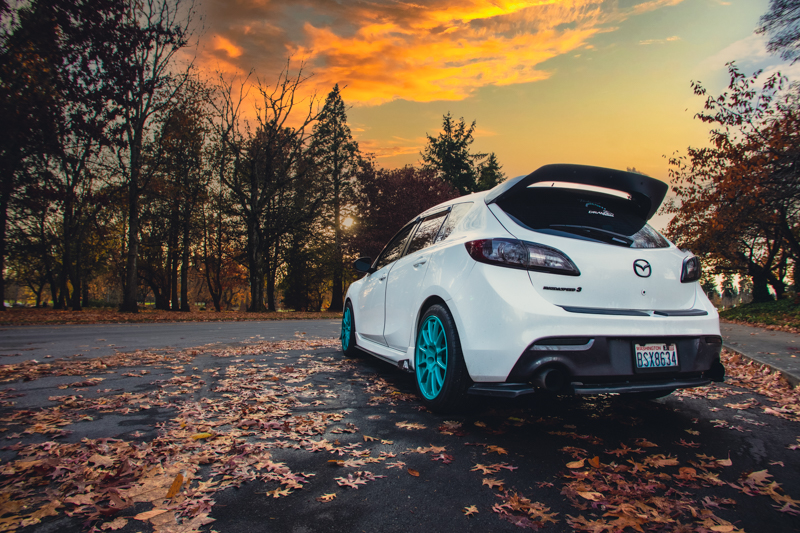
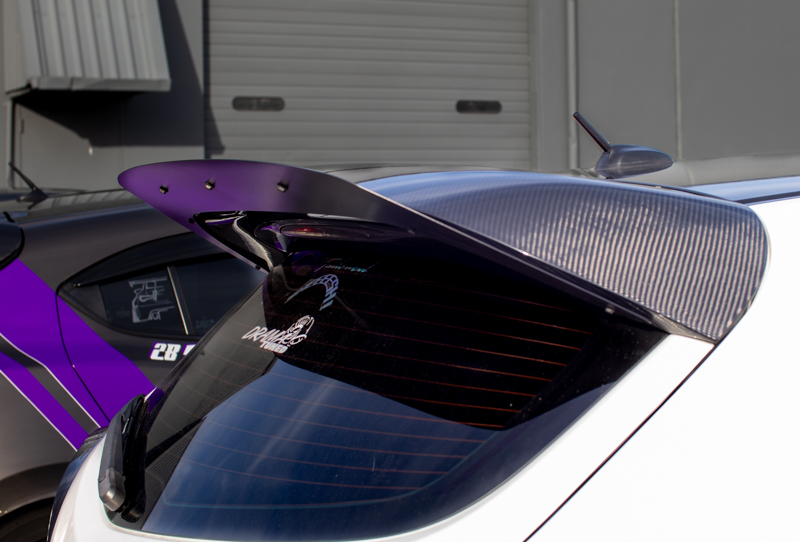
While the “gurney flap” style wing extension is not new to the Mazdaspeed community, we wanted to offer our interpretation of this fun, useful, and stylish performance part. We approached this design to improve the spoiler style, maybe some function, and make it durable.
With such a simple performance part how can we be unique and durable? That comes down to the design and materials…more specifically the combination of those two. The common option on the market today uses a plastic material for the “flap”. This is cost-effective, looks decent, and has decent durability. However, over time the plastic may degrade due to use, weather, and UV radiation.
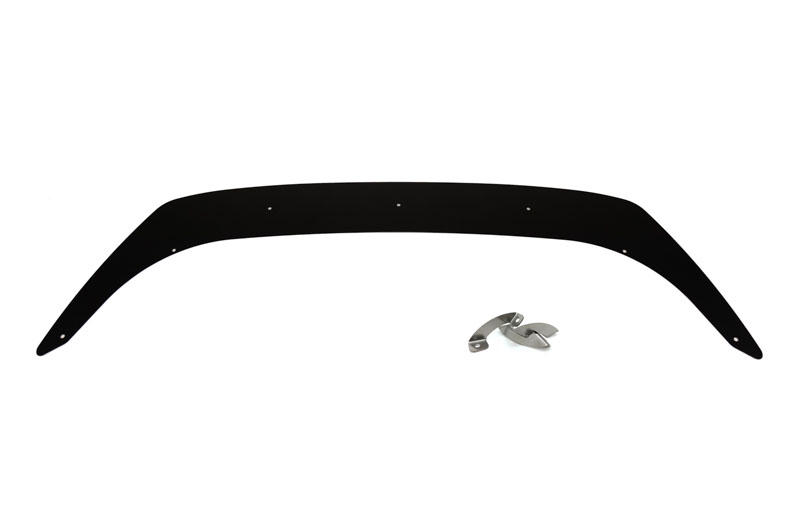
Durable Wing Extension
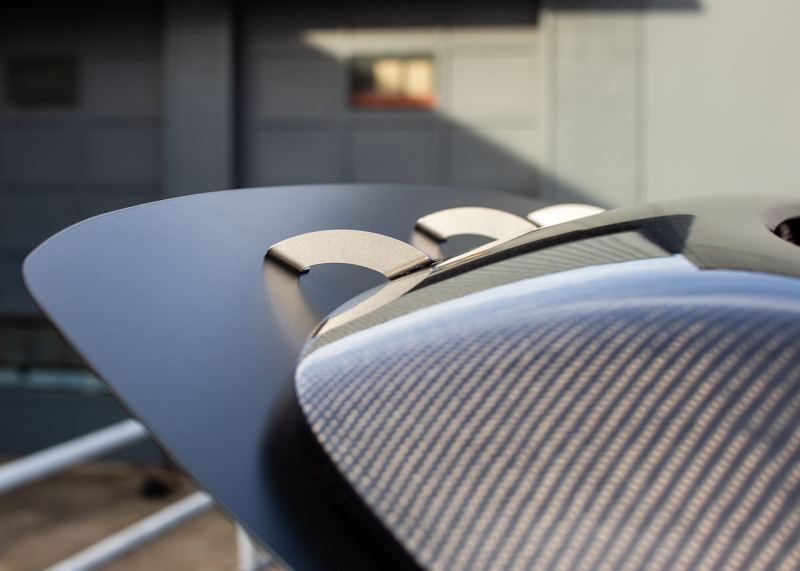
The CorkSport “flap” is made from 5052 Aluminum sheet and then powder coated a satin black for a durable and long-lasting finish and construction. Mounting the “flap” are three CNC-formed stainless steel brackets and four underside mounting screws…also stainless steel. This gives you a total of seven mounting points meaning there is no need for messy and finicky double-side tape.
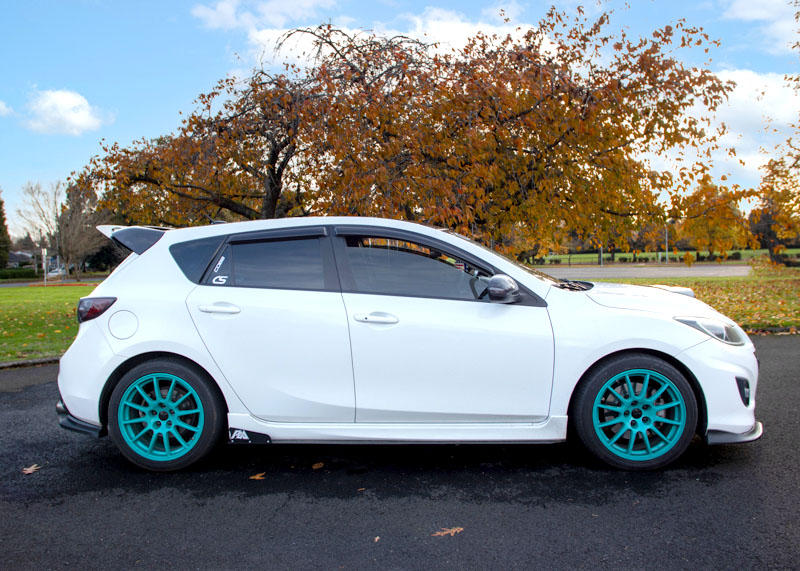
Designed for the OEM Mazdaspeed spoiler, the CorkSport Gurney Flap fits great on the OEM Spoiler and the CorkSport Carbon Fiber Spoiler. Installation is easy with our step-by-step instructions.
Standout with the CS Wing Extension
While we cannot make any official claims to added downforce, we have found the car to feel more stable at speed and a little gurney flap never hurt anyone. Measuring 4” in flap depth, the CS design is very noticeable as you walk up to the car with a pronounced flap and tumble-polished stainless brackets. All the underside hardware is black stainless so it blends into the satin black powder coat.
Thanks for checking out the 2nd Gen Mazdaspeed 3 Gurney Flap Style Wing Extension. While we don’t have a wing extension for the GEN1…we could! Let us know if you want CorkSport-style wing extension for your GEN1.