Mazdaspeed 3 & Mazda 3 Rear Swaybar

When designing an aftermarket rear swaybar, there are two main concerns, the weight of the bar, and the stiffness of the bar. The design chosen for the bar needs to be strong enough to resist chassis roll, while being light enough to keep weight down.

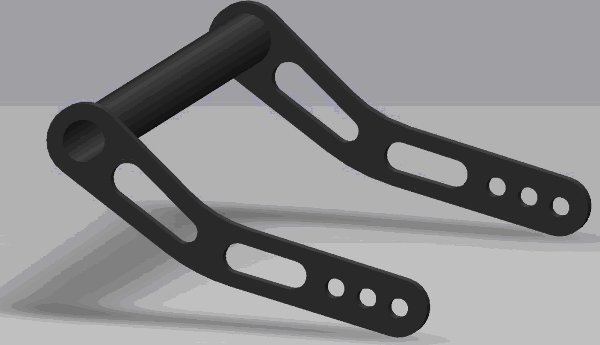
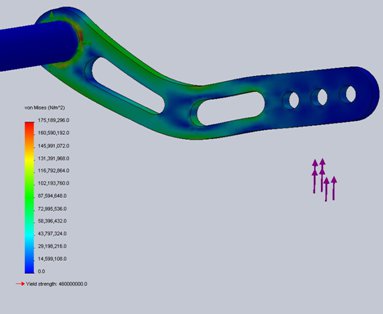
To battle the weight issue, we used a hollow tube for the main shaft of the bar. Hollow tubes are able to provide a greater torque resistance than a solid tube of equal weight. In addition, the two arms that connect the bar to the end links were optimized for weight by using finite element analysis. This allows me to design a bar that is structurally rigid, while removing material from areas of low stress. The image below simulates a load coming from the end link of the vehicle and the stresses that it puts on the arm. The deflection is exaggerated to give an idea of how the bar flexes during cornering.

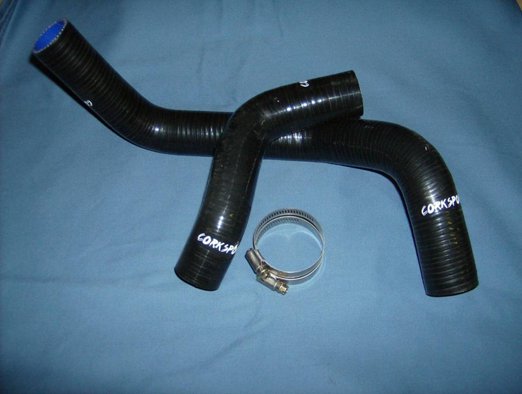
The increased stiffness of the bar comes from increasing the diameter of the tube. To allow this, we utilized a set of larger diameter urethane bushings with greasable fittings. This allows for a more rigid mount, while giving you the option of greasing the bar without having to remove the bushings. The whole system is topped off by having 3 adjustable mount points of varying stiffness from 20% to 80% stiffer, while offering roughly 3 pounds of weight savings. The bar is powdercoated to protect it from the elements and keep it looking nice.

Jake

The Method to Our Madness

Everyone wants the biggest number possible in terms of Horsepower/Money ratio. Therefore, when researching a new Intake system for your Mazda, you want to find out from the source, how those numbers were obtained. I have had several people ask me if our dyno numbers are accurate and how we get them, so I decided to pull back the curtain and show you what we do to get these numbers.

The image below shows two dyno runs with a 2010 Mazda 3 (2.0L). The lesser of the two is stock, while the higher of the two is with our Corksport Short Ram Intake installed. The gain shows 121.3 – 115.3 = +6 hp gain. These are real numbers that we have obtained from our personal testing.

Now you may be thinking “Well, you just took the highest run with the SRI on and the lowest run with a stock car and got a 6 hp gain.” This is not how we do things. That would be easy and good from a marketing standpoint, but also deceptive, which is not how we operate. We take several runs, keeping as many variables as possible constant, for each scenario to ensure that they are accurate numbers. The image below shows how we obtained the stock vehicle data using 3 separate runs of 115.3, 114.9, and 114. In this case, we used the highest stock number of 115.3, but all of them are very similar.

For the SRI runs, we obtained numbers of 121.3 and 121.8. In this case, we took the lowest number, but both are very similar.

In conclusion, we try and offer the customer unbiased numbers to help them decide for themselves what product suits them best. Obviously, more runs = more development costs = higher product costs, so we try and strike a good balance between obtaining accurate data, and maintaining a competitive cost.

Jake

Troubleshooting

Troubleshooting problems in a car can be a daunting task for some people. I got a reminder of how interesting it can be to chase down a problem and find a solution. The situation came up recently where our project 2010 MazdaSpeed 3 had a problem with the keyless entry system. The remotes would not operate the door locks and you could not start the car normally with the push button start. You would have to hold the remote close to the start button or use the key from the remote to activate the system so the start button would work. The outside push button door locks would not work either. The whole car acted like the security system had been activated as the stereo would not work as well.

The first step I took was to check out the owner’s manual. If there is a manual or users guide to the part you have installed, or a service book for your car this can be very helpful for finding the place to start your investigation. The MazdaSpeed 3 was flashing the red light above where the key goes when the clutch was engaged. When depressing the clutch pedal in the MazdaSpeed 3 the system checks to see if a remote is in close proximity and allows the car to turn on which prompted the red light. After going through the alarm section and keyless entry areas the solution for the problem I had the only solution was to take it to the dealer according to the owner’s manual.

Not being a big fan of hauling the car to the dealer. I did a quick check through the fuses related to the keyless entry system to see if something had blown out causing the problem. I could not find a blown fuse in the system for the security system, stereo, or Bose equipment. The MazdaSpeed 3 had been jump started a week prior so my next thought was maybe the logic units for the alarm got knocked out of whack. So I disconnected the negative battery cable from the car and hit the brake likes to drain the power from the system. After a minute I got everything connected back up and gave it another try. Still nothing responded the way it should.

It was getting later into the evening at this point so I was going to give the owners manual one more shot to see if there was something I had missed. I reached up and hit the map light which I found was not working. I hit the interior manual light switch and nothing there either. When the lights did turn on it set off a memory of an experience I had in the past in my 2001 MP3. Sometimes the interior circuits like the lights are connected into other interior systems since the lights are always live. This was the case with the MP3 where the factory stereo was not working but the fuse was good. The power feed for the memory was tied into the interior lights which had blown a fuse causing the stereo to not power up. I found the section with the fuses in the MazdaSpeed 3 owner’s manual which pointed me to the fuse box in the engine bay. Sure enough the 15 amp fuse for the interior lights was blown. I popped in a new fuse and hopped back in the car. I hit the start switch and car fired up like it should with the stereo working.

One person’s theory:

“The actual cause of the fuse being blown was one of our product engineers was checking out the visor light bulbs to see if there was a part we could supply which would work in that location. The fuse for the lights was tripped during the work which was not noticed since the car was not running and it was daytime. It wasn’t until the next day when a different person tried to move the vehicle that we noticed the problem.”

Another person’s (a person implicated in the above theory) theory:

“It was related to the dead battery and jumping the car.”

No matter what caused it, in the end the problem was pretty small and it took about 30 minutes to figure out. Remember if something electrical isn’t working, check those fuses.

Derrick

Breathing Life Into the 2010 MazdaSpeed3 Downpipe

As many of you may or not be aware of, CorkSport recently re-released our downpipe for the 2010 Mazdaspeed3’s. This downpipe will also fit the prior generation of Speed3’s 2007-2009, however the devil is in the details.

I have been relentlessly pursuing the elusive check engine lights that are associated with removal of the stock downpipe on the 2010 Speed3’s. These models are a bit more elusive and harder to pinpoint the sweet spot for the secondary oxygen sensor to eliminate a check engine light. This sweet spot is becoming harder and harder to find due to stricter emission controls.

This past week I have been driving our company car from home to work and back. As much as my boss loves me racking up miles, to the tune of 67 a day, on a brand new car from Vancouver, WA to Oregon City, OR it’s all done in the name of science. In an effort to understand the cars behavior and make slight corrections, documenting as much information as the data logging software will allow. Checking voltage to 02 sensors, Catalytic temperature and Engine RPM and Run time.

While driving down the local highway I am constantly monitoring the cars behavior, hooked up to the OBD-II port, viewing data on the laptop sitting in the passenger seat. Wires dangling over the steering wheel, chords draped across my legs power inverter plugged into the 12V outlet, in a way I feel like a mad scientist who is monitoring the vitals and trying to resurrect a sick patient.

The code I am battling right now is P0421. This trouble code means that the oxygen sensor downstream of the catalytic converter is detecting that the converter is not working as efficiently as it should be (of course, it is not even there!). As I continue to work on this non-life threatening issue, rest assured that the CorkSport Mazda Medical Center is actively perusing an antidote to rectify these symptoms.

Troy

CorkSport FC RX-7 Silicone Radiator Hoses

CorkSport just debuted our first set of silicone radiator hoses. This two piece set will fit the 1986 to 1991 Mazda RX-7. Who says we forget about the rotary powered Mazdas! The radiator hose kits are designed to replace your original equipment coolant hoses and will provide superior quality, looks, and durability over the original rubber hoses. These hoses are extremely durable and hand wrapped to 4 layers thick for incredible abrasion resistance. If your current set of RX-7 radiator hoses are deteriorated, weather checked, saturated with oil and swelled up, then I suggest you retire them and replace them with our silicone radiator hoses. The three inner layers are blue with a single layer of gloss black and are specifically built for RX-7 automotive applications, not parts we just found that happened to fit.

Also in the works are the Mazdaspeed3 silicone radiator hose kits, and they should be on out on the shelf ready to ship in a couple weeks.

Troy