

If you have a Mazdaspeed, then you have probably heard about cleaning your valves a time or two. You may be asking yourself, why is it that I need to do this? What is it good for? Or why do my valves get dirty in the first place? I’ll be covering all of that in this blog post today, along with full instructions on how to perform the job.
Why do my valves get dirty?
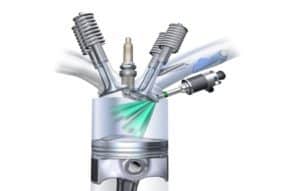
They get dirty because our engines are Direct Injected. This means that the fuel is injected directly into the combustion chamber, rather than in the ports. This also means that there is no fuel passing over your intake valves, and those nice detergents in the gas that are advertised don’t do anything for you.
That being said, Carbon from the EGR (Exhaust Gas Recirculation) system and oil from the PCV (Positive Crankcase Ventilation) have free reign to cake your valves.
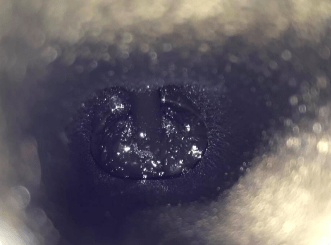
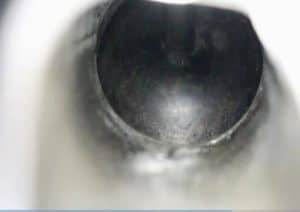
The figure above is an example of a dirty valve after approx. 80k Miles with no EGR delete or OCC.
Why do I need to do it?
If enough time passes without any preventative treatment, the valves eventually can get so caked with carbon, that it can start interfering with proper airflow, combustion, and even the valve’s ability to shut all the way. Intermittent misfires, knocks, poor fuel economy, and loss of HP are all symptoms that can occur.
What products do I need?
Before you get into this list – be sure to check out the CorkSport Valve Cleaning tool released after we published this blog!
I’m glad you finally asked that! Go ahead and get ready to start jotting down some notes on the things you will need! Most of these can be found locally. *You will need a Shop-Vac, and an Air Compressor.
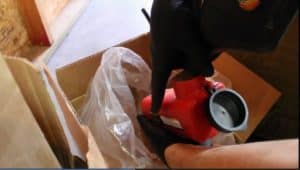
1. Media Blaster – This is just a gravity-fed gun with a hopper. Powered by compressed air. As you squeeze the trigger, the media falls in and goes out of the blaster. You can open and shut the media valve in order to Switch between media and air only.
Link: Purchase the Media Blaster

2. Media – You will want to pick up some of the 24 Grit Walnut. Do not get the 12 Grit as this is too large, and you will continue to jam up your gun where the media falls from the hopper into the barrel. The 24 will have “Fine” In the top right corner.
Link: Purchase Walnut Media

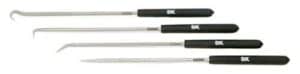
3. Long Picks – You won’t want to start blasting right off the bat. You will want to soak the valves for a little bit and get in there with some long picks to really start softening up that initially built layer. You order the picks online and these are a lot easier to use than the little scribes at Harbor Freight which have always felt too short to me.
Link: Purchase Long Picks
4. Carb Clean – Over the years people testing different
chemicals. The one still in the lead is B-12 Chemtool. You’ll use
this to soak the valves and let them soften up the carbon. Be sure you get the sprayable can.
Link: Purchase B-12 Chemtool
5. Miscellaneous Items
*You must also have all the normal tools required to remove your intake manifold.
- Blue painters tape
- Big garbage bag or plastic tarp
- Long hose to attach to the end of the blaster to be routed through the Shop Vac
- Funnel
- Toothbrush
- Brake clean
- Shop towels
The process!
1. Disassembly: The goal here is to get your Intake manifold off. This consists of removing the TMIC, (If you have it) your harness, and vacuum lines. A well-written write-up on MSF to remove your intake manifold can be found here if you have not yet done this!
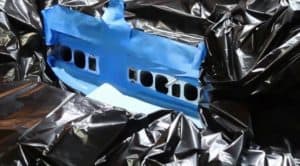
2. Mask off the Engine Bay: In order to prevent walnut from getting everywhere, a proper prep job is very important. Clean the face of the head, and around the runners well. They will be oily and blue tape will not stick well unless it’s clean! Cut two trash bags so that they lay flat, and stick the tape to them. End result should be like this! *Note that cylinder #2 is open and has been taped off.
3. Soak Your Valves: This is where the process actually starts! Spray down the valve with the B-12 Chemtool until all the build-up is covered. Let It sit for about 30-40 minutes. It may seem like a bit of time, but it does really help to make the process much easier.
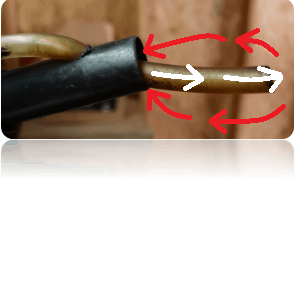
4. Start Scraping: This is where your long picks will start to come in handy. With the carb clean still soaking on the valve, use the slightly angled pick to begin the process of removing the buildup. Once you think you have scraped enough off, use the air gun and the Shop-Vac to remove the fluid. Route the hose from the blaster through the vacuum hose as so: The air will blow out whatever is in there, and the vacuum will cleanly evacuate it from the runner.
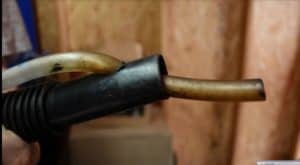
5. Start Blasting: Fill up the blaster with a little funnel. Try to keep it over the box because this stuff likes to go everywhere. Once you have it filled you can proceed to the blasting. Start on the first runner of your choice. Make sure that the hose from the blaster sticks out enough to go a decent distance into the runner. Open the valve on the blaster with the switch on the side, and pull the trigger. Pulse it every couple of seconds, as this allows time for the walnut to drain out, and gives your compressor time to keep up!
As you blast it, the compressed air forces it into the runner and then gets blown back into the suction of the vacuum. You will need to go back and forth between blasting and picking, as you run into stubborn bits that are giving you a hard time. You will need to go back and forth between blasting and picking, as you run into stubborn bits that are giving you a hard time.
6. Rinse and Scrub the Runners: Now you use the brake clean and a toothbrush. The runners by now will be coated in dust and some residue. Use the straw on the brake clean and thoroughly hit the runners. Use an old toothbrush or equivalent to scrub it. You may need to repeat this a couple of times in order to get it nice and clean. Suck out the fluid with the Shop-Vac and air gun as you did in step #4. Your final result will definitely blow your mind! *Take extra time to ensure that you have no media left in the runners. Blow it out thoroughly.
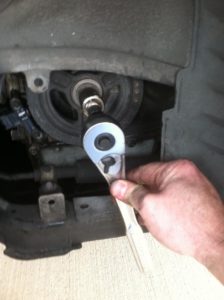
7. Repeat for the valve that was taped off: Now that you have completed the ones that were shut, you need to tape those off, and unmask the runner that has the valves open. The easiest way to do this is to rotate the engine by hand. The Crank Pulley is a 21mm Bolt. Simply turn the engine to the right a little bit until the valves fully shut. Having a spotter tell you “when” is the easiest way. If the Buildup makes it hard to tell, then you can put a long screwdriver, or extension in the spark plug hole and watch it reach its peak at TDC. This will ensure the valves are fully shut. Soak the valve, scrape, and blast, just like the previous valve.
8. Time to clean up: Remove your masking, and try to channel all the walnut into one area. Wad it all up and toss it. Keep the tape on the cylinder head until you are ready to install the manifold. Used some compressed air to clean off anything that may have gotten media where it doesn’t belong. Reassemble, and start it up! Check for vacuum leaks or loose clamps. Watch your fuel trims and AFRs on your AP (if you have one) to make sure everything is normal.
Hope this will help you guys on your valve cleaning ventures, and you can always give us a call at 360-260-2675 if you get stuck!
Connect with us
You may also like