Project RX-8
Project RX-8
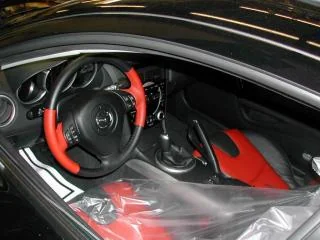
The Car: 2004 Mazda RX-8, GT package.
We picked up this car with 9 miles on the odometer. Aside from the $3900 option package the car has no other factory options or modifications.


STEP 1:
8/28/2003CS SWAY BARS INSTALLED
We install what will eventually become Cork Sport front and rear sway bars. These decrease ride comfort somewhat while greatly reducing body roll. We are currently testing the sway bar set before we release them to the sales team.
STEP 2:
8/28/2003

Mazdaspeed front bumper installed
This bumper comes already painted! Notice the two small extensions from the lip. These are painted a glossy grey color. The bumper is easy to install, and it only takes about 1/2 hour and you'll have all the hardware you need for installation.
Wow! This dramatically changes the look of the car. We also got the fog light brackets, but we will install those at a later date.
STEP 3:
12/05/2003

KVR Cross-drilled Rotors installed
Though we have not updated this section in a while we have been actively developing products for our project car. Shown here are cross drilled rotors done by KVR.
They look great with the factory rims and improve brakes that are already superb from the factory.
STEP 4:
12/05/2003

CS Power Series exhaust installed
We installed the prototype Cork Sport Power Series exhaust quite some time ago. It sounds great! It is loud enough to hear but not loud enough to bother us or our neighbors. You can finally here the wonderful sound of the Renesis engine winding to 9000rpm!
STEP 5:
12/05/2003

CS MS-style Front Bumper Installed.
We installed the Cork Sport MS Style front bumper. It fits great. Similar to the MazdaSpeed bumper, but we removed the side marker lights for improved appearance. Also, we changed the configuration of the grill (not shown here) so that it is mounted to the bumper itself rather than epoxied as is the norm with fiberglass bumpers. It is much more durable and attractive this way.
STEP 6:
12/15/2003

Production version of CS exhaust installed.
We installed the production version of the Power Series exhaust. The larger dual mufflers have a deep tone which sounds great.
STEP 7:
03/05/2004
Update on CS front bumper.
We mounted the grille and grille trim pieces supplied with the CS bumper. Once nice feature of this setup is that the grille can be changed out easily. This is great if you end up having to replace a damaged grille or simply want a different look.
STEP 8:
04/01/2004Installed a Mazdaspeed rear spoiler on Project RX-8!
STEP 9:

Installed Mazdaspeed Side Skirts
Of course, these look great! Installation is tedious but the supplied instructions and templates make perfect fitment a reality.
STEP 10: 05/10/2004
Installed CorkSport Brake Lines
These improve pedal feel and improve durability over stock rubber brake lines, as well as preventing volumetric expansion during braking.
STEP 11:
Installed K&N Typhoon Intake
The intake really opened up the car, the stock intake box is very restrictive. It's nice, you can really hear the intake sound now, lots of air moving around in there. It helps give the engine a more aggressive tone.

STEP 12:
Installed carbon fiber hood
This hood weighs less than the OEM hood. Fit and finish is great, and it looks awesome in addition to helping save some weight.

STEP 13:
Added vinyl decals
Our car was going to be featured in a car show, so we decided to give it that extra little bit by throwing on some sweet decals to help it stand out.

STEP 14:
MazdaSpeed Body Accessories
We added the MazdaSpeed rear bumper valence, and the MazdSpeed rear spoiler. The spoiler looks amazing, it's exactly what the trunk was missing. The rear valence really helps accentuate the awesome CorkSport Power Series exhaust that is on the car as well.


STEP 15:
Installed CorkSport lightweight aluminum traingular front strut brace
We wanted to develop something that would help stiffen the chassis of the RX8 without adding a lot of weight, and also would still allow us to run the attractive OEM engine cover.


STEP 16:
Installed Volk GT-F Wheels
These were one of the first sets of the new GT-F wheels to make it into North America, and as soon as we saw them we knew we had to have them.

STEP 17:
Installed Cooper Zeon 2XS tires
The Cooper Zeon 2XS tires we put on the car are awesome. Great sidewall rigidity and stability, a nice chunky tread pattern, and they aren't annoying loud at cruise on the freeway.

Well, that's all for now. We have lots of awesome products coming out for the RX-8 over the next year. Keep an eye on this page for updates!
